Original Link: https://www.anandtech.com/show/731
Gigabyte GA-6RX Apollo Pro266 ATX
by Mike Andrawes on March 8, 2001 2:15 AM EST- Posted in
- Motherboards
Introduction
Lately, in the motherboard market, the spotlight has mostly been on AMD platform products. Together with the 133MHz FSB Athlon-C processors, AMD released the 760 chipset that uses DDR memory. We have seen companies like FIC using the new chipset in their products, such as the AD11. Even more exciting is the VIA KT133A chipset, which allows the use of traditional PC133 SDRAM and officially supports the Athlon-C as well.
On the other hand Intel is garnering less attention since the Pentium III has already past its peak and the Pentium 4 still has yet to offer any tangible performance benefits over the Athlon. The i815E chipset has been around for more than nine months and Intel has no intention to release any new chipsets supporting the Pentium III. Even the newer i815EP chipset is nothing more than the i815E without an integrated video core so that the overall cost of the boards could be lower.
VIA took this opportunity and released the Apollo Pro266 chipset, the world's first Pentium III chipset with support for DDR SDRAM. Previously VIA took advantage of Intel’s failure with the i820 chipset and released the Apollo Pro133A, which filled the gap between what the market asked for and what the 440BX chipset couldn’t provide, such as AGP 4X and 133MHz/PC133 support. This time around VIA again tried to use the Apollo Pro266 to provide the market with what the i815E lacks, using DDR technology to provide more memory bandwidth as well as a larger memory capacity (the i815 still only supports 512MB of PC133 SDRAM).
It has been a while since we last touched a Gigabyte motherboard, but we have always had decent experiences with their products. This time around they brought us their VIA Apollo Pro266 solution, the GA-6RX. Being the first Apollo Pro266 board entering the AnandTech Labs, how are they going to try set the “standard” for other contenders?
|
Gigabyte GA-6RX |
|
|
CPU
Interface
|
Socket-370
|
|
Chipset
|
VIA Apollo Pro266 VT
8633 North Bridge |
|
Form
Factor
|
ATX
|
|
Bus
Speeds
|
66 / 75 / 88 / 90 / 100 / 105 / 110 / 124 / 130 / 133 / 136 / 140 / 145 / 150 MHz |
|
Voltages Supported
|
Auto Detect 1.30 – 2.05 V (in 0.05V increments) |
|
Memory Slots
|
4 184-pin
DDR DIMM Slots
|
|
Expansion Slots
|
1
AGP Pro Slot |
|
On-board Audio
|
Sigmatel
STAC9708T AC’97 CODEC |
|
BIOS
|
AMI
Simple Setup |
|
BIOS
Revision
|
12/27/2000
|
The Layout
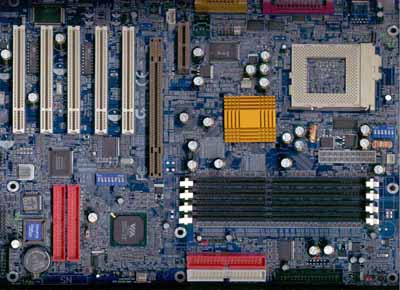
The GA-6RX uses quite a large PCB, measuring in at 12 by 9.5 inches; but Gigabyte did not waste any space as they put in a lot of features on the motherboard, making the layout quite "busy" with traces flying everywhere on the topmost visible layer.
In general the layout of the board is decent, but as usual, when you try to squeeze more and more features on a board there are tradeoffs that are made. The first gripe being that the CPU's socket is placed far in the back right corner of the motherboard. As we have discussed several times in previous articles, a potential problem of this placement resides with installing or removing your CPU. Since removing the heatsink/fan unit off the socket usually requires the use of a screwdriver (to give you the leverage necessary to unmount the unit), the socket being too close to the power supply in your case may mean that installing/removing a CPU while the motherboard is mounted in the case may be a bit of an ordeal.

The CPU socket is too close to the right edge of the board
To make up for that potential inconvenience, Gigabyte managed to leave quite a lot of space around the CPU by having all the capacitors at least half an inch away from the socket, so you should not have any problem putting in a larger sized HSF unit for better cooling. Also, the power supply connector is placed between the socket and the DDR DIMM slots, so the power cables will not need to run over the CPU, thus making sure that the airflow around the CPU remains unrestricted.
The four DDR DIMM banks are carefully placed so that the AGP Pro slot does not block the clips at the end of the banks. While this isn't a reason to run out and praise the board, it is good to know that Gigabyte does take these types of issues into consideration.
The two IDE and one floppy connector, powered by the VT8233 South Bridge are located on the bottom of the motherboard, which means they will be very close to the drive bays when everything is in the chassis.
Unfortunately, the third and fourth IDE connectors supported by the Promise IDE controller are located vertically below the third PCI slot. Not only does that block the use of any full length PCI cards on the third PCI slot, but since the 80-pin Ultra ATA 66/100 cables have a certain limit on their length, that means you might not be able to put drives too high in your case if you want to connect them to the two ATA/100 channels.
Apollo Pro266: More Bandwidth
The biggest, and possibly the most important feature of the GA-6RX is the support for DDR SDRAM, which is handled by the DDR memory controller in the VIA 8633 North Bridge. A major complaint we had against the Intel i815E chipset is not it's lack of memory bandwidth, but rather its 512MB SDRAM limitation. In addition to that, the i815 is limited (by its specification) to at most two PC133 SDRAM DIMMs installed at any given time. While a few motherboard manufacturers have gotten around this aspect of the chipset, there are motherboards that will force PC100 operation if more than 2 DIMMs are installed.
Now with the Apollo Pro266, the 8633 North Bridge on the GA-6RX supports up to 4GB of PC1600 or PC2100 DDR SDRAM; and Gigabyte put in a total of four 184-pin DDR DIMM slots to give you more flexibility in memory configuration. Since DDR technology is still relatively new, 1GB modules are not readily available yet, so having 4GB of DDR SDRAM on the GA-6RX is still far from reality. But even with the latest 256MB modules available in the market, you should have no problem running a maximum of 1GB (4 x 256MB) memory on with the GA-6RX, twice what the i815E chipset can handle.
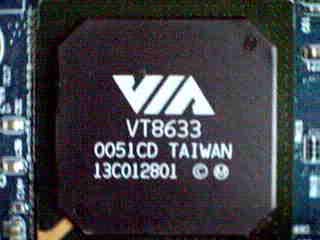
VIA 8633 North Bridge
Another interesting fact about the 8633 North Bridge on the GA-6RX is that it allows you to run the FSB and the memory asynchronously. This means that you can run your FSB at 100MHz while your DDR SDRAM operates at 133MHz DDR (effectively 266MHz), or a number of combinations of FSB and memory frequencies. Those of you that have been following the Athlon DDR motherboard market will know that this isn't possible on DDR Athlon platforms. The reasoning is simple, with the Athlon's FSB being a very high frequency DDR bus, it is quite difficult for motherboard manufacturers to produce a reliable board that doesn't synchronize the FSB and memory buses. This is also true for the Pentium 4's bus which operates at a 100MHz clock as does its memory bus, both multiplied by a factor that determines the final bandwidth of course. But in the case of the Apollo Pro266 on the GA-6RX, the 100/100, 100/133, 133/100 and 133/133MHz FSB/memory bus configurations are all fair game because of the relatively easy to deal with GTL+ FSB of the Pentium III.
The VIA 8633 North Bridge supports AGP 1X/2X and 4X modes, and Gigabyte also takes that a step further by making the on-board AGP an AGP Pro slot. The AGP Pro slot is a universal slot, so it is not specifically keyed for any video card, and you should have no problem installing any AGP card in the slot. We have yet to see AGP Pro as a requirement for any cards, as the extra pins are all used for ground and increased power signaling, so this feature is more of a filled checkbox on Gigabyte's part when it comes to OEM sales.
As described in our Apollo Pro266 chipset review, one major architectural change of the chipset is the dedicated channel between the North Bridge and the South Bridge, with the PCI bus now being driven as an extension off of the South Bridge. Therefore it’s necessary for VIA to have a new South Bridge that contains the PCI bus interface as well as the V-Link interface to the North Bridge; the result is the 8233 South Bridge.
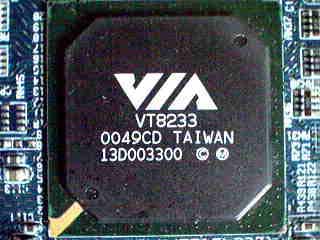
VIA 8233 South Bridge
Besides its V-Link support the 8233 South Bridge also features a total of six USB ports compared to four supported by the 686B South Bridge, the Sourth Bridge commonly found paired with other VIA chipsets such as the KT133A. However, for the GA-6RX, Gigabyte only made use of four ports: two traditional ones at the back of the board on the I/O panel and two through the USB connector in the bottom left hand corner of the motherboard. Unfortunately, Gigabyte still hasn’t included the necessary USB headers to take advantage of the third and fourth USB port much less boast support for the 2 remaining ports that the South Bridge supports.
The two IDE channels supported by the 8233 South Bridge are similar to that supported by the 686B South Bridge, which are Ultra ATA 100 ready. Another interesting thing to note is that Gigabyte actually uses the ITE IT8705F as an external I/O controller chip instead of the built-in I/O controller in the 8233 South Bridge. While this probably gives Gigabyte more features, at the same time it will also raise the cost of the motherboard at little gain to the end user.
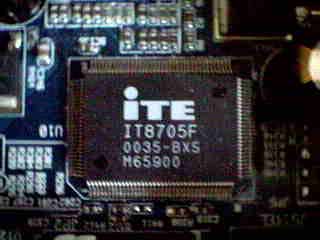
The ITE IT8705F I/O controller
From the expansion perspective, the GA-6RX provides a 5/1/0/1 (PCI/AGP/ISA/AMR) design, which is enough for most users but definitely not outstanding. The fact that the board features no ISA slots may be a turnoff for some but it's definitely time that we start looking towards a legacy-free future.
Instead of including an ISA slot, Gigabyte put in a non-shared AMR slot. The presence of an AMR slot really doesn’t mean much to most hardware enthusiasts, rather the slot is there for the OEM builders who can in theory use the slot to provide cheaper systems for end users. However, the usefulness of that feature is still questionable, as we still don’t really see AMR devices widely available in the market nor are they commonly used by OEMs.
Unlike most other manufacturers, Gigabyte provides quite a few on-board audio options. The least expensive solution is an implementation of the Sigmatel STAC9708T AC97 CODEC (software sound) or you can choose to have the optional Creative CT5880 on-board audio. The Sigmatel AC97 CODEC supports basic sound features at a cheaper price while the CT5880 is capable of producing higher quality audio at a marginally higher cost. But nonetheless, for top-notch audio, you should still go out and get an external PCI sound device such as the Creative Sound Blaster Live!.
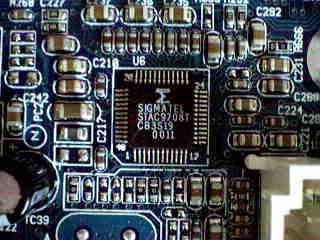
Sigmatel STAC9708T AC97 CODEC

Optional Creative CT5880
If you overclock it, they will come
Plainly implementing the Apollo Pro266 chipset is not enough to make the GA-6RX stand out from the rest of the crowd. As we have seen a lot of times, it’s really up to the manufacturers to put in all kinds of extra features that make their motherboards truly exceptional.
One of the most important things hardware enthusiasts – most AnandTech Readers – look for is overclocking support. Gigabyte has never been the master in overclocking, and they put in an average amount of overclocking options for you with the GA-6RX. With the help of the AMI Simple BIOS setup, you can tweak your FSB speeds and CPU core voltage from within the BIOS.
The FSB speeds available to you are 66 / 75 / 88 / 90 / 100 / 105 / 110 / 115
/ 124 / 130 / 133 / 136 / 140 / 145 and 150 MHz, which is not ideal in the sense
that there are some large gaps in between the FSB frequencies. In order to
fully tweak your CPU and push it to the limits, FSB with 1MHz increments are
required, and Gigabyte still has yet to implement that on their motherboards.
Also, the whole set of FSB speeds values are not always available. During our
tests we used a 133MHz CPU, and the only FSB speeds available were 133 / 136
/ 140 / 145 / 150 MHz since the board does an auto detect of the B21 pin state.
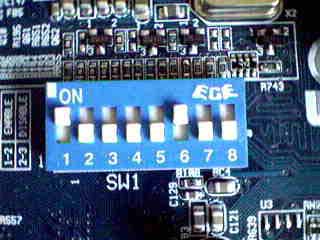
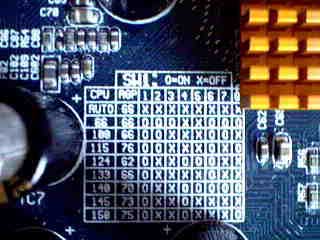
Dipswitch settings for FSB frequency
The CPU core voltage can also be manipulated from within the BIOS and the selectable values range from 1.30V to 2.05V in 0.05V increments. Keep in mind that putting too high of a voltage on your CPU may actually damage it, and voltages more than 15% above your CPU's default voltage may be pushing it.
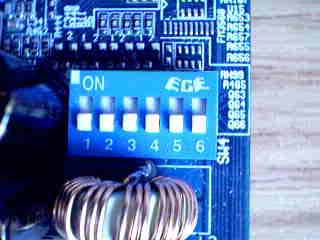
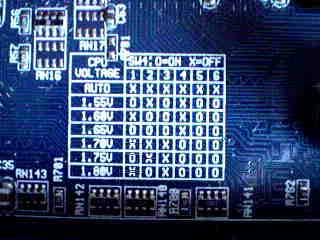
The voltage dipswitch settings
Even though all the voltages and FSB speeds are accessible from within the BIOS, Gigabyte still provides two sets of dipswitches on the GA-6RX for you to manually set the FSB speeds and the voltage. The reason for the presence of the dipswitches is most likely to provide OEMs with an easier way to setup the board.
Actions speak much louder than words therefore it’s important for us to find out just how well the GA-6RX can overclock. During our testing, with default CPU voltage, we were able to raise the FSB speed to 136MHz without any issues. At 140MHz, the system couldn’t maintain much stability when we were trying to run our benchmark suite. Here, once again, we see the importance of 1MHz FSB increments since the system might be able to run at 138MHz but not 140MHz.
Unlike some other motherboards, the GA-6RX does not allow for the manipulation of I/O voltage settings, which can come in handy when performing some extreme overclocking. The board does provide what Gigabyte calls “over voltage” settings for the memory and the chipset through jumpers, which might be able to make the system more stable in some overclocking situations.
The GA-6RX has a total of three fan headers on the motherboard, one for the CPU HSF unit and two for chassis fans. Inside the BIOS setup you are able to monitor the speeds of two of them as well as two temperatures and two voltages.
Stability wasn’t always the strongest hammer for Gigabyte, but the GA-6RX came out to be pretty impressive. Gigabyte doesn’t feature any large capacitors, but they do put in two 1500uF, six 1200uF and twelve 330uF capacitors around the CPU socket, the North Bridge, and the DDR DIMM slots. Together with the clean design of the board, the GA-6RX only crashed once time within 24 hours, which is definitely above par since on the average we encounter around 5 to 6 crashes during 24 hours.
Packing in the Sweets
Another important feature of the GA-6RX is the Promise on-board IDE RAID controller, which is also what Gigabyte used on their KT133 motherboard, the GA-7ZXR. The controller chip that the GA-6RX uses is the PDC20265R and it is capable of Ultra ATA 100 as well as RAID operation. There is a jumper on the motherboard for you to select whether you want to use the controller as a second Ultra ATA 100 IDE controller or as a RAID controller.
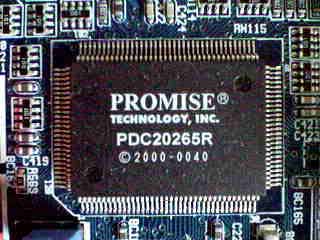
Promise PDC20265R IDE RAID controller
If you choose to use it as a second Ultra ATA 100 controller, you will be able to connect up to four IDE devices to the two channels (two devices per channel). Combining that with the two IDE channels supported by the 8233 South Bridge you are be able to support a total of eight IDE devices on the GA-6RX.
If you select to use the controller for RAID purposes, you will be able to get into the controller's BIOS and set the controller for RAID 0 or RAID 1 configuration. RAID 0 configuration makes use of two drives and performs striping of data between the two drives, thus boosting the overall disk read/write performance. RAID 1 configuration also uses two drives, but it does not yield any write performance gain and a potential read performance gain as RAID 1 simply mirrors the data across a minimum of two drives. Interestingly enough, a RAID 0+1 configuration (striping + mirroring) is not supported by the Promise controller on the GA-6RX.
Implemented in most Gigabyte products, the Dual BIOS feature helps to increase the reliability of the motherboard against faulty BIOS upgrades or virus attacks. Basically if one of the two BIOS chips are corrupted, either by virus attack or an unsuccessful BIOS flash, and the system refuses to boot, the second BIOS chip will step in and allow you to safely boot the system. This can dramatically reduce RMA rates for Gigabyte since quite a few returns tend to be caused by incorrectly flashed BIOSes.
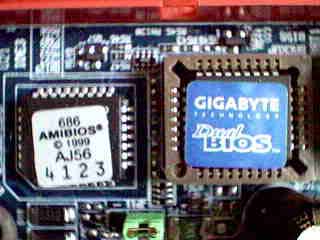
Gigabyte's Dual BIOS setup
The memory configuration options on the GA-6RX are pretty standard for a DDR board. For CAS latency, you are allowed to choose between CAS 2 and CAS 2.5, and you can also choose to run the memory with 2-bank or 4-bank interleaving enabled. One thing to note is that during our testing we were not able to run our DDR SDRAM at CAS2 with 4-bank interleave enabled. With either one of them enabled the system ran flawlessly, but with both options enabled the system couldn’t finish any of the tests. This could be an issue with the feature's implementation on the board since DDR is still relatively new technology to motherboard manufacturers.
To make life easier for beginners, Gigabyte also includes two software packages for better user support. The first one is called the @BIOS, which allows people to upgrade their BIOS from within Windows. While most users still prefer to flash their BIOS from DOS, Microsoft's phasing out of DOS with Windows 2000 and Windows Millennium, allowing for BIOS updates in the Windows environment is becoming increasingly important.
The second software package included is Gigabyte's own EasyTune III, which is essentially a software-overclocking tool where you are allowed to increase the FSB speeds of your system from within the Windows environment as well. There are two modes of operation. During the easy mode, the software will optimize the overclocking job itself, and during the advanced mode, you will have the chance to increase the FSB speeds manually. Again most people still prefer to do overclocking in the BIOS, but for most beginners, who are not entirely comfortable with BIOS overclocking, the EasyTune III does provide a friendlier environment.
The 127-page manual provided with the GA-6RX contains a lot of information for the user. It talks about the overall architecture of the board, all the jumpers, dipswitches, and connectors, both their functions and settings. You can also find details on the BIOS and RAID setup, as well as the software setup for the sound device. Some brief instructions were found on how to install the motherboard, CPU, and memory, but it would be better if Gigabyte also included brief instructions on chipset driver installation.
The Test
In recent times, choosing a motherboard cannot be completely determined by a Winstone score. Now, many boards come within one Winstone point of each other and therefore the need to benchmark boards against each other falls. Therefore you should not base your decision entirely on the benchmarks you see here, but also on the technical features and advantages of this particular board, seeing as that will probably make the greatest difference in your overall experience.
Click Here to learn about AnandTech's Motherboard Testing Methodology.
|
Test Configuration |
|
| Processor(s): |
Intel Pentium III 733MHz Retail
|
| RAM: |
1 x 128MB Smart PC2100 DDR SDRAM
|
| Hard Drive(s): |
Western Digital 153BA Ultra
ATA 66 7200 RPM
|
| Bus Master Drivers: |
VIA 4-in-1 v4.28 Service Pack
|
| Video Card(s): |
NVIDIA
GeForce 2 GTS 32MB DDR
|
| Video Drivers: |
NVIDIA
Detonator 6.50
|
| Operation System(s): |
Windows
98 SE
|
| Motherboard Revision: |
Gigabyte GA-6RX Revision 0.2
|
|
Windows 98 Performance |
|||
|
Intel Pentium III 733
|
Sysmark 2000
|
Content Creation
Winstone 2000 |
Quake III Arena - 640 x 480 x 16
|
| Gigabyte GA-6RX |
159
|
30.9
|
126.1
|
Gigabyte has never been strong with their performance, and that’s the case with the GA-6RX as well, which performed on an average level with other Socket-370 boards we've seen. As mentioned in the Apollo Pro266 chipset review, keep in mind that the Pentium III is not able to make use of the incredible bandwidth of DDR SDRAM so the performance improvement offered over the i815E chipset isn't all that great
Final Words
Here with the GA-6RX, Gigabyte set a strong pace for the Apollo Pro266 market. Although there are several layout issues with the board and a relatively expensive price tag compared to i815E boards, Gigabyte does do a good job of producing a feature filled board.
The Apollo Pro 266 chipset gives Gigabyte the benefit of not having the same limitations of Intel's 815E, allowing for larger memory configurations and allowing for more than two PC133 SDRAM DIMMs to be installed at once.
Unfortunately the premium the platform commands over the current set of i815E products isn't worth it. With a price tag of approximately $190, there is little Gigabyte can do to make the GA-6RX any more attractive than it is since they didn't make the chipset.
The Pentium III can't use the extra memory bandwidth that DDR SDRAM offers, and thus we can't justify spending the extra money on a DDR solution for the P3 platform.
How it Rates
|
AnandTech Motherboard Rating |
|
|
Rating (x/10)
|
|
|
Performance
|
5.0
|
|
Price
|
4.0
|
|
Stability
|
8.0
|
|
Quality
|
6.5
|
|
Features
|
7.0
|
|
Layout
|
5.5
|
|
Availability
|
5.5
|
|
Documentation & Software Bundle
|
6.0
|
| Overall Rating - not an average Click here to find out why |
6.5
|

