Original Link: https://www.anandtech.com/show/4547/mac-os-x-lion-server-review
In-Depth with Mac OS X Lion Server
by Andrew Cunningham on August 2, 2011 8:00 AM ESTMac OS X Server costs 5% of what it cost just three years ago. Whatever your needs and whatever the software’s shortcomings, this is hard to ignore. Leopard Server cost $999 for an unlimited-client license, Snow Leopard Server cost $499, and Lion Server costs $50.
For this reason alone, Lion Server will (and should) attract the attention of people who have never been in the market for server software before - home users, in particular - but it has to do so without alienating the business and education customers who currently rely on the software. These are Lion Server’s challenges: is there a real point in having it at home? And as a comparatively-dirt-cheap App Store download, is it lacking in features and power compared to previous versions?
I want to clarify a couple of things before I dive into the review proper: First, just like previous versions, Lion Server is very much just OS X with server functionality laid over top of it. In appearance, performance, system requirements, and operation, it is mostly identical to OS X client. I’ll point you to our massive review of Lion if you need to know more about any of that.
Second, know that I’m approaching this review from a different angle than the Lion client review - while most people interested in an OS X review have at least a passing familiarity with the software, this review will be the first exposure to OS X Server for many of you. For that reason, among the descriptions of Lion Server’s features and comparisons with past versions of the software, I’m going to be going a little more in-depth about how to actually configure the services. Hopefully the newbies among you can use these instructions as jumping-off points as you explore the software on your own.
Last, OS X Server can do a lot of things - some (like mail and DHCP) can be handled by many different products, but others (like Open Directory, NetBoot, or the OS X and iOS management features) are pretty unique to OS X Server. I’m going to try to at least touch upon every single service and tool in OS X Server, but I’ll generally focus more on the unique stuff for the purposes of this review.
Got all that? Good! Let’s jump in.
Like the client version of Lion, Lion Server is now a download from the Mac App Store, and as with Lion client this means that there are some changes in the installation process.
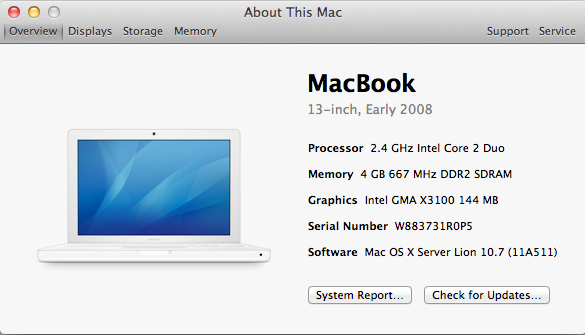
Upgraders should note that OS X Server upgrades tend not to go as smoothly as their client counterparts, and the App Store reviews for Lion Server indicate that this hasn’t changed - if you haven’t already backed up all the data that’s important to you (including a full-disk backup of the hard drive, if you can), make sure you do it before you upgrade. I would recommend doing a clean install if you can, but your mileage may vary - just know that the more you’ve customized Snow Leopard Server, the more likely the upgrade is to break something.
Interestingly, Lion Server removes Snow Leopard Server’s requirement that the software be installed on a desktop Mac system - if, for whatever reason, you want to use a laptop as a server, you can do it without any workarounds. I would generally recommend against this except in light-use or home-use scenarios, since slow-spinning 5400 RPM drives and higher heat are going to give you less-than-stellar performance in workloads that require lots of disk usage - the ability to install Lion Server on a laptop is more useful for remote management of a desktop server, which we’ll talk a little bit about in the next section.
So, you’ve installed Lion Server, and you’re ready to get started - go ahead and launch the new Server program (hereafter referred to as Server.app, for brevity’s sake).
If you’re one of those people, don’t get too worried yet - you can restore most of your lost functionality by installing the Server Admin Tools from Apple’s support website. This will install Server Admin, Workgroup Manager, the System Image Utility, Server Monitor, Podcast Composer, and XGrid Admin, all of which expose most of the functionality you’re used to in a familiar way.
Of these, Server Admin is the most important, since it has historically provided the most information and control over your different services, but even its importance has been lessened in Lion Server - it now provides access only to services that Server.app doesn’t manage, rather than advanced configuration setting for all services (if you’ve still got Snow Leopard servers to manage, don’t worry - Lion’s Server Admin can still manage all services on a Snow Leopard server just as before).
My main gripe with Server.app is that it doesn’t offer access to everything OS X Server can do - OS X Server without the Server Admin Tools is a much less functional product. People wanting to expose all of OS X Server’s functionality will have to use both apps, and as such I’ll do my best to cover both Server.app and the Server Admin Tools in this review.
Server.app Overview
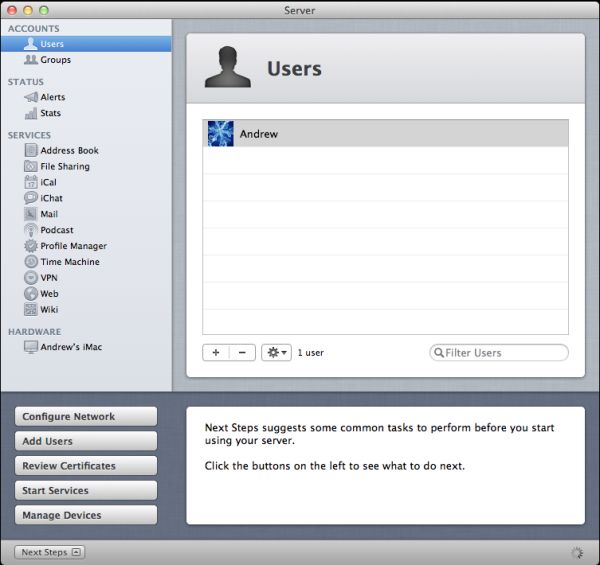
Let’s start with Server.app, since it’s going to be the administration tool we’ll use the most throughout this review. I’ll start with a general overview of what it is and what it does, and then I’ll move on to the specific services that it manages.
For small and/or uncomplicated directories, Server.app will be fine for managing your directory, though people wanting to do anything more advanced will want to be familiar with Workgroup Manager (one of the Server Admin Tools that we’ll discuss in depth later).
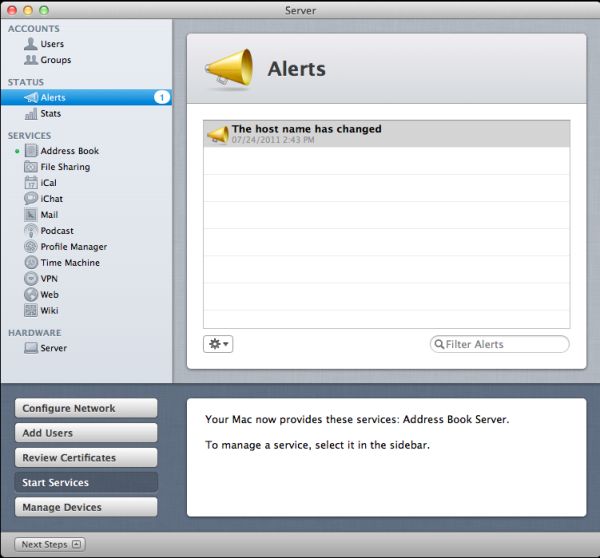
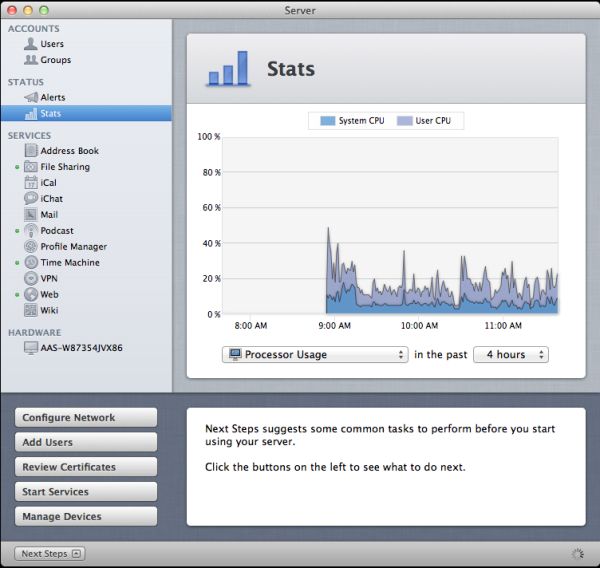
Moving down the sidebar, our next entries are Alerts and Stats under the Status heading. Alerts is a simple log viewer, showing you messages about your server that you should know (if you have Server.app in your dock, the number of Alerts you have will be displayed with the icon).
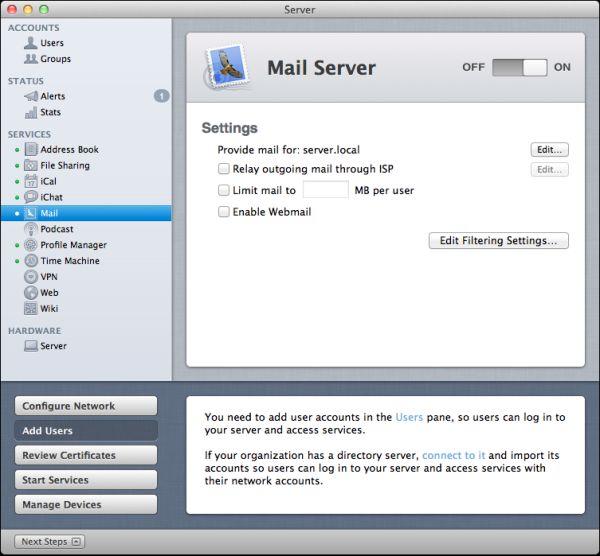
Next, under Services, is a full list of every service manageable by Server.app - most of these offer up big on-off switches (I can hear seasoned admins grinding their teeth at this) and some basic configuration options which vary from service to service - we’ll talk more about the available options for each service as we discuss them.
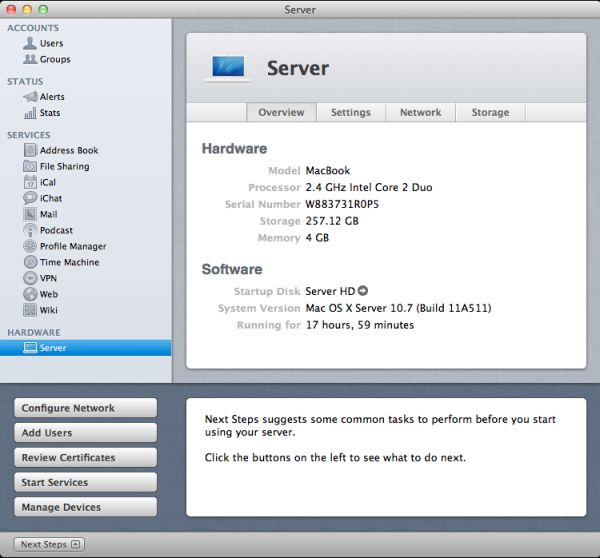
Last up is the Hardware section, which lets you do quite a few things. The Overview tab gives you basic information about your server’s hardware and uptime.
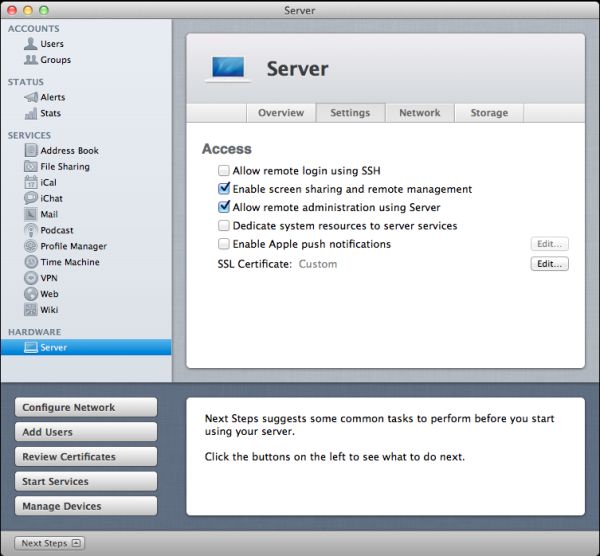
Under the Settings tab, you can enable and disable SSH and remote administration of your server, create and control SSL certificates, and “dedicate system resources to server services,” which enhances the performance of some server functions at the expense of “the performance of some user applications” (this would be a useful box to tick on a dedicated server, but not on a personal computer that’s doing double-duty as a workstation).
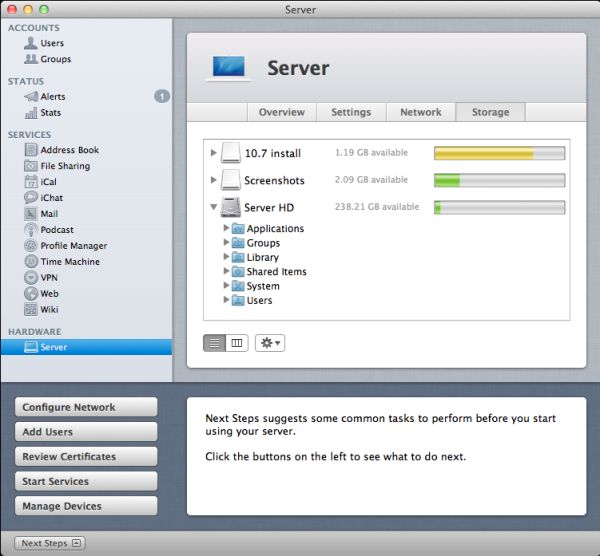
Under the Network tab, you can see your server’s various network interfaces and their IP addresses, and you can also change your server’s host name (which is nice, since changing the host name used to require digging around in Server Admin and/or some command line trickery, depending on what you were doing).Lastly, the Storage tab gives you an overview of your available disk space, and also allows you to change the access permissions on files and folders (useful if you have file-sharing enabled, though you should probably do this using the File Sharing service itself, since it is much better at it).
Lastly, at the bottom of the screen, you can see something called Next Steps - this is an excellent place for novices to figure out what to do now that they’ve setup a server. It will guide you through setting up your network, managing network accounts, managing devices, and starting services, among a few other things. Those needing more advanced help can go through the documentation for Lion Server - the page is looking a little sparse right now, especially when compared to the extensive documentation for previous OS X Server versions, but hopefully it will become a little more populated over time.
Lastly, let’s talk about remote administration - if your OS X servers are located in a server room where you don’t have physical access to them, you’ll need a way to manage them remotely. In past OS X Server versions, the Server Admin Tools were installable to any OS X client, and enabled remote administration of most services and tasks.
Server.app, however, is not available for client OS X versions - if you need to administer Lion Server remotely, you’ll either need to change your OS X client into a server (thus giving you access to Server.app, which can be used to connect to other servers), or you must control your servers directly using VNC or Screen Sharing or Apple Remote Desktop (take your pick). It’s not a deal-breaking change, but businesses (whose Lion licensing terms are a bit less generous than those for consumers) will have to cough up for additional Server licenses if they want their admins to administer services on their servers.
We’ll look at the individual Server.app services soon - first, I want to walk you through the Server Admin program and OS X Server’s directory services, since so many of the other services are dependent on them.
Server Admin Overview
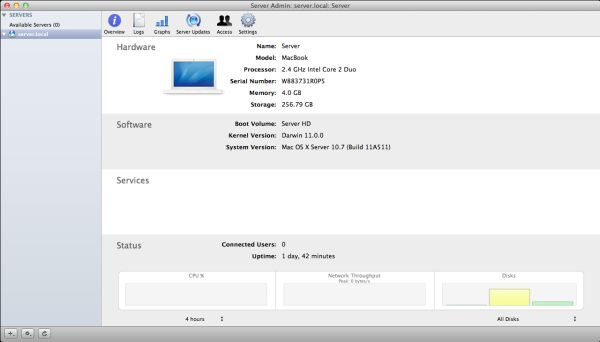
As we talked about before, Server Admin used to be the heart of OS X Server. Its role in Lion, while much reduced, is still important, since it still manages some of the software’s more interesting pieces.
Server Admin can still be installed to Lion clients and used to administer Lion Server (and Snow Leopard Server) remotely.
Now, time to talk about some services.
The first thing I want to walk through is Open Directory, OS X’s directory services implementation (roughly analogous to Microsoft’s Active Directory). Many of OS X Server’s other services rely upon or make use of a directory in some way, so it’s important to know how it works.
For those of you who have no experiences with directory services, a brief explanation: imagine you’re the IT support person for a business of, say, 50 employees, and each of those employees has a computer. So you don’t have to manage all of the user accounts on those computers manually, you want to have all of their usernames and passwords stored on your server so that you can keep better track of them. You can also organize users into groups, so that if you have one particular attribute to apply to many different accounts, you can do it once to the group instead of once for every member of the group. This is the essence of Open Directory and other directory services.
It goes further than that: with centrally stored credentials, you can also more easily manage access permissions on file shares or enable your employees to use the same username and password to login to multiple computers. You can control password requirements and store relevant information (email addresses, etc.) about your users. You can also tie other products into your directory so that your users can use the same credentials to access email or internal websites. The list goes on.
OS X Server can either host its own directory (using Open Directory), tie into another, pre-existing directory service (like Active Directory), or both (using Active Directory to manage credentials but Open Directory to manage Apple-specific functionality - Apple calls this a “golden triangle” configuration, and it’s a bit outside the scope of this review). For our purposes, we’ll setup a standalone Open Directory that we’ll then use with other services throughout the review.
Open Directory setup is one of the few things that can still be done with both Server.app and Server Admin, though the approaches differ:
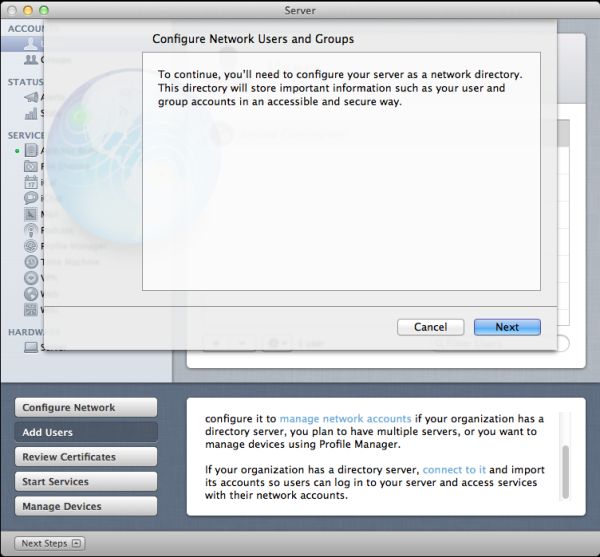
In Server.app: Go to the Manage menu and click Manage Network Accounts.
You’ll be asked to create a Directory Administrator account (which will differ from the local administrator account) - this is done to enable users to manage the directory without giving them control over other server functions. The default is diradmin, and that’s what we’ll go with.
Enter your organization’s name and your admin’s email address, and click through the rest of the prompts - you’ll have a quick and easy directory setup with a minimum of fuss.
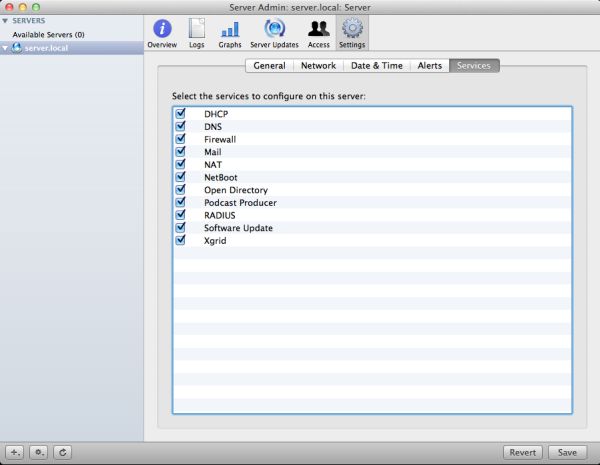
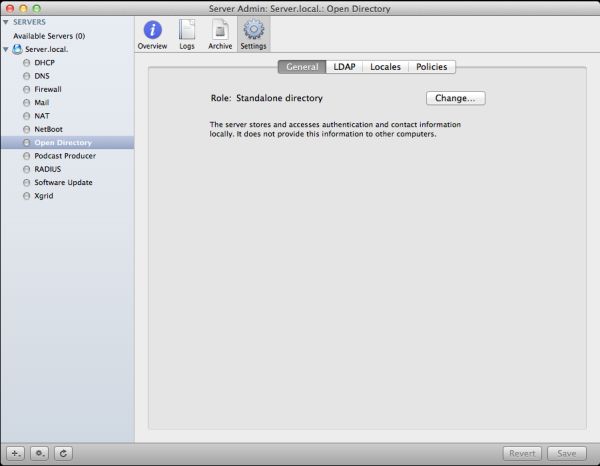
In Server Admin: To enable Open Directory in Server Admin, make sure the Open Directory service is viewable, and select it. In the Settings tab, click the Change button next to the server’s Role.
Here, you’re given three choices. We’ll want to set up an Open Directory master, but you can also connect your Mac to another directory (like Active Directory) or set up an Open Directory replica here. For the uninitiated, an Open Directory replica connects to an existing Open Directory master and mirrors every change made to the master - this can provide for load balancing (in an organization with many Macs) or automatic failover in the event that one or the other server crashes (Macs connected to an Open Directory master will automatically fall back to the replica if the master fails and vice-versa).
Anyway, elect to setup an Open Directory master, input your desired Directory Administrator credentials, input your organization name and admin email address, and you’re set, same as with Server.app. If you want to set a different Kerberos realm or LDAP search base, you can also do it here (but if you don’t know what that means, the default settings are fine).
(screenshot)
You can also use Server Admin to backup or destroy a directory you’ve made - to backup, just use the Archive tab to save and restore copies of your directory’s data. To delete the directory, go to the Settings tab, click Change next to the server’s Role, and select Set up a standalone directory.
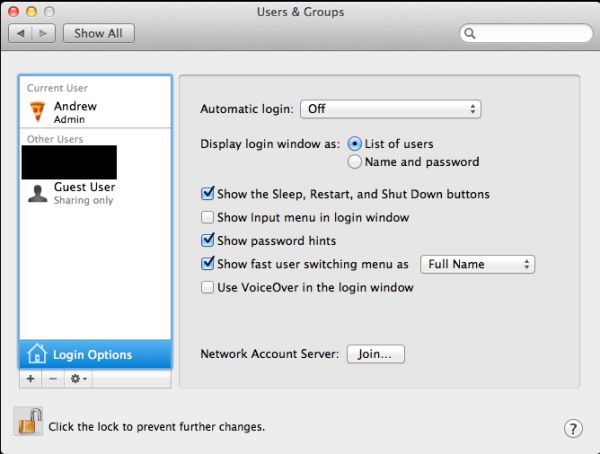
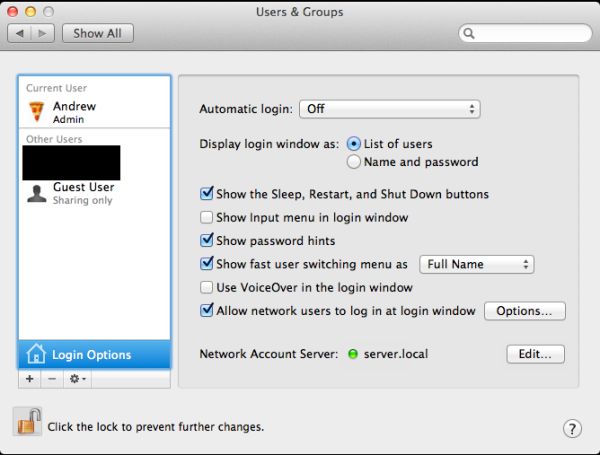
Once it's running, you can go ahead and bind client computers to it: in OS X, this is accomplished by going to the Accounts preference pane, clicking Login Options, and clicking the Join button next to Network Account Server.
Enter your server's address in the box that pops up and click OK. If successful, you should now see a green dot followed by your server's address, and you should be able to login to your client computer with any of the user accounts you create (we'll go over that next).
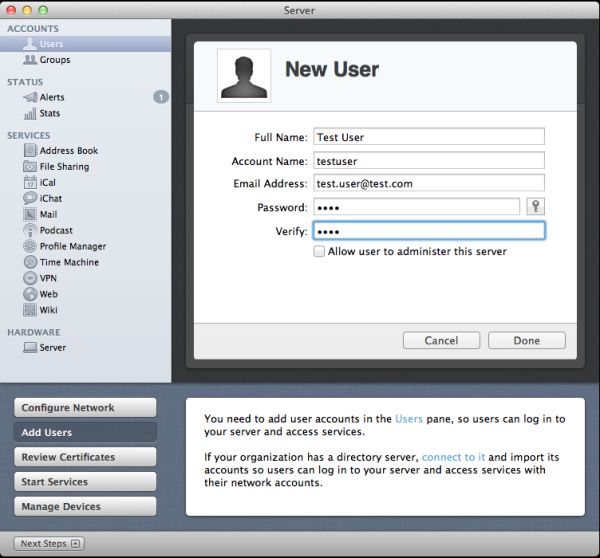
A directory isn’t much good to anyone without any objects in it, so we’re going to create a few users and groups to test things out. As with creating a directory, there are a couple of different ways to do it.
Directory accounts (as opposed to accounts local to your server) will appear with a circular blue globe icon next to their names.
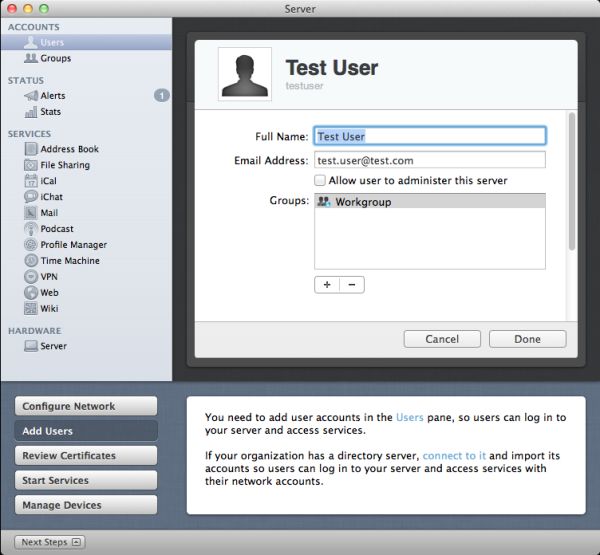
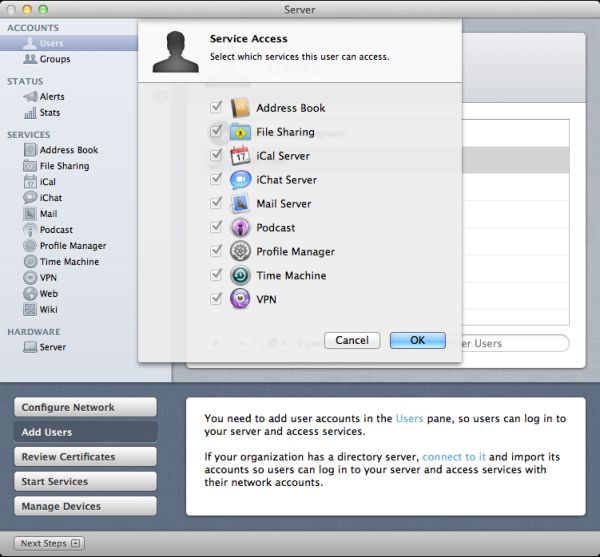
Clicking the gear icon will allow you to edit the user’s properties (including the full name, email address, whether he or she can administer the server, and group membership - the user’s short name isn’t changeable after it’s set), as well as edit the services that user can use (making it easy to keep, say, mail or VPN access off-limits to guest users).
Editing a user
Controlling access to services
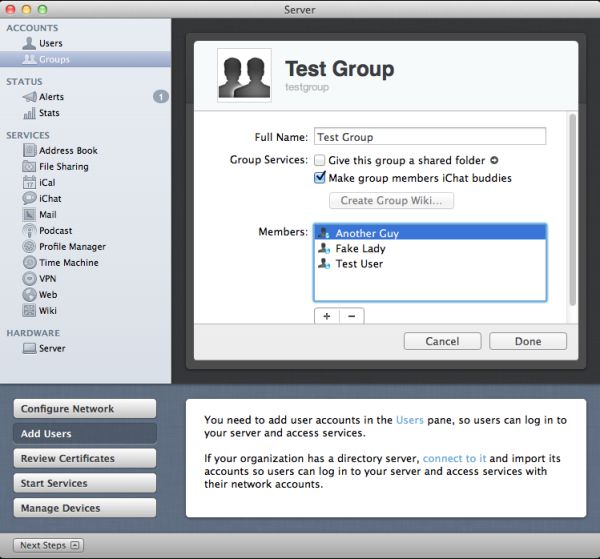
Under the Groups header, you can create and modify your groups and their memberships. If you’re running the Wiki or iChat services, you can make group-specific wikis and make group members appear automatically on each others’ buddy lists.
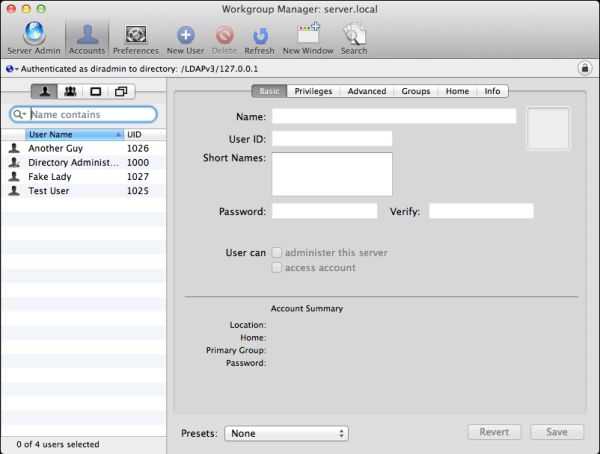
The second, more advanced way to edit users and groups is to use Workgroup Manager, another of the Server Admin Tools. Like Server Admin, this used to be the go-to tool for managing not just users and user groups, but also computers and computer groups - managing settings on a computer or computer group basis can be useful if you’ve got web kiosks or computer labs (for instance) that you want to act differently than standard workstations for users who log into them.Start Workgroup Manager and authenticate using the Directory Administrator privileges you specified when you created your directory. The window you’ll see is a bit scarier than what you get in Server.app.
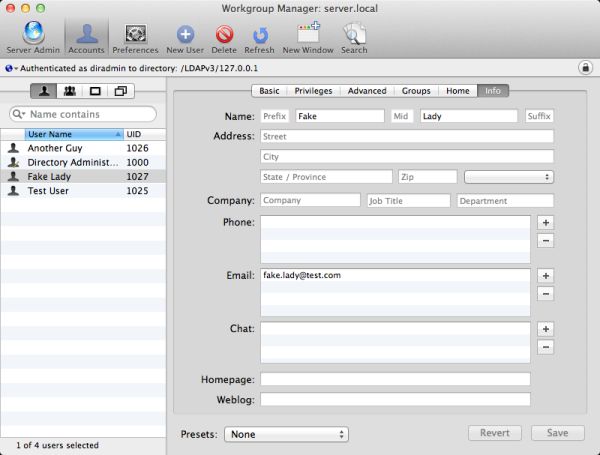
The four tabs above the left-hand column are for users, user groups, computers, and computer groups - if you made some users or user groups in Server.app before, they’ll show up here, too, and you can enter a lot more info in Workgroup Manager than in Server.app. There’s too much to go into in a general review, but this screenshot will give you an example of the detail you can go into:
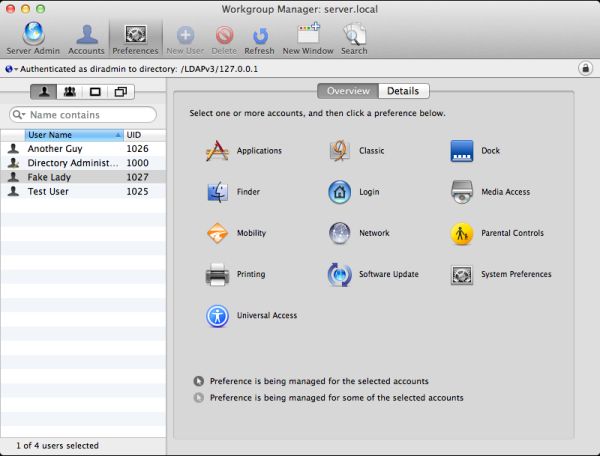
The main thing you can do with Workgroup Manager that you can’t do with Server.app is manage OS X preferences - everything from the icons in the Dock to what applications your users are allowed to launch. If you select a user or group or other entry, you can click the Preferences button to see all of your options.
Settings in here are roughly analogous to those in System Preferences in any ol’ Mac.
Workgroup Manager is a powerful tool for managing users and settings, but like many of the other longtime OS X Server standbys, it’s on the road to being deprecated. The preferences managed in Workgroup Manager are mostly to be used for Macs running pre-Lion versions of OS X. Lion (and also iOS) clients are best managed with a tool new to Lion Server: Profile Manager.
If you’ve played around with iOS management at all, you might be familiar with the iPhone Configuration Utility that Apple has been maintaining for awhile now. Basically, it creates XML files with .mobileconfig extensions that can be downloaded to iOS devices and used to configure most of the device’s settings, from email to VPN to password requirements.
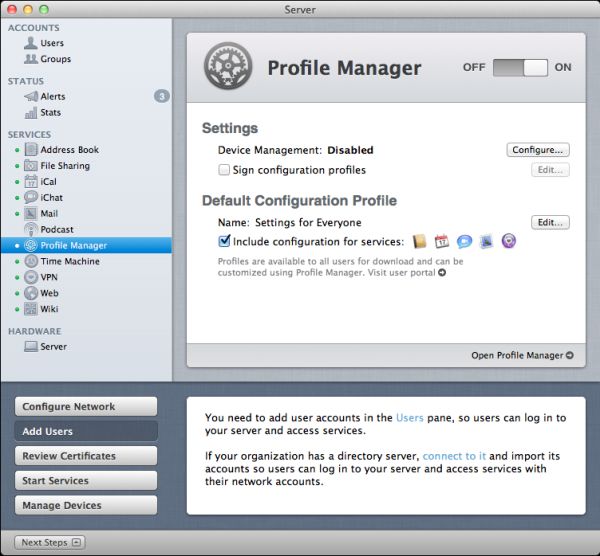
Since we’ve already configured our Open Directory, Profile Manager should start up without much fuss. Note that if you have other services running on your server that you’ve configured with Server.app (such as Mail, VPN, iCal, etc.), these will automatically be available to all of your users as a default configuration profile - that profile’s name and settings can easily be changed, and it can be turned off entirely if you want.
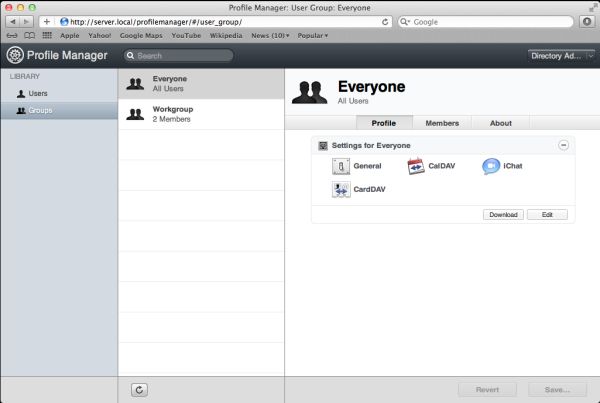
Now, open the Profile Manager (either by clicking the link in Server.app or typing <yourservername>/profilemanager into a browser and log in as the Directory Administrator account you made earlier. As an administrator, you should see all the users and groups with which you’ve populated your directory.
By default, every user on your directory who goes to <yourserveraddress>/profilemanager and logs in will be able to download and install the “Settings for Everyone” profile connecting them to your hosted services. That’s certainly not everything you can do, though - click a user or a group’s profile to bring up the profile editor.
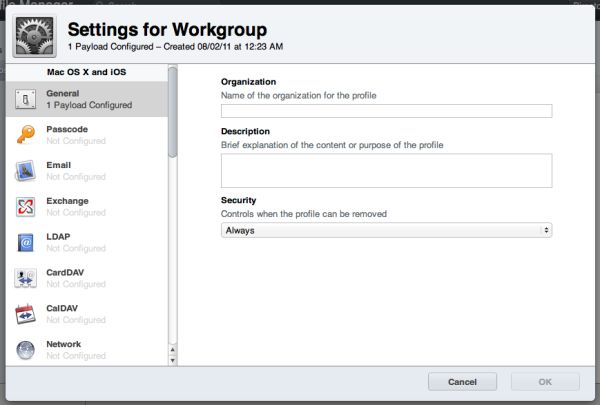
This window shows you all of the configurable options for your devices - some apply to iOS, some apply to OS X, and many apply to both. Aside from connecting your clients to your hosted services, you can also control just about every major setting in either OS: password requirements, how the Dock looks and acts, whether iOS users can install apps to their devices, and more. Profile Manager refers to each configurable subsection as a “payload.”
Go ahead and make a change or two - I want to make my iOS users use a passcode to lock their devices, while is available under Passcode - and when you’re done, click OK. You should now see an entry for every payload you configured under Settings. Cick Save to make your changes permanent, or Revert to discard.
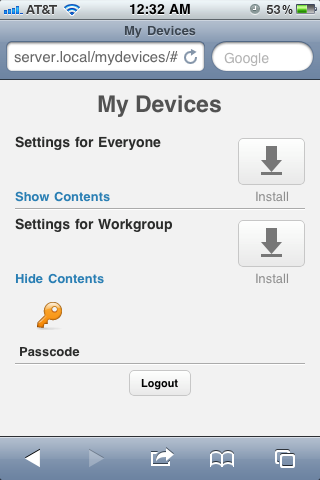
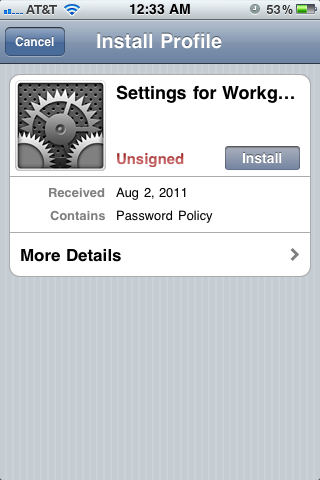
Now, on my iPhone (you can use a Mac for this step too, as long as there’s an applicable setting to manage), I’ll navigate to the Profile Manager and login as a member of the group I just edited. Now, in addition to the Settings for Everyone option, the Settings for Workgroup profile is also ready to download and install.
Note that any profile installed this way will need to be refreshed manually in the event of updates.
Device Management
For those of you who are interested in more active management of devices, you’ll have to go back to Server.app and enable Device Management.
You’ll need an SSL certificate to enable secure communication between your devices and your server - this isn’t going to work without a signed SSL certificate, at least not that I saw (feel free to correct me if I’m wrong in the comments), but we can still go through Device Management’s basic implementation.
Next, you’ll have to install a separate Apple Push Notification certificate to enable Push Notifications for your server and its clients. The only place to get one is from Apple, and the only way to do it is to associate an Apple ID with your server, though it doesn't cost anything extra.
If everything checks out, you should be told that your server meets all the Profile Manager requirements. Now, go ahead and start the Profile Manager by clicking the link in the lower right-hand corner of the window.
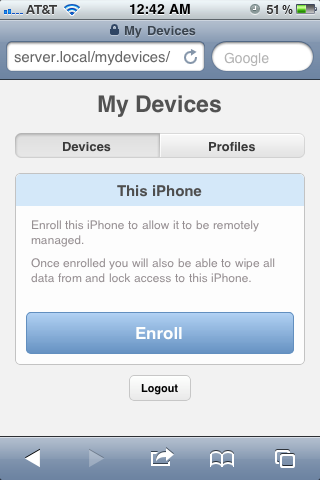
Now, if I take my iPhone to the Profile Manager site, there’s a second tab available with a giant “Enroll” button visible.
Clicking Enroll will establish a link between your device and the server - this will allow your server admin to update settings on your device, send out notifications, and even remotely lock and/or wipe your device in the event of theft.
Keep in mind that all of this is true both for iOS devices and Macs running Lion. While some of the iOS elements in Lion feel awkward and grafted on, Profile Manager really shows the promise of merging the two operating systems: it’s not just about making them look and act the same, but it’s also about making their management similar enough that it reduces time and money spent wrangling different management tools to manage the different OSes.
Address Book
Now that we’ve spent what seems like an eternity on the ins and outs of OS X Server’s directory and management capabilities, the rest of the review will go by pretty quickly - most of the services are pretty simple to setup and don’t have a lot of moving parts.
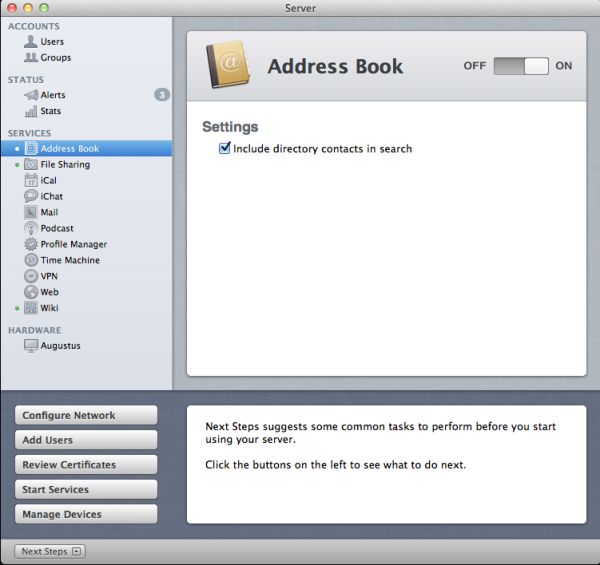
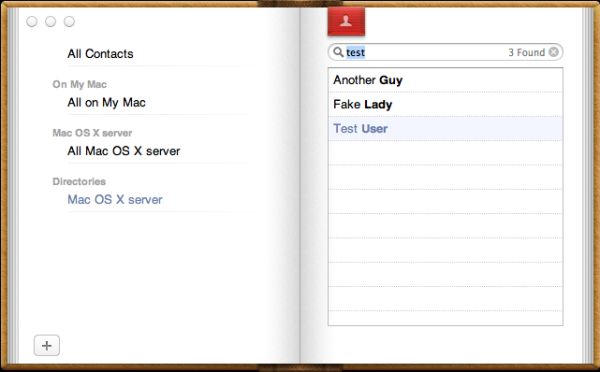
The Address Book service, for example, is basically a giant on/off switch with an option to include your directory users’ information in the address book search.
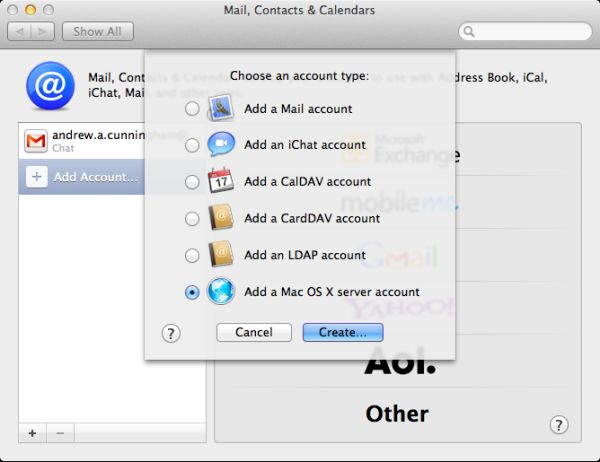
To connect your client computer to the Address Book, go to Mail, Contacts & Calendars in System Preferences, click Other, and then elect to Add a Mac OS X Server account. Either select your server or type in its address, authenticate, and you’ll be asked which services you want to use (based on what services your server offers, and which ones you have permissions to use). If you’ve configured everything correctly, OS X will handle the rest.
You now have a shared, centralized address book for every computer on your network that requests it.
iCal
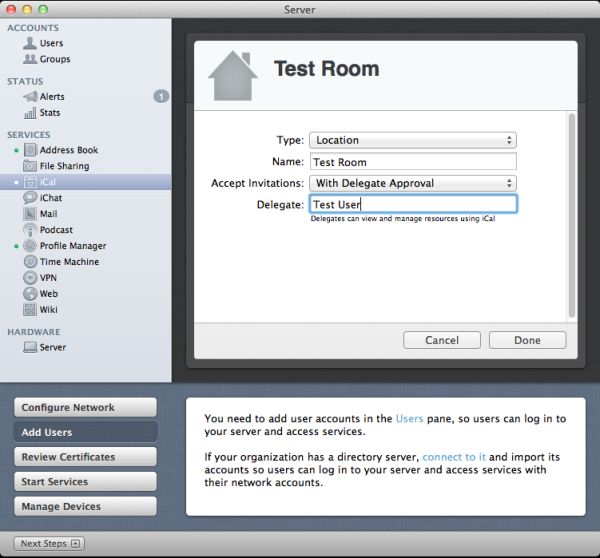
As with Address Book, the iCal service can begin to be used after the flip of a switch in Server.app, but this time around there are a couple other configurable options.
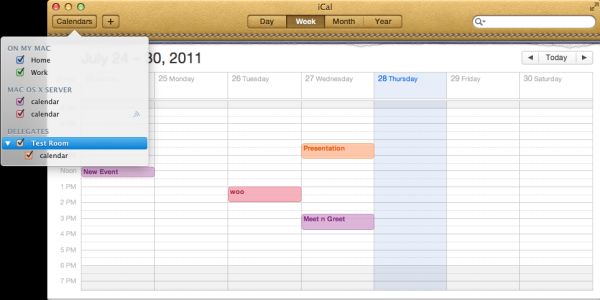
Mostly, these come in the form of “locations” (like particular buildings or rooms) and “resources” (like computers or projectors) - adding these to your server will make them available as separate calendars, allowing people to schedule time to use them. Designating users or user groups as “delegates” for each location or resource allows the user or users to approve (or disapprove) scheduled meetings.
Otherwise, it’s a pretty standard server for a pretty standard calendaring service: every user on your server gets his or her own calendar, and they can all share them with each other to see what they’re doing. No surprises here.
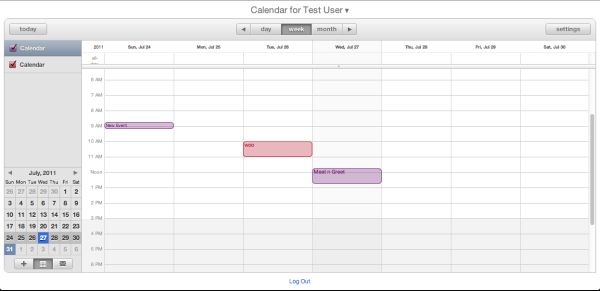
Connecting OS X clients to iCal servers is accomplished in the Mail, Contacts & Calendars section of System Preferences, just like Address Book. There’s also a simple web interface for the service that becomes available when you turn it on.
iCal web interface
iChat
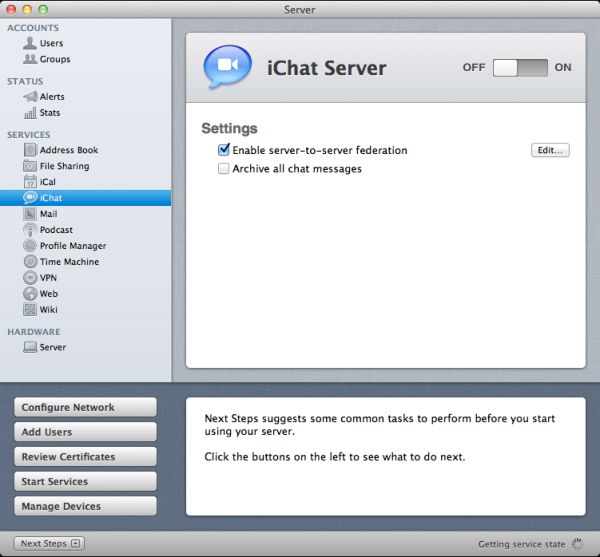
The iChat service is another on/off switch service, for the most part - your only configurable options are to log chats to the server, and allow users on your server to communicate via iChat with users on another OS X Server (which Apple calls “server-to-server federation” - it’s enabled by default, though you can restrict it if you want).
Connecting to your iChat server is, like iCal and Address Book, accomplished via Mail, Contacts & Calendars in System Preferences.
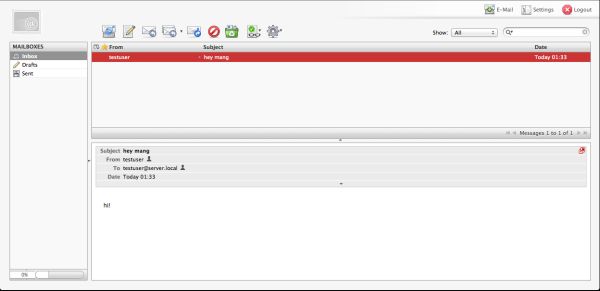
The next two are a bit more universally applicable - one is to set a quota on your users’ mailboxes, and the next is to enable a Webmail interface for your service - this is accessible by default by typing [your server’s name]/webmail into your address bar, and brings up a webmail interface that is quite usable, though it’s nothing special.
You can also access your Mail service through Mail.app using the Mail, Contacts & Calendars preference pane (the last service for which this is true), or any ol’ POP or IMAP-enabled email client (since POP, IMAP, and SMTP are all supported protocols).
Your last option in Server.app relates to virus and junk mail filtering - there’s a checkbox for the former and a slider for the latter - and blacklisting of known malicious email servers.
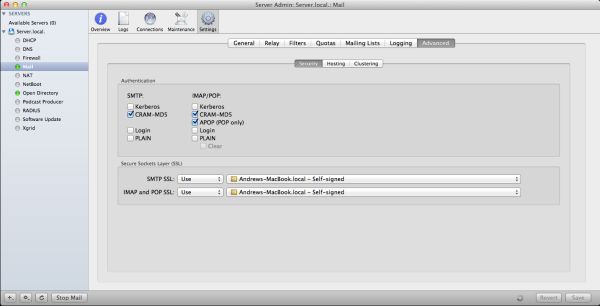
If you go into Server Admin you’ll get much more advanced options for configuring and monitoring your mail server. You can view logs and setup email alerts, configure more advanced filtering options, control quotas and maximum message size, enable mailing lists, and control authentication options.
Mail Server is reasonably full-featured, but there’s no getting around the fact that there are better solutions out there - big, established organizations considering adding Mac servers to their fleet are already going to be using competing systems like Exchange (and Microsoft is going to offer support for Exchange that far surpasses whatever Apple provides for OS X Server, from the point of view of most enterprises).
On the other hand, smaller organizations with fewer resources are likely going to be better off going with Google Apps for Business or another equivalent, something that offers the Mail service’s functionality while outsourcing the backend headaches to someone else. However, if you’re a small organization that insists on maintaining full control over all its data and aren’t willing to outsource, the Mail service could be useful to you.
File Sharing
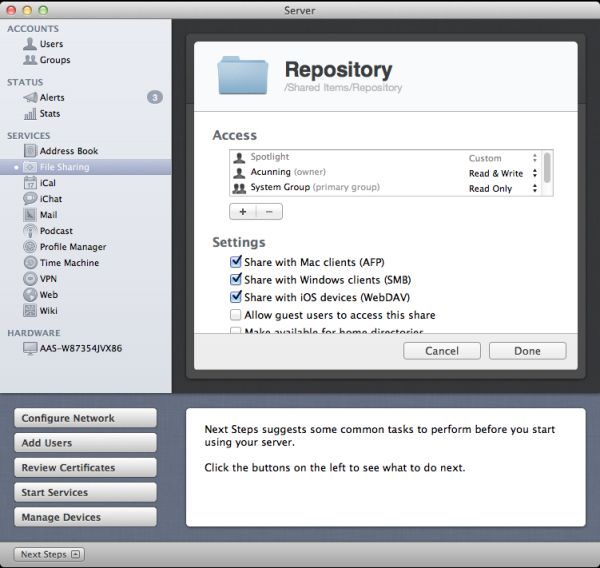
Click the edit button, and you can control access permissions to each individual folder, as well as what protocols the folders are offered over - AFP for OS X clients, SMB for Windows clients, and WebDAV for iOS clients (many apps, the iOS iWork apps among them, can only connect via WebDAV - this useful new feature is one of the few that could truly justify OS X Server in a home environment).
You may remember from our Lion review that Apple changed up its SMB implementation in Lion. As in the client version, the change shouldn’t affect most server users either: Windows 7, Vista, and XP clients can still connect to SMB shares hosted by OS X Server without issue.
Podcast and Podcast Composer
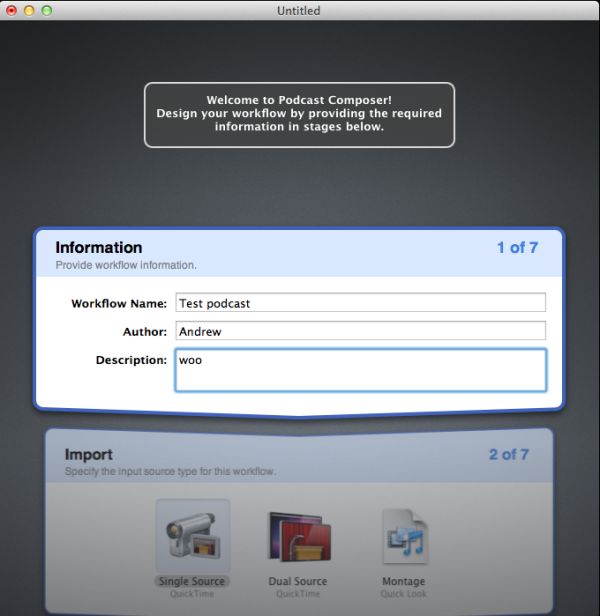
The Podcast service (which needs the Wiki service to be fully functional, it would seem) works together with the Podcast Composer (another of the Server Admin Tools) to provide end-to-end podcast recording, editing, and hosting. Turn on the Podcast service (and the Wiki service if you haven't already) and then fire up the Podcast Composer.
This program is pretty straightfoward - it builds a podcasting workflow, asking you what you'd like to use to record, what file formats you'd like to export to when done, what fades and wipes you'd like to use - everything a newbie podcaster needs, really (though this does seem to be tailored more to internal-use-only recordings and less to something you'd download from the iTunes store - just an observation). You'll want to specify your server's address under the Publish heading in the default workflow, where you can also specify whether you'd like to save any of the raw files along with the final product.
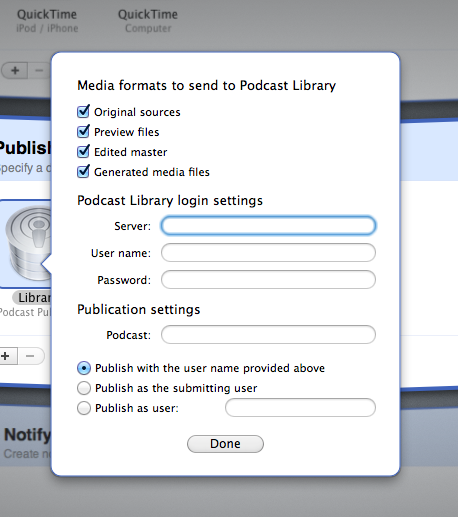
Once you've successfully published, they're up on your server for everyone with appropriate permissions to see.
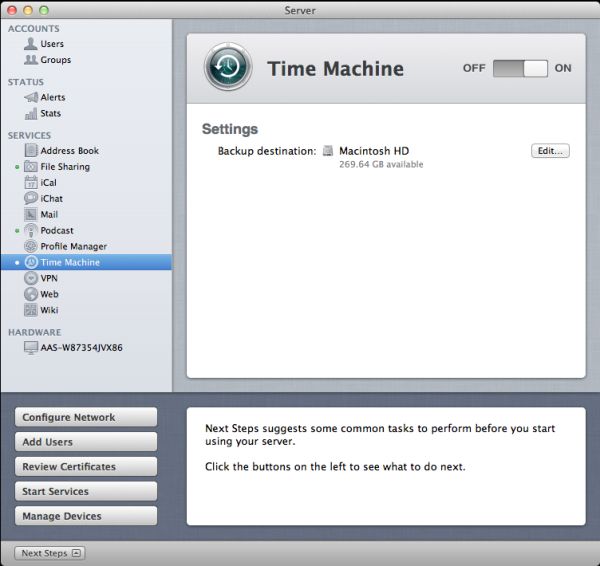
Time Machine
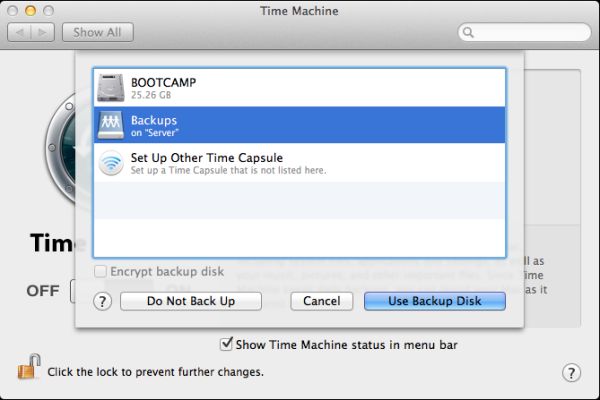
Once you do that, your server share becomes selectable from the Time Machine System Preference pane, and it works much the same as Time Machine backups to a local drive.
The thing about the Time Machine service on the Server end has always been one of scale - especially on Apple’s current server hardware, which ship by default with 500GB (Mini) and 1 TB (Mac Pro) hard drives, there’s just not enough storage available to back up dozens of computers unless you spend money on multiple servers or a huge attached storage pool.
In that sense, the Time Machine service actually makes more sense now that Apple server hardware and software are both within reach of the home user. While the Mini’s 500GB of storage (assuming you’re RAIDing your drives, as a good server admin would) might not be enough to backup the two dozen Macs that a small business would have, but it’d be great for the 1-3 Macs that a home user would have. It gives you a good network backup solution if you don’t want to splurge for a Time Capsule or something.
Whatever the case, it’s easy to setup - like most OS X Server services, it’s up to you to decide if it makes sense for you or your organization.
VPN
There’s nothing that can make setting up VPN (Virtual Private Networking, which allows access to your network from other networks) truly simple, but Lion Server includes an L2TP VPN host that tries very hard - flip the switch, set a password, and determine what IP addresses will be used for connecting clients. By default, it takes 30 addresses from the high 200s, addresses that are unlikely to be in use on a small network. Make sure that your IP settings won’t conflict with addresses used by local clients.
You’ll also need to make sure that your router is configured to forward the correct ports - I can tell you that, according to Apple’s list of ports used by OS X, the VPN service uses UDP 500, UDP 1701, TCP 1723, and UDP 4500, and I can tell you that this site is a good resource to use if you’re new to port forwarding. You’re on your own for the rest.
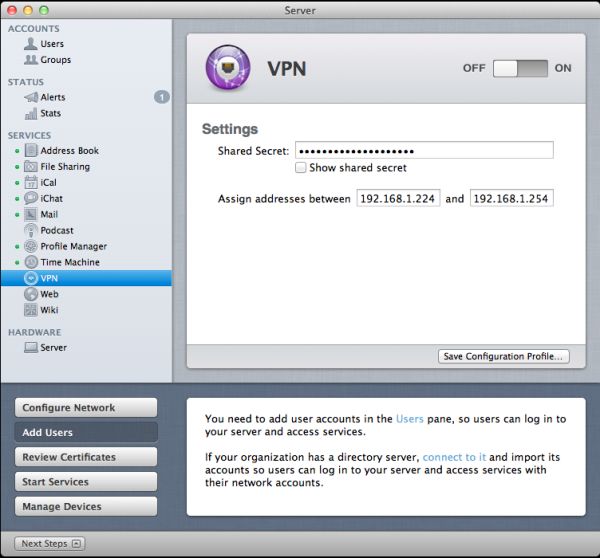
From here, you can setup clients to connect manually, or save a mobile configuration profile that can be used by Lion and iOS clients. Both OS X and iOS have their own built-in VPN clients that can use these profiles, and any Windows client that supports L2TP (or PPTP, if it’s enabled) should be able to connect as well.
VPN is a service that can be very useful in multiple settings, whether you’re a business user who needs access to files or systems from home, or a home user who wants to be able to remote into their home computer from work or a public Wi-Fi hotspot. While it does take some intermediate skills to setup, Lion Server’s VPN solution is relatively simple and sufficiently functional to serve most purposes.
Web
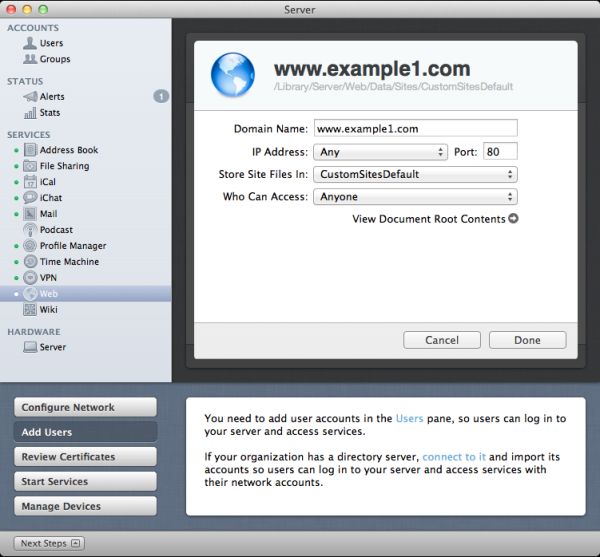
Configurable only via Server.app, the Web service (which uses an Apache backend) allows you to create multiple websites with customizable domain names, port numbers, and access permissions, and you’re also given the option to choose where the files are stored on the server.
The bad news is that if you need to do anything more advanced than that, you have to leave the warm comfort of the GUI and dive straight into TextEdit editing of configuration files. From Lion Server’s Help file:
“Web service uses Apache server. You can customize Apache settings by editing configuration files or creating web app plist files.”
Hardly user-friendly.
This is a far cry from the Web service in Snow Leopard server, which gave you a GUI for enabling and disabling modules, setting up aliases, and other advanced functionality. Comparatively speaking, Web server in Lion seems mostly content to provide a backend for things like Wiki, Mail, iCal and Profile Manager without doing a whole lot by itself.
It’s frustrating to see Apple do this to one of its services, especially when (for example) the Mail service maintains both its simplified Server.app administration panel and its advanced Server Admin counterpart. Advanced controls for the Web service already existed in Server Admin prior to Lion, and keeping them would have required little extra work on Apple’s part. Now, if you make heavy use of the Web service in your organization, you’re going to have to tool around in Terminal to perform many advanced functions, which runs counter to the simplification present in most of the other services.
Wiki
The Wiki service is similarly simplified in Lion, at least as far as Server.app is concerned - you can turn it on/off and manage what users can make wikis, but that’s just about it.
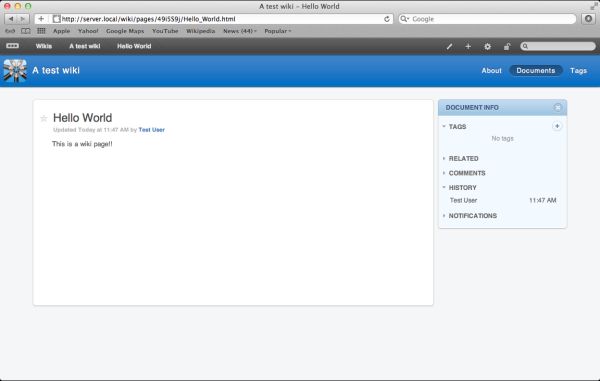
The meat of the Wiki service is accessed via your web browser, where users with the appropriate permissions can both create personal wiki entries and create new general-use wikis.
I’m not a particularly authoritative source on wiki software, so I’m not really comfortable comparing the Wiki service in Lion Server to other Wiki products, but I can say that the Lion service seems to do the job reasonably well as long as you're not doing anything too advanced. The appeal for a small business is that Wiki is a simple-to-setup service that can host easily-edited internal documentation, or perhaps information and progress reports on ongoing projects, or maybe even meeting notes - the service is there to use, but as always your wiki is only as good as the information you put into it.
We’ve now covered every service manageable by Server.app, which addresses the core of OS X Server’s functionality. As we mentioned before, though, the Server Admin Tools still expose quite a bit of extra functionality that Server.app still doesn’t manage, and I’ll do my best to cover the services still managed by Server Admin, as well as the rest of the Tools.
DHCP
In case you don’t know what DHCP is: Dynamic Host Configuration Protocol is responsible for automatically assigning and then keeping track of IP addresses for each device on your network. Without DHCP, you’d have to configure every one of your network-attached devices manually, to say nothing of keeping track of which device uses which IP.
For most home and small business users, your router is going to do this for you - nearly all routers have a basic DHCP service, as well as tools for assigning fixed IP addresses to devices on your network.
If you need something a little more advanced, the DHCP service in Lion Server can create different subnets, map static IP addresses, and provide more detailed logs than many routers.
DNS
DNS (Doman Name System) is also IP address-related, in that it redirects IP addresses to more easily-remembered names. That’s why you can type Anandtech.com into your address bar to get here instead of a 12-digit IP address followed by a five-digit port number.
Firewall
The Firewall service lets you block access to ports on your server, as well as for your network and any computers attached to it. Most home users and enterprises are protected by a firewall at the network level, but this can be useful if you want to explicitly allow or deny access to a particular port or ports.
NAT
The Network Address Translation service handles port forwarding, enabling one IP address to host many different services. This is another service usually handled by routers: it’s the reason why multiple computers and other devices can access the Internet despite having only one IP address (to see your true IP address, as opposed to the IP address assigned to your device by your router, you can use a service like whatismyip.com or IP Chicken).
RADIUS
NetBoot
The NetBoot service is one of my personal favorites - using a mix of standard PXE boot technology and some of Apple’s own mumbo-jumbo, you can use it to serve up OS images to client Macs over the network. Its uses are diverse - you can boot up a simple operating system designed to deploy OS X images to multiple computers at once (I recommend the excellent, free DeployStudio for this sort of work), you can serve up a vanilla OS X install disk, or you can use the System Image Utility (another of the Server Admin Tools) to capture a pre-configured OS X environment that can be served to many clients at once - the latter is particularly useful in classrooms, computer labs, public-use kiosks, and anywhere with a lot of Macs that need to look and act the same, since getting a clean instance of the OS is as easy as rebooting the system.
The actual setup and operation of the NetBoot service is basically identical to the way it was in Snow Leopard server (which looked a lot like Leopard’s implementation did, and so on). However, there are some inconveniences related to Lion’s dropping of support for Core Duo and Solo Macs if you’ve still got any hanging around - a bit of historical context will be useful here.
NetBoot dealt with the PPC-to-Intel transition by allowing administrators to choose what client architecture a particular image would boot - if you made one 10.4 NetBoot image for PowerPC systems and an equivalent image for Intel systems, you could set them both as the default images for their respective architectures, and offer the same services to all of your Macs regardless of architecture without incurring too much additional overhead.
10.5 made Universal images possible - these were simple times, because one image could boot basically all of your supported Macs (as long as you didn’t have any super-old G3s or G4s around), but you had to go back to the image-per-architecture model when 10.6 dropped support for PowerPC. It was a little extra work, but was totally doable.
As we discussed before, 10.7 drops support for the very earliest of the Intel Macs, but your Netboot architecture options remain the same - you can pick PowerPC, Intel, or Universal (for 10.5 images), but you can’t distinguish between supported and unsupported Intel Macs.
Granted, this problem will affect only a subset of Lion Server users - those who use NetBoot and need to support both the newest Macs (necessitating a recent 10.7 image, since as a rule OS X isn’t downgradeable) and a mix of older Macs - if this roughly describes your situation, begin devising workarounds now.
Using the System Image Utility
If you have several Macs on your network and are worried about Lion’s lack of restore media (and if, for some reason, you don’t want to make your own restore DVD or USB stick as we discussed in our Lion review), the NetBoot service provides you with one of the few supported methods for getting around it.
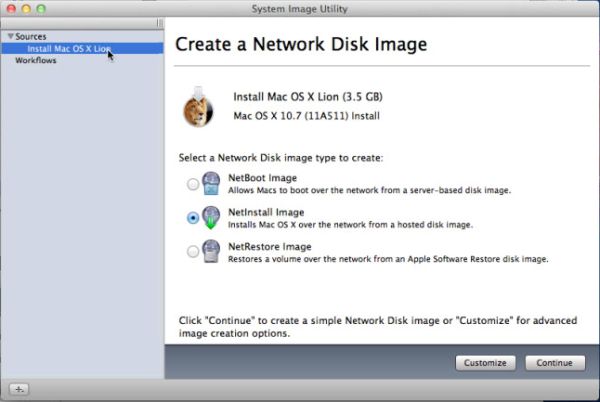
All you need to do is keep a copy of the Lion installer downloaded from the App Store. As long as you’ve got it stored somewhere on a drive that is readable by the computer, you can fire up the System Image Utility and see it listed as an image source.
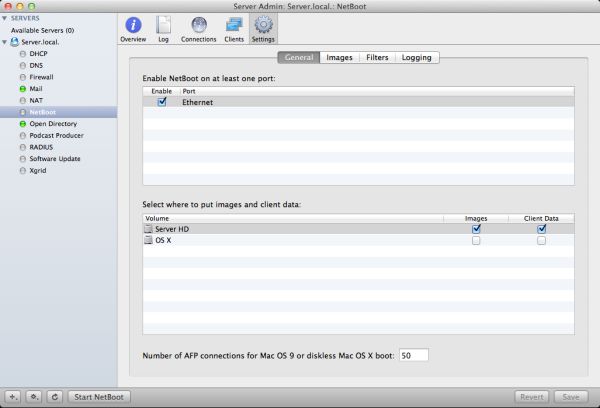
Go ahead and create a basic NetInstall image of it, and save the resultant *.nbi folder to your server's \Library\NetBoot\NetBootSP0 folder, and then enable it in the Images tab in Server Admin (note that the NetBoot folder is only created once you choose to store images and client data on your hard drive in Server Admin, and that your images only become visible to clients when you’ve enabled NetBoot on your server’s Ethernet port).
Enabling ports and storage locations
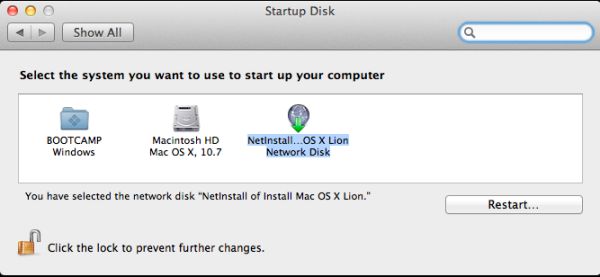
Once everything is enabled, you should see your new NetBoot image as an option in the Startup Disk preference pane on your client Macs.
You can use the System Image Utility to make a NetBootable image of any OS X partition, as long as it’s running the same version of OS X as the Mac running the System Image Utility - Lion can make Lion boot images, Snow Leopard can make Snow Leopard boot images, and so on.
Software Update
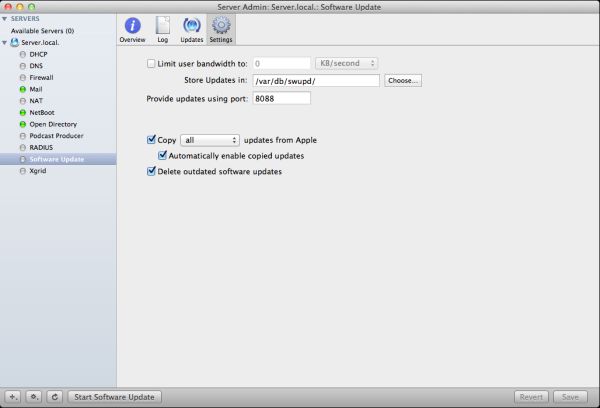
Software Update downloads every update in Apple’s catalog and allows you to serve them up to your users. This includes every product updated by Software Update: OS X (versions 10.5, 10.6, and 10.7 are supported), Final Cut, iLife, iWork, and various firmware updates included. With Final Cut and others making the transition to the App Store, it’s uncertain whether Software Update will continue to offer updates for these products. Another question is whether iOS updates will be offered via Software Update once over-the-air delta updates become the norm in iOS 5 - as usual, we’ll have to wait and see.
The other advantage is that you can choose exactly which updates to serve to your clients. If, for example, you know that 10.7.1 deletes user data, or that iTunes 10.5 is going to have problems that are fixed days later by iTunes 10.5.1, or that Safari 5.2 causes problems with some internal sites you depend on, you can uncheck those updates and elect only to serve them up after issues have been fixed.
All you have to do is point your client computers to your Software Update server. This is easily done via policies in Workgroup Manager or Profile Manager for managed Macs, or via some command line trickery for non-managed Macs. Downloading the entire update catalog does consume a fair amount of disk space, so make sure you've got a few dozen spare GB on your drive somewhere before turning the service on.
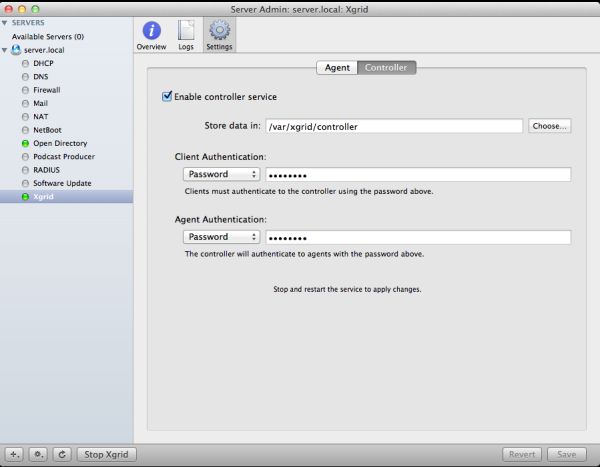
Xgrid is the last of the services we'll be looking at tonight, and it's not a new one so we won't spend too much time here. Accessible only via Server Admin, Xgrid is Apple's distributed computing service - basically, it allows many computers to process a single task, thus completing that task exponentially more quickly than any one computer could do alone.
Configuring the service is easy - just select the service in Server Admin, click the Configure Xgrid Service button, elect to create an Xgrid Host, input your Directory Administrator credentials, and you're done.
You can control how clients authenticate to your Xgrid in the Controller tab within the Settings tab. For convenience's sake, I'll just have my clients authenticate with a simple password. By the same token, you can make your server's CPU cycles available to Xgrid in the Agent tab.
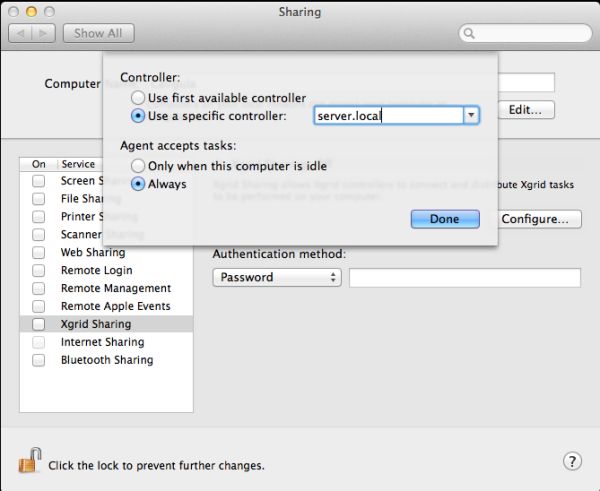
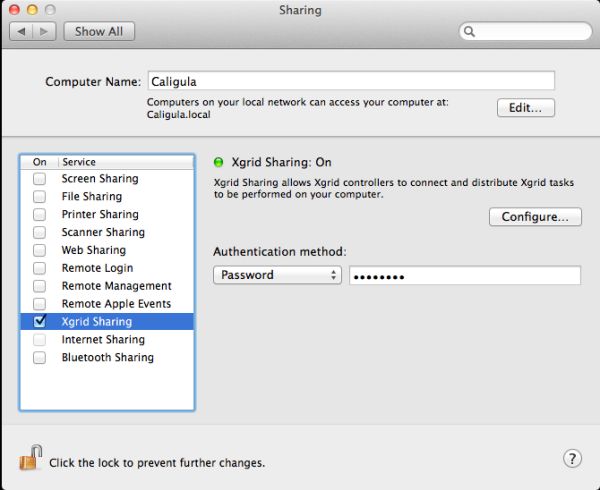
Now, to get other computers in on the fun, go to the Sharing System Preference pane, go to Xgrid Sharing, and click Configure. Tell your computer to use a specific controller, and input your server name.
Under Authentication method, make sure what you put here matches the setting you put in on the server, and then check the service's checkbox to start it up.
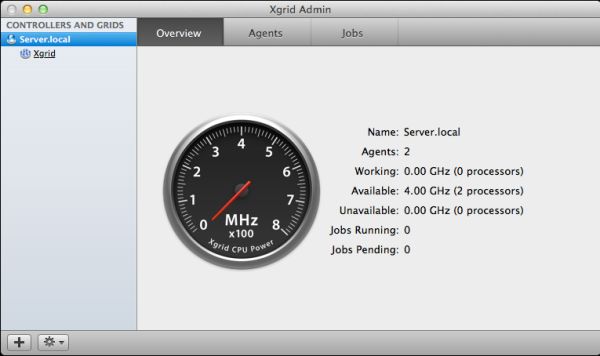
Now, check to see that everything is working using the Xgrid Admin Server Admin Tool - if you've configured your computers correctly, you should see that a pool of CPUs are available for your use.
Your Xgrid clients can now submit jobs via the command line, and you can use Xgrid Server to start, stop, pause, and dictate the priority of those jobs.
The actual use of Xgrid is a little outside the scope of this review, but sadly it's one of those things that sounds a lot cooler in theory than it is in practice. You can't really use Xgrid to speed up consumer applications from Apple or Adobe - it's best used to help with CPU-intensive calculations, and it's not even ideal for all of those. If you're interested in learning more (and if you're fairly technically literate), I'll point you toward the generally excellent Xgrid wiki and wish you luck.
Rather than keep interrupting myself throughout the review to talk about using Windows with OS X Server’s services, I thought I’d lump it all together at the end for convenience’s sake. There's not much to say, so I'll be brief.
Address Book, iCal, iChat, and Mail: All of these services use open protocols (or, at least, protocols that are supported by several non-Apple programs), so you can access them from many different products across many different platforms: POP and IMAP for Mail, CardDAV for Address Book, Jabber for iChat, and CalDAV for iCal. You may not get quite as polished an experience as with the built-in Apple tools, but you should still be able to interface with your OS X-using colleagues (and, of course, the services that offer web clients will render fine on PC browsers).
File Sharing: Lion's new SMB doesn't affect file sharing with Windows XP, Vista, and 7 clients - it all works as intended.
VPN: Properly configured Windows computers should be able to make full use of OS X Server’s VPN service, but check out this Apple support document for some caveats and configuration details.
Web and Wiki: Naturally, as long as you have a Web browser and appropriate permissions, you can access and edit Web and Wiki pages from Windows just as well as any OS X user. Note that you may have the best experience using Safari, but I didn’t have any problems using Chrome or Firefox in my testing.
Other Apple-tailored services - NetBoot, Podcast, Xgrid, Time Machine, Software Update, and others - won't do anything for your Windows clients. If you’ve got a mostly Mac network with a few Windows users, or if you intend to use OS X Server mostly to manage Macs and Windows servers to manage Windows, then OS X Server should work well for you; if you just have Windows clients, though, or if your Mac-to-Windows ratio is high enough, the removal of PDC functionality makes it hard to get by with just an OS X server.
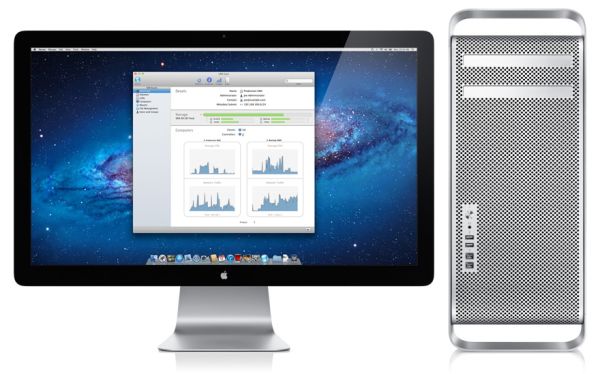
One thing to mention in a review of Lion Server is the state of Apple’s server hardware. As you may or may not remember, Apple discontinued its Xserve line of rack-mounted server hardware back in January, and slightly modified two of their desktop models to fill the void - Lion Server can be installed on any Lion-capable Mac, but these are the systems that are actually shipped with it installed.
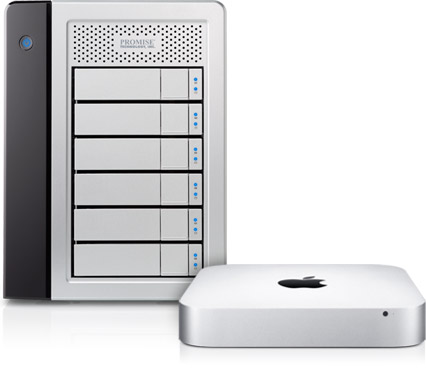
The Mini Server became easier to recommend after its recent refresh, where it gained the Sandy Bridge architecture and its quad-core processor in one fell swoop. Bump it up to 8GB of RAM (aftermarket, if you’re smart - friends don’t let friends pay $200 for a $60 memory kit) and you’ve got yourself a decent little server box.
The second is the Mac Pro Server, which can pack enough processing power and memory to host OS X Server and a couple of virtual OS X Servers if you wanted. It’s a little harder to recommend, since the performance gap between the base Mac Pro Server configuration and Mac Mini Server configuration is smaller than it once was, and since the Mac Pro would take up so much space in a rack. The Mac Pro is still waiting on its 2011 refresh, which should bring both newer processors and (if the rumors are to be believed) a new, smaller case (since the current case design has remained largely the same since the Power Mac G5 came out eight years ago). This, perhaps combined with a price drop, could make the Mac Pro Server a better choice than one or two Minis.
The main drawback of Apple’s current server hardware is lack of monitoring tools - the Server Monitor tool that continues to come with the Server Admin Tools download requires Lights Out Management (LOM) support in the hardware, and the XServes were the only Apple computers that did this. If you want to know things about your server’s temperature, RAID status, and the rest, you’ll have to rely on third-party tools.
Lion Server’s main problem, from an IT person’s point of view, has less to do with the software’s functionality and more to do with Apple’s software support model. Lion Server is a good product that maintains most of the appeal of past OS X Server versions, but like the client version of Lion, it’s clearly a transitional product that makes many changes and foreshadows many more, and there’s less tolerance for that sort of thing in the server room than on the client's end. If your organization depended on something like the Print or QuickTime Streaming service in Snow Leopard Server, or the ability to join Windows clients to Open Directory, Apple decided that those services were obsolete and got rid of them; now you’re stuck having to find something else to do the same work.
That said, server administrators will be happy to know that, in spite of its deeply cut price and consumer-friendly distribution method, Lion Sever stacks up favorably against Snow Leopard Server. Most of the important services, chief among them Open Directory, are present, and are just as useful now as they’ve ever been. Unless you’re hosting a web server on your OS X Server, I don’t anticipate that you’ll hate Lion Server once you get it up and running.
For home users, my recommendation is less conclusive: for power users who like toying around with advanced software and for people who saw a particular service (like VPN, NetBoot, Time Machine, or File Sharing, to name the most user-facing) that will fill a niche in their home, $50 is hardly a steep price to pay for the functionality you get. That said, there are plenty of open source products out there to fill most of these niches, and if you really need something like this in your home, chances are good that you’ve figured something out already. Still, for many services, Lion Server brings OS X’s simplicity to the server level, and that shouldn’t be discounted.
OS X Server is most useful in a handful of different scenarios: the first is that you have a small network that’s in need of a full-featured but easy-to-manage and simple-to-license server product. The second is that you’re managing a network of any size that used to be all-Windows, but hosts a growing number of Macs (this is often the case in education, for example) - OS X Server knows that it’s going to be finding its way into a lot of Windows shops, and as such it integrates fairly well with existing Active Directory setups. The last is that you have a bunch of iOS devices flooding your network and you have no idea what to do with them - iOS management may be Lion Server’s ace in the hole. If any of this sounds familiar to you, you really ought to give Lion Server a try. At $50, there’s not much reason not to.

