
Original Link: https://www.anandtech.com/show/3774/welcome-to-valhalla-inside-the-new-250gb-xbox-360-slim
Welcome to Valhalla: Inside the New 250GB Xbox 360 Slim
by Anand Lal Shimpi on June 18, 2010 1:59 AM ESTI own a total of five Xbox 360s. Four of them have died. Three because of the Red Ring of Death, all out of warranty. Many have had serial Xbox 360 failures, I had them in parallel.
The last revision of the Xbox 360, codenamed Jasper, was supposed to fix the infamous RRoD problem. So far my Jasper has been running fine. While Microsoft never confirmed the cause the RRoD seemed to be a result of poor cooling and manufacturing issues (either at the die/underfill level or at the solder level or both).
Needless to say, I wasn’t terribly happy about purchasing a sixth Xbox 360, but here it is:
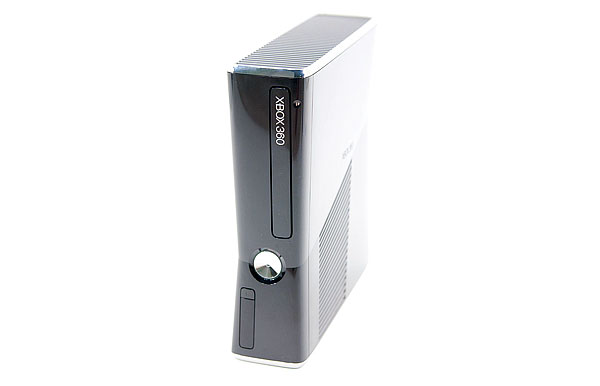
This is the latest revision of the Xbox 360, commonly referred to as the Xbox 360 Slim thanks to its shrinking in virtually all dimensions compared to the previous white box:
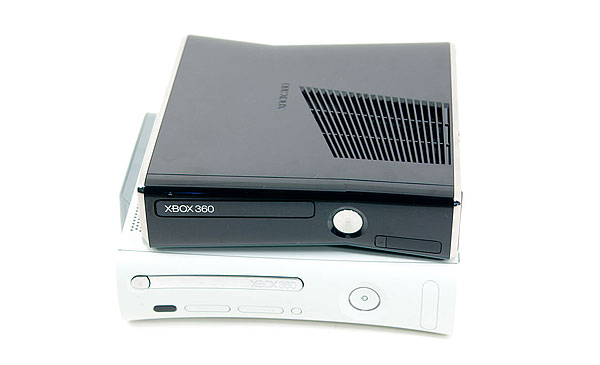
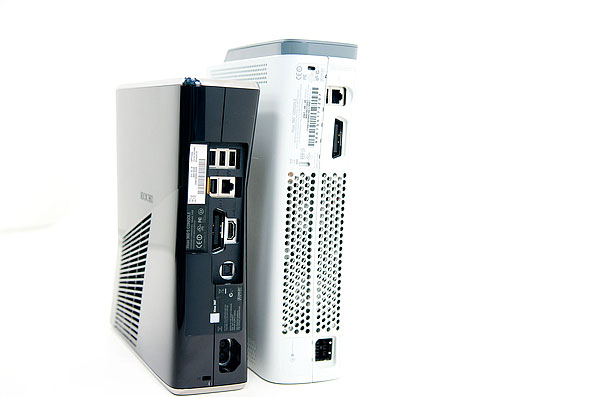
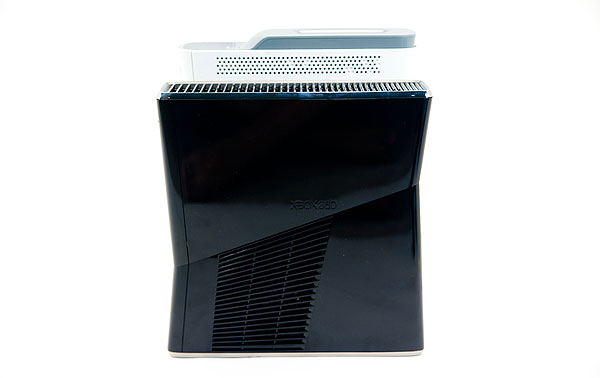
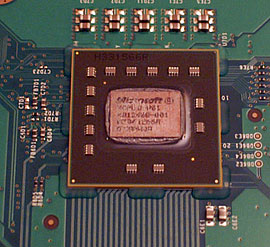
The internals are mostly new, featuring for the first time a single chip with CPU, GPU and eDRAM. Prior to this motherboard revision the Xbox 360 motherboard had two discrete packages, one with the CPU and one with the GPU + eDRAM.
 |
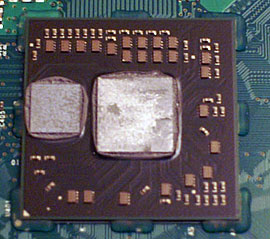 |
For those of you who don't remember, ATI originally designed the Xbox 360's GPU and called it Xenos. The GPU was the first we ever looked at that used a unified shading architecture, so there were no dedicated pixel or vertex units. The core was made up of 48 shader processors and each SP could work on a vect4 plus a scalar op in parallel. These days we'd probably call it a GPU with 240 cores, although it's a bit dated from a functionality standpoint. The GPU runs at 500MHz and is also home to the memory controller.
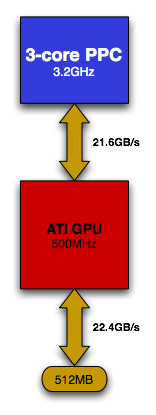
On a separate die, which ATI referred to as the daughter die, was 10MB of embedded DRAM along with all of the hardware necessary for z and stencil operations, color and alpha processing and AA. This eDRAM and associated logic helped Microsoft bring AA to games and improve overall performance compared to what was possible at the time with conventional architectures.
The CPU, codenamed Xenon, implemented three in-order PowerPC cores with SMT support - meaning the whole chip could work on six threads at the same time. The design was ahead of its time but given its 90nm manufacturing process it only had 1MB of L2 cache to share among all three cores. These days it isn't really considered the ideal approach to a many-core CPU. Private L2 caches with a large shared L3 cache is preferred for scaling beyond two cores.
Leading up to Jasper, each die was shrunk independently with each Xbox iteration. The table below shows us how:
| Xbox 360 Revision | CPU | GPU | eDRAM |
| Xenon/Zephyr | 90nm | 90nm | 90nm |
| Falcon/Opus | 65nm | 80nm | 80nm |
| Jasper | 65nm | 65nm | 80nm |
With the new Xbox 360 (codenamed Valhalla), at least two, possibly all three of the die are combined and placed on a single package:
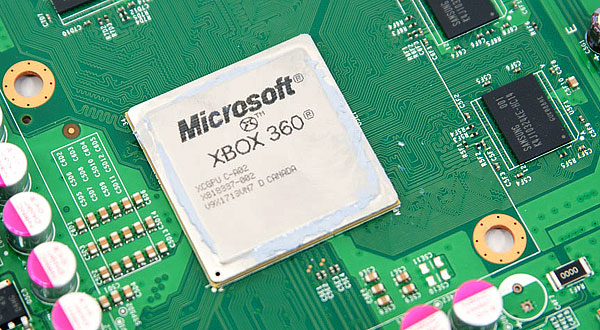
Bringing it all onto (presumably) a single die makes cooling much simpler as now there’s only one heatsink and one fan for all of the major heat generating components in the unit. This level of integration is made possible only by the not-so-magic of Moore’s Law. At 40nm it shouldn’t be a problem to bring all of those components onto a single reasonably sized die, which in turn reduces Microsoft’s manufacturing costs. It’s not totally clear whether Microsoft is building these chips on a 40nm, 45nm or 55nm node. The 40nm approach would make the most sense but TSMC is very capacity constrained at this point so it would be a slow ramp before all Xboxes got the Valhalla treatment. Update: Apparently 45nm is the magic number. The new CGPU is rumored to be made at Chartered Semiconductor, now under the ownership of Global Foundries.
The uncertainty is because of a pesky heat spreader. While previous Xbox 360 CPU/GPUs were visible to the naked eye once you popped the heatsink off, the Valhalla design has a heat spreader covering the Xbox CGPU (Microsoft’s term, not mine). Unwilling to potentially kill yet another Xbox 360, I’ve left my heat spreader intact for the purposes of this article.
What follows is an entire dissection guide for those of you who want to get inside the new Xbox 360 (for whatever reason you might have ;), as well as some power/noise information for those of you contemplating the upgrade.
Enjoy.
Much Prettier than the Original
Microsoft took a page from Sony’s playbook and outfitted the new Xbox 360 with all touch sensitive buttons. The eject button is much smaller but extremely sensitive, not to mention you get a loud beep whenever you hit it. There are no issues with knowing whether or not you hit the eject button.
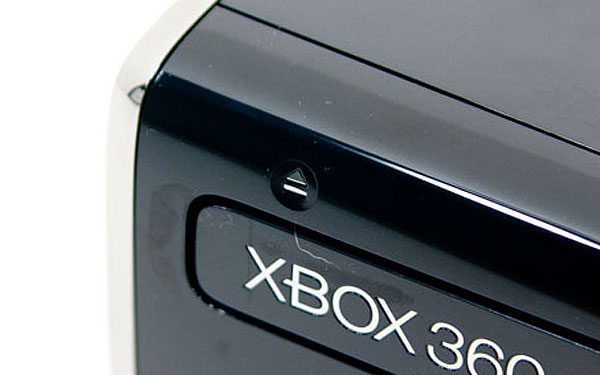
The power button is pretty much the same way, a light tap will toggle it and send you on your way. The green ring of light apparently doesn’t turn red anymore (it only flashes green when there’s a problem? engineering meet marketing). On the bright side like Jasper before it, there is no reason the new Xbox 360 should have the same RRoD problems as the older models. As you’ll see from the dissection not only is it a new chip fabbed on a new process, but it’s apparently cool enough to require much less force exerted on it by the heatsink clamp.
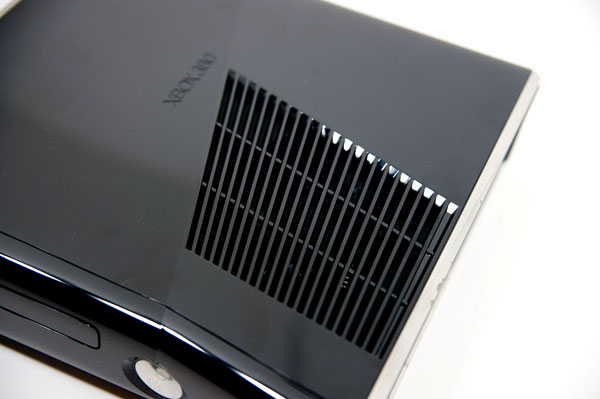
The exterior is a glossy black plastic. It looks great but picks up fingerprints and smudges like the dickins. A definite problem for those of you who like to cart your 360s around.
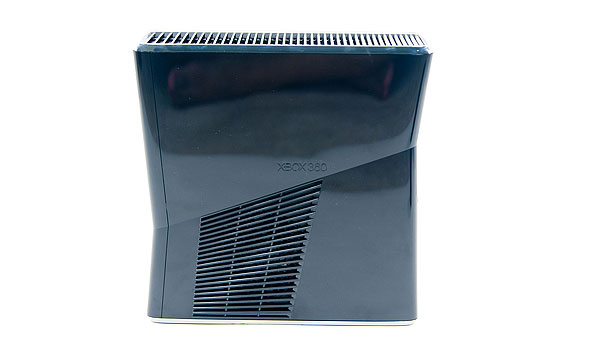
The Xbox 360 memory units are no longer supported but there are two USB ports up front that will accept USB drives as data storage.
Around back you get an optical audio out, Xbox 360 AV connector, HDMI output, three more USB ports, Ethernet port and input for Microsoft’s Kinect peripheral due out later this year.

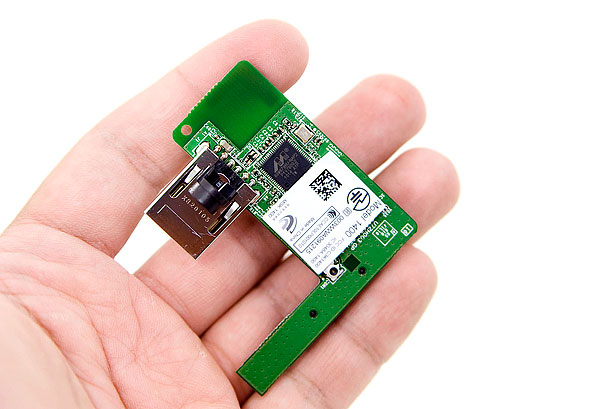
There’s 802.11n support integrated into the new Xbox 360. If you open up the case you’ll see a USB 802.11n adapter plugged into an internal USB port. This also makes me wonder if we’ll see a cheap version of the new 360 without WiFi support.

The hard drive is still a 2.5” model but now it’s tucked away at the bottom of the system (standing up) in a much smaller case. To get to it just pull back on a couple of the fins which will let you remove a part of the cover:
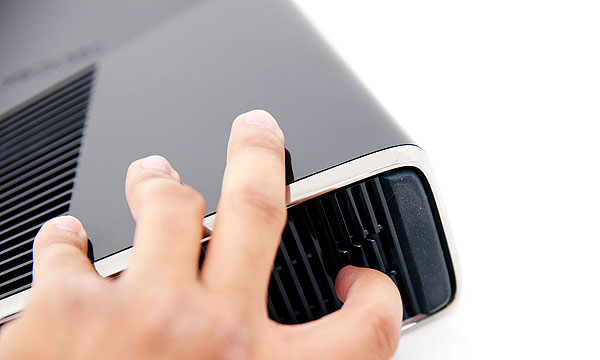
Yanking on the black ribbon (it takes a bit of pulling) will pull out the hard drive itself. Microsoft appears to have sealed this drive up pretty well. I’m not sure there’s a way to remove the physical drive without irreversibly breaking open the case. I had other ways of figuring out what was inside so I didn’t bother taking this one any further.

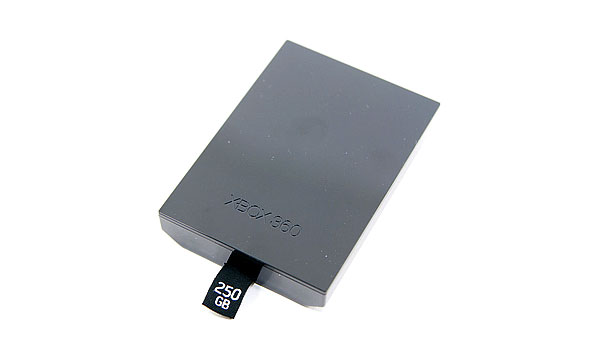
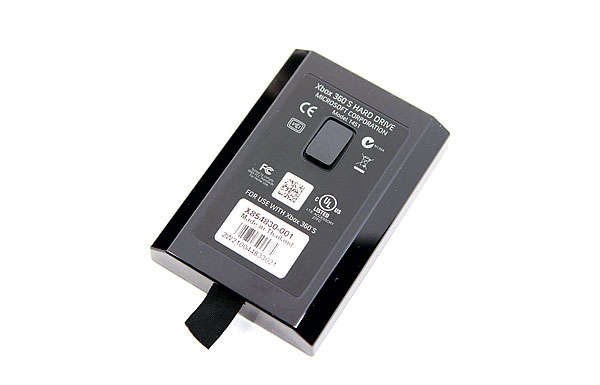
The new hard drive is a Hitachi HTS545025B9SA00 1.5Gbps SATA hard drive. It spins at 5400RPM and has an 8MB buffer. If you were hoping for a 7200 RPM drive, you’re out of luck.
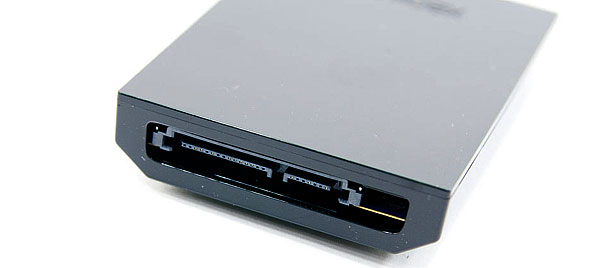
And just for fun here's a comparison shot to the old HDD:
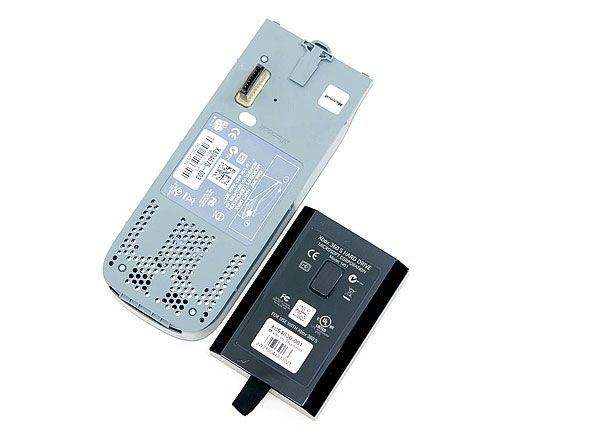
The funny part is the hard drive form factor never changed, just the case it came in.
Power Consumption: 50% of the Original Xbox 360, and Quieter
Moore’s Law is good for any of three things: 1) increasing performance, 2) adding features, 3) reducing power. Consoles have the benefit of not having to worry about improving performance or adding features over time. There are no changing API specs and games are always designed to the same hardware performance level. This leaves us with improvements in power consumption (and Microsoft’s profitability).
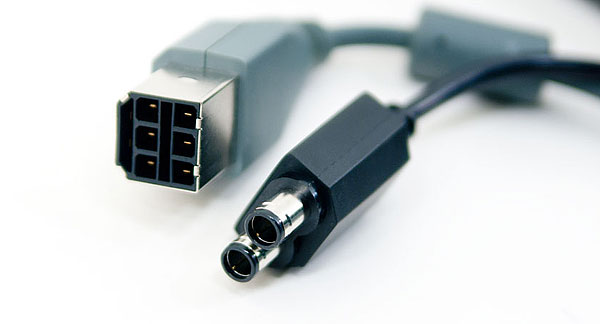
The new Xbox 360 power connector (right). It's slim.
The new power brick isn’t compatible with the old Xbox 360s. At 135W it isn’t enough to power even the Jasper Xbox 360 and thus you get a new power connector. It’s much lighter than the old unit and a bit smaller, but still larger than anything you’d get with a notebook for obvious reasons.
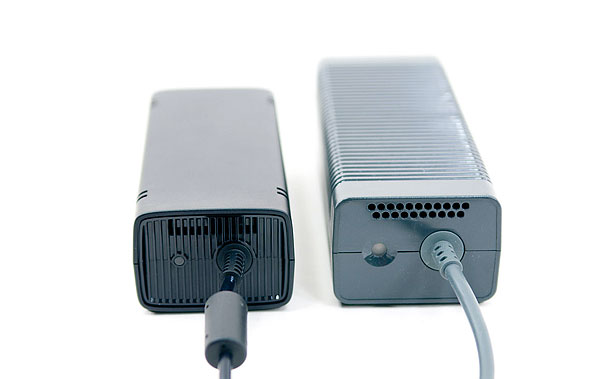
New power brick (left) vs Old power brick (right)
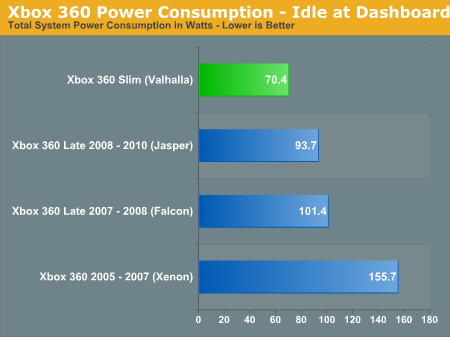
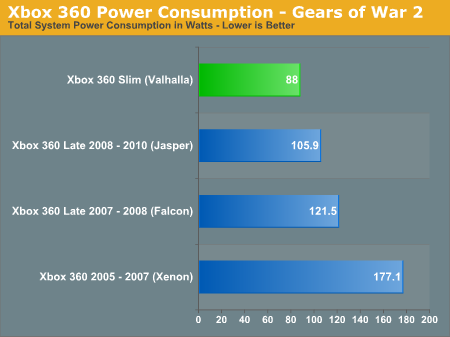
Given my plethora of Xbox 360s I happen to have a good amount of historical data on power consumption for all of the major revisions, I’ve added the relevant Valhalla numbers below.
| Power Consumption Comparison | ||||||||
| Xbox 360 Revision | System Off | Idle | Halo 3 | Rockband 2 | Gears of War 2 | Red Dead Redemption | ||
| Xbox 360 Slim (Valhalla) | 0.6W | 70.4W | 87.0W | 82.7W | 88.0W | 90.4W | ||
| Xbox 360 Late 2008 - 2010 (Jasper) | 2.0W | 93.7W | 105.9W | 101.0W | 105.9W | 109.3W | ||
| Xbox 360 Late 2007 - 2008 (Falcon) | 2.8W | 101.4W | 121.2W | 112.8W | 121.5W | |||
| Xbox 360 2005 - 2007 (Xenon) | 2.3W | 155.7W | 177.8W | 167.7W | 177.1W | |||
The biggest improvement is actually when the system is totally off. The new Xbox 360 slim pulled 0.6W compared to over 2W for the older 360s while doing nothing more than being plugged in. Idle power is roughly 75% of what it was with the Jasper Xbox 360 and load power is around 80 - 83% of what we saw with the previous generation. Note that the new Xbox 360 consumes less than half the power of the original 360!
Idle power consumption is actually not very impressive for a 40nm Xbox 360 if that's indeed what we're looking at. A modern day Core i5 system with an efficient power supply will idle at under 70W with a beefy discrete graphics card. While this is a significant drop compared to previous Xbox iterations, it's not impressive as a computing device.
The savings are tangible however and also result in a cooler, quieter system. The CPU and GPU are now cooled by a single, larger fan that keeps idle noise down to a minimum. I measured noise levels between Valhalla and Jasper at 2” away from the chassis and came up with the numbers below:
| Sound Comparison | ||||
| Xbox 360 Slim (Valhalla) | Xbox 360 Late 2008 - 2010 (Jasper) | |||
| Idle | 45 dB(A) | 50 dB(A) | ||
| Load (Spinning Disc) | 51 dB(A) | 54 dB(A) | ||
The measurements were taken in my office with a noise floor of around 37 dB(A). At idle the new Xbox 360 slim is noticeably quieter, but still audible. The drop in idle noise is perfect for those of you who use the Xbox 360 as a HTPC of sorts. You can still get quieter out of a well designed HTPC however.
While spinning a disc the old Jasper was absurdly loud it is more bearable on the new 360. It’s still not silent (nor can it be while quickly spinning a disc) and you’ll still scratch discs if you move the Xbox 360 while a disc is spinning, but it’s an improvement.
Getting Inside the new Xbox 360
To get into the Xbox 360 you’ll need pretty much the same tools you needed to get into the old one. A flat head screwdriver helps, preferably one with a long, thin stem (a tiny flathead is also useful in getting the heatsink clamp off if you want to go that far). You’ll need a torx driver with T8 bit. A phillips head screwdriver if you want to remove the fan on the heatsink and a selection of thin/flat tools to help you pry bits of the case apart.
The bad news is that the new Xbox 360 is not really any simpler to disassemble than the old one. I've included photos of the process here but for larger versions and even more than what I've included inline, check out the gallery below. As always, proceed at your own risk - we're not responsible for any damange to your console that happens as a result of following these instructions. Also know that proceeding with this will surely void your warranty from Microsoft.
To start you’ll want to first remove the hard drive. Next we have two plastic grates on the left and right of the system that pop right off. They are attached using clips along their edges so work one part out with your flat head driver and just pull the rest off.


The side without the hard drive is a bit more difficult. I crammed a plastic tool between the chrome casing and the plastic grate to pull it off and then wedged my fingers in there to get the entire piece off.

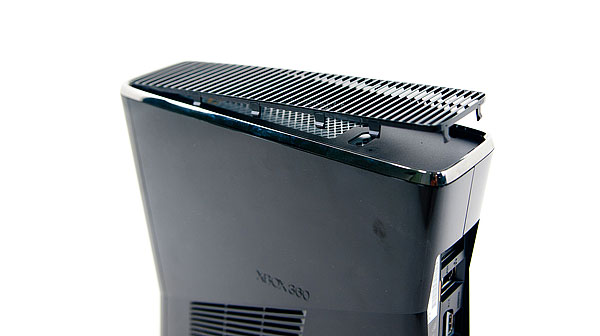
This next part is the first of two hard parts, and I’m not sure there’s a way around this. Removing the two plastic grates will reveal two more black plastic covers. You can wedge your flathead between the plastic cover and the rest of the system and pry it off.


The cover is attached to the system by several plastic stands that fit through little holes behind them. The stands are wider at their outer most edge than they are at the base, too wide to just fit through the hole. In fact, removing these plastic covers will break part of the stands off. It looks like Microsoft did this to make opening the new 360 something that could only be properly reversed at Microsoft itself. Thankfully doing so doesn’t fundamentally ruin the system.
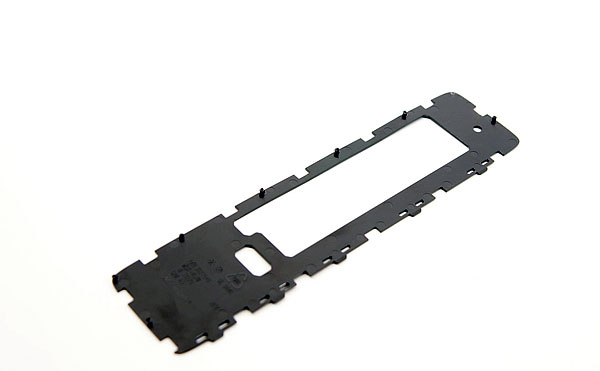
Stick your screwdriver in one of the cutouts and pry away. You’ll see a lot of flexing and then hear a pop, once you hear one move to the next portion of the plastic cover. Do this around the edge until the entire cover is removed. Repeat for the other side of the 360.

Now you’ve got line of sight into the system itself. Great.
At this point you can also remove the 802.11n card which is held in place by a single screw. Remove the T8 screw and the card slides right out. It is just plugged into an internal USB port.

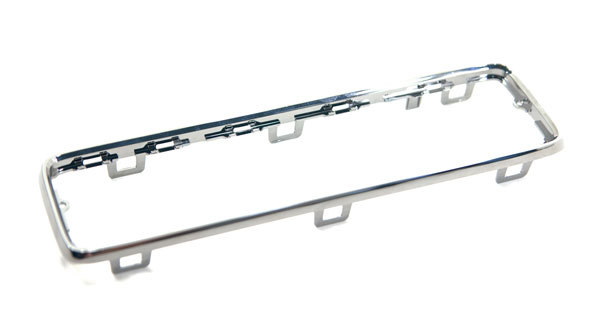
Now we have to remove the two chrome surrounds on either side of the system. These are attached via clips that can be tempted loose using that trusty flat head screwdriver. Wedge it between the clip and the rest of the chassis and push away from the chassis:


Some clips will give way easily, others will take some coercion. Some of the clips are only accessible via a very tiny, very long flat head. Start with the clips you know you can get off and then try to pry the tough ones later.
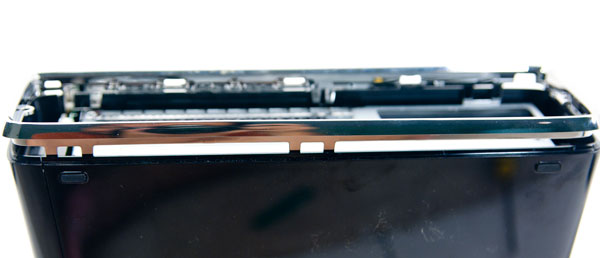
You’ve got 6 on one side and 5 on the other chrome lip, the shots below should help you.
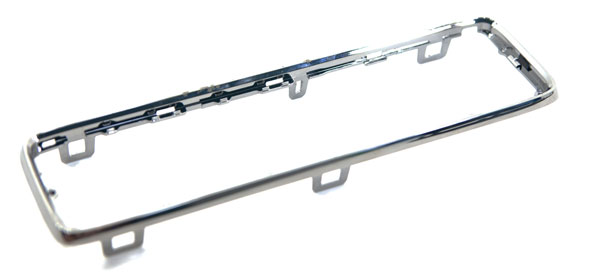
With the two chrome surrounds removed we’re now at the second most difficult part of dissecting the new Xbox 360. Remember these little things:
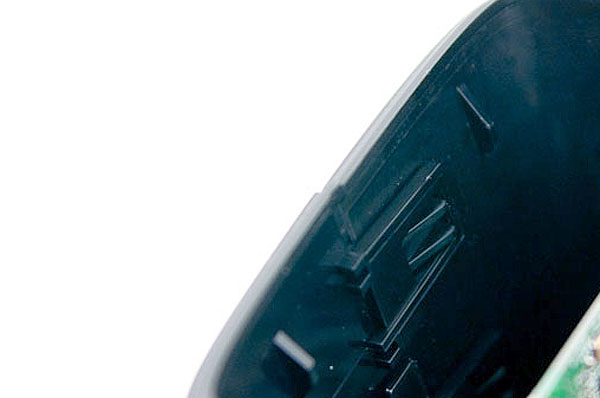
Yep, they’re back, and even more of a pain.
Lifting The Covers
On the old 360 you at least had a removable face plate and some insight into what was going on at the rear of the system. This time around you can only look in at the sides which makes this next part quite frustrating.
Thankfully I know exactly how many clips you have to break free: three on the back and eight on the front.
I started on the back, got the clips loose then moved to the front. You need to access clips at both the left and ride side of the Xbox 360. A flashlight can be very handy here. Remember you’ve got clips at both the top and the bottom of the Xbox to work free at the front. Unfortunately during the process I managed to snap a few of these clips, not to the point where the system couldn’t be put back together thankfully.
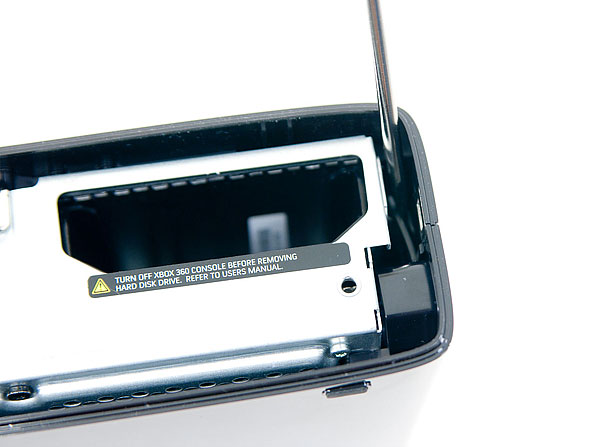
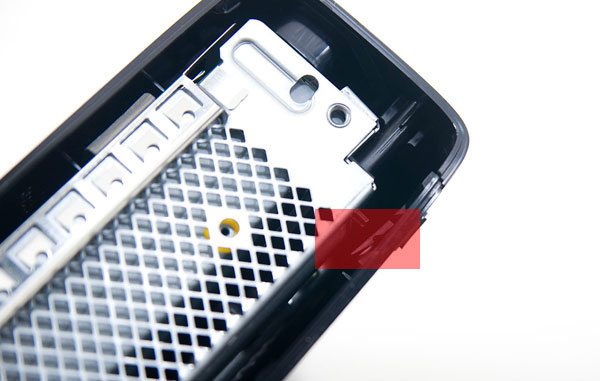
The only advice I can give you here is to be patient, persistent and have a good flathead screwdriver at your side. Once you’ve pried these clips free the front will separate from the rest of the system. If you’re trying to do it without breaking any clips, good luck, if you don’t mind then be prepared to put some force into the process.

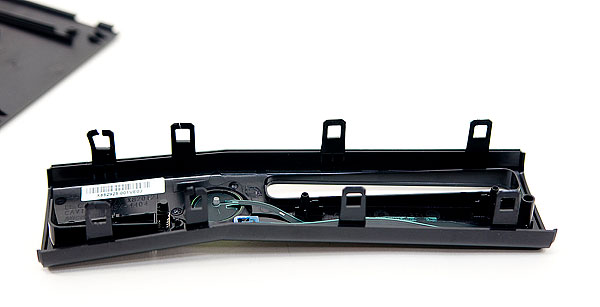
Be careful when removing the front of the system. There’s a ribbon cable that connects the 360‘s power button to the rest of the system, you have to remove it before you can proceed. In my original teardown the ribbon cable just ripped right out of its connector without any problems so if this happens to you, you should be ok.
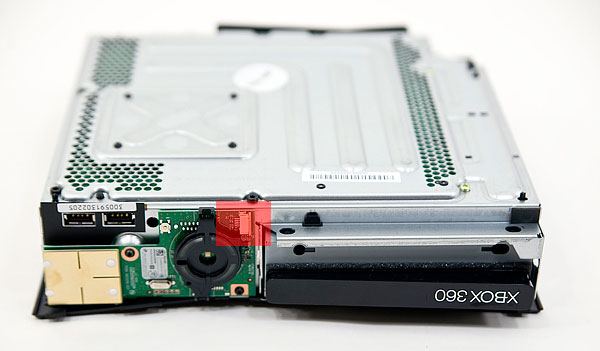
The ribbon connector attaches here
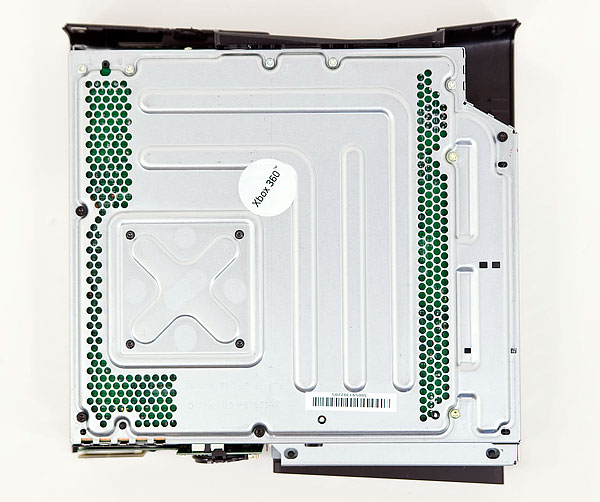
With the front removed, separate the clips on the back and the top cover of the 360’s should lift right off exposing what we have below:
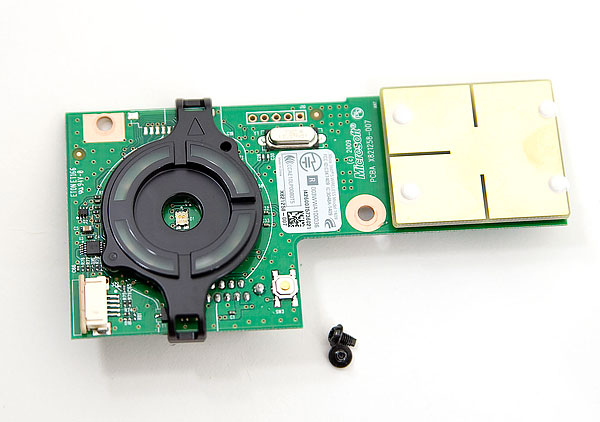
From this point on you’ll need your T8 bit. Start by removing the two screws that hold the front panel PCB in place. With the screws removed the PCB pulls straight out:
Now look at the side of the Xbox with the white sticker on it, there are 12 x T8 screws that you need to remove here to take the whole thing apart. If you just want to get the cover off I believe you only need to remove the 5 black ones.
The 12th screw is actually hidden under the white Xbox 360 sticker. It looks like Microsoft has done a lot to figure out whether or not you’ve opened this thing. Modders don’t make Microsoft happy. RRoD didn’t make me happy. Modders ftw.
The DVD Drive & Motherboard
I pulled all 12 screws out but left the four heatsink screws in place since I wanted access to the motherboard. With all four removed I could pull off the bottom cover leaving me with this:
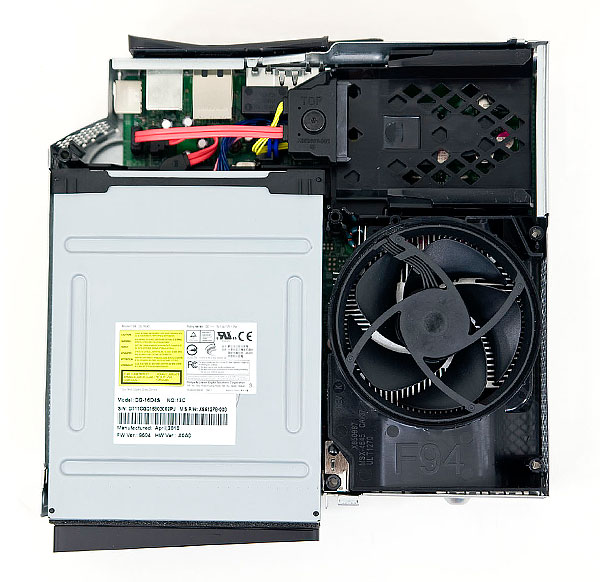
The DVD drive lifts right out and you can disconnect the power and SATA cables from the unit easily just like on the older models.
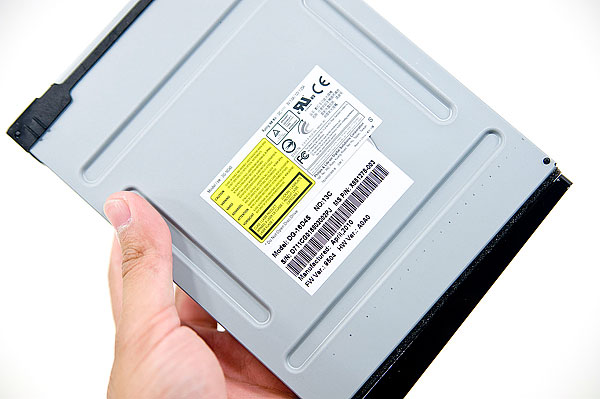
This is a newer version of the Lite-On drive found in the newer Jasper Xbox 360s. They use the DG-16D2S while the Valhalla uses the new DG16-D4S.
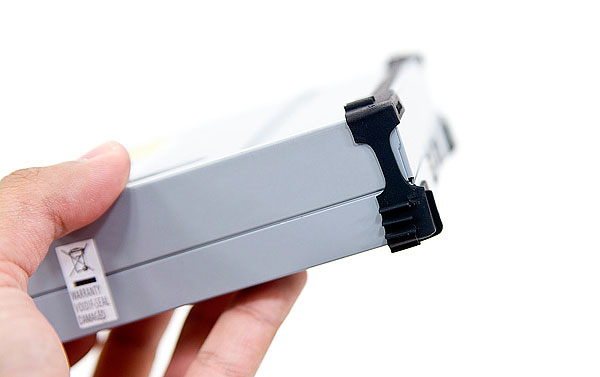
Microsoft also outfitted the drive with a strip of rubber to help dampen vibration:
You can also remove the CGPU heatsink fan shroud at this point, it is a snug fit but it should lift straight off:
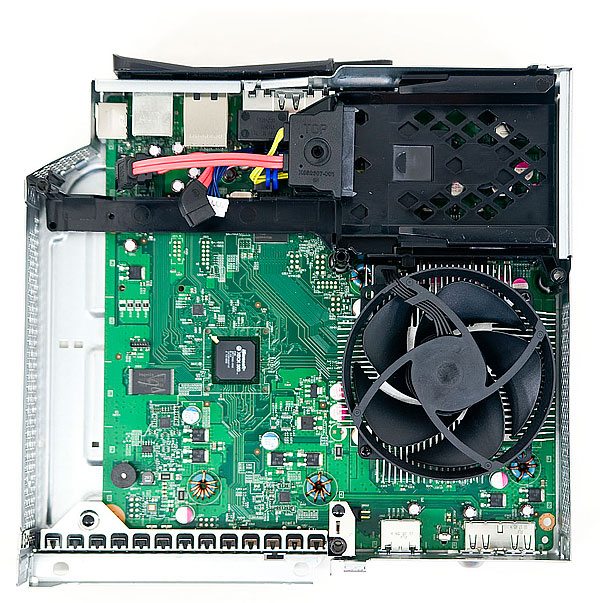
The piece of aluminum shielding in the lower left of the picture above lifts straight out, you can remove that if you want to pull out the motherboard.
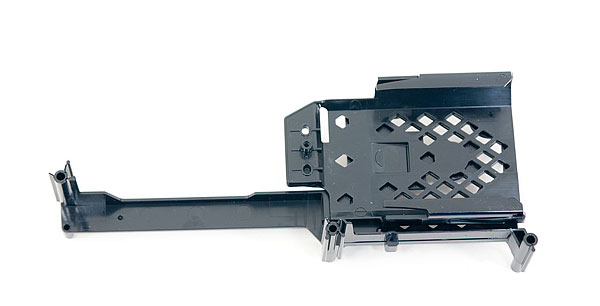
The black piece of plastic in the upper right hand corner of the picture above is the HDD carrier. It’s actually mounted on a flexible mount to allow for some vibration dampening and shock resistance. There’s a single large T8 screw holding it in place, remove this screw.
The drive tray isn’t completely free yet, there’s one more T8 screw at the back of the Xbox 360 that has to be removed. It was hidden by the casing but with that off you can now access it. Remove that screw and the drive tray is free:
The Motherboard
Two phillips screws hold the fan in place. You don’t need to remove them to remove the heatsink but I did anyway:

The single large heatsink is a lot heftier than what we'd seen in previous 360s, it doesn't feel quite as cheap or as insufficient. This time around it has to do double duty cooling both the CPU and the GPU.
At this point I can easily remove the motherboard and flip it over, revealing our old friend: the x-clamp.
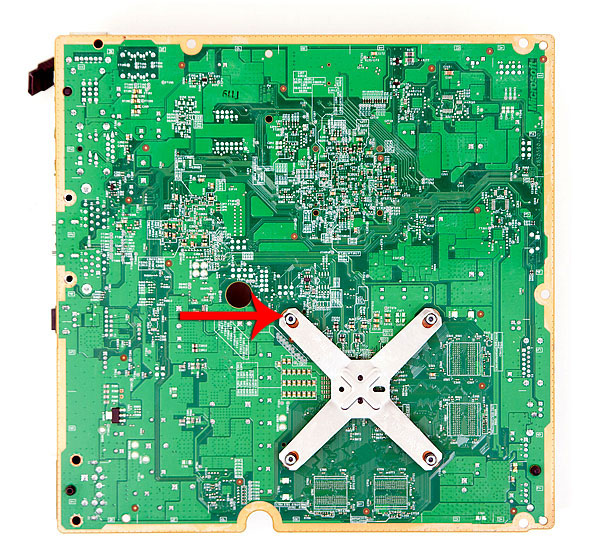
Place your flathead screwdriver tip here, pointing away from the xclamp, and pry the clamp off at this point. Repeat for 1 - 2 more and the whole thing should come off easily.
Unlike previous Xbox 360s, the Valhalla x-clamp isn’t a pain to remove. In fact all I had to do was slide a small flathead screwdriver in each of the four slots in the clamp and push down to make the clamp pop out. I’ve marked the area on the photo above.
With the x-clamp removed the heatsink pulls off revealing Microsoft’s Xbox 360 CGPU covered with a heat spreader. The heat spreader is great for making sure no one cracks a core while working on these things.
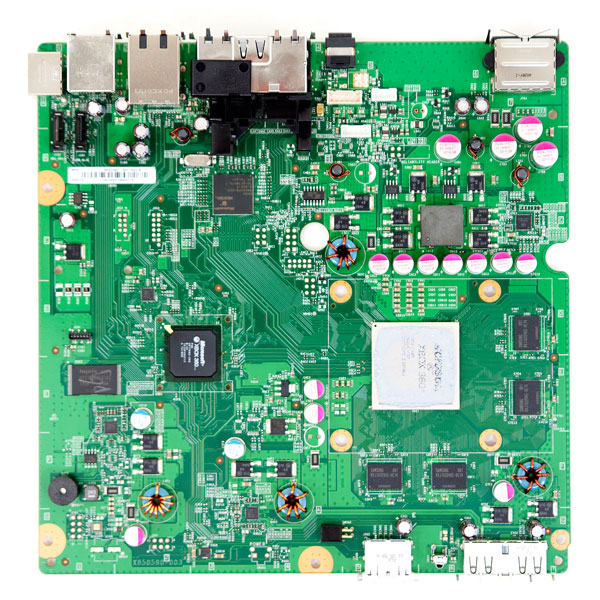
The chip to the left of the CGPU is the 360’s South Bridge, responsible for the SATA and USB ports in the system. The chip is marked as an A0 stepping which is usually the first stepping to come back from the fab. This is probably a pretty tried and true design by now with no bugs to worry about at this point.
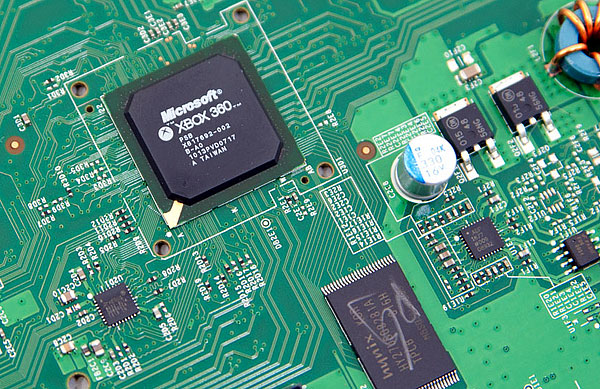
Xbox 360 South Bridge (top), 16MB SLC NAND (bottom)
The Hynix NAND on the motherboard is still 16MB in size. It is SLC NAND so it should last the lifetime of the Xbox as long as you don’t somehow mod it into a database server.
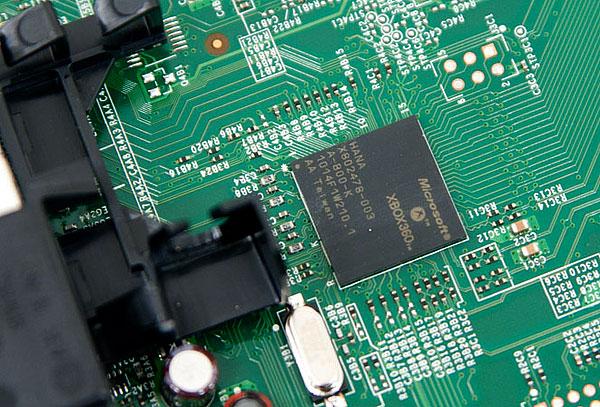
The third major ASIC on the motherboard is the HANA scaler/video encoder chip we’ve seen before on Jasper.
The motherboard now has two SATA ports directly on the board itself to support the new HDD tray.
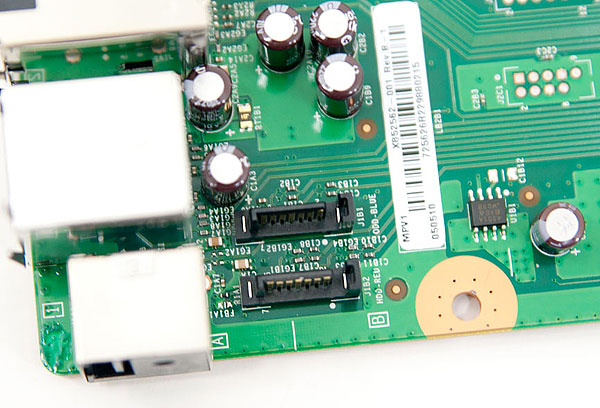
I’ve also included a ton of close up shots of various parts of the motherboard in the dissection gallery for our friends at Xbox-Scene.
Have fun!
Final Words
Microsoft, Nintendo and Sony are all trying to change the rules of the game for the next generation of consoles. Five years ago we were eagerly awaiting the arrival of the Xbox 360 and today we are still left without a replacement. Microsoft and Sony want to push the current cycle of consoles through 2012 in order to recover investment dollars. Thankfully despite the age of these consoles, the quality of titles only seems to be improving.
The Xbox 360 slim is often referred to as what the first 360 should have been. It is smaller, quieter and hopefully much more reliable than what Microsoft first shipped five years ago. If it is indeed using 40nm components from TSMC I wouldn't expect a quick ramp. It may be that the slim remains at the $299 price point for a while until Microsoft can get enough silicon back to bring it to lower price points. Update: It looks like the CGPU is made at Chartered, now Global Foundries at 45nm. We may see a quicker ramp than I first assumed as a result.
Coupled with Kinect and some exciting titles due out later this year and next (not to mention the 360's media streaming capabilities), there should be enough life in the 360 to make an investment in the new box today worthwhile.
That being said, I really do hope that we see just as many eager game developers take advantage of the tremendous increase in CPU and GPU horsepower we've been given over the past five years. When the 360's CPU was first announced no desktop CPU could manage 6 threads, today we can have twice that paired with over 12 times the amount of cache on the 360's CPU. Today's GPUs are similarly impressive and are going to be even more affordable this year, and faster next.
Just as the high end grows more powerful, so will mobile gaming devices. We are not that far away from having the power of an Xbox 360 in a smartphone. An in-order triple core CPU should be doable in an SoC within 4 years, and the GPU within a similar amount of time. And there are companies working on both. Eventually the 360's library may be the "arcade classic" titles you'll be playing on your smartphone.
Sweet.


