Original Link: https://www.anandtech.com/show/1868
Introduction
With the amazing rate at which full-fledged computers are dropping in price, it’s really no wonder why they’re starting to take over more and more roles that used to be accomplished by simpler machines. For everything from car stereo systems to hold massive music collections to kitchen machines for helping retrieve and store recipes, these “specialized” computer uses seem to only be expanding in number.
The home theater, a natural target for this expansion, has certainly received more attention than most others – and for good reason. To make a computer feel right in an office setting is one thing, but to make it work in a living room, many adjustments (some might call “sacrifices”) have to be made.
By far and large, the biggest change when switching to a home theater PC (HTPC) that has to be made to the computer is the case. Vertical towers (despite all the recent improvements in the looks department) still simply don’t work well aesthetically with other livingroom electronic components.
Luckily, there have been many improvements made in this category since the inception of the HTPC, and as such, we were able to round up four very nice looking enclosures to compare in this article. Every unit is advertised as being able to handle a full ATX motherboard, and since the demands for a powerful HTPC are relatively high, we’ll be giving these cases’ cooling systems a vigorous workout with a brand new 3 gigahertz Pentium 4-based ATX test bed.
With all that being said, let’s get started by simply checking out the units individually, starting in alphabetical order.
3R Mstation HT-1100
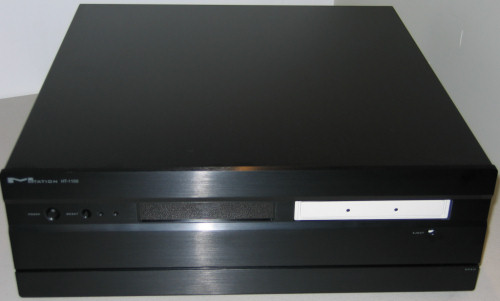
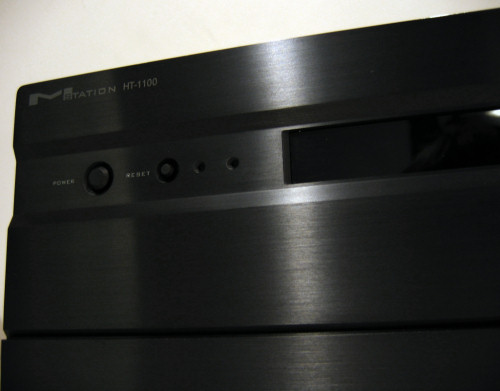
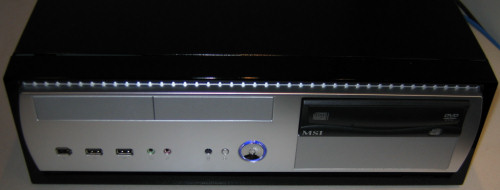
The first HTPC case that we’re going to look at is from a relatively obscure case manufacturer named 3R System. These first shots of the case already have a system installed in them.
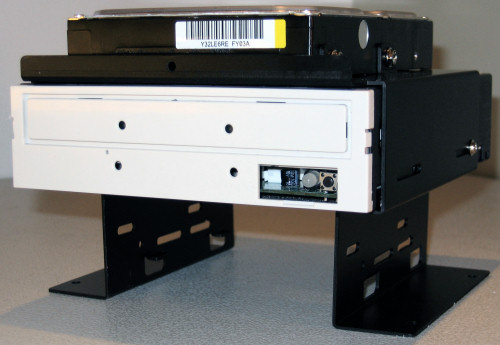
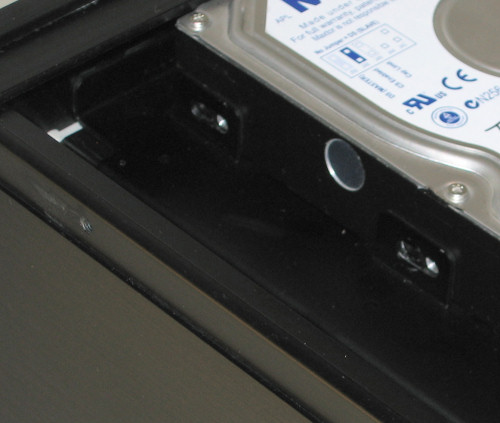
Right away, we have mixed feelings about the looks of the HT-1100. The display is a typical glossy glass black, which looks very nice, and along with the rest of the clean front bezel, this is for the most part the makings of a very attractive case. However, to stealthily concealing the optical drive, the system simply needs more work.
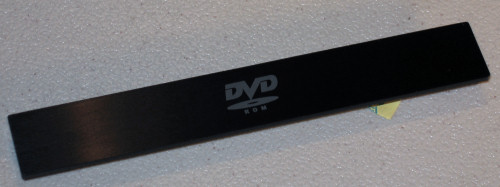
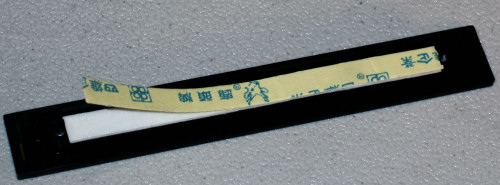
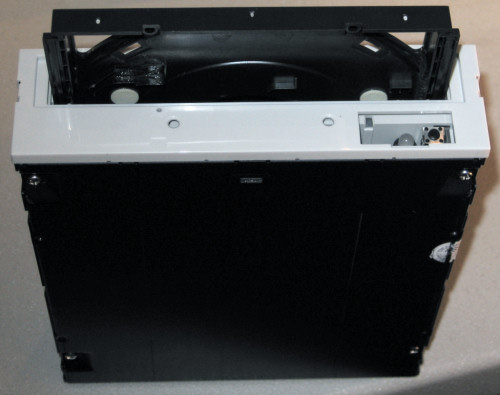
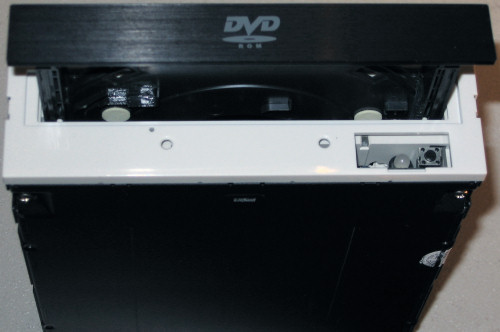
- The tray height does not exactly correspond with the tray opening in the front of the case.
- The tray cover of the CD/DVD drive is permanently attached to the tray.
- The eject button of the drive itself is permanently attached.
- The eject button doesn’t exactly correspond with the button opening in the front.
- The user decides to forego the use of an optical drive at all. (There’s no clean way to secure the tray cover without a drive installed.)
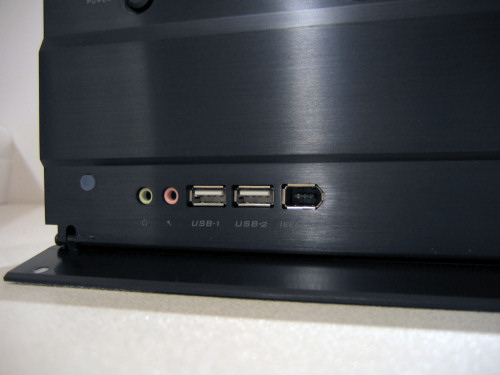
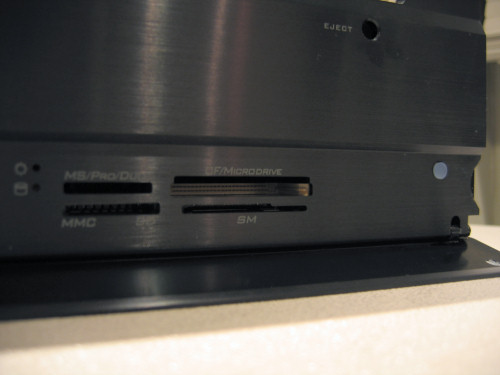
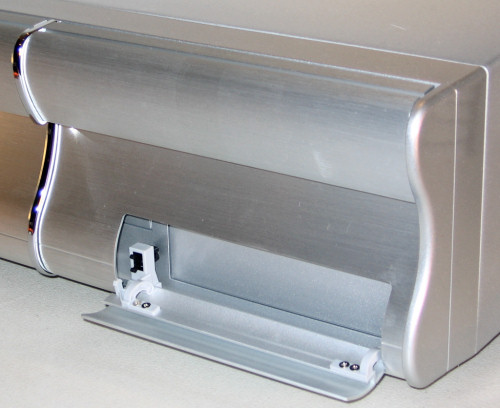
A magnetically latched flip-down front panel covers the port cluster on the left side, and flash memory card reader bays on the right. Labels for the ports and bays have been painted over the brushed finish and look particularly nice.
3R Mstation HT-1100 (cont’d)
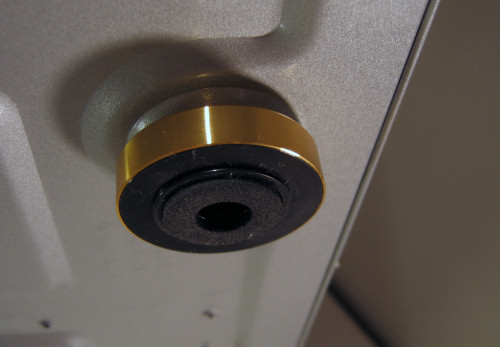
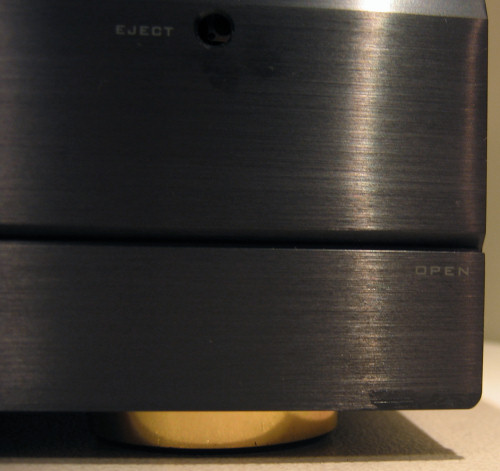
Examining the front closer, we notice the great job of the brushed aluminum finish even more so. With the flip-down face up, the minimal “OPEN” stencil is visible, in addition to the gold-colored feet.
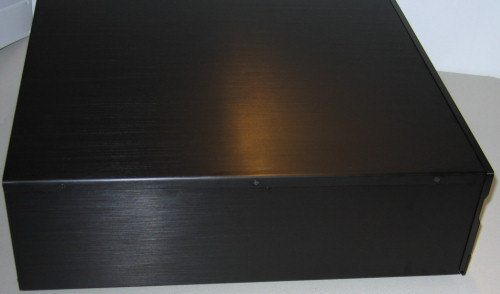
Moving on, here’s a shot of the Mstation from the side. Notice how the cover’s finish matches perfectly with the sides of the case and really helps keep the overall look immaculately clean.
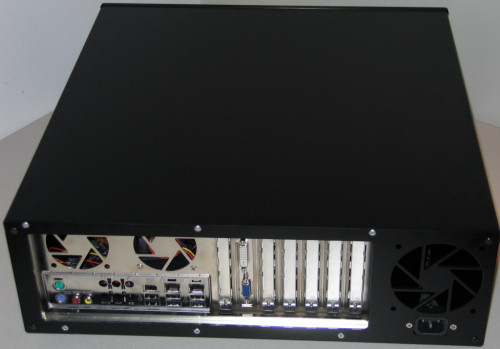
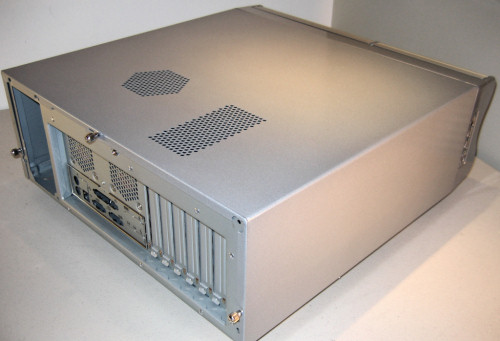
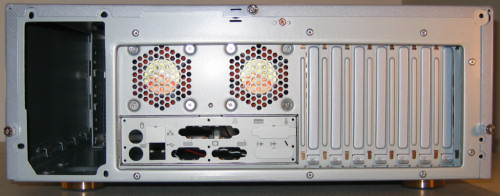
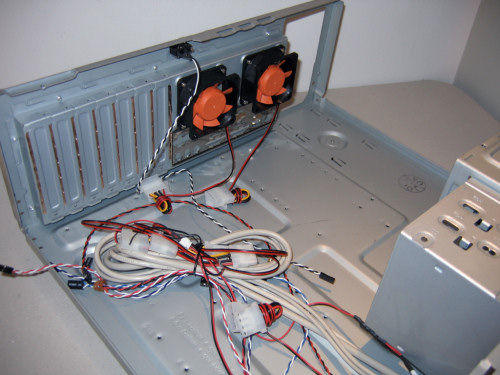
This theme is continued all the way around to the rear of the case, where a simple I/O plate with one installed 70mm fan (and space for a second), extra exhaust fan, and power connector can be found. Something that grew on us while working with this case was the unit’s dimensions. It doesn’t feel particularly long, deep, or tall, and would work perfectly with other electronic components right under or on top of it.
Getting inside the HT-1100 is as easy as unscrewing the three holes on each side of the top cover and sliding it back. The fit of the cover is perfect, and much to our liking, it doesn’t require any finicky latching mechanisms.
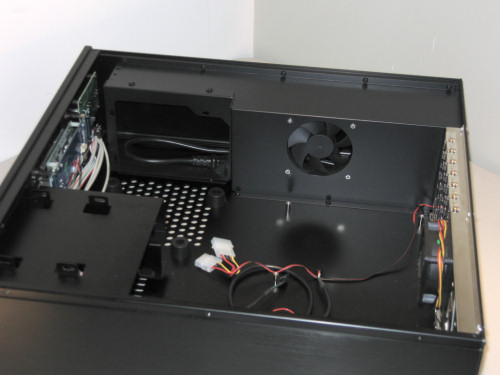
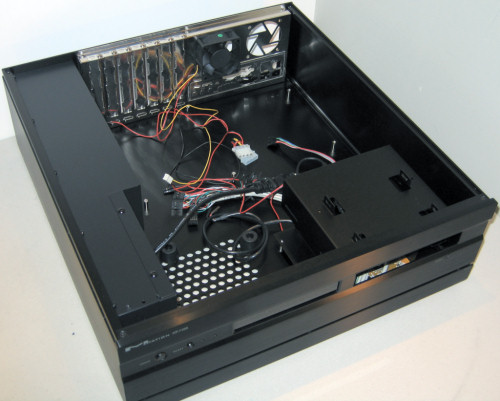
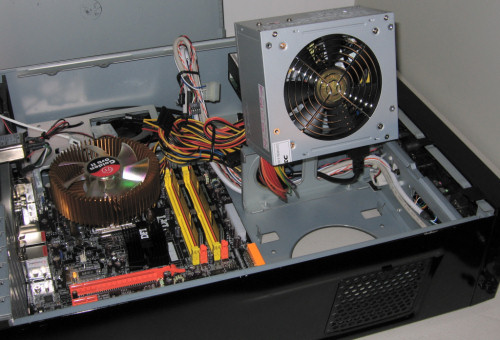
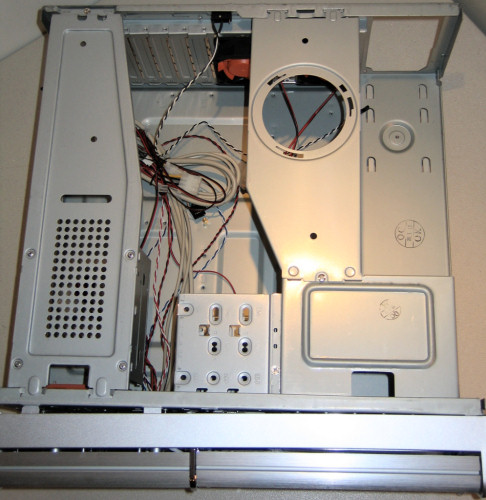
With the case opened, the most prominent feature of the Mstation comes into plain view; the warm air exhaust tunnel. With a power supply installed, the warm air from that (plus additional heat drawn in from the fan visible in the above picture) is all funneled out to the rear of the case. The idea sounds good, but we’ll only be able to tell for sure after we benchmark the case with our test bed installed.
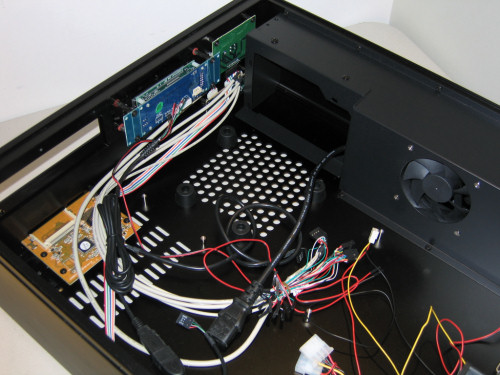
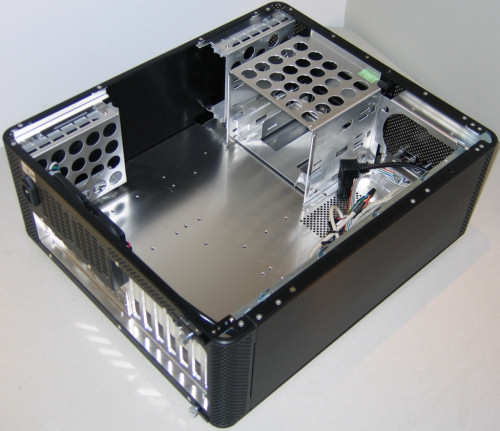
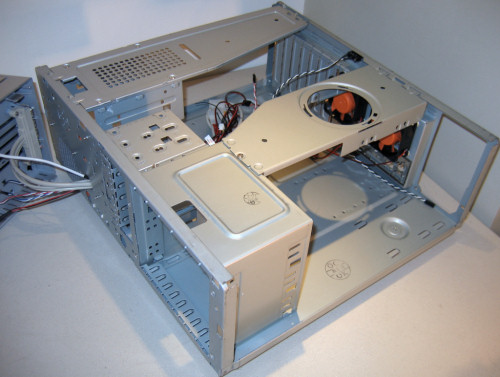
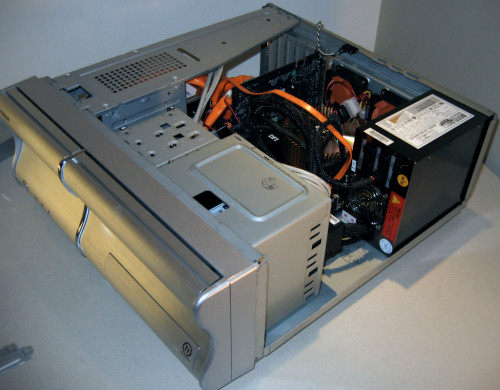
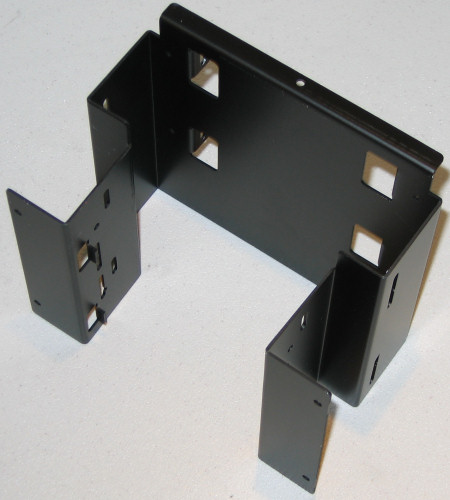
Turning the case slightly, we can see that, overall, the HT-1100 has a smart layout. Moving the power supply to the front should help keep motherboard clearance issues from arising, and the height of the system is kept in check, thanks to the omission of the external 3½” drive bay. While certainly this could be an issue for some people, for the majority of users, a floppy drive is not even really necessary anymore.
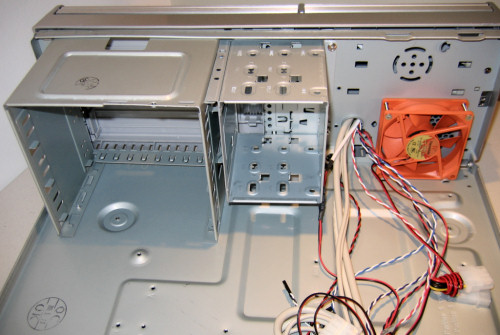
Like most HTPCs, the Mstation has plenty of cabling coming from the front of the case, but thankfully, there’s a space between the power supply and drive cage that makes cable routing a little easier.
Notice also the standoffs that will help support the power supply. While not exactly pliable rubber, they are still a soft plastic and will help absorb any additional vibrations from the power supply that would’ve otherwise added to the noise of a running system in this case.
3R Mstation HT-1100 (cont’d)
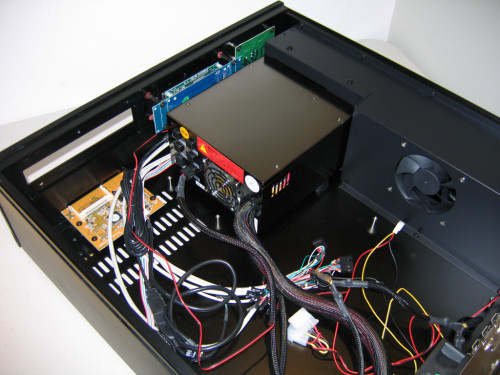
To begin the installation of our test bed, we first attached the mounting plate to our modular power supply, and then secured the plate with an attached PSU to the exhaust duct with two screws.
Compared to other cases in this roundup, this power supply install was just as easy, but unfortunately, if any switches are on the back your power supply, as is the case with ours, they will be virtually inaccessible once the unit is installed. We were able to put our MadDog unit in “quiet mode” by barely removing the supply (enough to push the switch with a thin screwdriver) while the unit was running, but it wasn’t a “user friendly” move by any means.
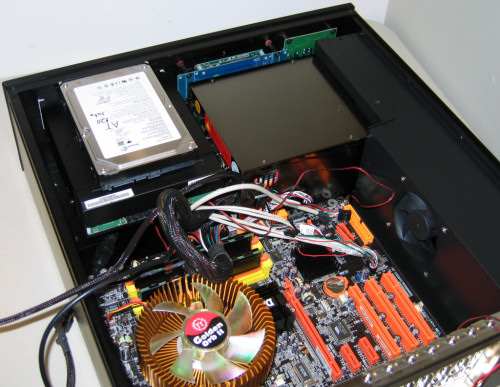
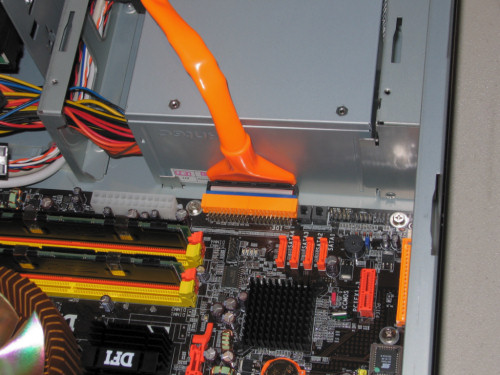
Other than our side-mounted IDE channel, the full-size ATX board fits without any problems. One snarl that we did run into, however, was that we had to remove the single 70mm exhaust fan before the motherboard could be laid down. This probably wouldn’t have been an issue had we installed the motherboard before the other components, but it wasn’t that big of a deal anyway.
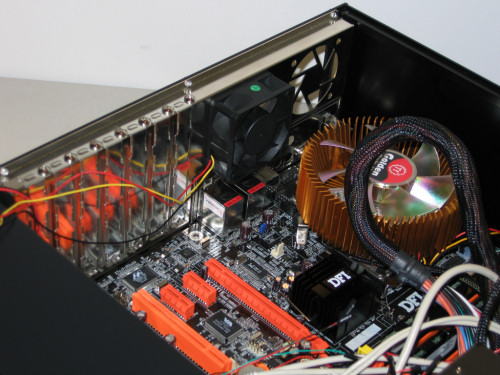
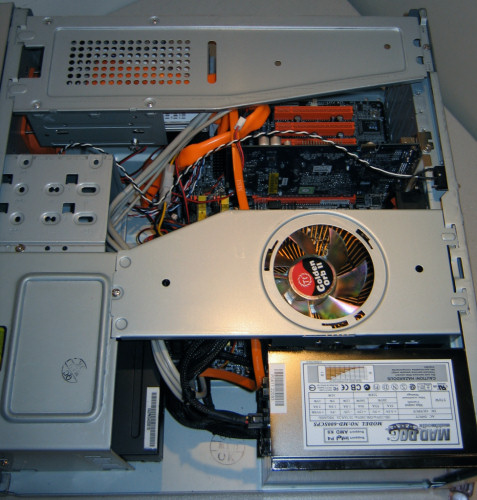
The final steps of installing our video card and connecting all the cables were easy enough, thanks to the familiar layout and abundant space inside the Mstation. Even our rather large Golden Orb II cooler fits without problems. All in all, the install process in the HT-1100 is smooth, straight-forward, and simple.
In addition to the chassis, this case comes with a remote to control common routines in Windows Media Center Edition.
The remote has more than enough features to get the most out of your HTPC, and the cursor controller pad in particular has a nice layout for the best ease-of-use.
Antec Overture II
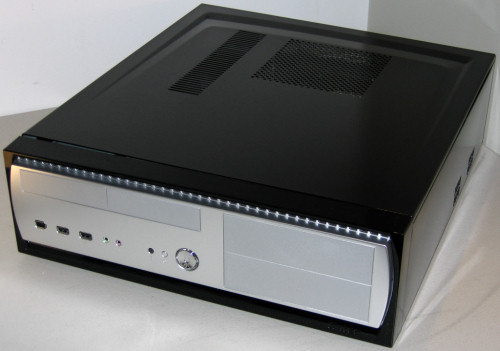
Antec is no stranger to case design, and with the Overture II, it shows. More reminiscent of an actual computer, this case also has a good feel to it in regards to its dimensions, but unlike the Mstation, it doesn’t look like it’d fit quite as well with other electronic equipment in one’s livingroom.
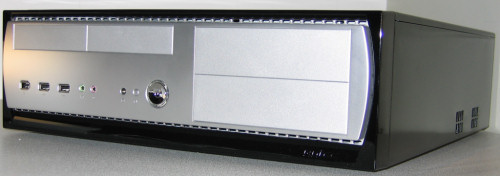
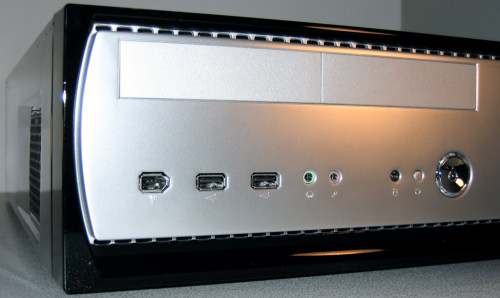
The majority of the case is finished in piano-black, glossy coated steel, but the front panel is primarily in shades of silver and chrome. Sporting two of each size of external drive, the Overture II has a lot more potential for a full-fledged system than the Mstation, but the 3R case did come with built-in flash memory card readers, while this case does not.
Something that we couldn’t be happier about though is the fact that Antec chose to space out the USB and Firewire ports enough for larger devices to be plugged in simultaneously. This is a common mistake in the case world, so it’s nice to see someone finally getting it right.
A large portion of the case’s intake air can come right in through the front panel, through the holes along the top and bottom edges of the front bezel. In this close-up shot here, we can see not only these holes in great detail, but also the embossed Antec logo.
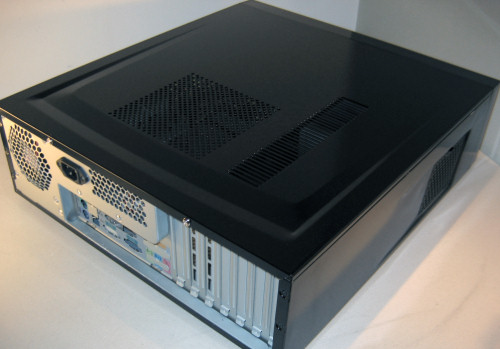
Extra venting holes in the top cover are visible in this angled shot of the back of the case, as well as vents for the main exhaust fans on the back and left sides of the case. Notice that, overall, the Overture is just a little slimmer than the Mstation.
Taking a look at the underside of the Antec case, we get an idea of why this case has its own custom power supply included. The large 120mm fan should definitely help the beefy 450 watt power supply stay nice and cool without making too much noise if running at lower speeds.
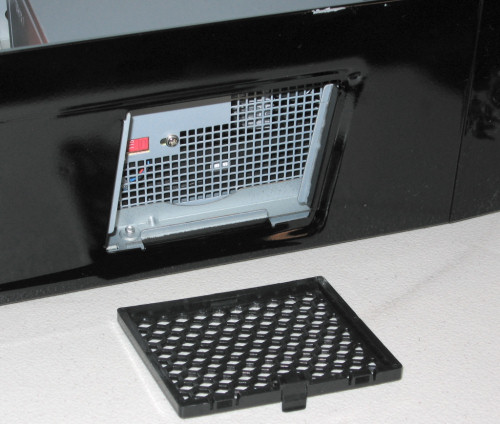
Our last look around the external of the Overture II takes us to the left side again where we see one more feature of some sort.
Antec Overture II (cont’d)
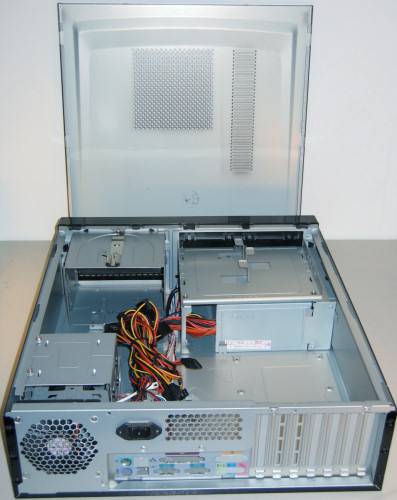
Taking a couple screws off the back of the top cover is all one needs to do to free the steel lid of the Overture II. Sliding it backwards and opening up the case reveals a more compartmentalized design than the Mstation, with much more capacity for additional drives.
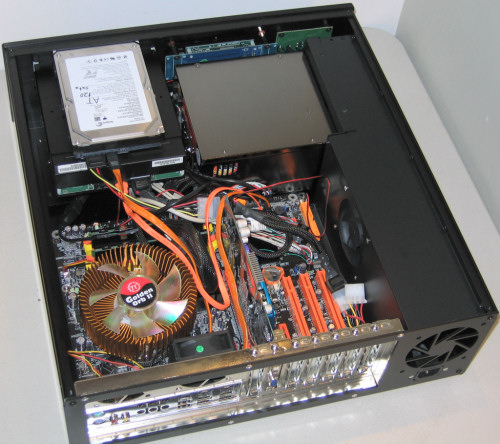
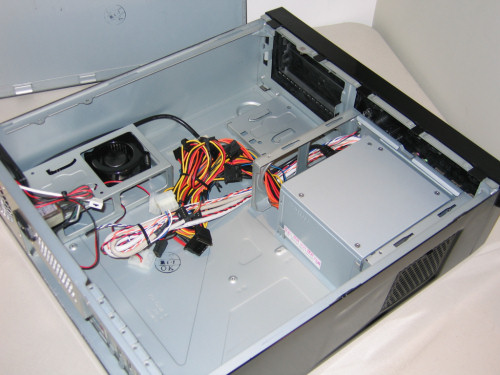
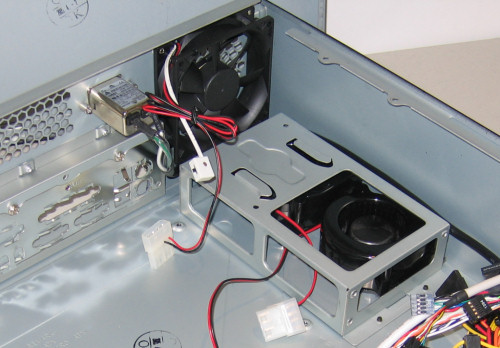
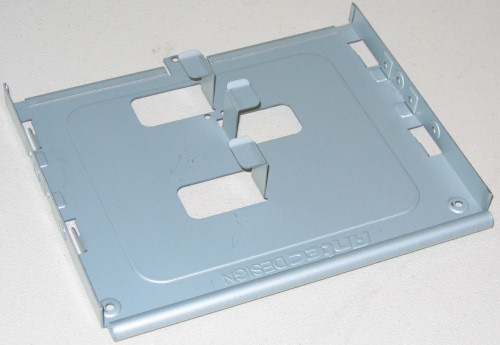
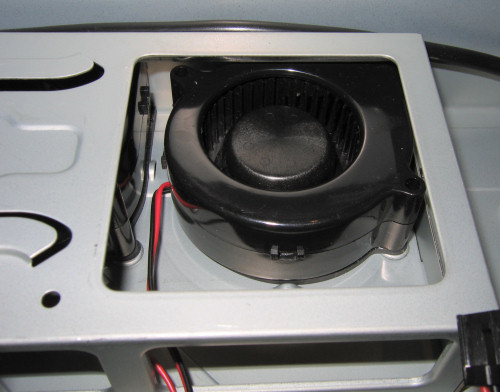
With the three removable drive cages taken out, the interior layout of the Overture II can be seen. The power supply is in pretty much the same place as it was in the HT-1100 case, but instead of extra space on the left for a specialized cooling duct, the Overture puts the extra space to use allowing for two additional hard drives and two exhaust blower fans - one of which remains hidden under the hard drive supports.
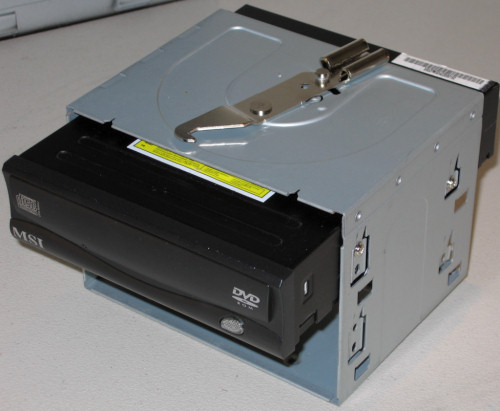
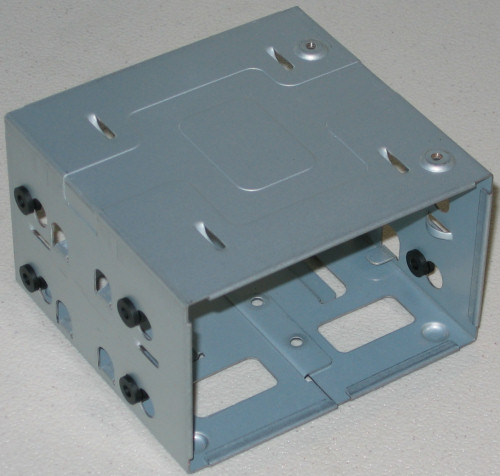
Here, we see the 5¼“ drive cage with our SATA DVD combo drive installed. The cage is well made, with strong, tool-less latches on the top and bottom, but doesn’t allow for any adjustments in terms of drive positioning.
The internal 3½” drive cage features rubber grommets for silent drive operation and is held in place by rails on the bottom and two case screws on top.
Antec Overture II (cont’d)
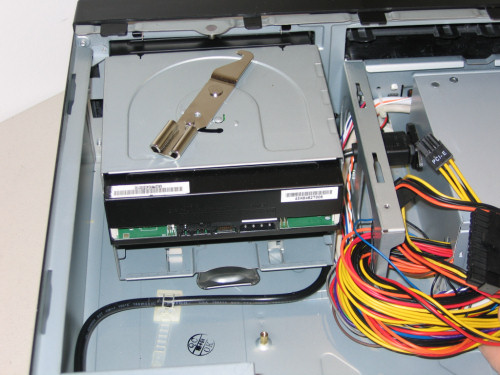
After putting the optical drive in its cage, we decided to put it in the case first. This cage, in particular, fits in very easily and latches in place quickly and solidly.
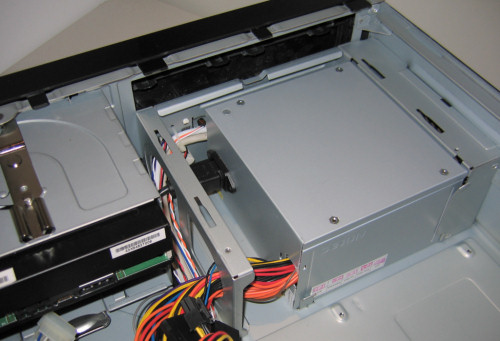
Here, we see another need for the specialized power supply, as the power cord needs to be routed out the same side of the unit from which the leads come out. What’s also noteworthy in this photo is the illustration of how easy it is to route the cables coming from the front panel of the case.
Next, we laid the motherboard in place, and simply to get a shot of the bottom of the included power supply, we lifted it in this picture from its normal position.
It fits! Even with our oddly-placed IDE connector, the Overture II allows barely enough space between the motherboard and power supply to accommodate those rare motherboards out there.
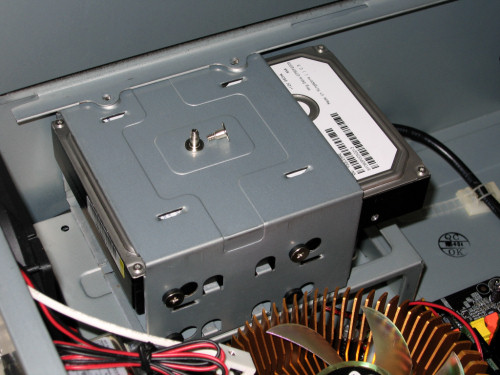
With the motherboard in place, we put the rear hard drive cage in next, and put two more of the included screws (designed to go through the rubber grommets) into the hard drive in the picture. The cage slides securely on rails into position and is held in place by the two mounting points visible towards the top of the picture.
Finally, after securing the rear hard drive cage and connecting all the cables, which was no easy task considering the massive amount of cables coming out of the included power supply, it was time to attach our video card. Unfortunately, this is where we ran into a relatively ugly problem with the Overture II. The PCI slot covers have an incredibly cheap feel to them, and short of prying them off with a pair of pliers, they are quite difficult to remove. If one wasn’t very careful, he could get cut wrestling with one of these.
The card did plug in though without problems, and we then put the front 3½” cage in place over the power supply and the install was completed. Like the Mstation, the install was straight-forward, but for the most part, the components didn’t fit quite as well.
When turned on, a plastic ring surrounding the power button glows blue for a subtle effect on the front of the case.
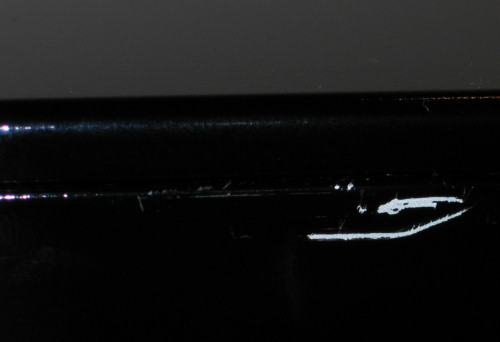
After finishing up with the Antec case, we noticed one other problem. When installing the lid, it must have been a little bit off a couple of times, and even with the brand new coat, a sharp enough edge scraped the paint off the top edge of the side.
This is simply something that happens when ideas like a glossy paint job and a removable top cover (as opposed to a three-side cover) come together. Regardless, a careful user really has no reason to let this affect their opinion of the case.
Lian Li PC-800B
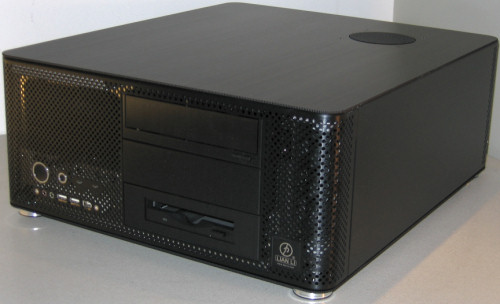
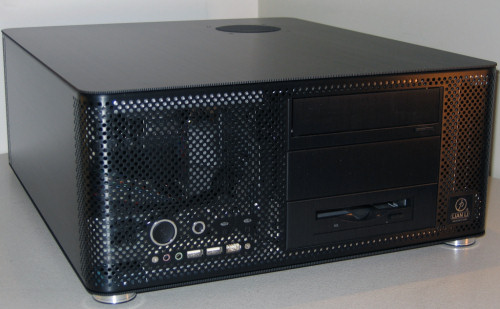
Next up, we have the PC-800 in black (thus the “B” at the end of the model name) from the well-known manufacturer, Lian Li. This HTPC has a rather different feel to it, as it’s much taller, but also quite a bit skinnier than the other cases in this roundup.
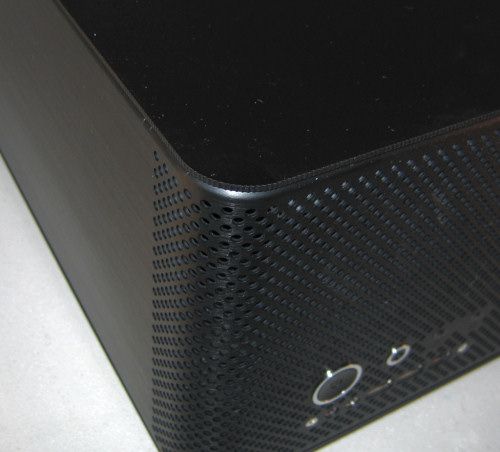
The case’s perforated front also contributes to its unique look, and should do a lot to help keep the components cool without creating excess noise.
Like other Lian Li cases, the PC-800B shows many signs of an attention to detail; in this close-up here, notice the scalloped edge of the lid. Besides simply looking nice, it also helps to make removing the lid and handling the case in general much easier.
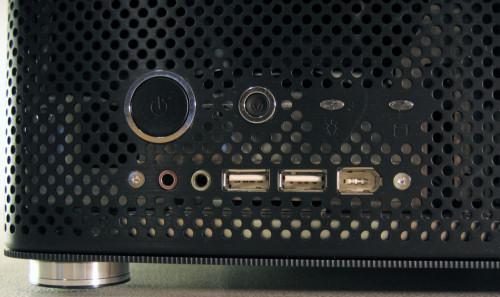
The bottom left of the front of the HTPC case is adorned with the port cluster, power and reset buttons, and HDD activity and power LEDs. Once again, the standard complaint of the ports being too close applies here, unfortunately. In this picture, the chrome finish of the feet can also be appreciated.
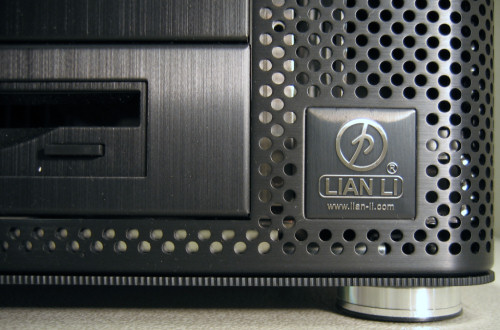
At the bottom right is a company symbol made with great detail, just like the entire front perforated surface. Even the drive bay covers share the same carefully applied brushed finish.
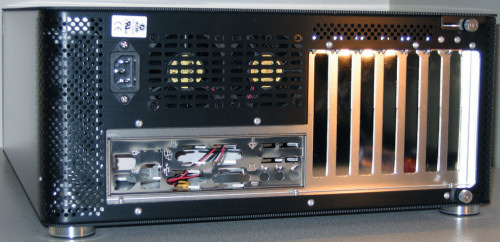
Finishing up our look at the PC-800B, we didn’t even bother showing more detailed pictures of the sides as they’re starkly void of anything characteristic, quite opposite to the the back. In examining it, we can begin to get an idea of how this case is arranged.
The total width of the unit is pretty much only the height of a standard ATX motherboard, which is definitely a different approach to the dimensions of an HTPC. To bore this idea out, let’s go ahead and pop the hood. In typical Lian Li fashion, the cover removes exceptionally smoothly, after loosening a single thumbscrew that holds the latch along the left edge in place.
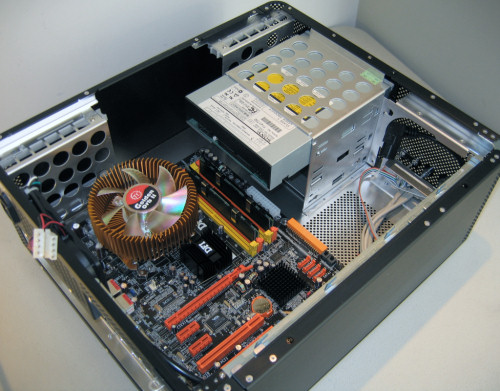
Right away, the main difference becomes obvious: the vertically-mounted hard drives. The other substantial difference is the orientation of the power supply. Instead of the power cord coming out the side as in the Overture and Mstation, it comes out of the PSU facing the front, with the leads coming out of the back. This should make installation particularly simple.
Lian Li PC-800B (cont’d)
Turning the opened case to get a better idea of what the back looks like, we can see the main cooling components of the PC-800. Dual 60mm fans exhaust warm air from the CPU area, and all the intake air should come easily from the perforations on the front and top mounted 80mm fan.
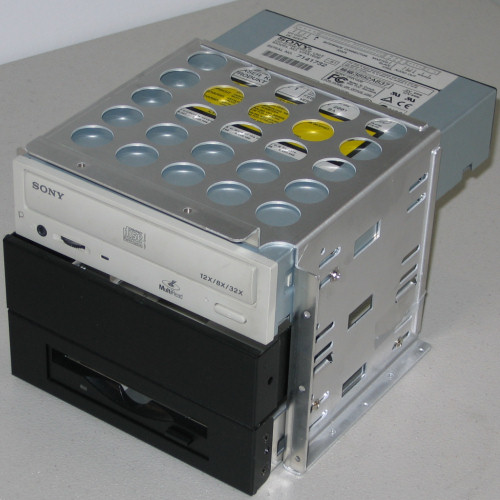
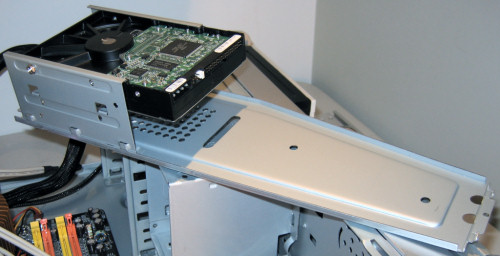
Turning it back around and examining the front closer, we find that the main removable components of the PC-800B are the combined 5¼” and 3½” drive cage and PSU mounting plate.
Getting right on with examining this case would be easiest by simply starting the installation process anyway, so here we have a couple pictures of the process of setting up the drive cage.
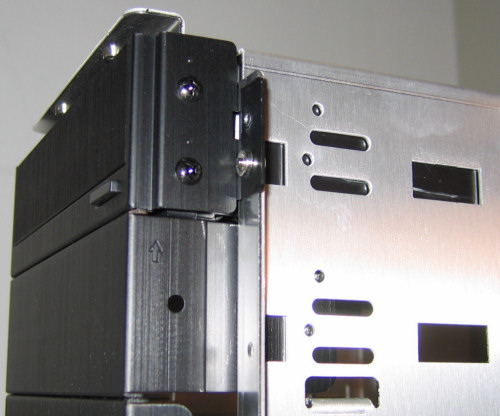
The stealthy optical drive cover is designed to work with more types of drives than 3R’s solution, but it still ends up failing to work with our MSI DVD combo drive. After removing the stealthy bezel, the drive is slid into position, but won’t go far enough after the bezel has been re-attached to line up with the screw mounts.
Switching to a different optical drive fixes the problem fine this time. The Sony burner fits behind the stealthy cover without incident.
After placing the drive cage into place, the assembled motherboard can be put into place. Choosing to put the power supply first might have worked too, but with longer units, it’s definitely easier with the PC-800 to put the motherboard in first.
Lian Li PC-800B (cont’d)
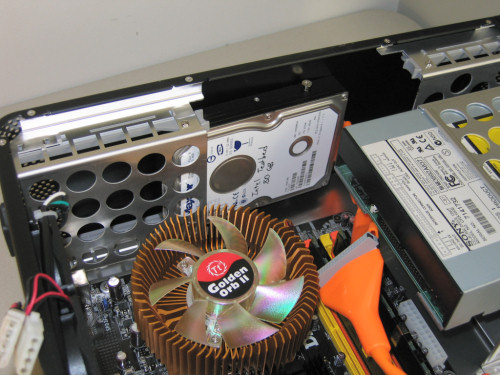
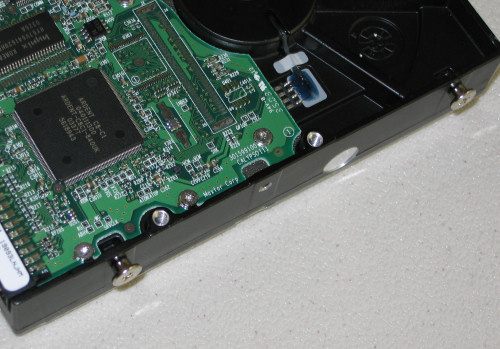
To secure the hard drives, special screws are screwed into the drive so that it can be simply slide into position along the rails on the right side.
Since the power supply will cover up the connection point for our IDE cable, we decide to route that first.
The next step is to secure the power supply mounting plate to our MadDog PSU, which is of course completely painless.
Now, with everything else under the PSU in place, the power supply can be set in place. This is the only slightly tricky step in the setup of the PC-800, and even that isn’t really too bad, but some power supplies or motherboard configurations could make it more difficult than others. For instance, our modular unit makes the power cable routing after the PSU has been set in place much easier.
Rather than having to punch out PCI slot covers, the PC-800’s are simply held in place by the same nice thumbscrews that one can use to hold down expansion cards. Installing our 6600GT video card was problem-free.
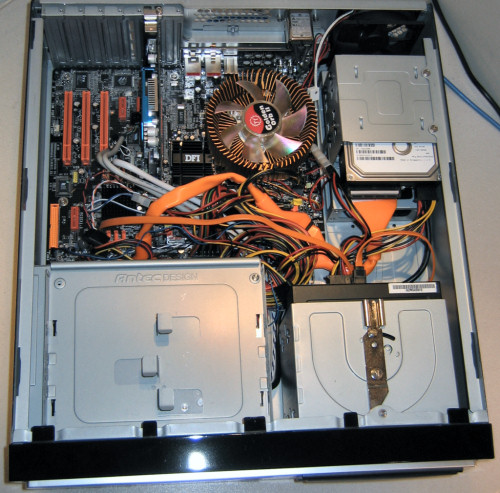
After finishing the final connections to the two rear exhaust fans and front panel connectors, the build was complete and looked something like this:
Thermaltake Tenor
And finally, the Tenor from Thermaltake. With a slightly different approach to the layout of components, which we’ll get to later, the Tenor manages to hold more externally available drives than any other HTPC in this roundup without being substantially taller.
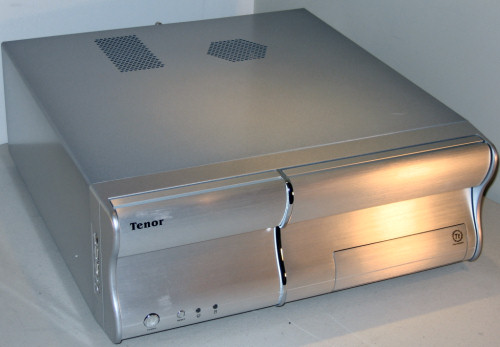
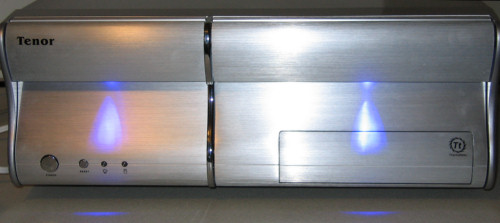
Taking a different spin on aesthetics, the Tenor has a very curvaceous front and a two-tone paint job. The top is finished in a glossy metallic silver while the front is brushed, anodized aluminum.
Our model came in silver, but a black version is available also.
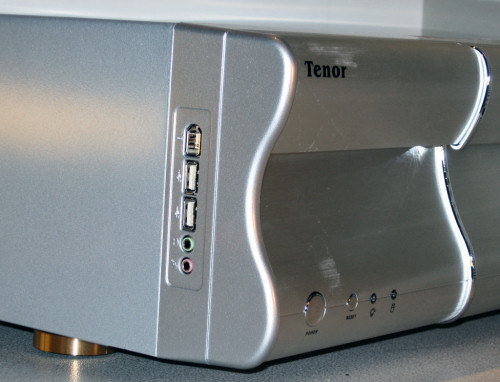
To keep the front as simple as possible, the port cluster has been moved to the side and features the usual combination in the cramped configuration that will frustrate users with larger USB devices or audio cables.
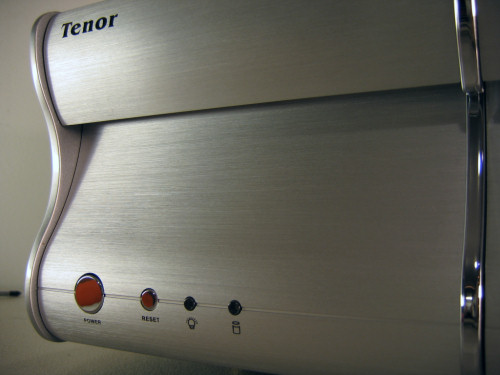
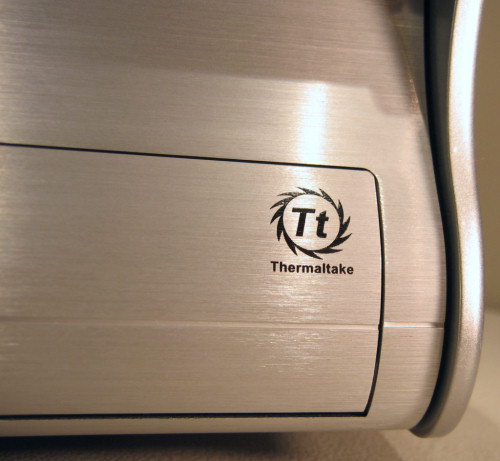
Also on the left side, but along the front edge, is the power and reset buttons, along with the HDD and power LEDs. We particularly like how Thermaltake has done the indented line through the buttons and embossed logo in the upper left-hand corner. The finish of the Tenor is definitely as good as or better than all the other case’s in the roundup, as is also evident in this shot of the Thermaltake logo on the lower right side.
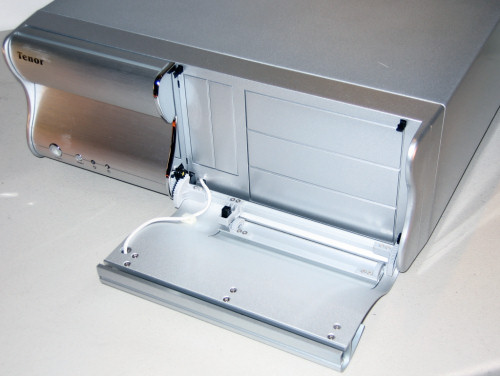
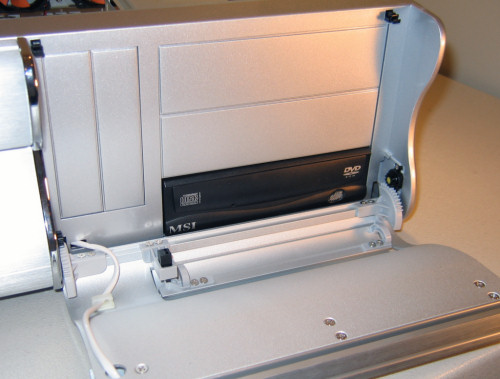
Another different idea implemented in the Tenor is a method for stealthily concealing all the drives, which has been pulled off rather effectively via a simple push-latch hinge, and resistance gearing to slow the fall of the cover.
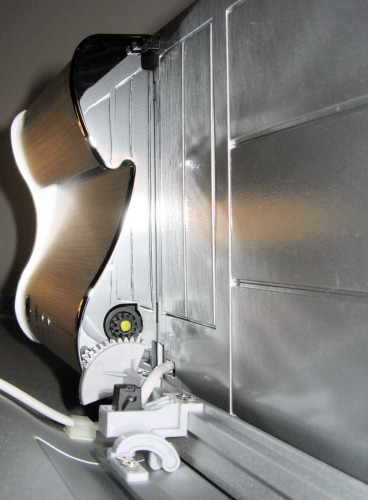
Separating the case into segments are three mirror-finished pieces, which really add to the elegance of the design in our opinion. In this close-up, you can also see the gears that slow the fall of the main door, along with the push-latch that makes the next feature (that we’ll be looking at) work.
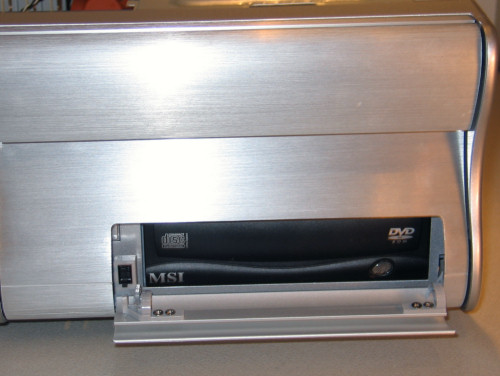
Instead of always having to open the entire door to simply get at an optical drive, the Tenor also gives one the option to get at just the bottom 5¼” drive via a second push-button door.
ThermalTake Tenor (cont’d)
Getting away from the front, we find that the Tenor keeps a relatively simple look for the rest of the case. Extra ventilation is situated over the CPU and video card, which certainly seems to make sense.
A head-on shot of the back reveals the major difference of the Tenor in plain view; the power supply is not in the front of the case at all as it was in the other HTPC cases that we’ve looked at so far.
Before diving inside the Tenor, here is one of the feet of the case. Just like most HTPCs, with nice looking feet, the case should fit much better when placed with other pieces of equipment.
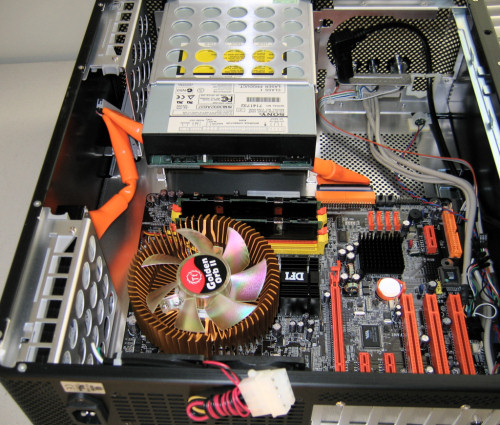
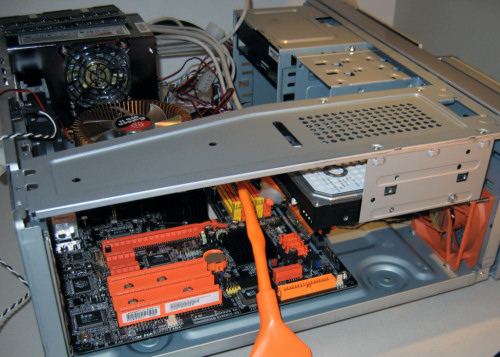
Taking off the three-side cover reveals a complicated bracing and drive cage layout, but without the side panels and after the removal of the braces, this actually becomes a very easy case in which to work.
The entire front of the case comes away as well, and in this angle shot here, we can get a better idea of how this case is constructed. One nice aspect that we noticed at this step is that all the cables from the front go through one hole, which has been rounded out carefully.
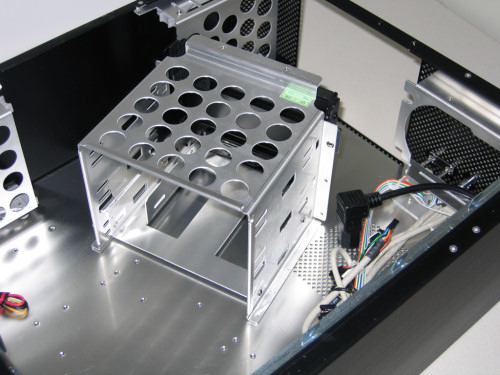
Taking the two braces away and focusing on the front, we find the three 5¼” drive bays and triple 3½” bay (two of which are externally accessible). To actively bring in cooler air, one 80mm fan is located here as well, but we couldn’t help but notice that there aren’t enough ventilation holes to cover the area of the fan’s blades.
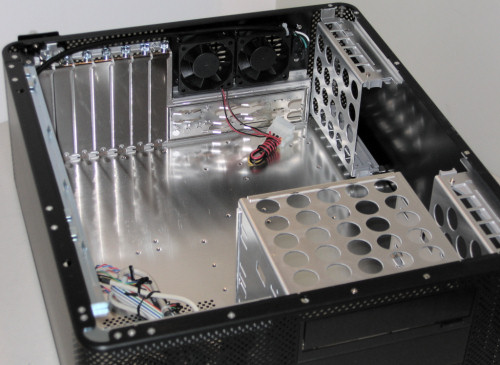
And here, we can finally see just how open the Tenor can get. Looking at the back, it actually looks much more like a typical ATX case, just turned on its side, with two 70mm Thermaltake fans taking care of exhausting the majority of the warm air from the case.
ThermalTake Tenor (cont'd)
Despite the openness of the case, the installation of our test bed into the Tenor was rather frustrating, mainly because we kept making assumptions about what would fit and we were wrong. The first snarl involved our 5¼" optical drive.
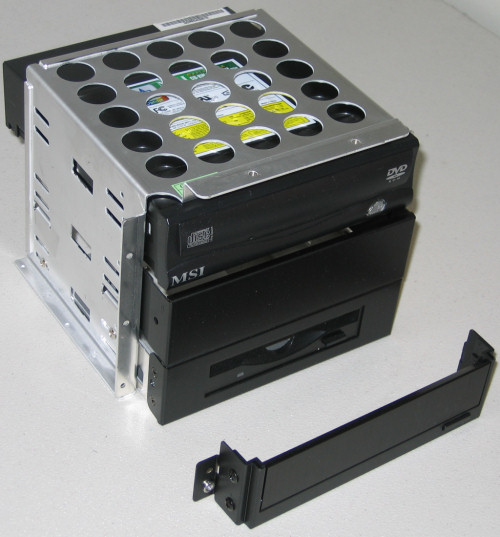
It's much easier to install the 5¼" from the front of the case, and in these two shots, you can see how well an optical drive in the bottom position works.
This concept is by far the most universally acceptable stealthy solution, as it doesn't matter what the optical drive's configuration looks like at all. So far, so good...
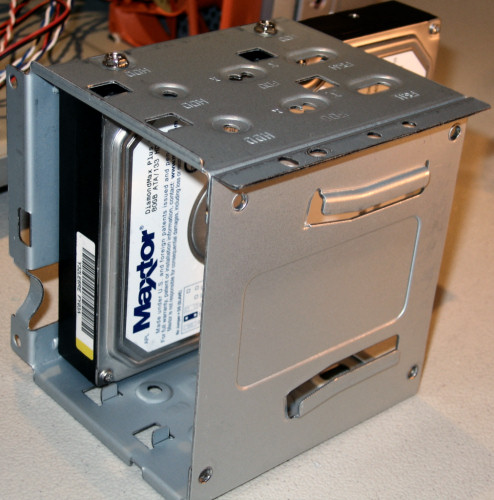
First, we decided to try installing the hard drive in the third (internal only) position of the 3½" bay. The cage itself is very easy to remove and install components.
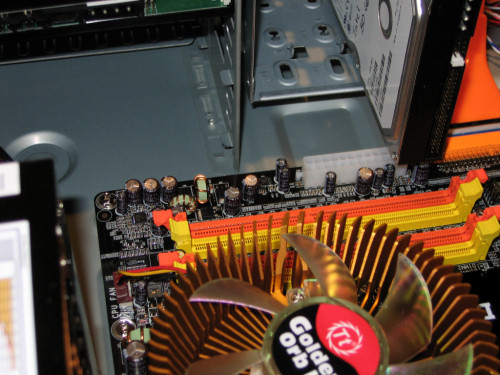
However, after placing the cage back in place and testing to see if the motherboard would fit, we realized that putting the CD drive into the bottom position rendered it impossible to put the motherboard in at all! The visible standoff isn't actually in the proper place to fit our motherboard in this picture, but it does help to get an idea of how much further the motherboard needs to move to get into position.
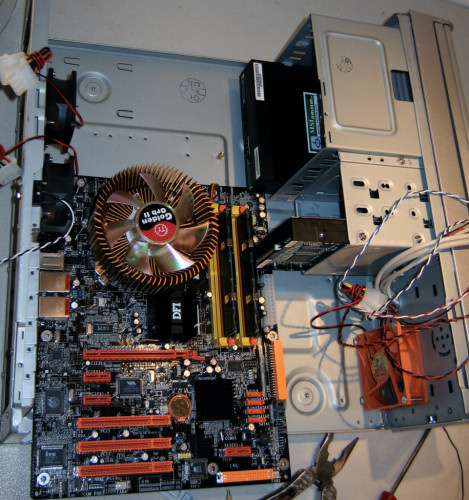
The hard drive in any position in the triple 3½" cage would make it impossible to plug in our motherboard's ATX power connector. Again, this is a problem that only applies to particular components, but this is a relatively popular location for the motherboard power, so it's still a bit of a problem.
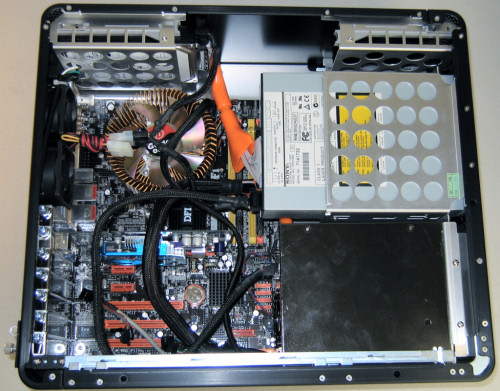
Again though, the Tenor comes through with its wealth of options and gives us another choice. We moved the hard drive to the left brace (which includes two slots for hard drives), visible upside-down in the picture here.
Sliding the power supply into place couldn't be easier. This is one aspect of the Tenor that easily trumps the other cases looked at in this review, especially since size isn't an issue really at all in this configuration.
With motherboard, power supply, and the left-side brace in place, this is what the case now looks like.
ThermalTake Tenor (cont’d)
The next step is to place the video card, which wasn’t a problem at all, and then we proceeded to connect all the cables.
With the rear fans connected along with everything else cable-wise, we can put the last brace back in place, which is simply for support and an additional optional intake fan for the CPU. Unfortunately, no shroud is included with the case, but even without a shroud, the CPU fan does a fine job of drawing air in through the matching ventilation holes in the top cover at this position.
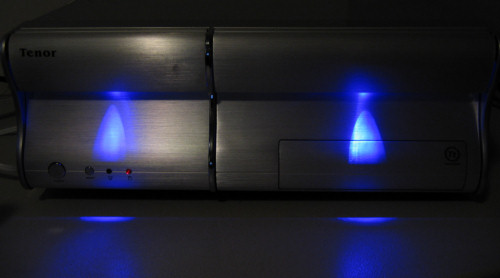
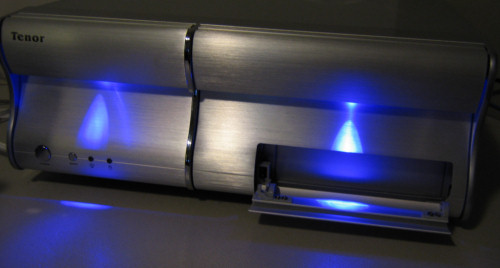
Putting the cover back on and turning everything on, we find another aesthetically pleasing aspect of the Tenor. Twin blue LEDs shine downwards from behind the top overhang to create a rather unique effect on the case and ground in front of the unit.
The effect is amplified when the optical tray opening is lowered.
Even in full room brightness, the lights cast a special look onto the front of the case. While certainly cool, one might have to take the effect into consideration if planning it for a particular room, but of course, the power can always be disconnected from the LEDs if a user would so desire.
Benchmark Comparisons
To get as meaningful a comparison as possible between the different cases, we installed the same set of hardware into each one. Our new standard ATX test bed is as follows.
| ATX Test Bed | |
| DFI LanParty UT 915P-T12 Pentium 4 530 Prescott 3.0ghz OCZ 512MB DDR2 x 2 Thermaltake Golden Orb II Seagate 120gb SATA - or - Maxtor 80gb IDE Hard Drive Chaintech Geforce 6600GT MSI DVD-CD/R/RW Combo drive - or - Other 5¼" Optical Drive |
 |
With the new test bed comes some new measurements, so we have compiled the results of all the heat and noise testing into two charts now. The only case in this particular roundup that came with an adjustable-speed fan was the Antec Overture II, and that was tested with the fan set to medium. The GPU Amb. column refers to a sensor located on our 6600GT video card that's not directly on the GPU core; the MOSFETs column refers to the motherboard sensor located near the voltage regulators, and the System column refers to the temperature of the air coming out of the unit's main rear exhaust vents. If there were more than one fan, the highest temperature was used.
| Heat Comparison Chart | ||||||||
| Case | Component Temperatures (in degrees Celsius) |
Exhaust Air Temperature (in degrees Celsius) |
||||||
| ( Idle / Full Load ) | ||||||||
| CPU | GPU | GPU Amb. | Chipset | MOSFETs | HDD | System | PSU | |
| Mstation | 34 / 60 | 53 / 93 | 48 / 69 | 38 / 44 | 42 / 58 | 28 / 32 | 27.8 / 29.6 | 24.7 / 36.5 |
| Overture II | 30 / 49 | 45 / 82 | 41 / 59 | 34 / 39 | 32 / 46 | 26 / 31 | 27.8 / 31.7 | 27.1 / 27.5 |
| PC-800B | 29 / 50 | 45 / 83 | 40 / 60 | 33 / 40 | 32 / 45 | 29 / 50 | 25.3 / 29.4 | 31.2 / 37.1 |
| Tenor | 35 / 56 | 47 / 83 | 42 / 60 | 37 / 44 | 36 / 52 | 26 / 30 | 29.5 / 34.7 | 30.5 / 40.9 |
| Noise Measurements | |
| Case | 6" from Front, Subjective rating, 12" from above |
| Mstation | 41db , 2/10, 44db |
| Overture II | 42db , 3/10, 47db |
| PC-800B | 46db, 4/10, 55db |
| Tenor | 46db, 4/10, 53db |
So, what's exactly the best way to interpret these results? First off, we just want to state that all of these cases are remarkably quiet. But even so, one case stands out: the Mstation not only delivers some of the lowest noise levels, but consequently also the highest temperatures. Subjectively speaking, the HT-1100 was even quieter from the front side than even what these numbers can illustrate, as the meter only went up half a decibel from our ambient noise floor when we turned the PSU to "quiet mode". The case was simply barely audible, and a perfect reminder of what all case manufacturers should strive for, especially in an environment like the HTPC application.
Unfortunately, while quietness is certainly wonderful, we simply can't recommend running components at temperatures this high, day in and day out. A GPU getting to 93 degrees centigrade is approaching water's boiling point, and while our rthdribl demo continued to run without artifacts at this temperature, the GPU's life could be substantially reduced if running in this warm of an environment for too long.
The next quietest case was the Overture, thanks for the most part to the huge 120mm fan keeping the PSU extra cool. The great news is that the components were still very cool in this case as well - it tied with the PC-800 for the coolest CPU under load; the PC-800 has a fan situated directly above the CPU heatsink.
Subjectively, the Lian-Li was just barely louder than the Tenor, which itself was just barely louder than the Overture. Unfortunately, the PC-800's noise was due to the higher pitch of its two main exhaust fans. However, with the dedicated top-mounted fan, it did pull off very nice CPU temperatures that were quite a bit lower than the Tenor's. The temperatures were, overall, very cool in the Lian Li, but not on the hard drive, which was up against the edge and received little to no air flow. If hard drive life is exceptionally important, the Tenor and Overture deserve recognition as they kept the drive's temperature particularly low.
Final Words
We at AnandTech want to stress that we believe certain issues are much more important when deciding on an HTPC, and other issues which normally matter a lot in the desktop environment simply don’t anymore.
Namely, an HTPC really doesn’t need all the tool-less features of a nice desktop case. They’re certainly appreciated, but a home theater computer most likely shouldn’t need to be upgraded that often, if at all.
So, what then are the more important aspects? Certainly, styling is up there, as no one wants components to dress down their living space. In this realm, we really feel that all four cases really have to be considered equal, since users have such different perspectives on what "good looking" means. The possible exception is the Overture, simply because it doesn't attempt to stealthily cover any of the external drives, but even then, it's still just a matter of preference to what one considers attractive. Also, glossy black metallic paint jobs aren't really all that common, and fingerprints can be a bit of a pain (at least Antec does include a cleaning cloth with the Overture II).
In our own opinion, the Tenor makes the boldest statement aesthetically and would probably fit in nicely with a more modern décor. At the other end of the spectrum is the more discrete Mstation, but with the problems with both of these case's optical drive systems, it's a bit of a gamble if they're the right case for you. Looking at the heat and noise charts alone, the Overture II appears to be a solid winner, and it's true that if noise and temperatures are the most important aspects, that would be a smart choice.
Does this mean that we think the Overture II is the best case in this roundup? No, each case in this roundup has something unique to offer and ultimately, it just comes down to what the prospective buyer is looking for. Basically, we feel that the ~$90 Tenor is a great value, which offers the most options and expandability and would be the best for the power-user who expects to build a very extensive media PC. The ~$130 Lian Li only gets our nod to users who love the perforated look (and slightly odd dimensions), and want as trouble-free of an installation as possible. If hot components aren't a problem, the Mstation definitely takes the cake as the quietest, sleekest performer - but beware the picky optical drive tray cover. Sadly, it doesn't appear very easy to get a case from 3R System in the U.S., so we really don't know what one could get the case for here. 3R is a Korean based company, and if the case really appeals to someone, we'd recommend checking them out in more detail at http://www.3rsys.com/english/main.asp. Lastly, the ~$100 Overture II is a cooling-performance-per-decibel marvel that is the perfect choice for users who don't want to have to get a separate power supply and then plan on getting a nice looking optical drive and perhaps floppy/card reader drive.
With quite a few little strikes against each case, we simply cannot justify giving any an editor's choice award. However, all four of these cases are still excellent, and combined with the proper components, they won't give users any problems. These types of cases have already improved ten-fold, so we can only imagine what the next generation of HTPC enclosures will offer. Hopefully, they'll be just as quiet and simply get the little things like stealthy drive covers and power supply and motherboard clearance issues straightened out.

