Original Link: https://www.anandtech.com/show/1714
Sony DSC-M1: Good Video, Disappointing Pictures
by Stephen Caston on June 20, 2005 12:05 AM EST- Posted in
- Digital Camera
Index
The DSC-M1 is a dual-function digicam from Sony that promises extended video functionality through the use of MPEG-4 compression in addition to a 5-megapixel still image mode. The camera has a unique vertical design with a flip-out LCD that can be rotated 270º. The M1 features several still recording modes ranging from Auto, Program, and 9 different preset modes. The camera offers some advanced exposure controls such as exposure compensation, white balance adjustment, and ISO control. The video mode uses MPEG-4 compression to record stereo audio and video with a resolution of 640x480 at 30 fps.In our review of the Sony DSC-M1, we discovered that although the camera has quite a bit going for it, the camera falls short in the end because of the quality of its still images. For example, the camera does very well in terms of startup time, cycle times without the flash, and auto-focus/shutter lag times. The video mode is exceptional, offering the use of the optical zoom during recording as well as a few image adjustment options. The true downfall of the M1 is in its mediocre still image quality. In our sample images, virtually every image suffers from soft/fuzzy details. We were also surprised to find JPEG artifacts in a number of images from the M1. In general, the images were also much noisier than they should have been (even at ISO 100). For all the details, read on for our full review of the Sony DSC-M1.
Product Sample provided by Newegg.com.
Sony DSC-M1 Specifications
| Sony DSC-M1 | |
| Release Date | September 2004 |
| Price | ~$455 |
| Pixel Count | 5.0 Million |
| Camera Type | Compact zoom |
| Highest Resolution | 2592x1944 |
| Lower Resolutions | 2592x1728, 2048x1536, 1280x960, 640x480 |
| Sensor Type | CCD |
| Sensor Size | 1/2.4" |
| LCD Screen Size | 2.5" |
| Optical Zoom | 3x; 38 - 114mm equivalent |
| Digital Zoom | 2x |
| Focus Range | 19.7" - Infinity |
| Macro | W: 3.1 |
| Aperture Range | f/3.5 - 4.4 |
| Shutter Speeds | 2 - 1/1000th sec. |
| Auto Focus | Yes |
| Auto Focus Type | TTL |
| Manual Focus | No |
| Lens Thread | No |
| AF-assist Lamp | Yes |
| ISO | Auto, 100, 200, 400 |
| Flash | Built-in |
| Flash Range | W: 1.0 - 5.9'; T: 1.6 - 5.6' |
| Flash Compensation | +, Normal, - |
| Exposure Compensation | ± 2 stops in 1/3 increments |
| White Balance | Auto, Daylight, Cloudy, Fluorescent, Incandescent, Flash |
| Bracketing | Yes, 0.3, 0.7, 1.0 EV |
| Metering | Multi-pattern, Spot |
| Color Space | sRGB |
| Aperture Priority | No |
| Shutter Speed Priority | No |
| Manual Exposure | No |
| Continuous Drive | Yes, ~4 fps for 4 frames (2592x1944) |
| Self-Timer | Yes, 10 sec. |
| Storage Method | Memory Stick Duo |
| Storage Included | 32MB Memory Stick Duo |
| Compressed Format | JPG |
| Uncompressed Format | None |
| Quality Settings | Fine, Standard |
| Video clips | 640x480 (30 fps), 320x240 (30 fps), 320x240 (15 fps), w/stereo sound, MPEG-4 (MP4), unlimited duration |
| Battery Type | NP-FT1 Rechargeable Lithium-Ion |
| Charger Included | Yes, 2.5 hours |
| PC Interface | USB 2.0 Hi-speed |
| TV-out | Yes |
| Tripod Mount | Yes, metal |
| Weight (w/ battery or card) | 8 oz. |
| Dimensions | 51 mm x 114 mm x 27.8mm |
| Included in the Box |
|
The Design: Sony DSC-M1
 |
 |
| Click images to enlarge. | |
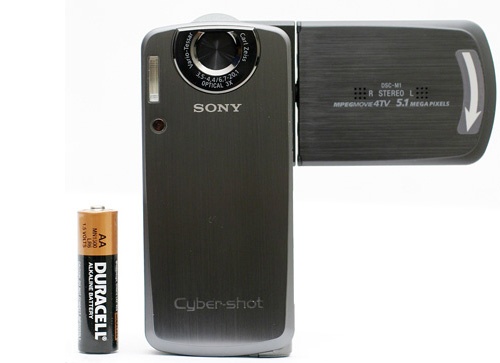
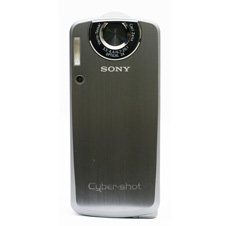
The front of the M1 features a 3x Carl Zeiss lens capable of a 38-114mm optical zoom (35mm equivalent). The built-in flash can be found just to the left of the lens. Because of its small size, the output is significantly less than average (1.0 - 5.9' at wide angle). The AF-assist/self-timer lamp is located just below the built-in flash. From this angle, we can also see two microphones on the back of the LCD panel, which give the M1 the ability to record stereo audio.
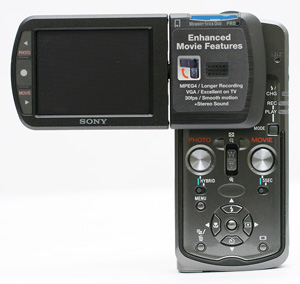
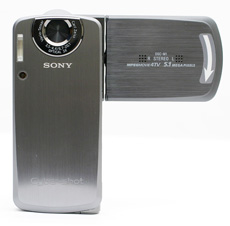
On the back of the M1 is the 2.5" LCD monitor, which contains 123K pixels and can rotate a full 270º. On the left side of the LCD are three buttons. The Photo and Movie buttons can be used as an alternative to the Photo/Movie buttons in the main control area. They also act as back/forward buttons when viewing images and movies. The middle button serves to start/pause video during playback. To the right of the LCD monitor is the speaker that plays back audio from recorded movie clips. Directly above the speaker is the slot for the Memory Stick Duo flash card. Just to the right of the word "Pro" is a tiny access lamp, which illuminates while the camera is writing data to the card. Starting at the upper right, we can see the Reset button and three indicator lamps. Each lamp will illuminate according to the current status of the camera: charging, Record mode, or Playback mode. The Mode button allows you to select the camera's mode from Record or Playback. Below the rotating LCD monitor are the main controls for the camera. Sony's dedication to video is apparent on the M1 through the inclusion of both a photo and movie shutter button. This means that you don't have to switch to video mode in order to shoot a video. Instead, you simply press the Movie shutter button to begin recording. Below both the Photo and Video buttons are switches that can alter their functionality. In between the shutter buttons is the zoom controller that operates the optical zoom in Record mode as well as the magnification of images during Playback. Surrounding the 4-way controller are the Menu, Image size/Delete, and Display buttons. The 4-way controller has a separate "set" button in the middle. At this point, we feel we should mention that the smaller buttons on the back of the M1 are recessed just enough to make them hard to press at times. Primarily, we are talking about the Menu, Image Size/Delete, Display, and Set buttons.
 |
 |
| Click images to enlarge. | |
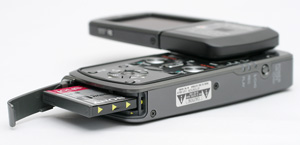
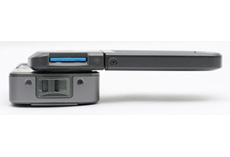
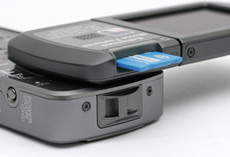
With the LCD monitor flipped open, we can see the Memory Stick Duo Pro media slot, which accepts regular Duo as well as Pro Duo cards. The M1 comes with a 32 MB Duo card, but we recommend upgrading to something larger, since the 32 MB card will only hold a handful of 5 megapixel images or short video clips. From this angle, we can also see the post for the included wrist strap.
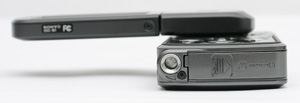
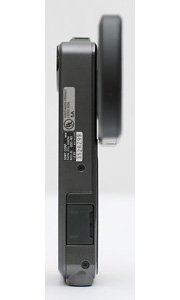
The bottom of the camera features a metal tripod mount as well as a rather flimsy plastic sliding door that conceals the battery compartment.
The Sony M1 uses the included NP-FT1 rechargeable Lithium-Ion battery (3.6V 680mAh).
On the right side of the camera is the main power button. However, the camera can also be turned on by simply rotating the LCD monitor to its open position. From this angle, we can also see the labels next to the lamps, which indicate the current camera mode.
 |
 |
| Click images to enlarge. | |
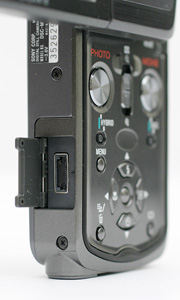
On the left side of the camera is a plastic hinged cover that protects the multi-connector. The multi-connector is used to connect the camera to the charging dock. You may have noticed that there are no USB or TV-out ports on the camera. These ports are both located on the charging dock. Therefore, you must have the camera "docked" in order to use either the TV-out or USB functionality.
The Sony DSC-M1 is certainly an interesting camera because of its unusual design. We are glad to see that the body is made of metal, which gives it a rugged feel in our hands. Handling the camera takes some getting used to as it is very easy to block either the lens or AF-assist lamp if you aren't careful with your fingers. With the physical design out of the way, let's take a look at some of the recording capabilities of the M1.
Recording Features
In all recording modes except Auto, the DSC-M1 records images as JPEG files with quality settings: Fine or Standard. In Auto mode, the camera always uses the Fine setting. The resolution options are below:| Setting | Resolution (pixels) |
| 5M | 2592x1944 |
| 3:2 | 2592x1728 |
| 3M | 2048x1536 |
| 1M | 1280x960 |
| VGA | 640x480 |
The DSC-M1 offers 11 different still image recording modes: Auto, Program, Magnifying glass, Twilight, Twilight portrait, Landscape, Snow, Beach, High-speed shutter, Fireworks, and Candle. In Auto mode, the camera will determine all the advanced settings for you. However, you still have access to some of the basic controls via the 4 directional buttons. For example, pressing the up arrow button will cycle through 4 available flash modes: Auto, Forced flash, Slow-synchro, and Off. With Auto flash, the camera will determine if there is enough light to take a properly-exposed photo. If more light is needed, the camera will activate the built-in flash automatically. The Forced flash option ensures that the flash fires even if there is already enough light to take a picture. This option can be used to fill in dark shadows caused by harsh lighting (often outdoors in direct sunlight). Slow-synchro mode will cause the flash to fire and the shutter will continue to stay open to gather ambient light. This is often used in situations with dim ambient light in order to capture a more realistic flash exposure. By pressing the left arrow button, the camera will enable/disable the macro mode. The down arrow button can be pressed to enable a 10-second self-timer. In all modes other than Auto, the right arrow button can be pressed to toggle between Multi-pattern and Spot metering. With Multi-pattern metering, the camera will measure light from the entire frame to determine the appropriate exposure settings. With Spot metering, the camera uses a small portion from the center of the frame to determine the exposure. When Spot metering is selected, a crosshair appears in the center of the frame to indicate the area that will be metered.
 Detailed |
 Detailed w/live histogram |
 No info. |
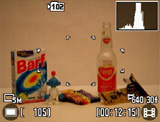
By pressing the Display button, the camera will toggle through four different displays: detailed, detailed w/live histogram, less information, and backlight off. In the default display, the following information will appear on the screen: image resolution, number of frames remaining, AF-illuminator, Red-eye reduction, shutter speed, f-stop, recording folder, focus points, movie resolution and frame rate, video time remaining, and battery life remaining. When the Display button is pressed again, a live histogram will be added to the display. The option to turn off the backlight is a great idea. We found that when shooting outdoors, we could not even tell the difference between the on and off states. This leaves the user a real opportunity to save battery power in brightly-lit situations. It is refreshing to see Sony continue to design the battery status indicator to provide the number of minutes remaining in the battery charge. Most cameras simply have a two- or three-bar indicator, which leaves you guessing about the exact battery life remaining.
In Program mode, there are several additional options that can be manipulated. For example, by pressing the Menu button, the following options can be adjusted:
| Menu | |
| EV | ± 2 stops in 1/3 stop increments |
| Focus | Multi AF, Center AF, Spot AF, 0.5m, 1.0m, 3.0m, 7.0m, Infinity |
| White Bal | Auto, Daylight, Cloudy, Fluorescent, Incandescent, Flash |
| ISO | Auto, 100, 200, 400 |
| P. Quality | Standard, Fine |
| REC mode | Normal, Speed Burst, Exp Brktg, Multi Burst |
| BRK | ± 0.3, 0.7, 1.0 EV |
| Interval | 1/30, 1/15, 1/7.5 |
| Flash Level | -, Normal, + |
| P. Effect | Off, Sepia, B&W |
| Saturation | -, Normal, + |
| Contrast | -, Normal, + |
| Sharpness | -, Normal, + |
| Setup | Enter |
 Multi AF, Focus lock |
 Center AF, Focus lock |
 Spot AF, Focus lock |
The auto-focus area can be selected from Multi AF, Center AF, or Spot AF. If Multi-AF is selected, the camera will select one or more of 5 possible focus points automatically. The chosen points will be displayed as green brackets. If all points are used, the green brackets will not be displayed. When Center AF is chosen, the camera will focus on the area in the center of the frame. If Spot AF is chosen, the camera will use a smaller portion of the center focus point. The M1 also offers 5 preset focus distances from which to choose. These can come in handy when shooting in particularly low lighting or in other situations where the camera may have trouble focusing.
The M1 offers a few options for continuous shooting: Speed Burst and Multi-Burst. With Speed Burst selected, the camera can take up to 4 images while the shutter button is held down. In Multi-burst mode, the camera records 16 consecutive images at a selectable interval (1/30th, 1/15th, 1/7.5th). The images are then compiled into a single image at a 1M resolution (1280x960 px). The M1 also offers the option to set an exposure bracket with the "Exp Brktg" setting. The bracket amount can be set to ± 0.3, ± 0.7, or ± 1.0 EV. The camera will take 3 pictures when the shutter button is fully depressed. The order of the pictures will be as follows: overexposed, normal, underexposed. For adjustment of the flash level, saturation, contrast, and sharpness, there are 3 levels from which to choose: "-", Normal, or "+". Setup mode is available in all shooting modes, so we will discuss those options a bit later.
In Magnifying glass mode, the M1 is capable of focusing on subjects as close as 1cm from the lens. In Twilight mode, the M1 can expose scenes for as long as 2 seconds. In Twilight Portrait mode, the camera uses a slow synchro flash to capture both subject and background detail. In Landscape mode, the camera focuses to infinity. In snow and beach modes, the camera applies a positive exposure compensation to ensure bright images. With Beach mode, the camera also ensures that blue tones from water are captured properly. High-speed shutter mode puts priority on the shutter speed in order to capture fast-moving subjects. In Fireworks mode, the camera sets the focus to infinity and uses a long exposure. In Candle mode, the M1 uses a slow shutter speed and daylight white balance to capture natural looking candlelit images.
One of the things that make the M1 so unique when compared to other digicams is its integrated movie mode. The option to record a movie clip is not buried in a menu or hidden on a mode dial. In fact, the M1 has a separate shutter button to start and stop video clips. In addition, the M1 records video clips with MPEG-4 compression to provide high-quality videos at a very small file size. This means that the video files will take up less space on your memory card, but it also means that you don't need a "Pro" card to keep up with the data stream. You can use the cheaper Duo cards and still record video at the highest quality setting. By default, the camera is set to record video clips at 640x480 and 30 fps. However, the resolution can be changed to 320x240 at either 30 or 15 fps by pressing the Image size/Delete button. Another great thing about the movie mode on the M1 is that the optical zoom can be used while recording. The "5Sec" switch under the Movie button will cause the camera to record a 5-second video clip instead of a continuous one. Under the Photo shutter button is a switch labeled "Hybrid". We thought that this was an interesting concept. When the camera is switched to Hybrid mode, the camera continuously records 5 seconds of video until the Photo shutter button is pressed. The camera then stores the 5 seconds of video before the picture was taken, the picture, and 3 seconds after the picture was taken. When played back, this adds a bit of context to the photo and gives a bit of a "behind-the-scenes" feel to the photo.
At any time, the user can access the Setup menu, which contains 4 screens of adjustable settings. To get to the setup menu, you simply press the Menu button and select the Setup option from the far right. Below, we have outlined these 4 screens:
| Camera Menu | |
| Hybrid Rec | Normal, Pre Rec |
| Digital Zoom | On, Off |
| Date/Time | Day&Time, Date, Off |
| Red-eye Reduction | On, Off |
| AF Illuminator | Auto, Off |
| Auto Review | On, Off |
The "Hybrid Rec" options allow you to adjust how the Hybrid Photo option operates. If Normal is selected, the camera will record 5 seconds of video before the picture and 3 seconds after. With "Pre Rec" selected, the camera will only record the 5 seconds of video before the photo. The Date/Time option allows you to stamp either the date and time on future pictures or just the date. The Auto Review option will determine whether or not the camera will display a picture on the LCD monitor immediately after it is taken. Even when "On" is selected, the user is unable to delete an unwanted image without switching to Playback mode.
| Memory Stick Tool Menu | |
| Format | OK, Cancel |
| Create REC Folder | OK, Cancel |
| Change REC Folder | OK (Select), Cancel |
By selecting "Create REC Folder", the camera will create a new folder with a number that is one higher than the last. With the "Change REC Folder" option, the M1 allows you to select the folder to which you would like to save future images.
| Setup 1 Menu | |
| Beep | Shutter, On, Off |
| Language | Select |
The Beep option allows the user to control the camera's operating sounds. When Shutter is selected, the camera will make a shutter sound when a picture is taken. If On is selected, the camera will make beeping noises whenever buttons are pressed in addition to the shutter sound.
| Setup 2 Menu | |
| File Number | Series, Reset |
| USB Connect | PictBridge, PTP, Normal |
| Video Out | NTSC, PAL |
| Clock Set | OK (Set), Cancel |
If Series is selected for the File Number option, the camera will use the next file number for new files even if the recording folder or Memory Stick Duo is changed. If Reset is selected, the camera will reset the file number whenever the folder is changed. The USB Connect options refer to the type of connection that the camera is making. For example, if the M1 is connected to a PictBridge compatible printer, you would select "PictBridge".
Playback Features
To switch to Playback mode from Record mode, simply press the Mode button. You can use the left/right arrow buttons to scroll through previously taken pictures and videos. The up/down arrow buttons can be used to adjust the volume of the speaker.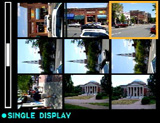 Image thumbnail view (3x3) |
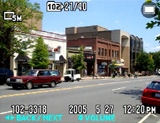 Image regular view |
 Image magnified 5.0x |
To view images as thumbnails, simply slide the zoom controller up. The first thumbnail screen displays 9 images at once; however, by pressing up on the zoom controller again, a 4x4 thumbnail screen will display 16 images at once. By sliding the zoom controller down, an image can be magnified up to 5.0x. While an image is magnified, you can scroll to different areas of the image by using the arrow keys. To jump back out to a full screen image, press the Set button (in the center of the 4-way control pad). While viewing a single image, it can be erased by pressing the Image Size/Delete button. If you are in a thumbnail display, you will have the option to delete everything in the folder or to select specific images to delete. To play back a video clip, the Set button must be pressed. While a video clip is playing, you can rewind or fast-forward with the left/right arrow keys. As we mentioned earlier in the review, there are navigation buttons to the left of the LCD monitor that can also be used to review images and play video clips.
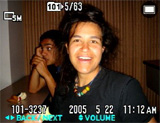 Normal |
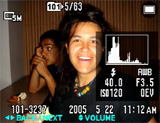 Detailed w/histogram |
 No info. |
The playback display can be selected from one of 4 options: Normal, Detailed w/histogram, no information, and backlight off. The normal display will have the battery life remaining (minutes), image resolution, folder, image number out of total images in folder, file number and date/time. On the display with the histogram, the following information is also added: exposure compensation, ISO, flash, white balance, shutter speed, and aperture.
By pressing the Menu button, there are a number of additional options at your disposal. Below is a table outlining these options.
| Playback Menu | |
| Folder | Select |
| Protect | Tag |
| DPOF | Tag |
| All in this folder, DPOF image, Select, This image, Cancel | |
| Slide | Interval (3, 5, 10, 30 sec., 1 min), Image (Folder, All), Repeat (On, Off), Start, Cancel |
| Resize | 5M, 3M, 1M, VGA, Cancel |
| Rotate | Rotate, Ok, Cancel |
| Setup | Enter |
The Folder option allows you to specify the folder which contains the images/videos that you want to view. The Protect option allows you tag specific files so that they cannot be deleted accidentally. Protected files can, however, be erased if the memory stick is formatted. DPOF (Digital Print Order Format) allows you to specify images that you wish to print and the Print option allows you to print images on a PictBridge-compatible printer. The Resize option will allow you to upsize and downsize images to one of the higher/lower resolutions. With the Rotate option, you can rotate images full circle, 90 degrees at a time. The Setup option will bring up the same setup screens that we discussed at the end of the Recording Features page.
Battery Performance
Our general method for battery testing is to reset the camera to its default settings and change the recording mode to the highest quality option. Then, we take 5 pictures without the flash and 2 pictures with the flash until the battery is dead. For more information on our battery test, please refer to our Testing Procedures page. For this test, we used the included NP-FT1 rechargeable Lithium-Ion battery (3.6V 680mAh). The batteries were fully drained before charging for the test.| Number of shots taken in one battery charge | |
| Canon PowerShot S60 | 1,040 |
| Sony DSC-M1 | 797 |
| Pentax Optio X | 451 |
Considering the size of the NP-FT1 battery, we were relatively impressed with the performance of the M1. We were able to take nearly 800 frames (797) on a single charge. On a related note, we applaud Sony for continuing to include a "minutes remaining" battery indicator. Since the user is forced to use proprietary batteries, at least they can see how much longer the camera will work before needing a recharge. Most other manufacturers use primitive and rather useless two- or three-bar battery indicators that don't give the user much information regarding remaining battery life. A spare NP-FT1 battery will run you approximately $50.
The Timing Tests
* NOTE: For all of our time tests, the camera is reset to its factory default settings and set to record using the highest resolution and quality setting. It is set to record in Auto mode. We also disabled all sounds. A 512 MB Memory Stick Pro Duo card was used.Before reading our results, please refer to our Testing Procedures page.
Startup Time
The startup time is recorded from the moment that the power button is pushed to the moment that the shutter sounds. The camera is set to record in Auto mode.| Startup time (seconds) | |
| Sony DSC-M1 | 1.76 |
| Pentax Optio X | 3.37 |
| Canon PowerShot S60 | 3.98 |
Startup time is not a problem at all for this camera. Compared to other compact 5 megapixel cameras that we have tested, its 1.76 sec. startup time is incredible. This has a lot to do with the internal lens system (also seen on the popular T1 camera). Since the camera uses folded optics, there is no need for a telescoping lens to protrude from the camera body. In fact, the 5 megapixel DSC-F88 has the same type of lens system and takes nearly the same amount of time to startup (1.73 sec.).
Auto-Focus and Shutter Lag
To record shutter lag, we perform two tests with the lens at its widest angle setting. For the first test, we pre-focus the lens and measure the amount of time that it takes the camera to take a picture after the shutter button is pressed. The second test measures the time that it takes for the camera to take a picture after we press the shutter button without pre-focusing. Each test is performed 3 times and the results are averaged. For more information regarding our testing procedures, please refer to our Testing Procedures page.| With Pre-focus (seconds) | Without Pre-focus (seconds) | |
| Sony DSC-M1 | 0.01 | 0.24 |
| Pentax Optio X | 0.09 | 0.92 |
| Canon PowerShot S60 | 0.08 | 0.69 |
As we've come to expect from Sony's digicams, shutter lag and auto-focus are very fast. When the camera is pre-focused, the shutter lag is so fast that it is less than a hundredth of a second. When we included focusing in the test, the M1 took only 0.24 sec. to focus and take a picture after pressing the shutter button. This is even faster than the DSC-L1, which we thought was incredible at 0.31 sec. The M1 is now the fastest compact digicam that we have ever tested in terms of focus and shutter lag.
Write Times
We recorded 5 different write times with a SanDisk 512 MB Memory Stick Pro Duo:Single Shot - The time that it takes for a single picture to be written completely to the flash card (the time that the "activity light" is on).
Shot To Shot (STS) - The time until the second shot can be taken after the first (shutter to shutter).
Shot To Shot w/Flash - The time that it takes the camera to take two pictures with the flash, starting from the moment that the first flash is fired to the moment that the second is fired.
Shot To Shot w/Buffer Full - The time between the last shot of a burst that fills the buffer to the moment that the shutter sounds again.
Clear Buffer - The time that it takes the camera to clear the buffer after a full burst of pictures is taken.
We performed each test three times and averaged the results. Below are the resolution, quality setting, and average file size used for the tests.
| Resolution (pixels) | Quality setting | Avg. file size (MB) | |
| Sony DSC-M1 | 2592x1944 | Fine | 2.22 |
| Pentax Optio X | 2560x1920 | Best | 2.51 |
| Canon PowerShot S60 | 2592x1944 | SuperFine | 2.05 |
| Single Shot | Shot to Shot | Shot to Shot w/Flash | Shot to Shot w/Buffer Full | Clear Buffer | |
| Sony DSC-M1 | 1.06 | 1.11 | 6.93 | N/A | 5.26 |
| Pentax Optio X | N/A | 4.39 | 5.96 | N/A | N/A |
| Canon PowerShot S60 | 2.73 | 1.87 | 5.54 | 3.67 | N/A |
The M1 has a very respectable shot-to-shot time at 1.11 sec. without the flash. However, when the flash is used, the M1 slows to nearly 7 seconds between shots. The M1 is so fast at flushing images out of its buffer that the buffer will never fill up when shooting in the normal recording mode. In other words, the camera can take a picture every 1.11 sec. until the memory card fills up. With the M1 in "Speed Burst" mode, it can take up to 4 frames at 4.17 fps. The camera then takes 5.26 sec. to clear those 4 images out to the buffer before more images can be taken. Unfortunately, the M1 is unable to take pictures while files are being written to the flash card - you must wait until all 4 are written. Overall, the M1 has very impressive write/cycle times compared to similar cameras that we have reviewed. However, this camera is definitely not the fastest if you plan on using the flash very often.
Resolving Fine Lines
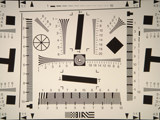
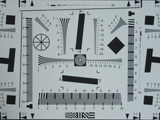
For our resolution test, we reset the camera to its default settings and then used the highest resolution and quality setting. The camera was then set to +1.3 E.V, Incandescent WB, and ISO 100. For more information, refer to our Testing Procedures page. When reading this chart, the numbers represent lines per picture height (LPH). For example, the number 16 would represent 1,600 LPH. Click on a thumbnail below to see the full chart at 100%.| Sony DSC-M1 | Pentax Optio X | Canon PowerShot S60 |
 +1.3 EV |
 +0.7 EV |
 +0.7 EV |
| Click on images to download. | ||
Sony DSC-M1 VS. Pentax Optio X
Roll your mouse over the 200% crops below to see the difference between the Sony DSC-M1 and the Pentax Optio X resolution charts.As the above comparisons demonstrate, the Sony DSC-M1 is capable of producing some very fine details. It surpasses the Pentax Optio X and matches the Canon PowerShot S60 in the horizontal crop by resolving lines out to 1,300 LPH. In the vertical crop, the M1 is able to resolve lines a bit further to 1,350 LPH. In short, the M1 puts in a very impressive resolution performance. It produces a clean resolution chart and moiré is very minor at the resolution limit.
Color Reproduction
* For all of our color tests, we reset the DSC-M1 to its factory default settings. It was then set to record using the highest image quality option. All images are sRGB.Incandescent
| Auto WB | Incandescent WB |
 Click to enlarge. |
 Click to enlarge. |
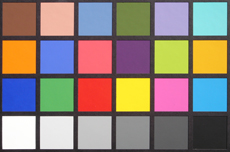
 Reference Chart ("actual colors") |
|
| Auto WB | Incandescent WB |
 |
 |
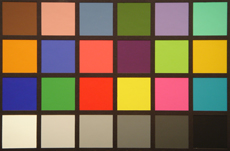
Under tungsten light with Auto WB, the DSC-M1 produces images with a rather strong yellowish cast. When we set the camera to Incandescent WB, the colors are much more accurate. However, we still detected a very slight yellowish cast.
Daylight
| Auto WB | Daylight WB |
 Click to enlarge. |
 Click to enlarge. |
 Reference Chart ("actual colors") |
|
| Auto WB | Daylight WB |
 |
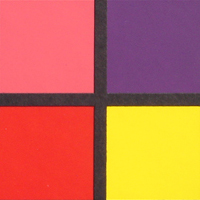 |
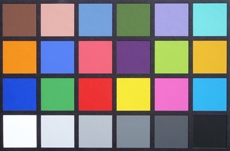
With Auto WB, the DSC-M1 produces images with a slightly cool (bluish) color cast. When the camera is set to Daylight WB, it produces image with extremely accurate color.
Built-in Flash
For the flash test, we set the camera to Auto mode w/Auto flash. The picture was taken from 5 feet away.The built-in flash does a decent job lighting our hand from 5 feet away. However, we detect a subtle warm cast on the white wall. Remember, the flash range of the M1 is significantly shorter than average. With the lens at wide angle, the flash will only light a subject up to 5'11" away.
Noise
The noise test consists of pictures of our studio shot taken at increasing ISO levels to show the effect on the image. The pictures were taken after resetting the camera to its factory default settings. The camera is then set to record with the highest quality option with Incandescent WB. Click on a 100% crop below to view the full-size image. All images are sRGB.| ISO 100 |  Click to enlarge. |
| ISO 200 |  Click to enlarge. |
| ISO 400 |  Click to enlarge. |
In the crops above, we can see that the M1 doesn't produce the cleanest images in terms of noise. Although there isn't a large amount of noise at ISO 100, it is still visible. At ISO 200, there is some slight discoloration as noise becomes more prevalent. At ISO 400, the images are definitely still usable. However, there are more areas with discoloration and noticeable loss of detail. Overall, it is good that there doesn't seem to be a dramatic difference from each ISO setting to the next. However, we are still disappointed at the overall level of noise (especially at ISO 100).
General Image Quality
For these pictures, the camera was reset to its factory default setting. Then, it was set to its highest quality recording setting. The pictures were then taken in Auto mode unless stated otherwise. Portrait-style images have been rotated using Irfanview's "lossless operations". Click on a thumbnail to view the full-size image. All images are in sRGB color space.  Click to enlarge. |
 Click to enlarge. |
 Click to enlarge. |
 |
 |
 |
 Click to enlarge. |
 Click to enlarge. |
 Click to enlarge. |
 |
 |
 |
Overall, the image quality of the DSC-M1 is fairly average. In the first two samples above, the M1 demonstrates that it is capable of capturing a decent amount of detail. However, the details are characterized by a fuzzy and muddy appearance. In both pictures, even though the subjects are in focus, the details appear very soft. In the third and fourth samples, the M1 reveals another common problem - JPEG artifacts. We were pretty surprised to see this considering the relatively large file sizes. Although we spotted JPEG artifacts more frequently in shadow areas, they are also visible along fine details in nearly every picture that we took. In the fifth sample, the M1 proves capable of taking very detailed macro shots through the use of the Magnifying Glass mode. In the final sample, we used the ordinary Macro mode. Although the flowers are in focus and aesthetically pleasing, it is also very obvious that the camera has oversaturated the red channel causing clipping. We recommend shooting in Program mode where the saturation can be adjusted. Again, we weren't incredibly impressed with the image quality of the DSC-M1. However, we were happy to see that there were no real problems with purple fringing or jaggies. Most people will find the image quality of this camera acceptable for prints up to 8x10", but anything larger and you will probably notice the soft details and JPEG artifacts.
Twilight mode
 (ISO 100, 1 sec., f/3.5) Click to enlarge. |
 |
In Twilight mode, the M1 is limited to maximum exposures of 2 seconds. In our 1-second exposure above, the M1 proves that it can capture a significant amount of detail. However, just as we found with our daylight images, the details are soft/fuzzy. Again, we are surprised to see so much noise at ISO 100.
Movie Mode
 (640x480, 30 fps) Click to view. |
We recommend using VLC to play this file if you are having difficulties viewing it.
As you can see by our sample clip, the image quality is pretty good. However, the real advantage that the M1 has over traditional MPEG-1 videos is the size of the resulting file. The M1 sample video file is only 4.98 MB (14 seconds) compared to the 18.5 MB (10 seconds) file size that we saw on the Canon SD300. With our 512 MB Pro Duo card installed, the M1 indicates that we have 21 minutes and 41 seconds of video available at 640x480 and 30 fps. In addition to the option to use the optical zoom while recording, you can also select the white balance, exposure compensation, and image effects (B&W and Sepia) for video clips.
Final Words
The DSC-M1 is Sony's attempt to make a true hybrid digicam offering both extended high quality video recording and all the still camera features that you have come to expect from a modern digicam. As with all cameras, we have found some positives and negative points throughout our review. To start, we were generally impressed with the M1's speed. It is quick to start up, showed fast cycle times without the flash, and has incredibly fast shutter lag and auto-focus times. With the flash enabled, the shot-to-shot time increases dramatically, making it a bit slower than average. Of course, what makes or breaks a digital camera in the end is image quality. The M1 performed very well on our resolution test chart. Unfortunately, the results that we saw in the studio did not translate well to the real world. Our sample images are all characterized by soft/fuzzy details. In addition, we spotted JPEG artifacts throughout several images during our testing. The M1 isn't the best in terms of noise either. Even at ISO 100, we were surprised by the level of noise that we saw in the images. We noticed a strong yellowish cast when using Auto white balance under tungsten light (which is fairly normal compared to other digicams). However, we didn't expect to see a slight bluish cast when using Auto WB under direct sunlight.Other than taking still images, the other main selling point of the M1 is its MPEG-4 video capability. We were very impressed with the quality of the video files. The M1 can record stereo audio and video at 640x480 and 30 fps. Thanks to the M1's MPEG-4 compression, the video file sizes are much smaller than those of comparable quality from other digicams using MPEG-1 compression. The M1 allows the use of the optical zoom during video recording as well as image adjustments such as white balance, exposure compensation, etc. Overall, the video mode is very impressive. It is unfortunate that the still image quality suffers from so many problems. If the M1 were priced under $400, it might be a decent buy for someone who shoots a lot of video and is looking for a compact dual-function camera. As long as they don't plan on making still prints larger than 8x10" or doing any heavy cropping, the M1 would fit the task. However, considering the $500 price tag, it doesn't seem worth it. The M1 was a good start by Sony, but more work needs to be done to improve the still image quality. We are excited by the future of MPEG-4 video modes in newer digicams by companies such as Casio, Pentax, Samsung, and Sony. Hopefully, newer cameras will have a better balance between the video and still image functionality.
| Pros | Cons |
| - Good resolution - Very fast startup time - Very fast cycle times w/o flash - Excellent movie mode - Live histogram - Decent battery life - AF-assist lamp - Very good movie mode - Excellent macro (magnifying glass) mode |
- Fuzzy/Muddy details - JPEG artifacts - Noise in images (even at ISO 100) - Slow cycle time w/flash - Recessed option buttons - Auto WB produces yellowish cast under tungsten light - Auto WB produces slightly cool cast in direct sunlight |
Thanks again to Newegg.com for loaning us the Sony DSC-M1 for review.

