Original Link: https://www.anandtech.com/show/1614
Antec Performance One
by Purav Sanghani on February 13, 2005 12:05 AM EST- Posted in
- Cases/Cooling/PSUs
Introduction
It has been over two years since we have looked at an Antec product. In January of 2003, we included Antec's True430, their mid-range power supply at the time, in the TruePower series. We now have our hands on the Performance One, or P160 aluminum case from Antec. Antec claims the P160 to be a "Super" mid-tower chassis and we'd like to find out exactly what they mean by that.
There's no question that Antec produces some high quality, high performance products. It is one of the biggest names in the industry, especially when it comes to power supplies and PC cases. We have received many requests to review various Antec products and we finally have our chance.
| Antec Performance One P160 | |
 |
Included Features |
| - Rotating auxiliary module w/temperature display - Tool-less drive bays - Removable motherboard tray - Security features |
|
| Improvements Needed | |
| - Drive rails for hard drive bays - Two standard 120mm fans |
|
Keep these features and possible improvements in mind as we take the P160 out of its box and look deeper into the aluminum chassis from Antec.
More information is available on the P160 at Antec's website.
The P160 at First Glance
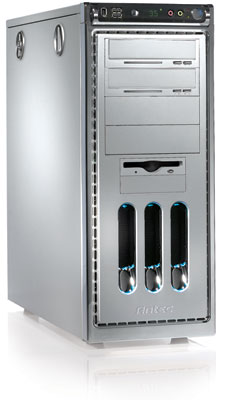
We have seen a great many cases with varying aesthetics, so it is difficult to differentiate between a theme and a normal, generalized look. Antec goes only as far as adding lighting at the front of the case, but we feel that, in this case (pun intended), they haven't really gone as far out there as some of the things that we have seen.
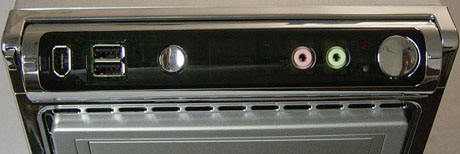
At the top of the P160's bezel, there is a unique auxiliary port module that rotates 45 degrees to aim wiring at a closer level to the user. Many cases feature these audio in/out, USB, and FireWire ports either at the bottom or on the side of the bezel, which limits where the case can be placed relative to the user. We feel that the top of the bezel is the best placement for the auxiliary ports since, when either placed on a desk or on the floor, the auxiliary ports are only 2 feet away from our heads. This module also features a power button on the right side as well as a smaller reset button on the left half.

To rotate the module, we press a small button on the left side to unlock it. It is not an extremely smooth motion, and we feel like it is pulling on something in the inside. We can see straight through the smoked plastic to the circuit board, on which each component lies.
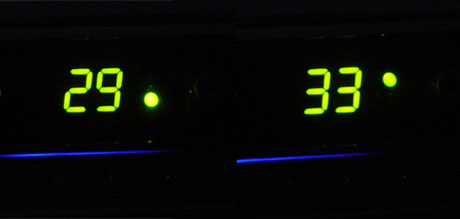
The auxiliary module also has a simple, but effective, built-in temperature monitor that shows the temperature of two separate components using two sensors on the inside. The 2x1 digit display switches between the two at a set interval of about 5 seconds. The temperature can also be switched between Celsius and Fahrenheit by way of a small button switch on the inside of the case.
Moving down to the drive bays, we see that the first two 5-1/4" bays have optical bezels installed with "eject" as well as "play" and "track forward" buttons on the right with a clear strip just left of the buttons for the drive activity LEDs to shine through. The last two of the four 5-1/4" drive bezels are plain silver to match the rest of the bezel.
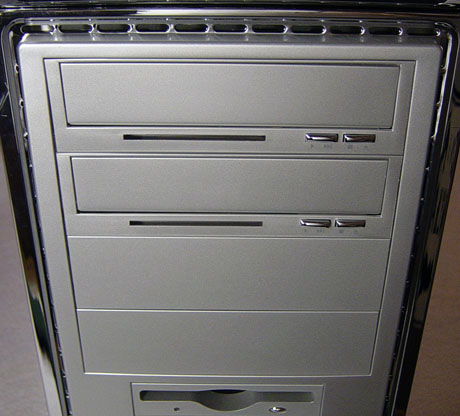
Below those bays, we see two vertically centered 3-1/2" bays; the first, occupied by a floppy drive bezel to match.
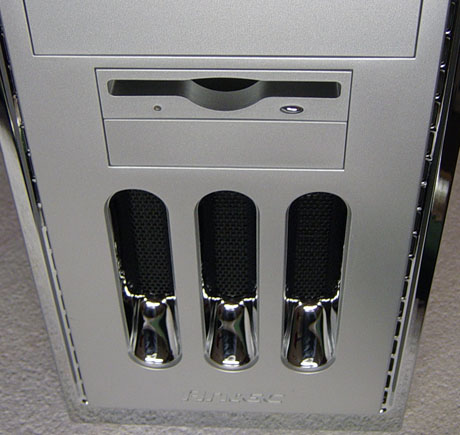
The bottom of the bezel consists of three vent holes, each lined on the inside with chrome paint. The vents have a black metal grill to hide the fan. Directly underneath the vents is the "Antec" name/logo molded into the plastic bezel and the bezel itself is framed by chrome painted plastic.
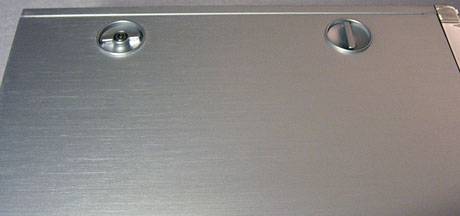
The only features of the left side panel are the dual 2-position locks, which secure the panel onto the case. In the vertical position, the locks hook onto the case's shell. The one at the back features a keylock design, which provides added security. Antec also provides thumbscrews at the back of the case to secure each panel.
Instead of metal or plastic feet at the bottom, Antec has installed rubber feet. For those of us with wood floors or desks, it is a great replacement and will eliminate the chances of scratches.
Inside the P160
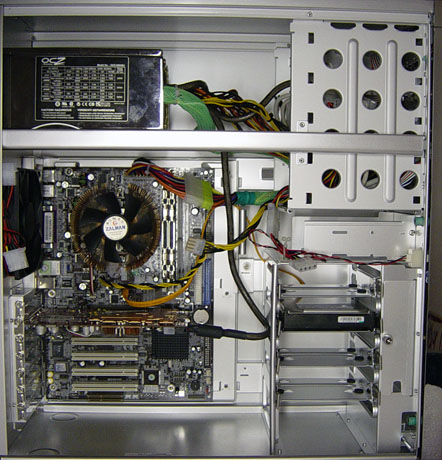
The P160 provides us with a few surprises inside, not that we're surprised anyway with any of the great features that Antec provides in many of its products. One of the main areas packed with features is the front end of the case.

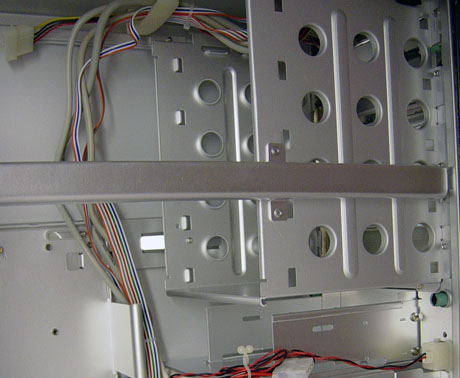
There are three types of drive bays in the front section. The top 5-1/4" drive bays do not have screw holes, but use drive rails only. The first set of 3-1/2" drive bays, however, does not use drive rails, but Antec has holes drilled to allow standard screw installation. To install drives in either of these bays, we need to remove the front bezel by pulling it off from the bottom, as many other cases allow, and slide in the drives with attached rails through the front.
The bottom set of drive bays are for hard drives only. As we can see from the picture, there are four slide-out drive-trays with rubber grommets, which will help cushion the drives as well as allow us to secure them to the trays by screwing them in from the bottom. The trays are slightly wider than any 3-1/2" hard drive, so there is no chance of scratching the sides of the drives.
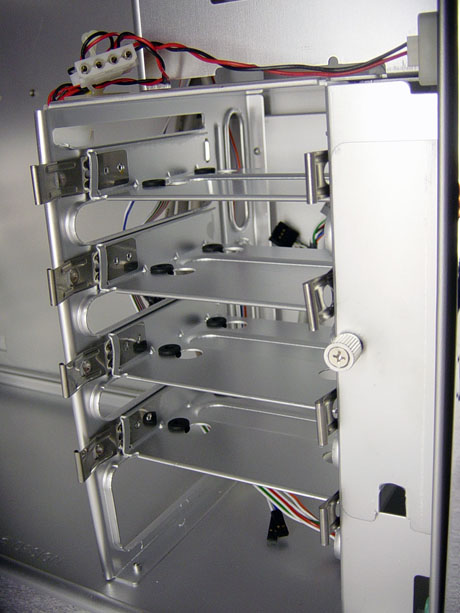
We also notice how much space is left over at the bottom of this drive cage. It seems like wasted space and could have easily allowed an extra drive to be installed.
From the 5-1/4" drive bays, specifically at the height of the third bay from the top, there is an aluminum support bar that extends all the way to the back of the chassis just below the power supply mounting area. It is obvious from the power supply cutout at the back of the case that there is much more room between the power supply and the roof of the case. We shouldn't have any trouble installing the PowerStream unit into the P160.

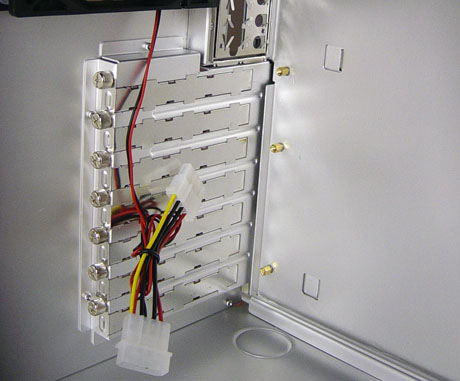
Down at the bottom of the backside of the P160, we see seven expansion slots with steel covers on them. The covers are secured to the slots by thumbscrews, which carry the tool-less design.
Cooling Hardware
Usually when we have a product with as many features as the P160, we expect the product to pack an equal amount of power in all areas of the case. One of the most important areas is the thermal management capabilities of cases.
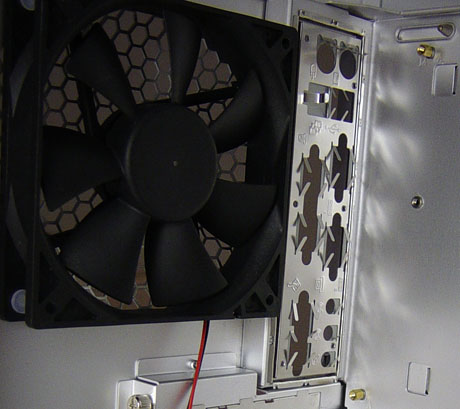
Antec includes a single 120mm exhaust fan at the back of the P160 with a total capacity for two. The included fan is rated at a speed of 1600rpm and as loud as 28dB/A. A removable fan mount has been implemented in front of the hard drive cage. We can see from the picture that there is a slide-out mount for the second 120mm fan. This makes it easier to install the fan, but it seems redundant since we don't usually replace case fans.
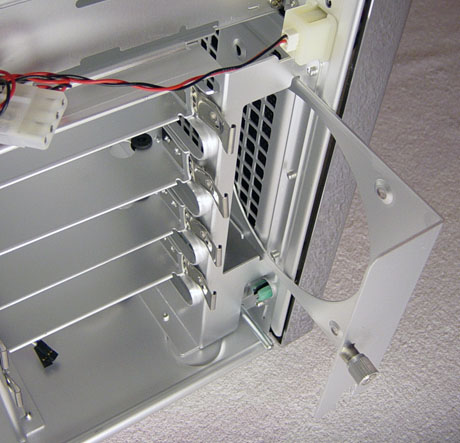
Now, we have seen cases with a single fan, even an 80mm fan will do fine when it comes to thermal conditions, but as technology progresses, components will only run hotter and produce even more heat. This heat will need to be moved away from the system components as quickly as possible and the P160 has the potential to do this with two 120mm fans. However, the stock model comes with only one fan as we have seen on various retailers' websites, forcing users to purchase another fan, thus adding to the cost of the case.
Motherboard Tray
The motherboard tray inside the P160 is also an interesting piece of hardware. Yes, you can safely assume that it is removable, but not like the traditional "slide-out-the-back" or "detach-off-the-side" trays. It is held onto the case by a small piece of aluminum with a thumbscrew.
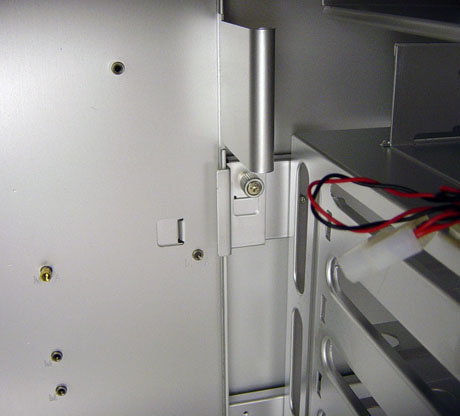
To remove the tray, we remove this aluminum piece and slide the tray towards the front of the case by about an inch. We can then safely pull it off and out through the left side of the chassis. This way, the only hardware removed is the motherboard and the add-on cards attached to it. All of the wiring connected to the motherboard will, of course, need to be disconnected and the add-on cards unscrewed from the expansion slots first.
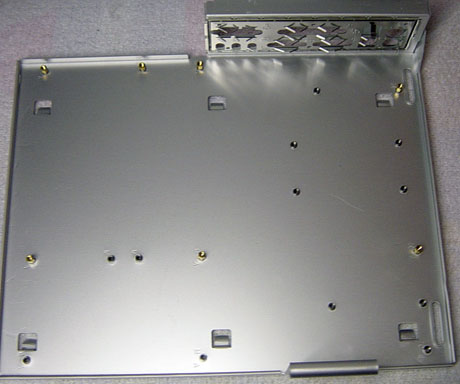
Once the tray has been removed, we can mount the motherboard by using screw-in stand-offs included with the P160. The tray supports ATX and microATX boards and has a removeable I/O backplate for various port layouts.
Case Construction and Security
With exception to the bezel, the case is made completely of 1.2mm anodized aluminum. Aluminum alone eliminates sharp edges while the 1.2mm thickness strengthens the structure of every part of the P160. What does that mean? We won't see any easily bent or dented panels or heavy hardware deforming any part of the case.

There are a couple of security features in the P160, which are new to us. It's been a while since we've seen any effective security features that prevent access to the inside of the case. The first security feature prevents removal of the case's bezel by way of a small metal rod that is only a few inches long. When the left side panel is installed onto the case, the rod is pushed in through a loop, which is then secured to the inside of the bezel.
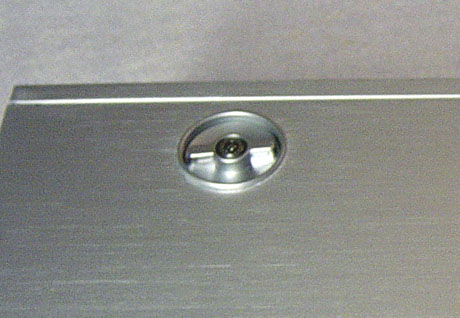
The left side panel can be locked onto the case by the key lock on the rear 2-position locks to complete a total lock-down of the case.
The Installation Process
Though there were many tool-less features included in the P160, the installation process took about 10-12 minutes to complete. We felt that the hard drive trays were a nice, but unnecessary feature, since we still had to screw the drives to the trays to install them, still requiring four screws. Drive rails would have been a better choice and would have resulted in quicker and easier installations. The upside to the trays was the rubber grommets and ease of use once the drives were mounted to the trays.
The motherboard also took about 3 minutes to install because we had to secure it with screws, and before that, we had to screw in the stand-offs.
The power supply was also very easy to install, since we had plenty of extra space to work with. We actually used the thumbscrews from the left side panel to mount the unit as we did not need them for the panel.

Something that we noticed with the wiring for the temperature sensors was that they were grouped together with a couple of motherboard connectors all the way up to the ends. We can still peel them apart, but sometimes the jackets of the wires may tear open in the process.
Benchmarks - Thermal
Describing the cooling equipment that comes with a case just doesn't cut it for us. We need to see how it actually performs, to determine if it is actually as effective as what the manufacturer's claim. We have hand-picked a full system that we believe to model the current system setup for the average user.
| PC Mid-Tower Test Bed | |
Chaintech VNF3-250 |
 Click to enlarge. |
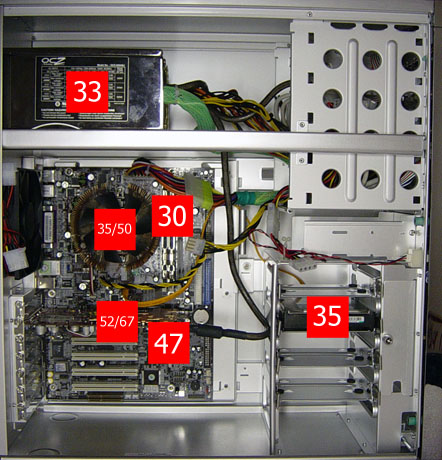
The thermal readings for the key components and points on the motherboard during operation were as follows. The numbers in each square represent the temperature of that particular section of the case in degrees Celsius:
We didn't expect the P160 to perform different from the PC-V1000 from Lian Li. Since adding that second fan would pretty much give the P160 the same cooling setup as the V1000, and the only difference was the slight variation in the layout of the hardware, we expected the very same average temperatures. Since our look at the V1000, our thermal benchmarking methodology has changed, but we still measure the temperatures of each critical component. The P160 performed well, cooling each individual component with the two 120mm fans.
Benchmarks - Sound
The other performance meter when it comes to cases is noise levels. We measure the noise levels of the P160 at 12" away from the closed chassis with the power supply and heatsink fans turned off. Take a look at our results.
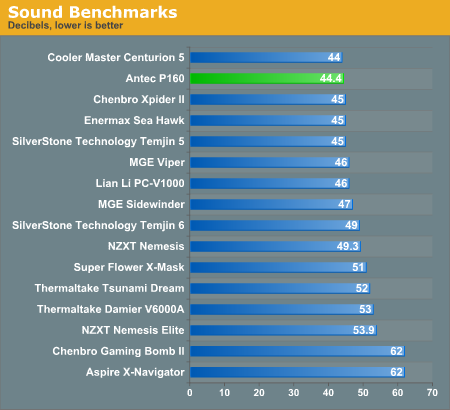
As we mentioned in the thermal benchmark section, since the P160 came with the single 120mm fan, we installed a second 120mm fan with the same specifications, 1600rpm and rated at about 28dBA to measure the sound of the case. Our results showed that the P160 still performed extremely well in the sound category of our benchmarks at about 44.4 decibels, a few decibels quieter than equally cooled Lian Li PC-V1000, which also had dual 120mm fans, but with holes all over the case.
Final Words
The P160 has some great features including the tool-less drive bays and expansion slots, the rotating auxiliary module with the integrated simple temperature monitor, as well as the security features that will appeal to almost all enthusiasts out there.
The P160 performed well in our thermal benchmarks, producing an average of 29-30 degrees of ambient heat. With the added 120mm fan at the front, the range of temperatures between 27 and 33 degrees was reached throughout the case. The individual components also ran, on average, 1-2 degrees cooler than those of the past few cases, including the Nemesis series from NZXT as well as the MGE Viper and the Gaming Bomb II from Chenbro.
Even with the added fan, sound performance did not suffer at all. On average, the fans produced about 44-45 decibels with the sealed chassis. The P160 did just as well as the Gaming Bomb II's sound performance.
The external look was also easy on the eyes and we believe that many will accept this model over any of the pre-mod cases that we have reviewed. By far, Chenbro's Gaming Bomb II appealed to us the most with all of the SilverStone cases coming in at second in aesthetics. Though the P160 doesn't have the curves that the Gaming Bomb II had, we are getting exactly what we pay for - we're not dropping over $200 for a case when we can get the P160 for only $125.
Given the combination of features and looks as well as the price for a 1.2mm aluminum chassis, the P160 is a great value for novice users all the way up to the enthusiast class who desire the high quality that Antec can provide. We recommend it over the higher priced aluminum models out there as well as the pre-modded cases that we have looked at in the past.

