Original Link: https://www.anandtech.com/show/1608
Optio X: A Look at Pentax's Ultra Thin 5MP Digicam
by Stephen Caston on February 6, 2005 5:01 PM EST- Posted in
- Digital Camera
Index
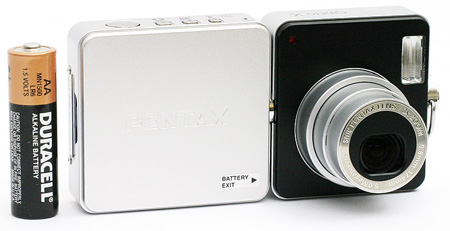
The Optio X certainly has a unique appearance with a twistable body and the slimmest in the Optio series. With a stylish black and silver body, the Optio X is one of Pentax's latest feature-packed 5 megapixel digicams. The Optio X features a 3x optical zoom lens and 15 different recording modes as well as movie and voice memo functionality. In addition, the camera offers advanced functions such as manual white balance and 5 different bracketing options.In our review of this camera, we discovered several strengths and weaknesses. For starters, it isn't the fastest camera available, but in most cases it puts in a decent performance. For example, it has respectable startup and write speeds. Unfortunately, the auto focus can be somewhat slow. In our test, the camera took nearly a full second to focus and take a picture. With respect to image quality, the Optio X generally does a good job taking even exposures with accurate color. However, we found clipped shadows and highlights in some of our samples in addition to jaggies along diagonal lines. Read on for more details of the ultra-thin Optio X.
Product Sample provided by Newegg.com
Pentax Optio X Specifications
| Pentax Optio X | |
| Release Date | August 2004 |
| Price | ~$320 |
| Pixel Count | 5.0 Million |
| Camera Type | Ultra-compact |
| Highest Resolution | 2560x1920 |
| Lower Resolutions | 2304x1728, 2048x1536, 1600x1200, 1024x768, 640x480 |
| Sensor Type | CCD |
| Sensor Size | 1/2.5" |
| LCD Screen Size | 2.0" |
| Optical Zoom | 3x; 36 - 107mm equivalent |
| Digital Zoom | 4x |
| Focus Range | 1.3' - Infinity |
| Macro | Normal: 7.1 - 19.7"; Super: 2.4 - 7.9" |
| Aperture Range | f/2.6 - 4.8 |
| Shutter Speeds | 4 - 1/2000th sec. |
| Auto Focus | Yes |
| Auto Focus Type | TTL; contrast-detection |
| Manual Focus | Yes |
| Lens Thread | No |
| AF-assist Lamp | No |
| ISO | 80, 160, 320 |
| Flash | Built-in |
| Flash Range | W: 0.6 - 11.8; T: 0.6 - 3.0' (Auto ISO) |
| Flash Compensation | None |
| Exposure Compensation | +/- 2 stops in 1/3 increments |
| White Balance | Auto, Daylight, Shade, Tungsten, Fluorescent, Manual |
| Bracketing | Yes, Exposure (+/- 2 stops in 1/3 stop increments), White Balance, Sharpness, Contrast, Saturation |
| Metering | Multi-segment, Center-weighted, Spot |
| Color Space | sRGB |
| Aperture Priority | No |
| Shutter Speed Priority | No |
| Manual Exposure | No |
| Continuous Drive | Yes, unlimited at 0.34 fps (2560x1920/Best) |
| Self-Timer | Yes, 10, 2 sec. |
| Storage Method | SD |
| Storage Included | 14 MB internal memory |
| Compressed Format | JPG |
| Uncompressed Format | None |
| Quality Settings | Best, Better, Good |
| Video clips | 320x240, 15 fps, w/sound, QuickTime MOV, unlimited duration |
| Battery Type | Rechargeable D-LI8 |
| Charger Included | Yes, Cradle, Approx. 2 hours |
| PC Interface | USB |
| TV-out | Yes |
| Tripod Mount | Yes, metal |
| Weight (w/out battery or card) | 4.4 oz. |
| Dimensions | 112 x 54 x 18 mm |
| Included in the Box |
|
The Design: Pentax Optio X
 |
 |
| Click images to enlarge. | |
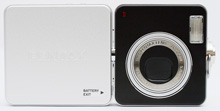
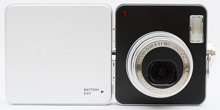
The front of the Pentax Optio X features a 3x optical zoom lens that extends out when the camera is powered up. To the upper right is the built-in flash with a working range of 0.6 - 11.8 ft. at wide angle and 0.6 - 3 ft. at telephoto. Opposite the built-in flash is the self-timer lamp. The battery is actually located under the gray panel on the left.
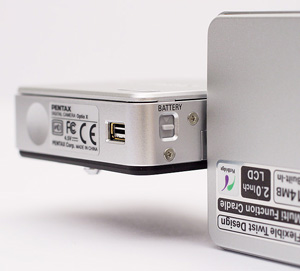
To release the battery cover, you must twist the camera halves to reveal the battery cover button (above). By sliding this button, the cover can be unlocked and removed.
 |
 |
| Click images to enlarge. | |
The battery can then be removed by pulling up on a plastic tab that lifts the battery out. It is not usually necessary to remove the battery because the battery is charged inside the camera via the supplied cradle.
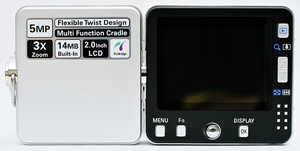
The back of the Optio X features a 2 inch LCD monitor with approximately 210,000 pixels. To the lower left of the LCD monitor are the Menu and Fn buttons. Just to the right of this is the multi-controller, which acts as a button as well as a 4-way selector. To the right of the multi-controller is the Display/OK button. On the bottom right corner are eight tiny metal stubs that help give your thumb something to grip. Just above this is the zoom controller that can slide up (telephoto) or down (wide). The zoom controller is supposed to return automatically to the middle position after you release it. As a side note, we found that during some of our field testing outside in the cold (28° Fahrenheit), the zoom controller began to stick in the telephoto direction. Finally, at the very top is the Play button. If the Play button is held down when the camera is powered up, the camera will start up in Play mode without extending the lens.
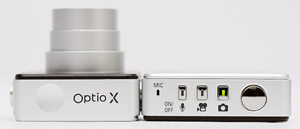
On the top of the camera are three main power buttons. Depending on which button you press, the camera will power on/off or switch to Voice Memo, Still Image, or Movie mode. The microphone is located to the left of these buttons and the shutter button is on the far right side.
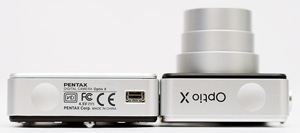
The only thing on the bottom of the camera is the USB connector for the cradle and an indentation on either side for grips. In order to use video, you must connect the camera to the cradle. Then, you can use the supplied A/V cable to connect a TV to the cradle.
 |
 |
| Click images to enlarge. | |
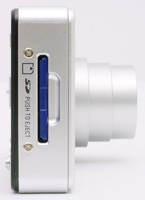
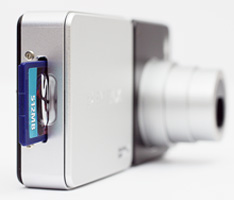
On the right side is the SD flash card slot. Although the camera does not come with a flash card, it has 14 MB of internal memory. However, we highly recommend picking up a 128 MB or larger SD card.
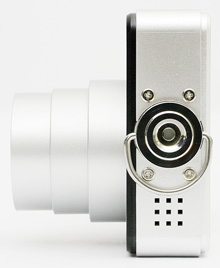
The left side of the camera features a metal tripod mount, a speaker, and an eyelet for the wrist strap. It is a bit annoying having to mount the camera vertically on a tripod. Unless you have a tripod that allows you to rotate the camera to its normal position, you will have to lean your head sideways to setup/review landscape-oriented shots.
Recording Features
In all recording modes, the Optio X records images as JPEG files with quality settings Good (*), Better (**), or Best (***). The resolution options are below:| Resolution (pixels) |
| 2560x1920 |
| 2304x1728 |
| 2048x1536 |
| 1600x1200 |
| 1024x768 |
| 640x480 |
 Default |
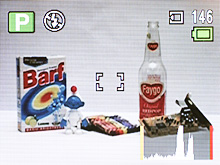 Live Histogram |
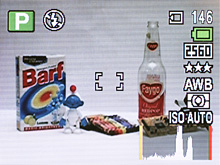 Histogram w/Details |
 No Info. |
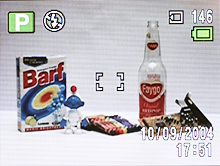
In any record mode, pressing the Display/OK button will cause the camera to cycle through 4 possible displays. The default display includes basic information such as record mode, flash mode, recording medium, number of images recorded, battery status, date/time, exposure compensation, shutter speed, aperture, and focus brackets. If the Display button is pressed, the date and time are removed to make room for a live histogram. In addition to the valuable information that the live histogram provides, the screen will blink in areas of the frame that are overexposed and underexposed. Another press of the Display button causes the following information to be added above the histogram: resolution, quality, white balance, metering mode, and ISO. Another press of the Display button will clear everything except the focus point, shutter speed, and aperture. A final press of the Display button will turn the LCD off.
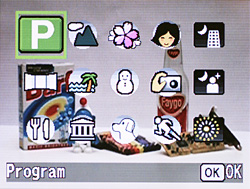
Mode selection screen
The Optio X offers a Program mode and 14 additional preset modes from which to choose for still image recording. To select a recording mode, you must first press up/down on the multi-controller to bring up the mode selection screen. The available modes are displayed in three rows with 5 options on each row. In all recording modes, an exposure compensation can be set to +/- 2 stops in 1/3 stop increments by pressing left/right on the multi-controller. In all still recording modes, the following screen is displayed when the Fn button is pressed:
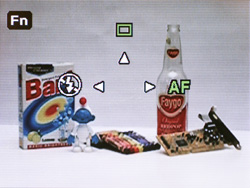
The options to adjust flash, drive, and focus modes are available. For flash mode, the options are Auto, Off, On, Auto w/Red-eye, and On w/Red-eye. The "On" options simply force the camera to use the flash even when there is adequate light for the exposure. This option is frequently used to fill in shadows when shooting outdoors. The Red-eye option causes the camera to fire a pre-flash to dilate the pupils of your subject(s). This helps to prevent red-eye from occurring. The drive mode can be selected from Standard, Self-timer (10 or 2 sec.), Continuous Shooting, Multiple Shooting, Auto Bracket, and Interval Shot. With Continuous Shooting, the camera will continue to take pictures as long as the shutter button is held down. The frame rate will depend on the quality and resolution setting. With Multiple Shooting, the camera takes 4 pictures in a row and saves the images into one JPEG file at 2048x1536. When Auto Bracket is selected, pressing OK will display the current Bracket setting. However, by pressing the OK button again, you can select the specific type of bracketing that you wish to perform. The following menu will be displayed:
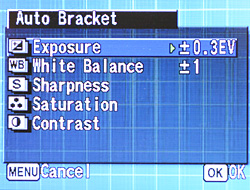
The options are Exposure (+/- 2 stops in 1/3 stop increments), White Balance (+/- 1-5), Sharpness, Contrast, or Saturation. With any option selected, the camera will record three images while varying the indicated setting. Below are the orders in which the settings are varied:
| Exposure | Normal, Underexposed, Overexposed |
| White Balance | Normal, Reddish, Bluish |
| Sharpness | Current, Soft, Hard |
| Contrast | Current, Low, High |
| Saturation | Current, Low, High |
The final drive mode is Interval Shot. You can specify an interval from 10 sec. to 4 minutes in one-second increments. You can also set the interval from 4 min. to 99 min. in one-minute increments. The number of frames can be set from 2 to 99. Finally, the start time can be set from 0 sec. to 23 hours, 59 minutes in one-minute increments. To begin shooting or to start the countdown, simply press the shutter button. The focus mode can be selected by pressing right on the multi-controller when the Fn screen is displayed. The options are Standard, Macro, Super Macro, Infinity, Manual Focus, and AF Area move. In Macro mode, the camera can focus on objects as close as 7.1", but in Super Macro mode, it can focus as close as 2.4". With Infinity selected, the camera will fix its focus to infinity for landscape shots. When Manual Focus is selected, a box appears in the center of the frame. To adjust the focus, you press up and down on the multi-controller until the image appears sharp. While focusing, the portion of the image inside the box will appear full screen (2x magnification) to aid in focusing. With AF Area move, you can use the multi-controller to select one of the 9 focus points that are arranged as a 3x3 grid across the frame.
In all still recording modes, the following screen is displayed when the multi-controller is pushed in:
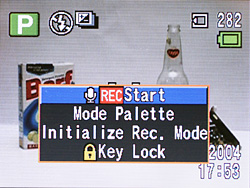
The first option allows you to record a voice memo. This option offers the same functionality as if the camera were in Voice Memo mode. The memos are recorded as WAV files (64 Kbps, 8 KHz) with the next incremental number as the filename. The Mode Palette option is simply another way of getting to the mode selection screen. The option "Initialize Rec.Mode" will reset all the options in the Record menu to their defaults. However, the options under the Setup and Play menus will remain as they are. "Key Lock" is like the Hold button on many consumer electronics. When the keys are locked, the only keys that will respond are the center multi-controller button, shutter button, and zoom controller.
The first mode is Program, which is recommended for general purpose shooting. In Program mode, the user has access to a large array of options. By pressing the Menu button, there are 3 pages of menus available to the user. Many of these options are also available in other shooting modes, but the range of options varies with each mode. Below, we have outlined the menu options in Program mode:
| Program Mode Menu 1/3 | |
| Recorded Pixels | 2560x1920, 2304x1728, 2048x1536, 1600x1200, 1024x768, 640x480 |
| Quality Level | Good, Better, Best |
| White Balance | Auto, Daylight, Shade, Tungsten, Fluorescent, Manual |
| AF Setting | Focusing Area (Multiple, Spot) Focus Limiter (On, Off) |
| AE Metering | Multi-segment, Center-weighted, Spot |
| Sensitivity | Auto, 80, 160, 320 |
 Multiple Focus (locked) |
 Spot Focus (locked) |
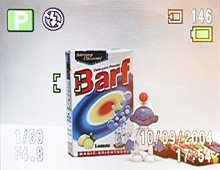
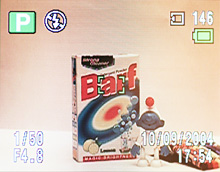
The Focusing Area can be selected from either Multiple or Spot. When Multiple is selected, the camera will select a point of focus automatically from one of nine available points. The 9 focus points are arranged as a 3x3 grid. The camera indicates a successful focus by displaying green brackets at the point of focus. If Spot focus is selected, the camera will always focus on the center focus point. When Focus Limiter is enabled, the lens will focus far for landscape shots and near for macro shots. By doing this, the camera is able to focus faster on the subjects. The Optio X offers three different metering options: Multi-segment, Center-weighted, and Spot. With Multi-segment selected, the camera will use light information from the entire frame to calculate the appropriate exposure. If Center-weighted is selected, the camera will measure the light mainly from the center of the frame. When Spot metering is selected, the camera will measure light from a small point at the very center of the frame.
| Program Mode Menu 2/3 | |
| Auto Bracket | Exposure (+/- 2 stops in 1/3 stop increments) White Balance (+/- 1-5) Sharpness Saturation Contrast |
| Interval Shoot | Interval (10 sec. - 99 min.) Number of Shot (2 - 99) Start Time (After 0 min. - 23 hours 59 min.) |
| Movie | Color Mode (Full Color, B&W, Sepia) Time-lapse Movie (Off, x2, x5, x10, x20, x50, x100) |
| Digital Zoom | On, Off |
| Instant Review | 0.5, 1, 2, 3, 4, 5 sec., Off |
| Memory | Flash, Drive, Focus, Zoom Position, MF Position, White Balance, AE Metering, Sensitivity, EV Compensation, Digital Zoom, Display, File # |
The color of movie clips can be selected from Full color, B&W, or Sepia. The Time-lapse Movie option allows you to select the desired delayed frame rate. For example, by selecting "x2", the camera will record only half the frames that it would at normal speed. The result is a video clip that appears to run at twice the normal speed. The Instant Review option allows you to specify how long the camera should display a picture immediately after it is taken. With the Memory options, you can specify which settings the camera should remember when it is powered off and back on again. By default, only the Flash setting and File # will be remembered.
| Program Mode Menu 3/3 | |
| Sharpness | Soft, Normal, Hard |
| Saturation | Low, Normal, High |
| Contrast | Low, Normal, High |
The other 14 still image modes are designed for use with specific environments or subjects. The camera will use specific settings to produce the best results based on the situation. The additional modes are Landscape, Flower, Portrait, Night Scene, Panorama Assist, Surf, Snow, Self-portrait, Night Scene Portrait, Food, Museum, Pet, Sport, and Fireworks. Each mode has a different amount of variable settings via the Menu button.
To switch to Movie mode, you must press the movie mode button on top of the camera. The Optio X records video clips as MOV files at 15 fps with a resolution of 320x240. The duration is only limited by the space remaining on the flash card/internal memory. The color of the movie clips can be selected from Full Color, B&W, or Sepia via the Menu button. While recording, the optical zoom cannot be used, but the digital zoom is available. The Optio X will allow you to take still pictures while you are recording a video clip. There are two ways to do this. You can either press the Still Image record button (top of camera) to switch back to your still image mode. The movie will continue recording and a time indicator will appear on the LCD monitor. The other option is to press in on the multi-controller and a menu will appear with two options: Take Still Image and Key Lock. By selecting "Take Still Image", the camera will record a JPEG file while continuing to record the movie clip. By pressing the Fn button, you can set a 2- or 10-second self-timer. By pressing left/right on the multi-controller, an exposure compensation can be set up to +/- 2 stops in 1/3 stop increments.
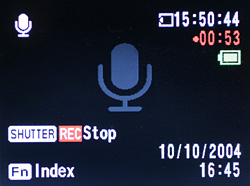
Voice Memo mode can be activated by pressing the Voice Memo button on the top of the camera. To begin recording a memo, simply press the shutter button. Memos are recorded as WAV files and are only limited by the remaining space on the flash card/internal memory. The LCD displays the current date, time, remaining recording time, and current recording time. The display can be disabled by pressing the Display button to save battery power. While recording a voice memo, you can switch over to a still recording mode to take a picture.
A setup menu is available via the Menu button in all recording modes. Below, we have outlined these options in two tables.
| Setup Menu 1/2 | |
| Format | Format, Cancel |
| Sound | Volume (5 increments) Start-up Sound (1-3, Off, User) Shutter Sound (1-3, Off, User) Operation Sound (1-3, Off, User) Self-timer Sound (On, Off, User) |
| Date Adjust | Date Style, Date, Time |
| World Time | Select |
| Language | Select |
| Folder Name | Standard, Date |
The Sound options let you choose a preset sound or select your own sound to be used for different camera operations. If you are selecting your own sound, you simply select which audio clip you want to use and the camera saves the first 2 seconds to its internal memory. The World Time option allows you to specify where you are in relation to your "Hometown". This helps you keep the right time if you are frequently taking pictures in different time zones. The folder naming system can be selected from either Standard or Date. An example of a Standard folder name is "101_PENTX" whereas a Date folder would appear as "101_0126".
| Setup Menu 2/2 | |
| Screen Setting | Change Start-up Screen (Select) Background color (1-6) Brightness Level (6 increments) |
| Video Out | NTSC, PAL |
| USB Connection | PC, PictBridge, PC Camera |
| Sleep Timeout | 2, 1 min., 30 sec., Off |
| Auto Power Off | 5, 3 min, Off |
| Reset | Reset, Cancel |
For the start-up screen, you can disable the default screen or specify a custom image. The USB Connection option allows you change the USB connection to either transfer files from the camera to a computer, connect the camera to a PictBridge compatible printer, or use the camera as a PC camera (webcam). The Sleep Timeout function determines when the camera should turn off the LCD after a period of inactivity in order to save battery power. The Auto Power Off option will power down the camera after a period of inactivity. Finally, the Reset option will reset the camera to its factory default settings.
The Optio X has a menu feature called "My Menu", which is located just after the Setup menu. If you press in on the multi-controller while highlighting any menu option, you are given the choice to add the item to "My Menu". If there is at least one item in the "My Menu" section, pressing the menu button will display "My Menu" automatically instead of a standard menu. By customizing items in the "My Menu" section, you can access frequently used items much faster than wading through the standard menus. You can even prioritize the items to the way you want them
Playback Features
To switch to Playback mode from one of the recording modes, simply press the Play button. To power on the camera in Play mode without extending the lens, you can hold down the Play button and hold any of the record mode buttons for about a second.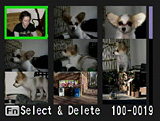 Image thumbnail view |
 Image regular view |
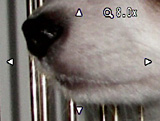 Image magnified 8x |
By default, the camera will display images one at a time as a full-screen display. To switch to a thumbnail display with 9 images, simply press the zoom controller toward wide angle. Conversely, an image can be magnified up to 8x by pressing the zoom controller toward the telephoto end. While an image is magnified, you can scroll to different portions of the image by using the multi-controller. To jump back to a normal display of the image at regular size, press the OK button.
 Default |
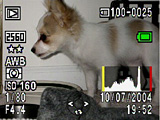 Detailed |
 No Info. |
By pressing the Display/OK button, the camera will cycle through three available displays. The default display includes basic information such as file number, battery status, date & time, and an icon at the bottom center of the screen that indicates the functionality of the multi-controller. The second display option has several additional pieces of information such as resolution, quality, white balance, metering, ISO, shutter speed, aperture, and a histogram.
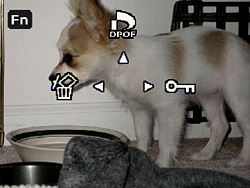
By pressing the Fn button during Playback, the above screen will be displayed. The options are Delete, DPOF, and Protect. To delete images, select the Delete option. The camera will present you with the following dialog: Delete, Cancel. In addition to simply deleting the current image, you can press the Fn button at this point to delete all media on the flash card/internal memory.
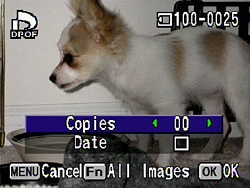
To tag images for printing with a DPOF (Digital Print Order Format) compatible printer, select DPOF from the main Fn menu. From here, you can specify the number of copies to print as well as whether or not to stamp the date on the picture. From this screen, you could also press Fn again to enter a DPOF settings screen for all images. The settings are the same as they are for single images. By selecting "Protect" from the main Fn menu, you can tag individual or all images so that they cannot be erased accidentally. Protected images, however, will still be erased if the flash card or internal memory is formatted.
By pressing in on the multi-controller, a menu will pop up with the options to record a voice memo, lock the keys, or start a slideshow. A voice memo can be recorded for as long as the remaining memory allows. To play back a voice memo, simply press up on the multi-controller. The volume can be adjusted by sliding the zoom controller up or down. While viewing an image, it can be rotated by pressing down on the multi-controller.
To view a movie clip, press up on the multi-controller to begin playing it. You can pause the clip at any time by pressing up on the multi-controller. The video clip can then be advanced forwards or backwards one frame at a time by pressing left or right. While the clip is playing, you can rewind the clip by holding left on the multi-controller.
By pressing the Menu button, there are several additional playback options available. In the tables below, we have outlined these options:
| Playback Menu 1/2 | |
| Slideshow | Interval (3, 5, 10, 20, 30 sec.) Effect (Wipe, Checker, Fade, Off) |
| Resize | 2560x1920, 2304x1728, 2048x1536, 1600x1200, 1024x768, 640x480, 320x240 |
| Trimming | Select |
| Copy image and sound | Internal to SD card, SD card to Internal, Select |
| Digital Filter | B&W, Sepia, Red, Pink, Purple, Blue, Green, Yellow, Brightness |
| Movie Edit | Save as Still Image, Divide Movies, Stitch Movies |
The Slideshow feature offers 5 different intervals and 3 different transition effects. To begin a slide show, you must press in on the multi-controller while viewing an item. Then, select Slideshow from the menu. With the Resize option, you can only select an image size that is smaller than the original image. After selecting the desired size, a dialog will ask if you want to overwrite the original file or save it as a new file.
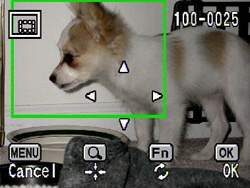
Trimming screen
When Trimming is selected, an editing screen will appear with a trimming area (displayed as a box). The size of the trimming area can be adjusted by sliding the zoom controller up or down. Additionally, you can move the trimming area using the multi-controller until you have the image framed as you want it inside the box. By pressing the Fn button, the trimming area can be rotated. After framing your image to the way you want it, press the OK button. Then, you can select an image quality setting for your new cropped image. The new image will be saved as a new file. The Digital Filter option allows you to apply a color filter or adjust the brightness of an image. You can choose to overwrite the original or to save the image as a new file.
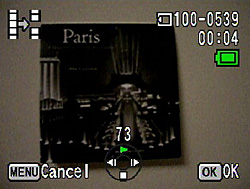
Divide movie screen
The Optio X offers the option to divide movie clips in two or to combine separate clips into one. In addition, you can save a specific frame from a movie clip as a still image. The frame will be saved as a new file with the same resolution as the video clip (320x240).
| Playback Menu 2/2 | |
| Quick Zoom | On, Off |
| Quick Delete | On, Off |
| Alarm | Alarm 1, 2, 3; Set Time, Select Image; Snooze (On, Off) |
With the Quick Zoom option enabled, pressing up once on the zoom controller will magnify an image 8x. With this option disabled by default, the magnification process involves several increments of magnification before reaching 8x. When Quick Delete is enabled, the "Delete" option will be highlighted by default when the delete menu appears. When this option is disabled, "Cancel" will be highlighted by default. The Alarm option lets you use the camera as an alarm that can display specific pictures at the specified times.
Battery Performance
Our general method for battery testing is to reset the camera to its default settings and change the recording mode to the highest quality option. Then, we take 5 pictures without the flash and 2 pictures with the flash until the battery is dead. For more information on our battery test, please refer to our Testing Procedures page. The battery was fully drained before charging for the test.| Number of shots taken in one battery charge | |
| Sony DSC-F88 | 1,480 |
| Casio QV-R51 | 1,431 |
| Nikon Coolpix 5200 | 965 |
| Pentax Optio X | 451 |
The Optio X uses a rechargeable D-LI8 Lithium Ion battery 3.7V 710mAh. In our battery test, the Optio X showed a sub-par performance compared to other compact 5 megapixel cameras that we've tested. At 451 shots in a single charge, you should expect the battery to last through a day of heavy use, but don't plan on leaving for the weekend without the charger. Extra batteries sell for $20 and up.
The Timing Tests
* NOTE: For all of our time tests, the camera is reset to its factory default settings and set to record using the highest resolution and quality setting. It is set to record in Auto mode. We also disabled all sounds. A PNY 512MB SD card was used.Before reading our results, please refer to our Testing Procedures page.
Startup Time
The startup time is recorded from the moment that the power button is pushed to the moment that the shutter sounds. The camera is set to record in Program mode. The startup sound used in our test is the factory default setting.| Startup time (seconds) | |
| Sony DSC-F88 | 1.73 |
| Casio QV-R51 | 2.58 |
| Nikon Coolpix 5200 | 3.34 |
| Pentax Optio X | 3.37 |
Although the Optio X has the slowest startup time in our comparison above, 3.37 sec. is a relatively decent time (with the startup sound disabled). The startup time is nearly half a second longer when the default startup sound is enabled (3.83 sec). We also recorded times with and without the startup screen, but it does not appear to cause a startup delay like the sound does.
Shutter Lag
To record shutter lag, we perform two tests with the lens at its widest angle setting. For the first test, we pre-focus the lens and measure the amount of time that it takes the camera to take a picture after the shutter button is pressed. The second test measures the time that it takes for the camera to take a picture after we press the shutter button without pre-focusing. Each test is performed 3 times and the results are averaged. For more information regarding our testing procedures, please refer to our Testing Procedures page.| With Pre-focus (seconds) |
Without Pre-focus (seconds) |
|
| Sony DSC-F88 | 0.08 | 0.41 |
| Nikon Coolpix 5200 | 0.08 | 0.82 |
| Pentax Optio X | 0.09 | 0.92 |
The Optio X puts in a relatively disappointing shutter lag performance compared to some of its competitors. When pre-focused, the shutter lag is a fairly normal 0.09 sec. However, when we included focusing time, the lag lengthened to a below-average 0.92 sec. We tested the camera with the setting "Focus Limiter" enabled and disabled, but we found no definable difference between the two times in our test.
Write Times
We recorded 4 different write times with a PNY 512 SD card. We were unable to record a single shot time for the Optio X because the camera does not have a precise activity light:Shot To Shot (STS) - The time until the second shot can be taken after the first (shutter to shutter).
Shot To Shot w/Flash - The time that it takes the camera to take two pictures with the flash, starting from the moment that the first flash is fired to the moment that the second is fired.
Shot To Shot w/Buffer Full - The time between taking the last shot that fills the buffer to the moment that the shutter sounds again.
Clear Buffer - The time that it takes the camera to clear the buffer after a full burst of pictures has been taken.
We performed each test three times and averaged the results. Below are the resolution, quality setting, and average file size used for the tests.
| Resolution (pixels) | Quality setting | Avg. file size (MB) | |
| Pentax Optio X | 2560x1920 | Best | 2.51 MB |
| Sony DSC-F88 | 2592x1944 | Fine | 2.10 MB |
| Nikon Coolpix 5200 | 2592x1944 | Fine | 1.69 MB |
| Casio QV-R51 | 2560x1920 | Fine | 0.90 MB |
| Shot To Shot | Shot to Shot w/Flash | Shot to Shot w/Buffer Full | Clear Buffer | |
| Pentax Optio X | 4.39 | 5.96 | N/A | N/A |
| Sony DSC-F88 | 1.46 | 6.92 | N/A | N/A |
| Nikon Coolpix 5200 | 2.17 | 3.02 | N/A | N/A |
| Casio QV-R51 | 4.24 | 8.51 | 2.51 | N/A |
The Optio X puts in a decent performance with respect to write times. Because of its low compression (larger-sized files), its shot-to-shot time is a somewhat slow 4.39 sec. Although this time is slow compared to other cameras in its class, it is important to note that the Optio X can shoot at this rate until the memory fills up - it never slows down. When the flash is enabled, the shot-to-shot time slows down by about 1.5 seconds to 5.96 sec. between shots. However, this is a bit better than the average time that we've seen in other camera's which we have reviewed. In continuous drive mode, the Optio X can shoot an unlimited number of frames (2560x1920/Best) at 0.34 fps (2.90 sec. between shots). The frame rate gets faster if the quality or resolution is decreased. While the Optio X isn't the fastest camera that we've reviewed, we certainly wouldn't call it slow. Also, we are impressed to see that it avoids any buffer slowdown at the highest quality setting.
Resolving Fine Lines
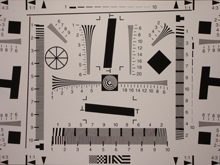
For our resolution test, we reset the camera to its default settings and then used the highest resolution and quality setting. The camera was then set to +0.7 E.V, manual WB, and ISO 80. For more information, refer to our Testing Procedures page. When reading this chart, the numbers represent lines per picture height (LPH). For example, the number 16 would represent 16,000 LPH.| Pentax Optio X | Sony DSC-F88 |
 +0.7 EV Click to download. |
 +1.0 EV Click to download. |
Roll your mouse over the crops below to see the difference between the Pentax Optio X and the Sony DSC-F88 resolution charts.
When it comes to resolution performance, the Pentax Optio X isn't the greatest performer in its class. In our reviews, we have discovered the average resolution for 5 megapixel cameras to be about 13,000 LPH. In the horizontal crop above, the Optio X is only able to resolve lines out until 1,200 LPH while the Sony DSC-F88 is capable of 1,300 LPH. The vertical crop is the same for the Optio X at 1,200 LPH while the F88 gains a bit of resolution, showing detail out to 1,350 LPH. In addition to capturing a somewhat unimpressive resolution with muddy/fuzzy details, the Optio X displays strong moiré throughout the test pattern, especially near its resolution limit. In short, the Optio X isn't going to blow anyone away with its resolution chart capabilities.
Color Reproduction
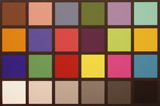
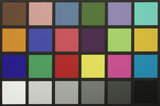
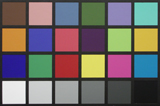
* For all of our color tests, we reset the Optio X to its factory default settings. It was then set to record using the highest image quality option. All images are sRGB.We took a picture of our color chart using each of the following WB settings: Auto, Tungsten, and Manual. Click on a thumbnail below to view a larger image.
Tungsten WB
| Auto WB | Tungsten WB | Manual WB |
 Click to enlarge. |
 Click to enlarge. |
 Click to enlarge. |
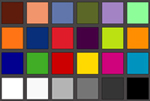 Reference Chart ("actual colors") |
||
| Auto WB | Tungsten WB | Manual WB |
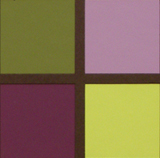 |
 |
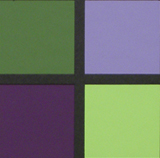 |
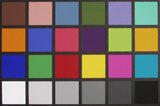
Under tungsten light, we weren't too surprised to see a bit of a yellowish cast with Auto WB. However, the strength of the color cast is a bit better than what we are used to seeing. With Tungsten WB, the yellowish color cast is nearly gone, but there is still just a hint of it visible. When we set the camera to Manual WB, the colors are very accurate.
Daylight WB
| Auto WB | Daylight WB | Manual WB |
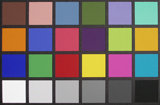 Click to enlarge. |
 Click to enlarge. |
 Click to enlarge. |
 Reference Chart ("actual colors") |
||
| Auto WB | Daylight WB | Manual WB |
 |
 |
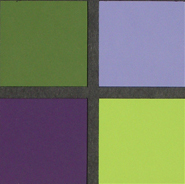 |
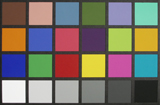
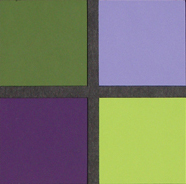
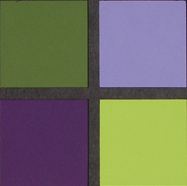
Under direct sunlight, the Optio X had no trouble producing bright and accurate colors. We were very impressed with all three white balance settings here.
Studio Shot
In this shot, we tested the camera's ability to reproduce colors in our studio shot using different WB settings under tungsten light.| Auto WB | Tungsten WB | Manual WB |
 Click to enlarge. |
 Click to enlarge. |
 Click to enlarge. |
Besides being underexposed, these samples of our studio shot show more clearly the yellowish color cast with Auto WB. With Tungsten WB, the colors become less affected by the color cast and with Manual WB, the colors are very accurate.
Built-in Flash
For the flash test, we set the camera to Program mode w/Auto flash. The picture was taken from 5 feet away.In our flash sample above, we detected a bit of a reddish cast over the image. Other than that, the skin tone looks fairly accurate and the exposure is good.
Noise
The noise test consists of pictures of our studio shot taken at increasing ISO levels to show the effect on the image. The pictures were taken after resetting the camera to its factory default settings. The camera is then set to record with the highest quality option with manual WB. Click on a 100% crop below to view the full-size image. All images are sRGB.| ISO 80 |  Click to enlarge. |
| ISO 160 |  Click to enlarge. |
| ISO 320 |  Click to enlarge. |
At ISO 80, the noise levels are fairly low and our sample image contains a decent amount of detail. When set to ISO 160, there is a substantial loss of clarity as the noise level increases. At ISO 320, images from the Optio X are still usable despite a noticeable decrease in image sharpness and the addition of soft noise. The effects of the increased noise levels are minimized by softening the image at the expense of clarity. If images are printed at 8"x10" or smaller, the noise at ISO 320 may not be a problem.
General Image Quality
For these pictures, the camera was reset to its factory default setting. Then, it was set to its highest quality recording setting. The pictures were then taken in Program mode unless stated otherwise. Portrait-style images have been rotated using Irfanview's "lossless operations". Click on a thumbnail to view the full-size image. All images are in sRGB color space.  Click to enlarge. |
 Click to enlarge. |
 |
 |
 Click to enlarge. |
 Click to enlarge. |
 |
 |
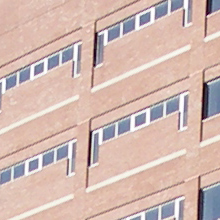
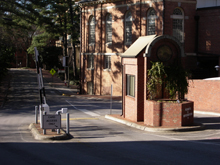
In the first two samples above, the Optio X proves capable of capturing an impressive amount of detail. However, these jaggies are visible along diagonals throughout several of the images that we took. We were a little surprised to see the level of detail that the Optio X can capture in these outdoor images. It certainly seems more capable than it did on our resolution chart. In the third image, we have cropped out a portion of the image that shows some shadow clipping. Also, just below where this crop was taken, there are some blown highlights. Given such a small sensor size and a high megapixel count, we aren't too shocked to see a smaller dynamic range in this camera. Finally, the last issue that we wanted to point out has to do with JPEG artifacts. Although they are not a huge problem with this camera, if you look closely in some of the pictures, you can see traces of it near edges. We were a little surprised to see JPEG artifacts at all considering we were shooting in "Best" mode and the file sizes are so large.
Overall, the Optio X performed better than what we expected in our outdoor samples. It produced well-exposed and nicely saturated images the majority of the time. In addition, we found that purple fringing did not pose a problem. Just like most ultra-compact cameras, don't expect much in terms of dynamic range from this camera. We also noted a bit of corner/edge blurring, but it did not appear to be too destructive to overall image quality. We were happy with the default level of saturation and contrast, but it is nice to know that you can adjust these to a level above and below the default. The major image quality issues that we found with the Optio X are the limited dynamic range and the visibility of jaggies.
Night Scene
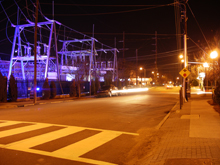 (f/2.6, 2.5 sec., ISO 80) Click to enlarge. |
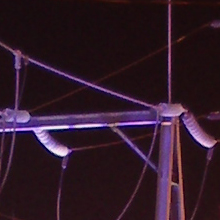 |
In Night Scene mode, the Optio X can take exposures up to 4 seconds long. In this 2.5 sec. exposure, we were very impressed with the results. Detail is high and noise levels are low. Other than the subtle jaggies and mild blurring at the upper-left corner, the image quality is good and the exposure is right on.
Movie Mode
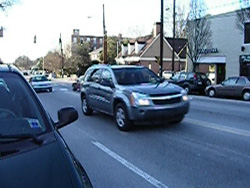 (320x240, 15 fps) Click to view. |
Movie clips with the Optio X are just so-so. At a resolution of 320x240 at 15 fps, Pentax is a bit behind the times for such a recent camera. On the bright side, the Optio X can record for an unlimited duration as long as there is free space. We should also point out that we noticed a bit of audio lag when shooting video clips.
Final Words
The Pentax Optio X is certainly an interesting camera. It has a stylish black and silver body that is twistable and packs in a great amount of features. The camera is capable of taking large 5 megapixel images and offers 15 recording modes from which to choose. It even has advanced functions such as manual white balance and several types of bracketing. In addition, it offers a movie and voice memo mode. Indeed, the camera proved to be a good performer in some of our tests. For example, when sounds are disabled, it starts up in a respectable 3.37 seconds and has decent write times as well. Under tungsten light, the Auto WB system performed a bit better than what we are used to seeing. Also, the colors were extremely accurate in our Auto WB daylight samples. The Optio X can expose night images for up to 4 seconds with good low-noise results. Unfortunately, that is about as far as the positive remarks go.From a resolution standpoint, the Optio X is below average compared to other ultra-compact 5 megapixel cameras that we have tested. Throughout several of our outdoor samples, we found jaggies even at the highest quality setting. In addition, occasionally we saw some notable blurring at the edges and/or corners of the frames. Given the small sensor size of this camera, we weren't expecting a large dynamic range. However, it is important to mention that we discovered clipped shadows and highlights in some of our samples. In our shutter lag test, the Optio X took nearly a full second (0.92 sec) to focus and take a picture, although the pre-focused lag time was average. In our battery test, the Optio X took significantly less pictures than comparable cameras that we have reviewed. With this camera, it will almost be a necessity to buy an extra battery for any kind of extensive photo outing. Finally, we were very unimpressed with the movie functionality of the Optio X. Offering a resolution of only 320x240 at 15 fps, we certainly expect more from a camera as new as this. To make things worse, there is an audio lag in the movie clips. In the end, this camera falls a bit short of being really good. For someone who doesn't plan on printing over 8"x10", the image quality issues might not be a problem. However, considering all the downfalls and a price tag of $300+, it might be a better idea to consider other cameras.
| Pros | Cons |
| - Fast startup time - Decent write times - Decent Auto WB in tungsten light - Even outdoor exposures with accurate colors - Night mode produces nice low noise images - Ultra-compact twistable metal body |
- Below average resolution - Mild jaggies - Slight blurring at edges/corners - Relatively slow shutter lag - Below average battery life - Audio lag in movie mode - Mediocre movie mode (320x240, 15fps) - No optical viewfinder |
Thanks again to Newegg.com for loaning us the Pentax Optio X for review.

