Original Link: https://www.anandtech.com/show/1591
AnandTech Guide to Better Photos: Portraits
by Stephen Caston on January 19, 2005 12:05 AM EST- Posted in
- Digital Camera
Index
Welcome to our second guide to taking better photos. In our first guide, we discussed some basics of composition to help you achieve more striking photos. This time, we are going to focus on how to improve portraits. Have you ever tried to take a picture of a friend or relative, only to see them turn away and say, "I'm not photogenic"? Perhaps one of the reasons people think of themselves this way is that they often see poor portraits of themselves. If only the photographer had the techniques to take better portraits, these people might have a different attitude towards themselves and their photos.There are many simple things that you can do to improve the overall quality of your portrait shots. For example, one of the most common problems in portrait photography has to do with the way a subject is lit. While we are not going to get into ultra-technical indoor lighting techniques, we will show you some very simple ways to produce great portraits with good lighting, both indoors and outdoors using very few tools.

A portrait should reveal the character of your subject. Obviously, this is easiest to accomplish when your subject is comfortable in front of the camera. If they are not immediately comfortable, it may take some time for them to warm up and show their true character. You will most likely find that after taking a few pictures, they will begin to open up and start to feel more uninhibited. Since portrait photography is all about capturing that special moment where a subject's character really shows, be sure to take a lot of pictures. To do this, it is clearly beneficial to have a relatively fast digital camera and a good size memory card. Now, let's move on to some portrait basics.
The Basics
First off, let's discuss some of the basic things that you'll need to know/have to take portrait pictures. To take effective portraits, you're going to want a camera with some kind of a zoom or telephoto lens. The reason for this has to do with perspective and DOF (depth of field). DOF refers to the area in front of and behind the subject that appears in focus. With shorter focal length lenses (wide angle), it can be more difficult to achieve a small DOF. In addition, a wider lens will exaggerate your subject's features (think of how things look with a fisheye lens). Conversely, with longer focal length lenses (telephoto), it is easier to achieve a small DOF and your subject will appear more natural. Another factor that is crucial to determining the DOF is the aperture setting of your camera. A larger aperture (small f number) will create a small DOF, while a small aperture (large f number) will result in a large DOF. If your camera has advanced shooting modes, the easiest way to ensure a large aperture is to use the aperture-priority mode. In aperture priority mode, you indicate the aperture that you wish to use and the camera will select the appropriate shutter speed automatically. Below is an example of the difference between a larger aperture and a smaller one. Hold your mouse over the original image taken at f/5.6 to see it at f/13.As you can see, the direct light from the built-in flash results in flat, unnatural lighting. In addition, an unsightly shadow is cast on the wall behind our subject. By using an accessory flash bounced off the ceiling, the effect is much more natural. It is rare to see someone in real life who is lit primarily from a light source directly in front of them. By bouncing the light off the ceiling, we were able to create a more believable effect, almost like light from a ceiling lamp or the sun. It also adds depth by creating subtle shadows on the face. Most accessory flashes can be adjusted to point in numerous directions - giving you endless possibilities for tough indoor shots. However, if your camera doesn't support optional flash units, don't give up hope yet. If you must shoot with your built-in flash, try to keep your subject a fair distance away from walls to avoid highly defined shadows behind them. Your camera may also have the ability to perform a slow-sync flash. A slow-sync flash allows you to illuminate the subject with the flash along with an extended shutter release in order to capture ambient light as well. The result is a more natural-looking picture. However, be aware that with slow-sync flash shots, your camera will be using a slower shutter speed. Therefore, it is almost essential to steady the camera with a tripod. Other than using your built-in flash, there are still options for indoor portraits with ambient light also known as "available light".
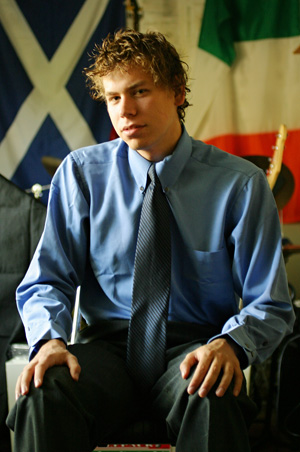
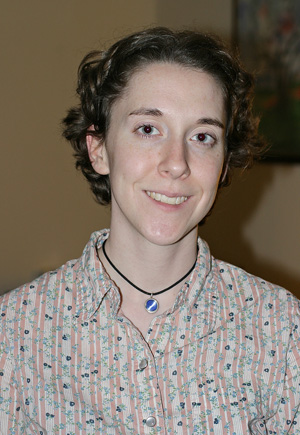
In the above pictures, the only source of light was a nearby window. By setting a large aperture and keeping our camera steady, we were able to capture relatively low-light portraits. Of course, to take available light portraits, it is very helpful if your camera has a large aperture. Otherwise, a tripod and a still subject will have to do. Obviously, the best place to find available light is outside. So, now we will focus on outdoor portraits.
Outdoor Portraits
In the daylight outside, there is usually more than enough light for versatile portrait photography. One of the greatest opportunities for portraits is an overcast day. The diffusion of daylight through the clouds creates a very pleasant soft light that looks great for portraits. If there are no clouds to shoot under, look for the shade of a tree instead. The effect is similar with the sunlight filtering through the leaves. Without shade from the sun, there will likely be strong shadows and bright highlights on your subject that will be difficult to expose properly. Strong shadows tend to exaggerate noses, wrinkles, etc. - all of which your subject will not appreciate.When arranging your shot, pay close attention to the direction of light. Have your subject face in different directions while you monitor the effect. Even with diffused overcast lighting, if the light is shining down from a position above your subject, there will be some soft shadows that may not be the most flattering for your subject. To remedy this, there are two popular options: reflectors and fill flash. A reflector is simply a white or colored surface that is used to bounce light upward into the subject's face to fill in shadows. The difference in the color of the reflector simply affects the color cast on the subject. For example, if you wanted to reflect a warmer light, you could use an orange reflector. Below is an example of how a reflector can be used.
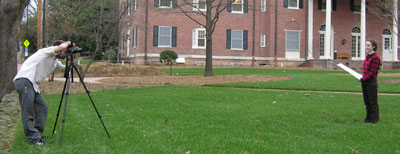
Subject at right holding reflector
In the image above, our subject held the reflector herself. If we were taking full body portraits, we would obviously need another method of holding the reflector. In the absence of assistance, a tripod and self-timer will allow you to hold the reflector for your subject. In the example below, we used a large white piece of cardboard to reflect light into shadow areas on the subject's face. You can pick up one of these inexpensive reflectors at any office supply store. However, high quality collapsible reflectors can be purchased from professional camera stores as well. Hold your mouse over the image below to see the difference.
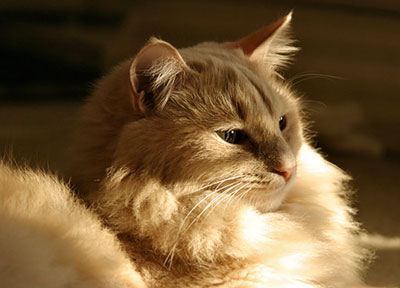
Look for interesting lighting when you are shooting outside. For example, when the sun is behind your subject, a "halo" effect can be achieved from the backlighting. In the example below, we took a picture of our subject with the sun behind her.

The effect is a warm highlight along the edges of the hair. In the picture above, we used a whiteboard to reflect light back to the subject's face to fill in some shadows. One of the problems that you will run into when shooting into the sun is that the camera will most likely underexpose the image. To avoid this, you should try setting your camera to spot metering. When set to spot metering, the camera will meter the light from a small point instead of the whole frame. Another option when working with backlighting is to apply an E.C. (exposure compensation). E.C. can be applied to force the camera to expose the image more or less than it normally would. When a camera is pointed at a bright scene, it will typically underexpose the subject. If this is the case, try applying a positive E.C. Check the results and adjust the E.C. until the picture looks well-exposed.
 |
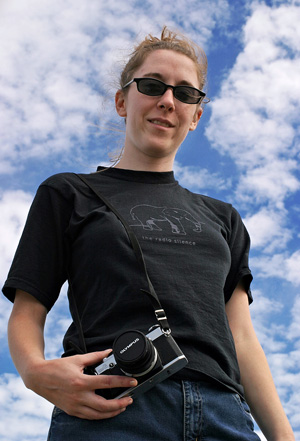 |

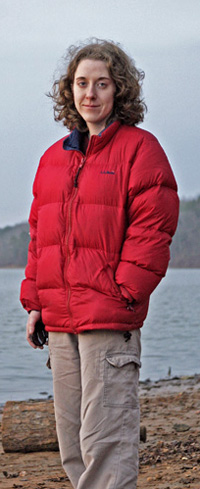
With these basic portrait ideas, you should have no problem producing great looking portraits with little effort. Remember to experiment with different shooting angles and subject positions. Pay attention to the quality of light. If it is too harsh or strong shadows appear, use a fill flash or reflector. For outdoor shooting, there is no excuse for not getting a reflector. They are inexpensive and will enhance your overall portrait quality. The more pictures you take, the more you will learn what works and what doesn't. In our next guide, we are going to explore the possibilities of night pictures. In the meantime, start taking more pictures of your friends and family. Pay attention to your technique and analyze the results. Before you know it, people will be begging you to take their picture!

