Original Link: https://www.anandtech.com/show/1579
Index
In this roundup, we have examined three popular 3 megapixel cameras: Fuji FinePix A330, Kodak EasyShare CX7330, and Olympus D-540. All three are entry-level cameras at the $150 price point with similar features. In our review of these cameras, we discovered that they are all capable of producing some good-looking pictures. However, there are some small differences that make the Fuji A330 stand out. For example, both the Kodak and Olympus cameras over-sharpen their images, causing jaggies to appear along fine lines. In the case of the Kodak CX7330, we also detected JPEG artifacts through its images. In terms of speed, the Fuji outperforms the Kodak and Olympus cameras from startup and shutter lag to shot-to-shot time. Read on for an in-depth look at these cameras and their performance abilities.
Kodak CX7330 provided by Newegg.com
Specifications
| Fuji FinePix A330 | Kodak EasyShare CX7330 | Olympus D-540 | |
| Release Date | February 2004 | May 2004 | February 2004 |
| Price | $149 | ~$145 | $158 |
| Pixel Count | 3.2 Million | 3.1 Million | 3.2 Million |
| Camera Type | Compact | Compact | Compact |
| Highest Resolution | 2016x1512 | 2032x1524 | 2048x1536 |
| Lower Resolutions | 1600x1200, 1280x960 | 2032x1354, 1656x1242, 1200x900 | 1600x1200, 640x480 |
| Sensor Type | CCD | CCD | CCD |
| Sensor Size | 1/2.7" | 1/2.7" | 1/2.7" |
| LCD Screen Size | 1.5" | 1.6" | 1.8" |
| Optical Zoom | 3x; 38 - 114mm equivalent | 3x; 37 - 111mm equivalent | 3x; 38 - 114mm equivalent |
| Focus Range | 24" - Infinity | 23.6" - Infinity | W: 19.2" - Infinity; T: 36" - Infinity |
| Macro | 3.9" - 31.2" | W: 5.1 - 27.6"; T: 8.7 - 27.6" | W: 7.9" - 19.7"; T: 19.7" - 35.4" |
| Digital Zoom | 1.3x, 1.6x | 1.0 - 3.3x | 3.3x |
| Lens Thread | No | No | No |
| Auto Focus | Yes | Yes | Yes |
| Auto Focus Type | TTL Contrast-type | TTL | TTL |
| Manual Focus | No | No | No |
| Aperture Range | W: f/2.8 - 4.8; T: 5.6 - 9.5 | W: f/2.7 - 5.2; T: f/4.6 - 8.7 | W: f/2.9 - ?; T: 5.0 - 7.0 |
| Shutter Speeds | 2 - 1/2000th sec. | 1/2 - 1/1400th sec. | 1 - 1/2000th sec. |
| ISO | Automatic | Automatic | Automatic |
| Flash | Built-in | Built-in | Built-in |
| Flash Range | W: 2 - 11.5', T: 2 - 9.8' | ISO 140 W: 2 - 11.8'; T: 2 - 6.9' |
W: 0.7 - 11'; T: 0.7 - 7' |
| Flash Compensation | None | None | None |
| Exposure Compensation | -2.1 EV - 1.5 EV in 1/3 increments | +/- 2 stops in 1/2 EV increments | +/- 2 stops in 1/2 EV increments |
| White Balance | Auto, Sun, Shade, Daylight Fluorescent, Warm White Fluorescent, Cool White Fluorescent, Incandescent | Auto | Auto, Sunlight, Overcast, Tungsten, Fluorescent |
| Bracketing | None | None | None |
| Metering | TTL 64 zones | Multi-pattern | Digital ESP |
| Color Space | sRGB | sRGB | sRGB |
| Aperture Priority | No | No | No |
| Shutter Speed Priority | No | No | No |
| Manual Exposure | No | No | No |
| Continuous Drive | No | Yes, 3 frames at 3.4 fps (2032x1524) | Yes, 12 frames at 1.5 fps (640x480) |
| Self-Timer | Yes, 10 sec. | Yes, 10 sec. | Yes, 10 sec. |
| Storage Method | xD-Picture Card | SD/MMC, Internal | xD-Picture Card |
| Storage Included | 16 MB xD-Picture Card | 16 MB Internal | 16 MB xD-Picture Card |
| Compressed Format | JPG | JPG | JPG |
| Uncompressed Format | None | None | None |
| Quality Settings | Fine/Normal (only at 3M setting) | None | SHQ/HQ (only for 2048x1536) |
| Video clips | 320x240/160x120, 10 fps, no sound, AVI, 60 sec. max at 320x240, 240 sec. max at 160x120 | 320x240, 15 fps, w/sound, QuickTime MOV, unlimited duration | 320x240/160x120, 15 fps, no sound, QuickTime MOV, unlimited |
| Battery Type | 2-AA Ni-MH/Alkaline, NH-10 | 2-AA Ni-MH/Alkaline, CRV3 | 2-AA Ni-MH/Alkaline, CRV3 |
| Charger Included | No | No | No |
| PC Interface | USB | USB | USB |
| TV-out | Yes | Yes | Yes |
| Tripod Mount | Yes, plastic | Yes, plastic | Yes, plastic |
| Weight (w/out battery or card) | 5.1 oz. | 6.2 oz. | 5.3 oz. |
| Dimensions | 104 x 62 x 31 mm | 103 x 65 x 38 mm | 102 x 56 x 37 mm |
| Included in the Box | ||
| Fuji FinePix A330 | Kodak EasyShare CX7330 | Olympus D-540 |
The Design: Fuji FinePix A330
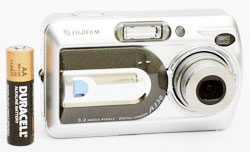
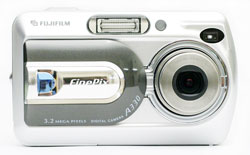
The front of the Fuji FinePix A330 features a 3x optical zoom lens that extends from the body on startup. Just above the lens are the self-timer lamp and viewfinder window. To the left of the self-timer lamp is the built-in flash with a working range of 2 - 11.5 feet in wide angle and 2 - 9.8 feet at telephoto. The sliding door on the front of the camera acts to protect the lens and to power the unit on and off.
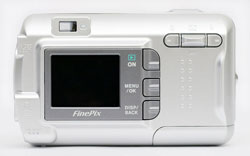
A 1.5" LCD monitor with 60K pixels can be found on the back of the camera. Just above this are the viewfinder and viewfinder indicator lamp. To the right of the LCD monitor are 3 buttons: On (Playback), Menu/OK, and Disp/Back. The On button can be used to toggle between Record and Playback modes and to power on the camera in Playback mode without extending the lens. At the upper-right corner are three buttons. The button on the left serves to move back an image in review mode and to toggle the macro option on and off. The middle button is the zoom controller and can be pushed forward/up to zoom in and back/down to zoom out. Finally, the right button allows you to move to the next picture in review mode and to toggle the flash mode.
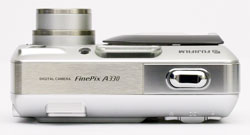
The top of the camera is very straightforward with just the shutter button at the right side.
 Click to enlarge. |
 Click to enlarge. |
On the bottom of the camera is a plastic tripod mount as well as a sliding hinged door that conceals the battery compartment and xD-Picture Card slot. The camera requires either 2-AA alkaline/NiMH batteries or an NH-10 rechargeable battery. Although the camera is packaged with alkalines, we recommend picking up some NiMH batteries for longer battery life.
The only thing on the right side is a post for the included wrist strap.
On the left side are 3 ports: video-out, USB, and a DC port for the optional 3V AC adapter.
The body of the A330 is constructed mainly of plastic except for a metal strip that runs along the sides and top of the camera. Overall, the camera is fairly light and well-balanced. Although it is not the smallest camera around, it is small enough to fit into one's pocket for on-the-go shooting.
Recording Features
In all recording modes, the A330 records images as JPEG files. Only the highest resolution setting has a quality option (Fine/Normal). The resolution options are below:| Resolution (pixels) |
| 2016x1512 |
| 1600x1200 |
| 1280x960 |
The A330 offers 6 still recording modes and a movie option. The still modes are Auto, Portrait, Scene, Sport, Night, and Manual. To select a recording mode, you must press the Menu/OK button and move over to the Shooting Mode menu. In all shooting modes, the camera sets the shutter speed and aperture values automatically. Auto mode is a general-purpose shooting mode that is recommended for most shots. In Portrait mode, the camera attempts to use a large aperture to create an image where the subject is in focus and the background is blurry. In Scene mode, the camera uses a small aperture to keep as much as possible in focus. With Sports mode, the camera will use the fastest possible shutter speed in order to freeze action. With Night mode, the camera uses slow shutter speeds to capture poorly-lit environments. If the flash is enabled, it will fire using a slow-sync method. Slow-sync means that the camera first fires a flash to illuminate the subject. Then, the shutter stays open to capture ambient light. The result is a well-balanced and natural-looking picture. A tripod is highly recommended due to the slow shutter speed.
There are several flash options available on the A330. Although the available flash modes are different for each shooting mode, they are all available in Manual mode. They are Auto, Red-eye, Force, Off, Slow-sync, and Red-eye slow-sync. If it is set to Auto, the camera will decide automatically if the flash is necessary to produce a well-lit exposure. The Red-eye setting fires a pre-flash right before the real flash to help reduce red-eye. The Force flash mode allows you to use the flash even if the camera doesn't deem it necessary. This can be very helpful in outdoor shots where a subject's face is covered in shadows or when there is a strong backlight behind your subject. The Macro option is only available in Auto and Manual mode. With Macro enabled, the camera can focus as close as 3.9 inches.
As this is a true point-and-shoot camera, the Manual recording mode does not have the same meaning that "Manual" would have on a more advanced camera. In fact, setting the camera to Manual simply offers two additional recording controls: exposure compensation and white balance. Exposure compensation is available from -2.1 EV to +1.5 EV in 1/3 stop increments. The white balance options are Auto, Sun, Shade, Daylight Fluorescent, Warm White Fluorescent, Cool White Fluorescent, and Incandescent. The A330 does not offer any metering options. Instead, it measures the light from 64 zones of the frame to determine the appropriate exposure. In all modes other than Movie, a 10-second self-timer is available via the main menu.
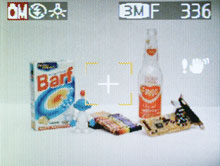 Typical record display |
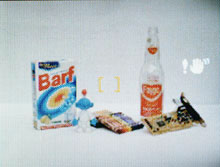 Locked focus |
In all still recording modes, the camera displays a box with an auto-focus crosshair in the middle. To focus on an object, you can half-press the shutter button. If focus is achieved, the camera will emit two short beeps. If focus fails, the camera will not beep and "!AF" will appear in red on the screen. Since the camera always focuses at the center point, you must use AF/AE lock to frame an off-center subject. To do this, simply half-press the shutter button with the center point over your subject. Then recompose the picture while continuing to half-press the button. When you have the image framed the way you want it, press the shutter button down fully.
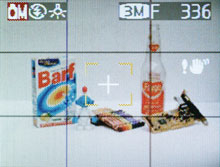 Grid |
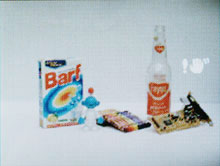 No information |
The Disp/Back button can be used to change the amount of information that is displayed on the LCD monitor. The default display shows the current shooting mode, resolution and quality setting, number of pictures remaining, camera shake warning icon (if there is not enough light for a sharp handheld picture), and AF box. When the Display button is pressed, a 3x3 grid is superimposed over the image to aid in composition. Another press of the Display button clears all information from the screen except the camera shake warning icon. Finally, a last press of the Display button turns off the LCD monitor.
The final recording option is Movie mode. The A330 is capable of recording silent video clips at either 320x240 or 160x120 at 10 fps as AVI files. When recording at 320x240, the clips are limited to 60 seconds. At 160x120, the maximum recording time is 240 seconds. During recording, the optical zoom is unavailable. However, the digital zoom can be used.
Playback Features
To review previously taken pictures, you can do one of two things. If the camera is off, you can hold down the Play button to start up the camera without extending the lens. If the camera is already on, holding down the Play button will switch the camera over to review mode. The lens will retract automatically after approximately 7 seconds.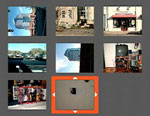 Thumbnail view |
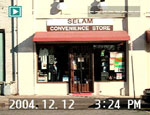 Image regular view |
 Image magnified |
To move to different images, you can use the buttons on either side of the zoom controller. By pressing forward on the zoom controller, you can magnify an image in 14 increments. To view a specific portion of the image, you must first press the left or right button to enter "panning" mode. After entering "panning" mode, you can use the zoom controller to move up and down and the left and right buttons to move across the image. To fit the image to screen again, simply press the Disp/Back button twice. While viewing a single image, the default information on the screen indicates the file number, date, and time. By pressing the Display button, all information will be removed from the image. Another press of the Display button changes the screen to a 3x3 thumbnail display. This enables you to see 9 images at a time and you can select an image by moving the highlighted box up/down or left/right.
To erase an image, you must press the Menu button. Then, you can choose to erase the current image or all images. Another option in the menu is DPOF (Digital Print Order Format). With this option, you can tag specific images for printing with a DPOF-compatible printer. You can also choose to stamp the images with the date on which they were taken. Also, in the menu is a Protect option, which allows you to mark images as "protected". This simply keeps them from being deleted if you select "All Frames" from the Erase menu. There is a slideshow option in the menu that offers two types of transitions and two intervals from which to choose. Finally, there is a "Trimming" option that allows you to specify a portion of an image that you would like to crop. The process is achieved exactly the same as if you were magnifying an image. When you have the image framed and magnified to your desire, simply press the OK button to save the cropped image as a new file.
In the main menu, there is a Set-up option with several settings for adjusting operational functions of the camera. Below is a table with the available options:
| Set-up Menu | |
| Image Display | On, Off |
| Power Save | 2, 5 min. |
| Format | OK, Cancel |
| Beep | Off, Low, High |
| Date/Time | Set |
| Time Difference | Home/Local, Set |
| LCD | On, Off |
| Frame NO. | Cont., Renew |
| USB Mode | Printer, PC, Web |
| Language | Select |
| Video System | NTSC, PAL |
| Discharge | OK, Cancel |
| Reset | OK, Cancel |
The Image Display option refers to whether or not the camera will show a review of an image immediately after it is taken. With the Power Save option, you can select how long you would like the camera to wait before shutting down automatically. The Beep options change the behavior of the operational beep sound. Low and high refer to the pitch, not the volume. The A330 allows you to specify both a home and local time. This would be handy if you are frequently traveling between time zones. The USB mode options allow you to specify the hardware to which the camera is connected. As you can see, the camera can also be used as a webcam. Selecting OK to the Discharge option tells the camera to drain the batteries of their charge. In order to help maintain the maximum charge capacity, the manual recommends using the Discharge option when using new Ni-MH batteries or when your batteries do not seem to be holding the same charge that they once did. Something known as the "Memory Effect" can occur with rechargeable batteries. This causes the batteries to hold a lesser charge than they are capable of. The Reset option allows you to reset the camera to its factory default settings.
The Design: Kodak EasyShare CX7330
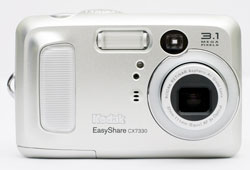
The front of the CX7330 features the 3x optical zoom lens with built-in lens cover. To the lower left of the lens is the microphone and just above this are the light sensor and self-timer/video lamp. Near the top, we can see the built-in flash. Just to the right of the flash is the viewfinder window. On the left side of the front is an angled plastic hand grip.
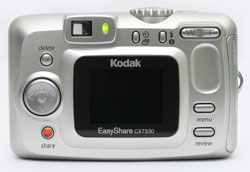
The back of the camera features a 1.6" LCD monitor with 72,000 pixels. To the left is a multi-directional controller. The OK button in the center is activated by depressing the entire controller. On opposite sides of the controller are the Delete and Share buttons. Above the LCD monitor are the viewfinder and "ready" light. To the right of these are the Self-timer/Burst and Flash/Status buttons. In the upper-right corner is the zoom controller, which controls both the optical zoom in record mode and the magnification of images in playback mode. Just below the zoom controller is a small indention for resting your thumb. Below this are the Menu and Review buttons.
On the top of the camera is the Mode Dial, which also serves as the main power switch. To the right is the shutter button.
 Click to enlarge. |
 Click to enlarge. |
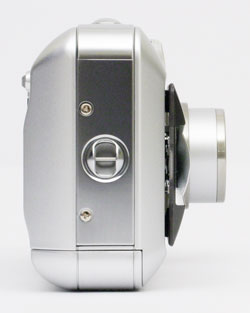
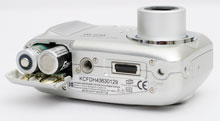
The bottom of the camera has a connector for the optional EasyShare camera/printer dock. To the right of this is the tripod mount. On the far right side is a swinging hinged door that covers the battery compartment. The camera requires either two AA batteries or a CRV3 battery. Although the CX7330 comes with alkaline batteries, we highly recommend using Ni-MH rechargeables.
 Click to enlarge. |
 Click to enlarge. |
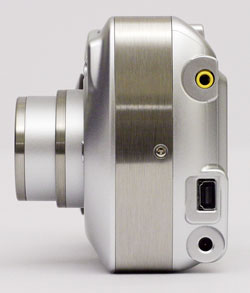
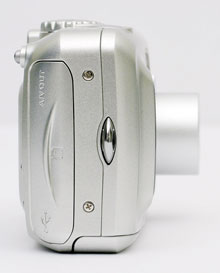
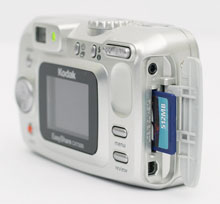
On the right side is a sliding hinged door that conceals the SD/MMC flash card slot, the USB port, and the A/V-out port. It is important to note that the A/V cable must be bought separately, since it is not included in the box. Although the camera comes with 16 MB of internal memory, you will most likely want more storage space. We recommend at least a 128 MB SD card to get started. There is also a post for the wrist strap on this side.
The only thing on the left side is a DC-in port for the optional 3V AC adaptor.
Recording Features
In all recording modes, the CX7330 records images as JPEG files. The resolution options are below:| Setting | Resolution (pixels) |
| Best *** | 2032x1524 |
| Best (3:2) *** | 2032x1354 (3:2) |
| Better ** | 1656x1242 |
| Good * | 1200x900 |
All resolution options are in a 4:3 aspect ratio, except for the second setting. The aspect ratio of 4:3 is the same as a standard TV screen, whereas 3:2 is the same as a 4"x6" print. The CX7330 offers 6 available recording modes: Auto, Sport, Night, Landscape, Close-up, and Video. Ironically, although Auto mode is a general purpose shooting mode, it actually offers the largest amount of control because most of the other modes are presets for specific situations. Like all the shooting modes, in Auto mode, the camera will determine automatically the appropriate aperture and shutter speed to produce a good exposure. Sport mode enables the fastest possible shutter speed to capture fast-moving subjects. In Night mode, the CX7330 can take images with shutter speeds as slow as 0.5 seconds. When the flash is enabled, the camera will perform a slow-sync flash. This means that it will first fire a flash to illuminate the subject. Then, the shutter will stay open longer to allow ambient light to fill in the background details. This slow-sync method provides natural-looking flash pictures. A tripod is highly recommended due to the longer exposure time. Landscape mode uses a small aperture opening in order to keep both the foreground and background in focus. In Close-up mode, the camera can focus on objects as close as 5.1 inches at wide angle and 8.7 inches at telephoto.
In all still recording modes, there are several flash options available: Auto, Flash Off, Fill Flash, and Red-eye. With Auto flash selected, the camera will determine automatically whether or not to fire the flash when the picture is taken. Fill Flash is known as "Force Flash" on some cameras and can be used to fill in shadows on subjects that may be caused by harsh lighting. The Red-eye option fires a pre-flash to contract the subject's pupils before taking the picture with the real flash.
 Normal display |
 Focus locked |
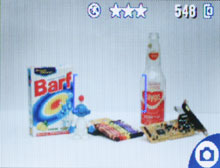
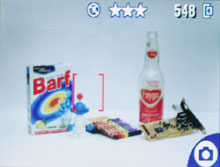
The CX7330 displays brackets to indicate the status of a focus attempt. The camera can focus on one or more points at a time. If focusing is successful, the brackets will appear red. If focusing fails, the brackets will disappear and the Ready lamp will blink red. By pressing the Self-timer/Burst button, you can set the camera to take multiple pictures in a row or to take a self-timer shot. After selecting the burst option, simply half-press the shutter button to lock the focus and exposure. By pressing down the shutter button and holding it, the camera can take up to 3 pictures in succession at full resolution. Since this camera is a true "point and shoot", there are no options to adjust the white balance or metering. The camera uses automatic white balance and multi-pattern metering at all times. Multi-pattern metering works by measuring the light from areas all over the frame. Then, the camera makes a calculation to determine what the best settings should be to produce a proper exposure.
By pressing the Menu button, there are a number of shooting options that can be adjusted. Below, we have outlined these options in a table:
| Menu | |
| Image Storage | Auto, Internal Memory |
| Exposure Compensation | +/- 2 stops in 1/2 stop increments |
| Picture Quality | Best ***, Best *** (3:2), Better **, Good * |
| Color Mode | Color, Black & White, Sepia |
| Set Album (Still) | Exit, Birthday, Holiday, Wedding |
| Date Stamp | Off, YYYY/MM/DD, MM/DD/YYYY, DD/MM/YYYY |
| Orientation Sensor | On, Off. |
| Setup Menu | Enter |
The Image Storage setting allows you to select where you would like images to be saved. If "Auto" is selected, the camera will save images to a media card if one is detected. Otherwise, it will save images to the internal memory instead. With the "Set Album" option, you can tag images so that they can be easily found with the bundled software. For example, if you choose one of the options, all the images you shoot will be grouped together when you view them later. The "Orientation Sensor" option can be enabled so that the camera will rotate portrait style images automatically for you. This saves some time later when you are viewing/editing. The Setup menu offers some additional options pertaining to operational settings.
| Setup Menu | |
| Return | Enter |
| Default Print Quantity | 1 - 100 |
| Quickview | On, Off |
| Liveview | On, Off |
| Advanced Digital Zoom | Continuous, Pause, None |
| Date & Time | Set |
| Video Out | NTSC, PAL |
| Language | Select |
| Format | Memory Card, Internal Memory, Cancel |
| About | OK |
The "Default Print Quantity" option simply sets the default number of pictures for printing. If "Quickview" is enabled, the camera will briefly display an image immediately after it is taken. "Liveview" refers to the LCD preview capability. If this is set to "Off", the LCD monitor will be disabled by default. However, it can be enabled again by simply pressing the center of the directional controller. The settings under the option "Advanced Digital Zoom" refer to the behavior of the digital zoom. If "Continuous" is selected, the digital zoom will begin automatically as soon as the optical zoom reaches its limit. If "Pause" is selected, the digital zoom will not begin until the zoom controller is released and pressed again.
As you might expect from an entry-level, point-and-shoot camera, the movie functionality of the CX7330 is fairly average. It offers 15 fps video at 320x240 with sound. The files are recorded as Quicktime (MOV) files and are only limited by the remaining available recording space. While recording, both the optical and digital zoom are disabled. Just like in a still recording mode, the option "Set Album (Video)" is available via the Menu button. This allows you to tag video clips for easier organization later.
Playback Features
To review previously taken pictures, simply press the Review button. By default, images are displayed one at a time, but you can view them as thumbnails by pressing the down arrow button. To move to different pictures, you must press the left/right arrow buttons. To delete an image or video, press the Delete button. A confirmation screen will appear with the following options: Picture/Video, Exit, or All. Thumbnail view |
 Image regular view |
 Image magnified 4x |
By pressing the OK button, you can magnify images up to 4x. Each press of the OK button has the following effect: 2x, 4x, original state. By pressing the Menu button, there are some additional options available:
| Playback Menu | |
| Magnify | Magnify/Play Video |
| Share | Cancel Prints, Print All, Print, E-mail, Favorite |
| Protect | On, Off |
| Image Storage | Auto, Internal Memory |
| Album | Select |
| Slide Show | Begin Show, Interval (5 - 60 sec.), Loop (On, Off), Exit |
| Copy | Picture, All, Exit |
| Video Date Display | Select |
| Multi-Up | OK |
| Picture Info | OK |
| Setup Menu | Enter |

Picture Info
The "Magnify/Play Video" option can also be accomplished by simply pressing the center of the multi-directional controller. By selecting the "Share" option, the camera displays a list of ways that you can tag images. You can tag pictures as favorites, to print, or to email. This information is used later when viewing the pictures with the included software. The "Slide Show" option will cycle through your images with an interval of 5 - 60 seconds. You also have the option of looping the show. The Copy function enables you to copy images from a memory card to the internal memory or vice versa. The "Video Date Display" simply changes the way that the date appears with video clips. "Multi-up" shows images as thumbnails. The same thing can be accomplished by pressing the down arrow button while viewing a picture/video. The "Picture Info" option displays a screen with the following information: filename, directory, date, time, and picture quality. The "Setup Menu" option brings up the same menu as in record mode.
The Design: Olympus D-540
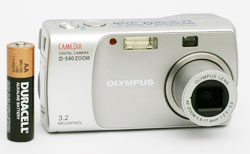
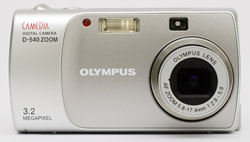
The front of the Olympus D-540 features a 3x optical zoom lens. Directly above the lens is the viewfinder window. To the left of this are the built-in flash and the self-timer lamp. The flash has a working range of 0.7 - 11 feet in wide angle and 0.7 - 7 feet at telephoto.
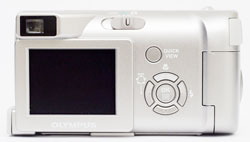
The back of the D-540 features a 1.8" LCD monitor with 85K pixels. Right above the LCD monitor is the viewfinder, which protrudes a bit from the body. To the right of this is the main power switch. The positions are Off, Play, and Record. To the right of the LCD monitor is the "Quick View" button. This button can be used to view previously taken pictures without sliding the power switch to Play mode. Below the Quick View button are 4 directional buttons and a separate OK/Menu button in the middle. The directional buttons serve to navigate menus as well as perform one additional purpose. For example, the up button toggles the macro mode, the right button toggles the flash mode, and the down button toggles the self-timer. The left button opens the main shooting menu where you select the desired shooting mode.
The top of the camera is fairly simple. On the right side are the shutter button and the zoom controller. The zoom controller has an odd, round shape.
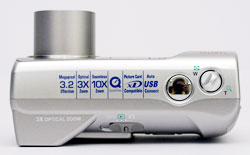
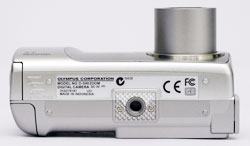
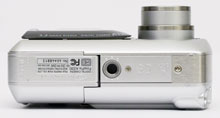
The bottom of the D-540 simply features a plastic tripod mount.
 Click to enlarge. |
 Click to enlarge. |
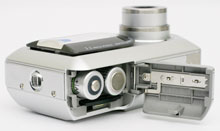
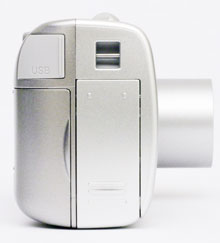
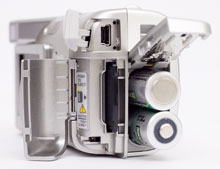
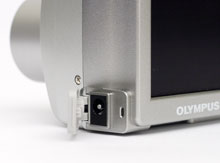
On the right side is a spring-action hinged door that reveals the battery compartment. The D-540 takes 2 AA alkaline/Ni-MH batteries or a CR-V3. Although the kit comes packaged with alkalines, we highly recommend picking up some Ni-MH rechargeables for longer battery life. Just to the left of the battery compartment is the compartment that stores the xD-Picture Card. The slot is protected by a swinging door that snaps shut. Above the flash card slot is a rubber tab that fits in place to cover the USB port. Just to the right of this is a post for the included wrist strap.
 Click to enlarge. |
 Click to enlarge. |
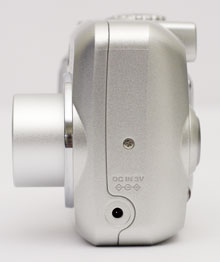
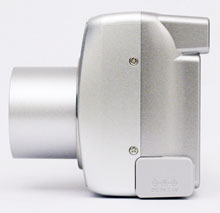
The only thing on the left side is a rubber tab that covers the 3.4V DC port for the optional AC adapter.
Recording Features
In all recording modes, the D-540 records images as JPEG files. Only the highest resolution setting has a quality option (SHQ/HQ). The resolution options are below:| Setting | Resolution (pixels) |
| SHQ/HQ | 2048x1536 |
| SQ1 | 1600x1200 |
| SQ2 | 640x480 |
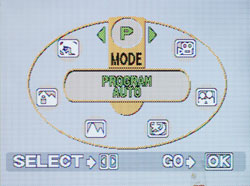
Virtual Dial
To select a recording mode, you must press the left arrow button. The camera then presents a "Virtual Dial" that displays all the possible recording modes. The available recording modes are: Program Auto, Portrait, Landscape + Portrait, Landscape, Night Scene, Self Portrait, and Movie. To cycle through the options, you must press the left/right arrow buttons to rotate the dial clockwise/counterclockwise. After positioning the desired mode at the top, simply press the OK/Menu button to select it. Program Auto is considered a general purpose shooting mode and is recommended for casual shooting. In Portrait mode, the camera uses a large aperture to keep the subject in focus while blurring the background. In "Landscape + Portrait" mode, the camera attempts to focus on both the subject and the background. With Landscape mode, the camera uses a small aperture to keep the foreground and background in focus. With Night Scene mode, the camera uses a slow shutter speed to capture scenes lit by low levels of light. If the flash is enabled, the camera will first fire a flash to illuminate the subject. Then, the shutter will stay open to gather ambient light. The result is a natural, well-balanced night picture with both foreground and background detail. With Self-portrait mode selected, the camera fixes the zoom at wide angle, allowing you to take a picture of yourself.
In most of the still recording modes, there are several options available to the user. For example, the flash mode can be selected by pressing the right arrow button. The options are Auto, Red-eye, Fill-in, and Off. Fill-in flash mode forces the camera to use the flash even if there is enough light without it. This can be useful, for example, in an outdoor shot where a subject's face is covered in shadows. Additionally, macro mode can be enabled by pressing the up arrow button. With the standard macro mode, the camera can focus as close as 7.9" from the subject. However, there is also a "Super Macro" mode available in the "Camera Menu" discussed below.
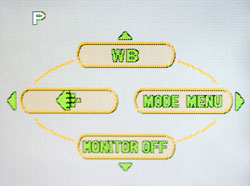
Main Menu
By pressing the OK/Menu button, four main sub-options will appear: Quality, White balance, Mode Menu, and Monitor Off. The Quality option simply displays a screen where you can select the recording resolution and quality option desired. Selecting the white balance option brings up a screen with the following options: Auto, Sunlight, Overcast, Tungsten, and Fluorescent. Selecting the Mode Menu option brings up three additional menus: Camera, Card, and Setup. The options are detailed below:
| Camera Menu | |
| Exposure Compensation | +/- 2 stops in 1/2 stop increments |
| Digital Zoom | Off, On |
| Super Macro | Off, On |
| Drive | Single, Continuous |
| Panorama | Select |
The Super Macro option fixes the lens at wide angle and enables the camera to focus as close as 0.8" from the subject. If the drive mode is changed to continuous, the quality setting is changed automatically to SQ2 (640x480). The camera is then able to shoot approximately 12 frames at 1.5 fps. The Panorama option is only available with an Olympus xD-Picture Card. The camera helps you to take pictures, which can be stitched into a panorama with the bundled software. The Card menu only has one option called "Card Setup". Selecting this option allows you to format the flash card.
| Setup Menu | |
| All Reset | Off, On |
| Digital Zoom | Select |
| Rec View | Off, On |
| File Name | Reset, Auto |
| Pixel Mapping | Start |
The option, All Reset, refers to whether or not the camera will remember the current settings the next time that it is powered on. With "Rec View" enabled, the camera will briefly display a picture immediately after it is taken. Selecting "Reset" from the File Name option causes the camera to reset its file naming sequence. Pixel Mapping is designed to fix "hot" or "stuck" pixels, which can appear as brightly colored pixels in the image. In the user's guide, Olympus recommends performing Pixel Mapping once a year.
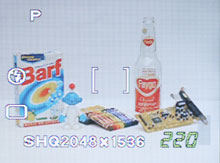 Typical record display |
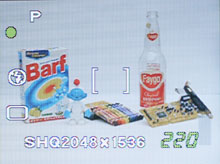 Locked focus |
In any still recording mode, the D-540 will display two brackets that indicate the focus point. To lock focus on an object, you simply position the brackets over your subject and half-press the shutter button. If focus is successful, a steady green dot will appear at the upper-left corner of the LCD monitor. If focus fails, the green dot will blink. To focus on an off-center subject, simply half-press the shutter button while the center brackets are over your subject. Then recompose the shot and press the shutter button down fully.
Movie mode on the D-540 is capable of recording at either 320x240 or 160x120 at 15 fps. The video clips are recorded as QuickTime MOV files with no sound and the duration of the clips is only limited by the remaining available flash card space. For being a point-and-shoot camera, the D-540 offers some advanced options for its video capability. For example, the optical and digital zoom can be used while recording. In addition, exposure compensation and white balance can be adjusted prior to recording.
Playback Features
To view previously taken pictures and videos, you can either press the Quick View button or slide the main power switch to Play. Moving to different files can be accomplished by pressing the left and right arrow buttons. You can also jump ahead 10 pictures by pressing the down button or back 10 pictures by pressing the up arrow.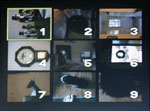 Thumbnail view |
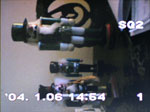 Image regular view |
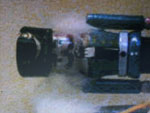 Image magnified 4x |
By pressing the zoom controller toward the wide end, you can view a thumbnail screen with 9 images. Conversely, by pressing the zoom controller in the telephoto direction, you can magnify an image up to 4x in 0.5x increments. While an image is magnified, you can move around to different areas of the image by using the directional buttons.
By default, the LCD monitor displays the recording quality and number of each picture. However, to view additional information for an image, you can press the OK/Menu button and select "Info". By doing this, the following information will be added to the display: resolution, exposure compensation, white balance, and file number. Despite which level of information you choose to have displayed, the information will disappear approximately 3 seconds after viewing a picture.
Other than the information option, there are 3 additional options available: Slideshow, Mode Menu, and Erase. The slideshow feature does not have any adjustable values. Instead, the pictures are displayed for approximately 3 seconds before moving to the next image. The Mode Menu contains a few more submenus with options related to playback: Play, Edit, Card, Setup. We have outlined the options below:
| Play | |
| Protect | Off, On |
| Rotate | +90°, 0°, 90° |
| Print Order | Select, All |
The Protect option allows you to tag specific images so that they cannot be erased accidentally. With the Print Order option, you can specify images for printing as well as the number of copies desired. You can also specify whether or not to stamp the time or date on the printed images. The Edit submenu only has one option: resize. You can resize an image to either 640x480 or 320x240. The resized image is saved as a new file. The Card menu only has the option to format the flash card. The Setup menu has the "All Reset" and "Language" options that we already discussed in the Recording Features section. Below are the 3 additional options:
| Setup | |
| LCD Brightness | 15 increments |
| Date/Time | Set |
| Thumbnail | 4, 9, 16 |
The Thumbnail option allows you to specify how many images are to appear on the thumbnail screen during playback.
Battery Performance
Our general method for battery testing is to reset each camera to its default settings and to change the recording mode to the highest quality option. Then, we take 5 pictures without the flash and 2 pictures with the flash until the battery is dead. For more information on our battery test, please refer to our Testing Procedures page. For this test, we used 2-AA NiMH Power2000 2500mAh batteries charged overnight in a Power2000 wall charger. The batteries were fully drained before charging for the test.| Number of shots taken in one battery charge | |
| Fuji FinePix A330 | 1,781 |
| Kodak CX7330 | 886 |
| Olympus D-540 | 781 |
In our battery test, the Fuji A330 showed the best performance by taking 1,781 images on a single battery charge. Both the Kodak CX7330 and Olympus D-540 showed fairly decent performances at 886 and 781 pictures respectively. Since all three of these cameras use AA, you have the benefit of picking up some cheap backup batteries. This means that you shouldn't have to worry about down time with any of these cameras as long as you have two fresh batteries ready to go while you are shooting. However, at 1,781 pictures, the Fuji FinePix A330 is the clear winner here.
The Timing Tests
* NOTE: For all of our time tests, the cameras are reset to their factory default settings and set to record using the highest resolution and quality setting. They are set to record in Auto mode. For the Fuji and Olympus cameras, we used a FujiFilm 512 xD-Picture Card. For the Kodak camera, we used a PNY 512 MB SD card.Before reading our results, please refer to our Testing Procedures page.
Startup Time
The startup time is recorded from the moment that the power button is pushed to the moment that the shutter sounds. All cameras were set to record in Auto mode.| Startup time (seconds) | |
| Fuji FinePix A330 | 3.27 |
| Kodak CX7330 | 6.09 |
| Olympus D-540 | 7.17 |
Fuji is clearly the winner here with a fairly impressive startup time of 3.27 seconds. Kodak had a rather slow startup time at 6.09 sec., but Olympus has the worst performance at 7.17 seconds.
Shutter Lag
To record shutter lag, we perform two tests. For the first test, we pre-focus the lens and measure the amount of time that it takes the camera to take a picture after the shutter button is pressed. The second test measures the time that it takes for the camera to take a picture after we press the shutter button without pre-focusing. Each test is performed 3 times and the results are averaged. For more information regarding our testing procedures, please refer to our Testing Procedures page.| With Pre-focus (seconds) | Without Pre-focus (seconds) | |
| Fuji FinePix A330 | 0.19 | 0.59 |
| Kodak CX7330 | 0.20 | 0.79/1.29 |
| Olympus D-540 | 0.19 | 1.50 |
When we pre-focused the cameras, we found that they all had a relatively fast shutter lag of either 0.19 or 0.20 sec. However, when we included auto-focus time in our test, the Fuji A330 is the clear winner with a fast time of 0.59 sec. The Kodak CX7330 showed a decent time of 0.79 sec. on the first shot taken. Unfortunately, as soon as there is even one picture in the buffer, the lag increases to 1.29 sec. Finally, we were astounded by the painfully slow 1.50 sec. shutter lag of the Olympus D-540 when auto-focus was included.
Write Times
Single Shot - The time that it takes for a single picture to be completely written to the flash card (the time that the "activity light" is on).Shot To Shot (STS) - The time until the second shot is able to be taken after the first (shutter to shutter).
Shot To Shot w/Flash - The time that it takes for the camera to take two pictures with the flash, starting from the moment that the first flash is fired to the moment that the second is fired.
Shot To Shot w/Buffer Full - The time between taking the last shot of a burst to the moment that the shutter sounds again.
Clear Buffer - The time it takes the camera to clear the buffer after a full burst of pictures is taken.
We performed each test three times and averaged the results. Below are the resolution, quality setting, and average file size used for the tests.
| Resolution (pixels) | Quality setting | Avg. file size (MB) | |
| Fuji FinePix A330 | 2016x1512 | Fine | 1.47 |
| Kodak CX7330 | 2032x1524 | Best | 1.19 |
| Olympus D-540 | 2048x1536 | SHQ | 1.71 |
| Single Shot | Shot To Shot | Shot To Shot w/Flash | Shot to Shot w/Buffer Full | Clear Buffer | |
| Fuji FinePix A330 | 1.58 | 1.94 | 10.40 | - | - |
| Kodak CX7330 | 6.37 | 2.27 | 2.57 | 6.02 | 22.48 |
| Olympus D-540 | 3.64 | 9.33 | 16.90 | 4.99 | 25.99 |
In our timing tests, these cameras really spread themselves out in terms of performance. The Fuji A330 had a very impressive Shot to Shot time of 1.94 sec., but slowed down to 10.40 sec. between shots when the flash was used. Although it does not offer a continuous shooting mode, we were impressed that it can shoot at 1.94 sec. between shots without slowing down.
The Kodak camera showed a mixed performance as well. Although it has a decent Shot to Shot time (with and without the flash), the CX7330 can only hold 3 full resolution frames in its buffer before slowing to 5.71 seconds between frames. In its continuous drive mode, the Kodak CX7330 can shoot up to 3 frames at 3.4 fps before filling its buffer. Then, it takes an abysmal 22.48 seconds to clear all three images to the flash card. However, as soon as the buffer fills from a continuous burst, one more frame can be taken every 6.02 sec.
Finally, the Olympus D-540 proved to be the slowest camera of the pack. It had a horrendous Shot to Shot time of 9.33 seconds and an even slower time of 16.90 sec. between shots with the flash. In its continuous drive mode, the D-540 can shoot 12 frames (640x480) at 1.2 fps. After this, the camera needs nearly 26 seconds to flush these images to the flash card. After the buffer fills from a continuous burst, the camera can take one more frame after 4.99 seconds.
After running our time tests and looking at the data, it becomes clear that the two fastest cameras are the Fuji A330 and the Kodak CX7330. Which one you prefer will depend on two things. How often will you be shooting with the flash? Do you need a continuous drive mode? The Fuji A330 has the advantage of being able to shoot "forever" without running into a full buffer slowdown. The Kodak CX7330 remains pretty fast until its buffer is filled with 3 images. It is really going to be a personal decision, but we would opt for the speed of the Fuji A330.
Resolving Fine Lines
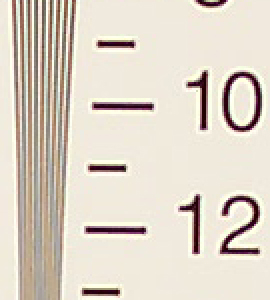
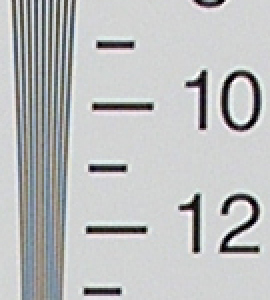
For our resolution test, we reset the cameras to their default settings and then, used the highest resolution and quality setting. The Fuji and Olympus cameras were set to Tungsten WB. For more information, refer to our Testing Procedures page. When reading this chart, the numbers represent lines per picture height (LPH). For example, the number 15 would represent 1,500 LPH. Below are 200% crops of the test. Click on a crop to see the full chart at 100%.| Fuji A330 +0.6 EV |
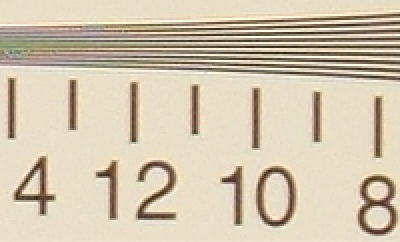 Click to enlarge. |
| Kodak CX7330 +1.0 EV |
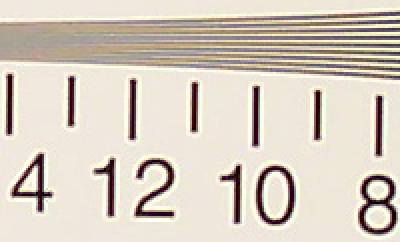 Click to enlarge. |
| Olympus D-540 +1.0 EV |
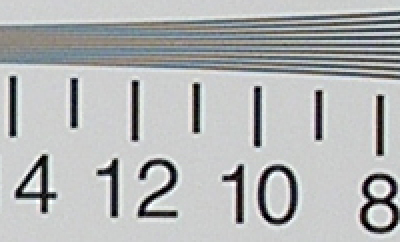 Click to enlarge. |
Although the Fuji A330 resolution chart appears to have the least amount of contrast, it also shows the highest resolution of 1,150 LPH. The Olympus D-540 is able to resolve fine lines until 1,050 LPH. Finally, the Kodak CX7330 showed a fairly poor performance-retaining detail until 950 LPH. Notice that all three cameras produce moiré near their resolution limits.
| Fuji A330 +0.6 EV |
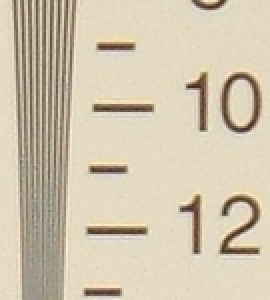 Click to enlarge. |
| Kodak CX7330 +1.0 EV |
 Click to enlarge. |
| Olympus D-540 +1.0 EV |
 Click to enlarge. |
The resolution advantage that the Fuji A330 had in the horizontal crops is lost in these vertical crops. All three cameras show a resolution of 1,050 LPH, which is fairly decent for three megapixel cameras. However, we think that the Fuji A330 wins out over the Kodak and Olympus cameras with its higher overall resolution.
Color Reproduction
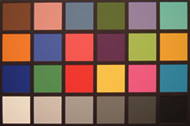
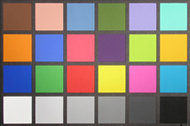
* For all of our color tests, we reset the cameras to their factory default settings. They were then set to record using the highest image quality option. Color space is sRGB.We took a picture of our color chart both indoors (tungsten lighting) and outdoors (direct sunlight). Click on a thumbnail below to view the full-size image.
Tungsten WB
| Auto WB | Tungsten WB | |
| Fuji FinePix A330 | 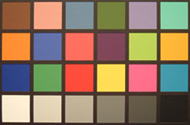 Click to enlarge. |
 Click to enlarge. |
| Kodak CX7330 | 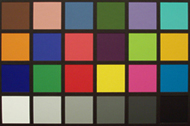 Click to enlarge. |
N/A |
| Olympus D-540 | 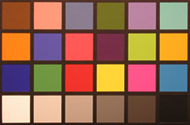 Click to enlarge. |
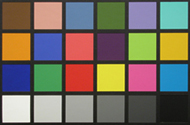 Click to enlarge. |
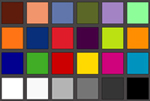 Reference Chart ("actual colors") |
||
| Auto WB | Incandescent WB | |
| Fuji FinePix A330 | 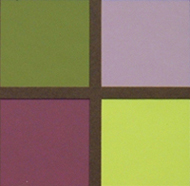 |
 |
| Kodak CX7330 | 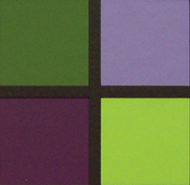 |
N/A |
| Olympus D-540 | 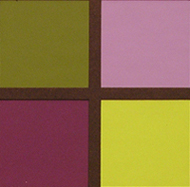 |
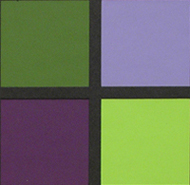 |
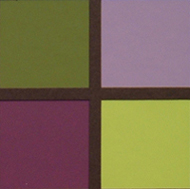
Under tungsten lighting with Auto white balance, the Kodak camera has the best color reproduction. The Fuji A330 shows a very slight yellow/orange cast while the Olympus was afflicted with a rather strong yellow/orange cast. When each camera was set to Tungsten WB, the Olympus camera showed very accurate color reproduction. The Fuji camera still displays a yellow/orange cast here. The Kodak camera does not offer adjustable white balance options.
Daylight WB
| Auto WB | Daylight WB | |
| Fuji FinePix A330 | 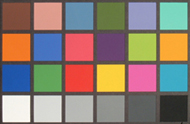 Click to enlarge. |
 Click to enlarge. |
| Kodak CX7330 | 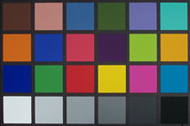 Click to enlarge. |
N/A |
| Olympus D-540 | 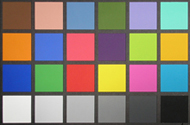 Click to enlarge. |
 Click to enlarge. |
 Reference Chart ("actual colors") |
||
| Auto WB | Daylight WB | |
| Fuji FinePix A330 | 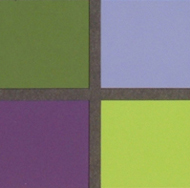 |
 |
| Kodak CX7330 | 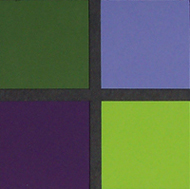 |
N/A |
| Olympus D-540 | 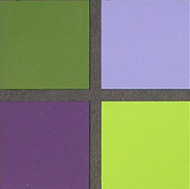 |
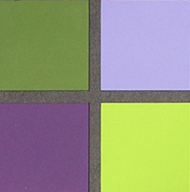 |
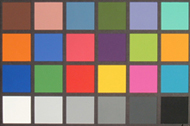
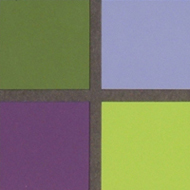
When set to Auto WB in the sun, all three cameras proved to be capable of very accurate color reproduction. However, this comparison also shows the differences in exposure. The Fuji camera produced the brightest colors while the Kodak camera produced the darkest. With the cameras set to Daylight white balance, both the Olympus and Fuji cameras produced very accurate colors. The only significant difference is that the Fuji chart is a bit brighter and more saturated than the Olympus. Again, the Kodak camera offers no other setting than Auto.
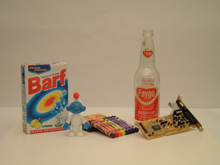
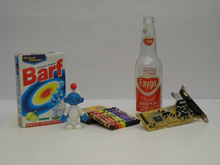
Studio Shot
In this shot, we tested the camera's ability to reproduce colors in our studio shot using different WB settings under tungsten light.| Auto WB | Tungsten WB | |
| Fuji FinePix A330 | 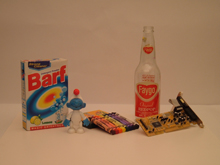 Click to enlarge. |
 Click to enlarge. |
| Kodak CX7330 | 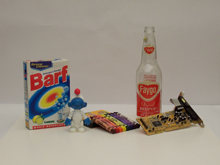 Click to enlarge. |
N/A |
| Olympus D-540 | 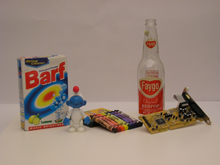 Click to enlarge. |
 Click to enlarge. |
Not surprisingly, the Kodak camera produces the most accurate colors of the three cameras. However, it is interesting to see that the Fuji camera actually has a stronger yellow/orange cast than the Olympus camera. This is the opposite of what we saw with the color charts above. When the cameras are set to Tungsten WB, the Olympus D-540 shows a very accurate color performance and underexposes the frame, while the Fuji A330 has a yellow/orange cast and a brighter exposure than the Olympus.
Built-in Flash
For the flash test, we set the cameras to Auto mode w/Auto flash. The pictures were taken from 5 feet away.| Fuji FinePix A330 | Kodak CX7330 | Olympus D-540 |
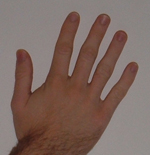 Click to enlarge. |
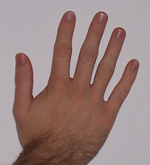 Click to enlarge. |
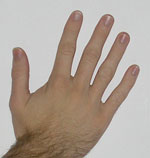 Click to enlarge. |
In this flash comparison, all three cameras managed to avoid any color cast on the white background. However, it is fairly obvious that they all reproduce skin tones differently. The Olympus D-540 produces the most accurate skin tone followed by the Fuji A330. The Kodak CX7330 has oversaturated the hand producing a reddish appearance.
Noise
The noise test consists of pictures of our studio shot taken at increasing ISO levels to show the effect on the image. The pictures were taken after resetting the cameras to their factory default settings. The cameras were then set to record with the highest quality option using Tungsten WB (if possible). Click on a 100% crop below to view the full-size image.Unfortunately, none of these cameras have the option to change the ISO setting. Therefore, we are comparing the noise levels of images taken in Auto mode. From the EXIF information, we know that both the Fuji A330 and Olympus D-540 images were taken at ISO 100. In the User's Guide, Kodak indicates that the CX7330 uses an ISO rating between 100 and 200.
| Fuji FinePix A330 | Kodak CX7330 | Olympus D-540 |
 (ISO 100) Click to enlarge. |
 (ISO Unknown) Click to enlarge. |
 (ISO 100) Click to enlarge. |
It is clear from this crop comparison that the Olympus D-540 has produced the most noise in our sample shot. The difference between the Fuji A330 and the Kodak CX7330 is much harder to see. Both cameras are capable of producing a fairly low-noise image. If we had to choose one over the other, we would pick the Fuji camera due to the higher visibility of JPEG artifacts in the Kodak image.
General Image Quality
For these pictures, the cameras were reset to their factory default setting. Then, they were set to their highest quality recording setting. The pictures were then taken in Auto mode unless stated otherwise. Click on a thumbnail to view the full-size image. The crops below the thumbnails are 100%. All images are sRGB.| Fuji A330 | ||
 Click to enlarge. |
 Click to enlarge. |
 Click to enlarge. |
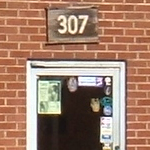 |
 |
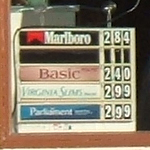 |
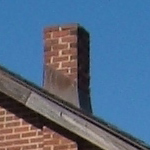
As the above crops demonstrate, the Fuji A330 has no major problems to speak of. We are pleased to see that the A330 is able to capture pictures with impressive detail without over-sharpening the images. Notice the lack of jaggies in these images. The images are well-exposed with a reasonable amount of saturation. Also, we are unable to spot any significant chromatic aberrations in any of the images. Overall, the Fuji proves to have very good image quality.
| Kodak CX7330 | ||
 Click to enlarge. |
 Click to enlarge. |
 Click to enlarge. |
 |
 |
 |
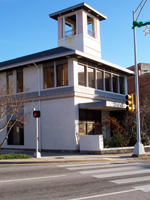
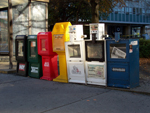
The Kodak CX7330 image quality is not too bad overall. The images all appear to be well-exposed with a decent level of detail. In addition, we couldn't find any chromatic aberrations. One of the main problems we noticed is that the CX7330 uses a bit too much sharpening, resulting in jaggies along lines. In fact, in the third crop, you can see how over-sharpening appears to result in the loss of detail. The other problem is the visibility of JPEG artifacts throughout the CX7330's images. These JPEG artifacts are a result of highly-compressed images in an attempt to lower the size of the files. We expect better-looking JPEGs from the highest quality option.
| Olympus D-540 | ||
 Click to enlarge. |
 Click to enlarge. |
 Click to enlarge. |
 |
 |
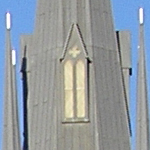 |
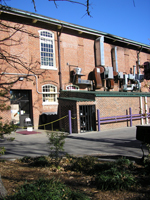
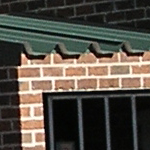
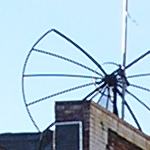
Unfortunately, it also shares the over-sharpening problem that we saw in the Kodak camera. This results in the common appearance of jaggies. The camera also appears to produce images with a relatively high contrast compared to the other cameras. In the 2nd and 3rd samples, the Olympus proves that it can capture some fine detail despite its over-sharpening problem.
Sometimes it is easy to look at the pictures from each camera and see which is best. Unfortunately, this is not one of those cases. Each camera is capable of producing some decent-looking pictures. All three cameras had no problem producing well-exposed and well-saturated images with no signs of chromatic aberrations. In fact, the differences between these cameras are rather subtle. We found that the Kodak and Olympus cameras both seem to have an issue with over-sharpening. Upon close inspection of the images produced by these two cameras, we found unsightly jaggies to be common. In the case of the Kodak camera, we also found JPEG artifacts caused by the camera's over-compression of its images. Overall, we prefer the look of the Fuji A330's images because of their smooth, yet detailed appearance.
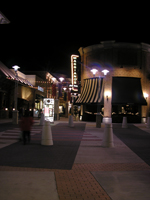
Night Samples
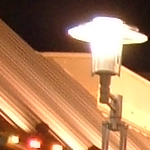
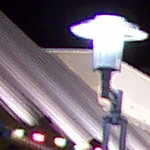
| Fuji FinePix A330 | Kodak CX7330 | Olympus D-540 |
 (0.8 sec., f/2.8, ISO 100) Click to enlarge. |
 (0.5 sec., f/2.8) (Click to enlarge. |
 (0.5 sec., f/2.9, ISO 50) Click to enlarge. |
 |
 |
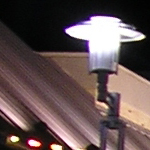 |
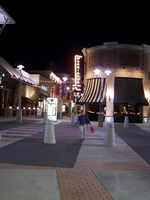
In this comparison of each camera's night setting, the Fuji A330 proves to provide the most detail. We can see some chromatic aberrations in the Kodak image along with some jagged lines ("jaggies"). The Olympus D-540 comes close to matching the quality of the Fuji. However, it falls short with more noise and an overall soft appearance. The Fuji camera also has the advantage of a 2 second maximum shutter speed, while the Kodak maxes out at 0.5 sec. and Olympus at 1 second.
Movie Mode
| Fuji A330 | Kodak CX7330 | Olympus D-540 |
 (320x240, 10 fps) Click to view. |
 (320x240, 15 fps) Click to view. |
 (320x240, 15 fps) Click to view. |
As you might expect from a $150 point-and-shoot, the video modes on these cameras aren't too spectacular. However, there are some noteworthy differences between them. For example, the Fuji camera is the only one that will limit the duration of the video clips (60 seconds at 320x240). The Kodak and Olympus cameras with allow you to record until you run out of space. Also, the Kodak camera is the only one that will record audio along with the video. The Olympus camera offers the most recording control. For example, it is the only camera out of the three that lets you utilize the optical/digital zoom (while recording), adjust white balance, and set exposure compensation.
Final Words
In almost every test of our review, we discovered the Fuji FinePix A330 to offer the best performance of the group. In terms of speed, it has a fast startup time and very little shutter lag. Although the Shot to Shot w/Flash times are rather slow, without the flash, it is able to shoot the fastest of the bunch without filling its buffer. It proved to have the highest overall resolution and longest battery life.In comparison, both the Kodak CX7330 and Olympus D-540 were slow in starting up. Although the Kodak camera can nearly keep up with the Fuji A330 from Shot to Shot, it starts to drag after 3 consecutive frames. In addition, although the Kodak and Olympus cameras have the advantage of a continuous drive mode, the benefits are questionable considering the long buffer clearing times. The Kodak CX7330 has a couple of advantages over the other cameras. For example, its Auto WB setting is actually pretty accurate. Also, the CX7330 is the only camera from this group that can record audio with its video clips.
The Olympus camera is absolutely horrendous in basically all the timing tests. The fact that it takes over 9 seconds between shots without the flash is obscene. When the flash is used, waiting 17 seconds between shots is also unacceptable. We were also disappointed with its shutter lag (with auto-focus) performance. When the camera is pre-focused, the lag isn't too bad. However, when auto-focusing is added to the equation, the camera really takes a while locking focus and shooting. There are some good things about the D-540. The movie mode is unlimited and allows use of the optical zoom, white balance, and exposure compensation. Also, the D-540 can take macro pictures as close as 0.8 in. from the lens.
The most important aspect of a digital camera review is obviously image quality. We were surprised to find that despite the differences in our other tests, all three cameras were able to produce pretty good looking pictures. All three cameras consistently took pictures that were well-exposed and well-saturated. The differences between the cameras are subtle, but important. For example, upon close inspection, we discovered that both the Kodak CX7330 and the Olympus D-540 used high levels of in-camera sharpening. This results in the appearance of jaggies along fine lines. In the case of the Kodak camera, we also found very visible JPEG artifacts - evidence of over-compression. Even at the highest quality setting, the Kodak CX7330 over-compresses its images in an attempt to lower the file sizes. In contrast to both the jaggy and over-compression issues, we found the Fuji A330 to produce smooth and detailed images.
Overall, we chose the Fuji FinePix A330 over the Kodak and Olympus cameras because of a combination of its speed and image quality performances. Our second choice would probably be the Kodak CX7330 because, despite its JPEG artifacts and jaggies, the camera is much faster than the Olympus. The image quality of these entry-level digicams is getting very impressive. For only $150, it is now possible to buy a digital camera and easily make beautiful 8x10 prints from the images.
| Fuji FinePix A330 | |
| Pros | Cons |
| Fast startup time Bright and colorful daylight pictures High resolution Very little shutter lag Smooth, but detailed, images Outstanding battery life |
Slow Shot to Shot w/Flash time No continuous drive Limited video clip duration Mediocre auto WB in tungsten light |
| Kodak EasyShare CX7330 | |
| Pros | Cons |
| Fast shot to shot w/flash time Accurate Auto WB in tungsten light Video clips are unlimited and w/sound Decent battery life |
Slow startup time Below-average resolution Relatively slow lag time (w/auto-focus) Jaggies (over-sharpening) JPEG artifacts from high compression |
| Olympus D-540 | |
| Pros | Cons |
| Superb Super Macro mode Decent resolution Video clips have unlimited duration Video mode allows use of optical zoom Decent battery life |
Very slow startup time Very slow shot to shot w/flash time Poor Auto WB in tungsten light Very slow lag time (w/auto-focus) Jaggies (over-sharpening) No TV-out |
Thanks again to Newegg.com for loaning us the Kodak EasyShare CX7330.


