Original Link: https://www.anandtech.com/show/1540
Canon 20D: Raising the Bar for Prosumer Digital SLRs
by Stephen Caston on November 11, 2004 12:05 AM EST- Posted in
- Digital Camera
Index
Canon is shaking up the digital camera community with the release of its newest affordable SLR. The 20D features an additional 1.9 megapixels over its predecessor, yielding a large 8.2 megapixel output. The camera design is a bit different as well with support for EF-S lenses that can provide a wider angle of view. The 20D has a new 9-point auto-focus system compared to the 7-point system seen on the 10D. The 20D promises to provide lower noise than the 10D at higher ISO settings as well as a large speed improvement.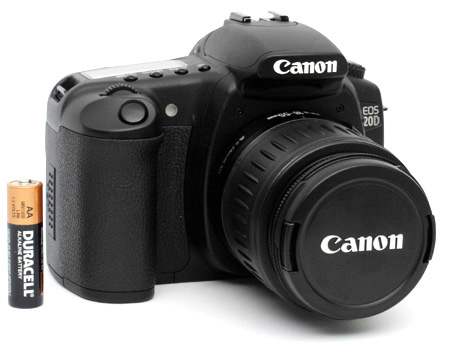
In our review, we found the Canon 20D to be a great performer. Compared to the 10D, it is much faster in several ways. The camera is able to start up in just 0.23 seconds compared to the 10D's 2.39 second time. In many of our other timing tests, the 20D continues to outperform the 10D by a large margin. The 20D raises the bar by allowing continuous shooting at 5 fps for 20 frames in JPEG (Large/Fine) mode compared to 3 fps for 9 frames on the 10D. Although general image quality on both cameras is very similar, the 20D has a huge advantage when it comes to high ISO performance. At ISO 3200, the 20D produces images that are low-noise and rich with detail, while the 10D produces images with a large loss of detail and discolored pixels. Read on to see all the details of our review of the Canon 20D.
Product Samples provided by Newegg.com
Canon EOS 20D Specifications
Note: Bold indicates a difference from the predecessor| Feature | Canon EOS 20D | Canon EOS 10D |
| Release Date | August 2004 | March 2003 |
| Price | ~$1500 (body only) | ~$1150 (body only) |
| Pixel Count | 8.2 Million | 6.3 Million |
| Camera Type | SLR | SLR |
| Highest Resolution | 3504 x 2336 | 3072x2048 |
| Lower Resolutions | 2544 x 1696, 1728 x 1152 | 2048x1360, 1536x1024 |
| Sensor Type | CMOS | CMOS |
| Sensor Size | 22.5 x 15.0 mm | 22.7 mm x 15.1 mm |
| LCD Screen Size | 1.8" | 1.8" |
| Lens Thread | EF, EF-S | EF |
| Auto Focus | Yes | Yes |
| Auto Focus Type | TTL, 9 focus points | TTL, 7 Point Focus |
| Manual Focus | Yes | Yes |
| Aperture Range | N/A | N/A |
| Shutter Speeds | Bulb, 30 - 1/8000th sec. | Bulb, 30 - 1/4000th sec. |
| ISO | 100, 200, 400, 800, 1600, 3200 | 100, 200, 400, 800, 1600, 3200 |
| Flash | Built-in, pop-up | Built-in, pop-up |
| External Flash | Yes, hot-shoe, sync | Yes, hot-shoe, sync |
| Flash Range | Guide no: 43 ft (ISO 100) | Guide no: 43 ft (ISO 100) |
| Flash Compensation | +/- 2 stops in 0.3 or 0.5 increments | +/- 2 stops in 0.3 or 0.5 increments |
| Exposure Compensation | +/- 2 stops in 1/3 increments | +/- 2 stops in 1/3 increments |
| White Balance | Auto, daylight, shade, cloudy, tungsten, fluorescent, flash, manual, Kelvin (color temperature) | Auto, daylight, shade, cloudy, tungsten, fluorescent, flash, manual, Kelvin (color temperature) |
| Bracketing | Yes, +/- 2 EV in 0.3, 0.5, or 1.0 EV increments | Yes, +/- 2 EV in 0.3, 0.5, or 1.0 EV increments |
| Metering | Evaluative (35-zone), Partial, Center-weighted | Evaluative (35-zone), Partial, Center-weighted |
| Color Space | sRGB, Adobe RGB | sRGB, Adobe RGB |
| Aperture Priority | Yes | Yes |
| Shutter Priority | Yes | Yes |
| Manual Exposure | Yes | Yes |
| Continuous Drive | Yes, 5 fps for approx. 20 frames (Large/Fine), 6 frames RAW | Yes, 3 fps for 9 frames (Large/Fine), 9 frames RAW |
| Self Timer | Yes, 10 sec. | Yes, 10 sec. |
| Storage Method | CompactFlash Type I and II, Microdrive | CompactFlash Type I and II, Microdrive |
| Storage Included | None | None |
| Compressed Format | JPG | JPG |
| Uncompressed Format | CR2 (Raw file + separate JPEG) | CRW (Raw file with embedded JPEG) |
| Quality Settings | Fine, Normal (JPEG) | Fine, Normal (JPEG) |
| Video clips | None | None |
| Battery Type | BP-511A Lithium-Ion Rechargeable | BP-511 Lithium-Ion Rechargeable |
| Charger Included | Yes, 90 minutes | Yes, 90 minutes |
| PC Interface | USB 2.0 Hi-Speed | USB 1.1 |
| TV-out | Yes | Yes |
| Tripod Mount | Yes, metal | Yes, metal |
| Weight (w/out battery or card) | 1.5 lb | 1.7 lb |
| Dimensions | 144 x 106 x 72 mm | 150 x 107 x 75 mm |
| Included in the Box | |
| Canon EOS 20D | Canon EOS 10D |
* Please note: Firmware version 1.0.5 is used on the 20D for this review.
The Design: Canon EOS 20D
In most respects, the 20D looks very similar to the 10D. The difference in size is very small. The 20D is 6mm less wide, 1mm shorter, and 3mm skinnier. This, together with the small weight difference, is not really very noticeable - they both feel very similar in our hands. There are a few major design differences and several more subtle contour changes.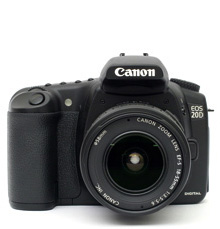 Click to enlarge. |
 Click to enlarge. |
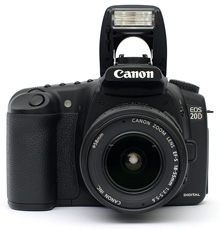
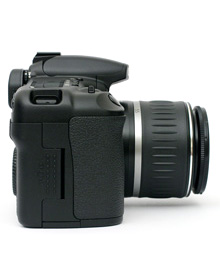
The front of the 20D features an EF/EF-S lens mount. Support for EF-S lenses is an addition that was seen on the Digital Rebel, but was not available on the 10D. The new EF-S mount was specifically designed to provide a wider angle of coverage for the smaller sensor seen in the Digital Rebel and the 20D. Currently, there are 3 EF-S lenses released by Canon: 18-55mm (kit lens), 17-85mm w/IS (image stabilization), and the 10-22mm. Keep in mind that these EF-S lenses are just additional choices for Digital Rebel and 20D user; they can also choose from any of the numerous EF lenses available. Just to the right of the lens is the Lens Release button. You can remove/change lenses by holding down this button and rotating the lens counterclockwise. On the left side of the camera is the Red-eye reduction/Self-timer lamp. In the image above with the flash raised, we can see that Canon went with the same great decision they made on the Digital Rebel. The flash rises considerably higher than it does on the 10D. This should result in the ability to shoot over larger lenses as well as a reduction in the occurrences of red-eye.
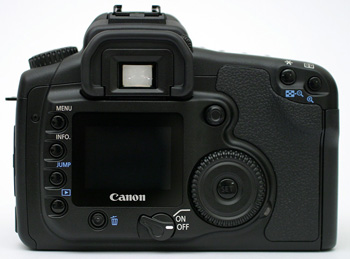
At first glance, the back of the 20D looks very similar to the 10D. However, upon closer inspection, there are some significant changes to notice. Both cameras have 1.8" LCD monitors with 118,000 pixels. Along the left side of both cameras is a column of buttons. In this column, both cameras have the following buttons: Menu, Info., Jump, and Play. The 20D is missing a button that the 10D has: the Direction Switching button. The reason for this absence points us to another major difference between the two. The 20D has added a Multi-controller (to the upper-right of the LCD). The Multi-controller is used to select AF points in record mode and to move across a magnified image in Play mode. It can be pushed in like a button or pushed in 8 different directions (vertical, horizontal, and diagonal). Both cameras feature the Quick Control Dial (seen below the Multi-controller). On the 10D, the Quick Control Dial is used in conjunction with the Direction Switching button to move around magnified images. However, only one axis can be utilized at a time. This means that to move to the upper right portion of an image, you must rotate the dial clockwise, then press the D.S. button, and rotate the dial counterclockwise. With the 20D, this process is simplified with the use of the Multi-controller. To the lower right of the Quick Control Dial is the "Access Lamp", which blinks whenever there is activity (reading or writing) on the flash card. On the 10D, this activity lamp is located on the right side of the camera (on the flash door).
Another main difference lies in the power button. On both cameras, the switch is located in the same position. However, on the 20D there are two positions on the main switch. The first position turns on the camera, but does not enable use of the Quick Control Dial. The second position turns on both the camera and the Quick Control Dial. The 10D offers these two power options as well, but has a separate power switch just for the Quick Control Dial. Again, the 20D offers the same options as the 10D, but in a more simplified manner. The Erase button is located between the power switch and the Play button.
At the upper-right are two buttons. The button on the left is used as an AE/FE lock, Index (in Play mode), and to zoom out while viewing an image in Play mode. The button on the right allows you to select AF points in Record mode and to zoom in on an image in Play mode. The viewfinder displays 9-point AF diamond as opposed to the 10D's 7-point AF cross arrangement. Additionally, the focusing screen has been improved to provide a brighter image and to make manual focusing easier. The viewfinder has a dioptric adjustment wheel to calibrate the focus of the viewfinder. Also, like the 10D, the rubber eyepiece is removable and can be replaced with a fitting on the shoulder strap to block out light during long exposures.
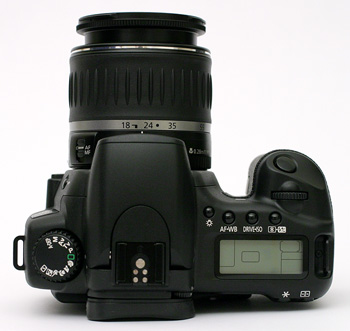
The top of the 20D is nearly identical to the 10D. On the left side is the Mode Dial, which has settings for the 12 different available shooting modes. The 20D's built-in flash raises to a higher level than the 10D's, allowing it to shoot over longer lenses. We should also mention that the 20D is compatible with the new Canon Speedlite 580EX external flash. To the right of the flash are the LCD information panel and 4 buttons. The information panel is very similar to the 10D in that it displays numerous camera settings that can be viewed in a glance. However, the arrangement of the information is quite different. Above the information panel is the "LCD panel illumination button". Pressing this button turns on the backlight for the information panel. The light can be turned off by pressing the button again or by waiting approximately 6 seconds. To the right are the AF mode selection/White balance, Drive mode/ISO speed, and Metering mode/Flash exposure compensation buttons. On the hand grip are the Main Dial and the shutter button. The Main Dial jogs through the choices available for AF mode selection, drive mode, and metering mode.
 Click to enlarge. |
 Click to enlarge. |
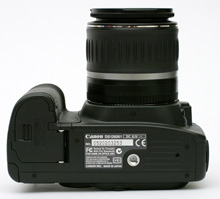
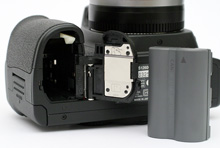
The bottom of the 20D features a locking hinged door that hides the compartment for the BP-511A Lithium-Ion Rechargeable battery. In addition, a CR2016 battery is now stored in the same compartment (on the 10D it was a CR2025 and was located on the bottom of the camera between the main battery compartment and the tripod mount). A metal tripod mount is located on the 20D in line with the center of the lens.
 Click to enlarge. |
 Click to enlarge. |
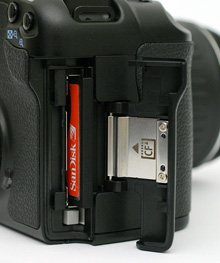
The right side of the 20D features the same type of sliding hinged door seen on the 10D. The main difference is that the 10D has its "Access Lamp" located on the door, while it is located at the back of the camera on the 20D.
 Click to enlarge. |
 Click to enlarge. |
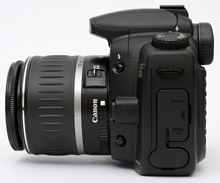
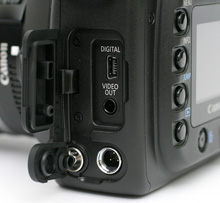
On the left side of the camera are two small back buttons. The one on the bottom is the depth-of-field preview button. While framing a shot, the camera will use the maximum aperture to allow you to see the brightest image possible. However, pressing this button will cause the camera to step down to whatever the aperture setting is. This allows you to see what the depth-of-field will actually look like in the final picture. The button on the top (above the lens release button) is the flash release button. Pressing this button will cause the flash to pop up and the camera will fire the flash when the shutter button is pressed. Finally, there is a rubber tab that fits into four connectors. The top two connectors are for the USB 2.0 (high-speed) port and the video-out port. Below, this is the PC Sync terminal and the Remote Control terminal.
Recording Features
The 20D can record images as JPEG files, RAW files, or RAW files and JPEG files (simultaneously). The JPEG settings Fine and Normal refer to the compression used. Below are the different settings:| Setting | Resolution (pixels) |
| Large Fine/Normal | 3504 x 2336 |
| Medium Fine/Normal | 2544 x 1696 |
| Small Fine/Normal | 1728 x 1152 |
| RAW | 3504 x 2336 |
| RAW w/JPEG* (Large, Medium, Small) (Fine/Normal) | 3504 x 2336 w/JPEG* |
In addition to the extra 1.9 megapixel advantage over the 10D, the 20D also differs in its RAW mode approach. Despite having a different extension (.CR2 compared to the 10D's .CRW), the 20D allows recording of RAW files along with a separate JPEG file. On the 10D, the JPEG file is embedded in the RAW file.
The 20D features the same exposure modes as the 10D and the Digital Rebel. These are split into two different "zones" on the Mode Dial: the Creative Zone and the Basic Zone. The Creative Zone offers 5 modes: Program AE, Shutter priority, Aperture priority, Manual, and Automatic Depth-of-Field. Program AE is an "automatic exposure" mode like Auto mode with several exceptions. For example, the aperture/shutter speed relationship can be adjusted by rotating the Main Dial. Additionally, advanced exposure settings such as white balance, ISO, exposure compensation, RAW mode, and several others can be accessed. In Shutter priority mode, the user can set the desired shutter speed while the camera sets the appropriate aperture automatically. Aperture priority mode is the exact opposite - the user sets the aperture desired while the camera picks the shutter speed. In both Shutter priority and Aperture priority modes, the Main Dial is used to adjust the shutter speed/aperture setting. In Manual mode, the 20D gives you total control over the camera's exposure allowing you to select the shutter speed and aperture. The Main Dial adjusts the shutter speed while the Quick Control Dial adjusts the aperture setting. The final mode in the Creative Zone is called Automatic Depth-of-Field. With this mode, the camera will set the aperture and shutter speed so that the subjects under the selected focus points are in focus. This is especially useful for pictures with groups of subjects at varying distances from the lens.
The Basic Zone offers the following 7 shooting modes: Full Auto, Portrait, Landscape, Close-up, Sports, Night Portrait, and Flash Off. In all Basic Zone modes, the camera sets automatically the AF mode, white balance, ISO, metering, flash behavior, etc. Additionally, RAW shooting is unavailable in these modes. In Full Auto mode, the camera selects the appropriate aperture and shutter speed automatically to provide an accurate exposure. The built-in flash will pop up from its closed position if the camera decides it is necessary. This is also true in Portrait, Close-up, and Night Portrait modes. In Portrait mode, the camera uses a large aperture to produce an image with a focused subject and an out-of-focus background. In Landscape mode, the camera uses a small aperture to produce an image where the foreground and background are in focus. Close-up mode is designed for macro shots and will produce a sharply-focused subject with a blurred background. In Sports mode, a fast shutter speed is the priority. The drive mode is set automatically to Continuous, AF is set to AI Servo, and the flash is unavailable. With Night Portrait mode, the camera will engage the flash if there is not enough light. Then it will use a slow sync flash to illuminate both the subject and the background properly. The camera uses a slow shutter speed during which the flash will fire to illuminate the subject and the camera will allow ambient light to illuminate the background. This method produces a natural-looking night picture. The final shooting mode in the Basic Zone is Flash Off where the camera disables the use of the flash and sets the AF mode to AI Focus.
Because the Creative Zone is where the camera gives the user access to all the settings, this is where we will focus our discussion. We begin with the three available drive modes: Single, Continuous, and Self-timer. With the Single drive mode, the camera will only take one picture when the shutter button is pressed. With Continuous drive selected, the camera will continue to take pictures while the shutter button is held down at a rate of 5.0 fps. Below is a table provided by the Instruction Manual that shows the total number of images that can be shot in a single burst depending on the image quality setting:
| Image-recording quality | Large/ Fine | Large/ Normal | Medium/ Fine | Medium/ Normal | Small/ Fine | Small/ Normal | RAW | RAW +JPEG |
| Max. Burst | 20 | 32 | 28 | 61 | 64 | 123 | 6 | 6 |
We should note that these numbers will vary depending on the speed of the CompactFlash card and the shooting conditions. With the 10D, the continuous drive mode is only able to shoot either 9 Large/Fine JPEG files or 9 RAW files at 3 fps. The most significant advantage that the 20D has over the 10D is that it is able to write files to the flash card even while the shutter button is half-pressed. The 10D will not write any files (unless the buffer is full) until you stop pressing the shutter button entirely. The difference is enormous and results in the 20D's increased readiness to shoot more frames. The final drive mode is Self-timer. Using the self-timer creates a 10-second delay after the shutter button is pressed. However, if Custom Function 12 (Mirror Lockup) is enabled, the delay changes to 2 seconds.
The 20D uses a new auto-focus system with 9 focus points in a diamond arrangement. This is up from 7 focus points on the 10D in a cross arrangement. The new auto-focus system is designed to be faster and more effective in low light. There are 3 auto-focus options: One Shot, AI Focus, and AI Servo. With One Shot focus, the camera will lock focus when the shutter button is half-pressed. This mode is best fitted for still subjects because the lens will only focus one time. Additionally, when evaluative metering is used, the camera will lock the exposure settings at the same time that the focus is locked. With AI Servo, the camera focuses continuously while the shutter button is half-pressed, making it very effective for moving subjects. The exposure settings also change continuously according to variations in lighting. AI Focus mode switches automatically from One Shot and AI Servo when it detects subject motion. Of course, manual focus is always an option as well. In addition to the different focusing modes, the user also has control over which focusing points the camera uses in the Creative Zone modes. The camera can be set to select focus points automatically or the user can select one of the nine points. To do this, you must first press the AF-point selector button. Then the Multi-controller is used to specify which point to use or to use all points (auto). The 20D, like the 10D and Digital Rebel, does not have a dedicated AF-assist lamp. Instead, the built-in flash is used as the AF-assist by firing several short flashes of light to aid the camera in focusing. However, we should point out that if Custom Function 7 (Flash firing) is changed from "Fires" to "Does not fire", the pop-up flash can be left up. By doing this, the camera will use the flash for focus assistance, but will not fire the flash when the shutter button is pressed.
The 20D offers 6 different ISO settings from which to choose: 100, 200, 400, 800, 1600, and 3200 (H). ISO 3200 must be enabled in the Custom Functions menu before it is displayed as an option. For white balance, the 20D has 9 options: Auto, Daylight, Shade, Cloudy, Tungsten, Fluorescent, Flash, Custom, and color temperature (Kelvin). For the color temperature setting, you must set the desired color temperature in the Menu from 2,800K to 10,000K. To set a custom white balance, you first take a picture of the white object that you wish to use as a reference. Then, in the main menu, you select "Custom WB" and select the image from the images on the flash card. The 20D even has a reminder that tells you to "Set WB to 'Custom WB'" if it is not already set on the information panel.
There are three basic metering modes available: Evaluative, Partial metering, and Center-weighted average. With Evaluative metering, the 20D uses several factors to determine the proper exposure by measuring light from various portions of the frame. With Partial metering, the camera uses a small portion of the frame to determine the exposure. This area is seen in the viewfinder as a circle covering approximately 9% of the frame. Center-weighted average metering determines the exposure by measuring light across the entire frame, but by placing special emphasis at the center.
The Canon 20D offers both exposure compensation and flash exposure compensation of +/- 2 stops in either 1/2 or 1/3 stop increments. The increment can be selected via Custom Function 6. To adjust the exposure compensation before a shot, you simply rotate the Quick Control Dial clockwise or counterclockwise to select the desired compensation. For flash compensation, the flash must first be raised. Then, press the Metering/Flash exposure compensation button and rotate the Quick Control Dial to the desired amount.
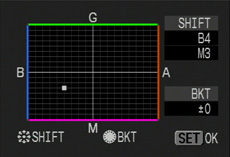
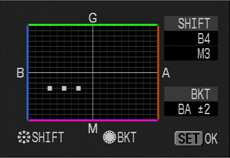
AE and FE lock are also available on the 20D. AE (auto exposure) lock allows you to use the exposure settings from a different part of the subject than the focus point. To do this, you simply point the lens to the area where you would like to lock the exposure and then press the AE lock button. Then, recompose the image and shoot. The same method is applied for a flash exposure lock. With FE lock, the flash will fire a short pre-flash in order to determine the exposure with the flash added to the equation. The 20D also offers AE and WB (white balance) bracketing. AE bracketing is available as +/- 2 stops in 1/2 or 1/3 increments. Essentially, AE bracketing is a way to ensure a usable exposure. It takes 3 separate pictures with the varied exposures that you indicate. For example, if you set an AE bracket of 0.5 EV (exposure value) and the exposure compensation is set to 0, the resulting three pictures would be: -0.5 EV, 0 EV, and +0.5 EV. This would give you three pictures with different exposures. The order of the exposures can be set via the Custom Functions menu. Although white balance bracketing is offered on the 10D, the 20D takes it to a whole new level with its "WB Shift/BKT" option in the menu.
 White Balance Shift |
 White Balance Shift/BKT |
At first, this screen can be very intimidating, but it is actually fairly intuitive. There are two axes: Blue-Amber on the horizontal axis and Magenta-Green on the vertical axis. By using the Multi-controller, you can choose to create a WB shift by simply moving the small indicator block on the screen to one of 361 points horizontally, vertically, or diagonally. After selecting a shift point, you can add bracketing to the equation by rotating the Quick Control Dial clockwise for a Blue-Amber bracket or counterclockwise for a Magenta-Green bracket. Even if it is difficult to describe, it is really simple to use. With WB bracketing, the camera takes just one picture and saves it as 3 separate files with each color variation.
The main menu is broken up into 3 different sections: Shooting, Playback, and Set-up. Below, we have outlined the Shooting and Set-up menu options available:
| Shooting menu | ||
| Quality | Large/Fine Large/Normal Medium/Fine Medium/Normal Small/Fine Small/Normal |
RAW +Large/Fine RAW +Large/Normal RAW +Medium/Fine RAW +Medium/Normal RAW +Small/Fine RAW +Small/Normal RAW |
| Red-eye | Off, On | |
| Beep | Off, On | |
| Shoot w/o card | On, Off | |
| AEB | +/- 2 stops in 1/2 or 1/3 increments | |
| WB Shift/BKT | Shift amount/BKT amount | |
| Custom WB | Set | |
| Color temp. | 2,800K - 10,000K | |
| Color space | sRGB, Adobe RGB | |
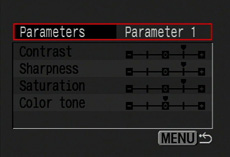
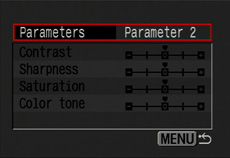
| Parameters | Parameter 1, Parameter 2, Set 1, Set 2, Set 3, B/W | |
 Parameter 1 |
 Parameter 2 |
The 20D differs from the 10D in that it separates the Color space options from the Parameters. By default, the 20D uses Parameter 1, which has added saturation, sharpness, and contrast. Parameter 2 is neutral shooting option. Sets 1 through 3 are user-programmable, which allow you to switch between different customized parameters quickly. The B/W option is an interesting one for Canon to implement into their prosumer SLRs. You can specify the contrast and sharpness of the black and white images. In addition, to mimic film cameras, there are 4 different filter effects from which to choose: Yellow, Orange, Red, and Green. Also, there are 4 toning options that can be applied: Sepia, Blue, Purple, and Green.
| Setup Menu | |
| Auto power off | 1, 2, 4, 8, 15, 30 min., Off |
| Auto rotateOn, Off | Select images |
| LCD Brightness | 5 levels |
| Date/Time | Set |
| File numbering | Continuous, Auto reset |
| Language | Select |
| Video system | NTSC, PAL |
| Communication | Normal, PTP |
| Format | Set |
| Custom Functions | *See table below |
| Clear settings | Clear all camera settings, Clear all Custom Functions |
| Sensor clean | Set |
| Firmware Ver. x.x.x | Update |
The Auto power off option determines how long the camera will wait before turning itself off. A half-press of the shutter button will turn back on the camera. With Auto rotate enabled, the camera will tag pictures taken with a portrait orientation so that they can be viewed as they were taken on the LCD monitor as well as with the included software. LCD brightness can be set to one of 5 positions like the 10D. Although the brightest setting works very well indoors and in low light, just like the 10D, we found the monitor difficult to view in bright sunlight due to reflections. With Continuous File numbering, the camera will assign each new image a sequential number from "0001" to "9999". If Auto reset is selected, the numbering scheme will reset to "0001" each time the flash card is replaced. Communication mode Normal is used for interfacing with a computer while PTP is used when the camera is connected to a printer. The Custom Functions option brings up 18 advanced settings that change the way the camera operates:
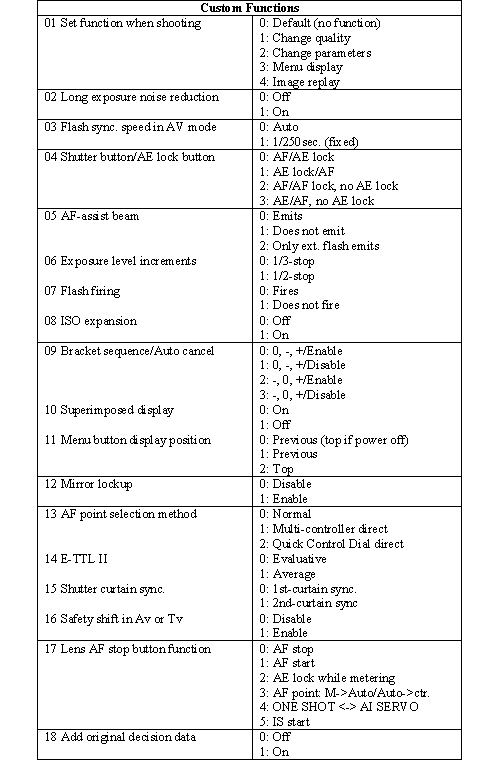
As you can see, the Custom Functions offer quite a bit of control over the camera's functionality. The 20D's Custom Functions are similar to those of the 10D with a few exceptions. The 20D has added an option for Long exposure noise reduction. With this selected, the camera will take a second frame for exposures longer than 1 second. Then, using a dark frame subtraction method, the 20D will attempt to lower the noise of the original image. The 20D has separated the options for AF-assist beam and Flash firing, which were combined into one Custom Function on the 10D. The E-TTL II option supports the new 580EX Speedlite flash. Also, Custom Function 18 is designed for use with the optional Data Verification Kit (DVK-E2).
The Clear Settings option allows you to either reset the camera's settings or to reset all the Custom Functions to their defaults. The "Sensor clean" option causes the camera to open the shutter and to flip the mirror up, giving you access to the sensor for cleaning. You must have sufficient battery power or the AC adaptor; otherwise, the camera will refuse the request. Lastly, the Firmware option in the menu will display the current firmware version that is being used. Pushing the "Set" button will initiate a firmware upgrade process.
Info screen
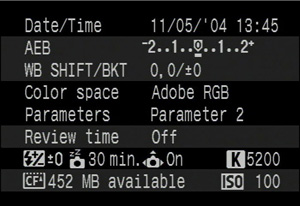
Like the 10D, pressing the Info button on the 20D will bring up a display containing all the major camera settings on one screen. This allows you to see numerous settings at a glance.
Overall, if you are familiar with the 10D or Digital Rebel, the 20D will be a cinch to shoot with. However, there are some minor differences in the layout of things. For example, when selecting a white balance mode, rotating the Quick Control Dial clockwise on the 20D will rotate through the options clockwise. The same clockwise motion on the 10D wheel would result in counterclockwise white balance selection. However, the white balance options are a mirror image of each other. So, rotating the dial clockwise on both cameras will select the same options in the same order (in opposite directions). This difference, although confusing to explain, is more logical on the 20D. Just by shooting casually with the 20D, you will notice a large speed improvement over the 10D and Digital Rebel in terms of auto-focus as well as startup and write speed.
Below is a list of some of the major recording differences between the 20D and the 10D:
| 20D | 10D |
| 8.2 megapixels | 6.3 megapixels |
| DIGIC II processor | DIGIC processor |
| 1/8000 max. shutter speed | 1/4000 max. shutter speed |
| 1/250 flash sync | 1/200 flash sync |
| Fast startup | Average startup |
| New auto-focus system with 9 focus points | 7 focus points |
| 5 fps for 20 frames (Large/Fine) 5 fps for 6 frames (RAW) |
3 fps for 9 frames (Large/Fine) 3 fps for 9 frames (RAW) |
| Dual function power switch for camera and Quick Control Dial | Separate switch for camera and Quick Control Dial |
| Improved parameters now allow B&W shooting with Filter and Toning effects | No color filter options |
| Extensive WB Shift/BKT | No Shift, just bracketing |
| Added Custom Functions for Noise Reduction and for Data Verification Kit | No option for noise reduction or DVK |
| Selection of WB Shift/BKT and focus points with new Multi-controller | No Multi-controller |
| RAW mode can record separate JPEG files | RAW files embed JPEG files |
| Shutter sound is chunkier | Shutter sound is thinner |
Playback Features
Playing back images on the 20D is much faster than on the 10D. To start with, the 20D is able to load pictures faster after pressing the Play button. While reviewing pictures on the 10D, it is not uncommon to see a "busy" signal on the monitor while the camera loads an image. The 10D first presents a low quality version of the image followed by a high quality version. The 20D immediately presents a high quality image to begin with. We took a Large/Fine JPEG image with both cameras. After pressing the Play button, it takes the 10D approximately 2.5 seconds to display a high quality image, while the 20D takes roughly 0.5 seconds. Image regular |
 Image magnified 10x |
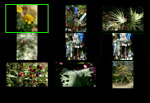 Thumbnail |
You are able to magnify an image up to 10x by using the Enlarge/AF point selection button. While an image is magnified, the image can be scrolled vertically, horizontally, or vertically through the use of the Multi-controller. Although the 10D does not have a multi-controller, and thus requires the use of a Direction Switching button, we found the Multi-controller to be a bit slow when held down. To reach the same scrolling speed of which the 10D is capable, you must press the Multi-controller repeatedly in the direction that you wish to move. In this respect, the 10D is much faster, simply requiring a roll of the Quick Control Dial. To view the images as thumbnails, you must press the Reduce button while an image is being viewed full screen. A 3x3 thumbnail view will be displayed. To delete an image, simply press the "Erase" button. You can then choose "Cancel", "Erase", or "Erase All".
 No Info |
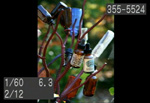 Basic Info |
 Detailed Info |
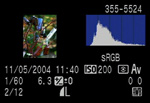
The Info button toggles the amount of information that is displayed about each image. The first option is to display no information on the screen other than the image itself. Another press of the Info button will result in the display of some very basic information, including: file number, shutter speed, aperture, and image number out of the total number of images on the card. The third option contains a large amount of information, including a histogram with blinking overexposed sections and the following: file number, date and time, ISO, metering, record mode, color space, shutter speed, aperture, exposure compensation, WB shift, white balance setting, image number out of total number on the card, and image size and quality.
Below, we have outlined the various options available via the Playback menu:
| Playback menu | |
| Protect | Select |
| Rotate | Select/Rotate |
| Print Order | Order, Set up |
| Auto Play | Set |
| Review Time | 2, 4, 8 sec., Hold, Off |
The Protect option allows you to mark images as "protected" so that they may not be deleted. However, formatting the card will erase all images, including protected files. The Print Order option allows you to select images for printing on a DPOF (Digital Print Order Format) compatible printer. After selecting the quantity for each image, you can specify the Print Type from "Standard", "Index", or "Both". Additionally, there are options to include a date and/or file number stamp on each print. The Auto Play option is a slideshow feature that cycles through the pictures on the flash card approximately every 4 seconds. The slideshow can be paused and un-paused by pressing the "Set" button. Review Time refers to the amount of time that the 20D will display an image immediately after it is taken. The "Hold" option means that it will display the image until either the shutter button is pressed or the camera turns itself off.
Our main impression of the 20D's playback mode is that it is much faster than the 10D. Switching back and forth from Record to Playback mode is noticeably faster. This makes checking focus, framing, etc. on previous shots a whole lot less painful than it is on the 10D. Also, the 20D allows you to access the menu while the camera is writing images to the CF card. The 10D will simply display a busy message until all the files have been written. This is a nice advantage of the 20D. Our only disappointment is the speed of scrolling while holding the Multi-controller in a specific direction. Although it is a good idea for selecting focus points, we still prefer the Quick Control Dial and Direction Switching button for faster scrolling.
Battery Performance
Our general method for battery testing is to reset the camera to its default settings and change the recording mode to the highest quality option. Then, we take 5 pictures without the flash and 2 pictures with the flash until the battery is dead. For more information on our battery test, please refer to our Testing Procedures page. For this test, we used the included 511A Lithium-Ion battery on the 20D. The 10D results come from our previous review with the use of the 511 Lithium-Ion battery. The batteries were fully drained before charging for the test.| Number of shots taken in one battery charge | |
| 20D (BP-511A) | 4,353 |
| 10D (BP-511) | 1,727 |
Our battery test shows that the 20D is capable of a very impressive 4,353 shots in a single charge with the new BP-511A battery (supplied with the camera). In our earlier review of the 10D, we discovered it to be capable of 1,727 shots in a single charge. In the 20D manual, Canon suggests that if the BP-511 were used in the 20D, the battery life would drop by 25%. We think that along with the higher power output of the new battery, the speed and efficiency of the 20D had a large part in providing so many shots. Remember that these numbers do not represent casual shooting. We perform these battery tests in one sitting. In the 20D and 10D manuals, Canon rates the cameras with the following shooting capacity using the CIPA (Camera & Imaging Products Association) criteria:
| CIPA | ||
| No Flash | 50% Flash | |
| 20D (BP-511A) | 1000 | 700 |
| 10D (BP-511) | 650 | 500 |
Anyway you look at it, both cameras have a very impressive battery life. However, if the supplied battery does not provide enough power, both cameras have optional battery grips. The 20D supports the new BG-E2, which can hold either two Lithium-Ion batteries or 6-AA batteries. The 10D supports the BG-ED3, which can hold two Lithium-Ion batteries. The grips are about $170 and the BP-511(A) goes for about $50.
The Timing Tests
* NOTE: For all of our time tests, both cameras were reset to their factory default settings and set to record in Program AE mode. The 20D was set to Parameter Set 2 which is equivalent to the Standard parameter on the 10D. A SanDisk Ultra II 512MB CompactFlash card was used.Before reading our results, please refer to our Testing Procedures page.
Startup Time
The startup time is recorded from the moment the power button is pushed to the moment the shutter sounds. The cameras were set to startup record in Auto mode.| Startup time (seconds) | |
| 20D | 0.23 |
| 10D | 2.39 |
The startup time is where you can really begin to see where Canon made its major improvements over the 10D. The 20D is able to start up and take a picture in just 0.23 sec., while it takes the 10D 2.39 sec. to do the same thing. This means that there is no waiting around while the camera boots up to take a picture. Essentially, by the time you have taken off the lens cap or raised the camera to your eye, the 20D is ready to go. The improved startup time alone makes this camera feel so much more responsive than the 10D.
Shutter Lag
To record shutter lag, we perform two tests. For the first test, we pre-focus the lens and measure the amount of time it takes the camera to take a picture after the shutter button is pressed. The second test measures the time it takes for the camera to take a picture after we press the shutter button without pre-focusing. Each test is performed 3 times and the results are averaged. For the 20D and 10D, we set the cameras to Shutter speed priority at 1/500th sec. For more information regarding our testing procedures, please refer to our Testing Procedures page.| With Pre-focus (seconds) | Without Pre-focus (seconds) | |
| 20D | 0.09 | 0.23 |
| 10D | 0.09 | 0.24 |
Not surprisingly, the shutter lag on both the 20D and 10D are about the same. They both have a very reasonable pre-focused lag of 0.09 seconds. Without half-pressing the shutter, they both showed very fast performance. The 20D had a lag of 0.23 sec. and the 10D had a lag of 0.24 sec. The difference between these two times is negligible at 0.01 sec.
Write Times
We recorded 5 different write times with a Sandisk Ultra II 512 MB Compact Flash card:Single Shot - The time it takes for a single picture to be completely written to the flash card (the time the "activity light" is on).
Shot To Shot (STS) - The time until the second shot can be taken after the first (shutter to shutter).
Shot To Shot w/Flash - The time it takes for the camera to take two pictures with the flash from the first flash to the second. The camera is 10 ft. from the subject.
Shot To Shot w/Buffer Full - The time between taking the last shot of a continuous burst to the moment the shutter sounds again.
Clear Buffer - The time it takes the camera to clear the buffer after a full burst of pictures is taken.
We performed each test three times and averaged the results. Below are the resolution, quality setting, and average file size used for the tests.
| 20D | ||
| Setting | Resolution (pixels) | Average file size (MB) |
| JPEG (Large/Fine) | 3504x2336 | 5.13 |
| RAW +Small/Normal JPEG | 3504x2336 | 10.30 |
| 10D | ||
| Setting | Resolution (pixels) | Average file size (MB) |
| JPEG (Large/Fine) | 3072x2048 | 4.41 |
| RAW +Small/Normal JPEG | 3072x2048 | 7.66 |
| Single Shot | Shot To Shot | Shot To Shot w/Flash | Shot to Shot w/Buffer Full | Clear Buffer | |
| 20D (JPEG) | 0.69 | 0.41 | 1.14 | 0.94 | 14.22 |
| 20D (RAW) | 1.66 | 0.42 | 1.17 | 2.08 | 10.09 |
| 10D (JPEG) | 2.54 | 0.41 | 1.03 | 4.95 | 33.91 |
| 10D (RAW) | 5.04 | 0.43 | 1.12 | 8.57 | 59.94 |
The write times are where we can see that the 20D has a distinct advantage over the 10D. Even though the file size of both the JPEG and RAW files of the 20D are larger than those from the 10D, it is able to write them in a significantly shorter time. The 20D can write a Large/Fine JPEG in just 0.69 sec. while it takes the 10D 2.54 seconds. Additionally, the 20D can write a RAW +Small/Normal JPEG in just 1.66 seconds where it takes the 10D 5.04 seconds.
When it comes to Shot to Shot times, the 20D and 10D are very similar until they reach their buffer limits. The 20D has a Shot to Shot time of 0.41 sec. for 16 Large/Fine JPEG frames before slowing to 1.15 sec between shots. However, the 10D is only able to shoot at 0.41 sec. between frames for 9 frames before slowing to 4.99 sec. between shots. In RAW mode, the 20D has a Shot to Shot time of 0.42 sec. until the buffer fills after 6 frames. Then, shooting slows to 2.13 sec. between shots. The 10D has a Shot to Shot time of 0.43 sec for 9 RAW frames before slowing to 9.99 sec. between shots.
For Shot to Shot w/Flash images, the 10D was just a bit faster. The 20D shot JPEG images at 1.14 sec. between shots while the 10D shot them at 1.03 sec. In RAW mode, the 20D took 1.17 sec. between shots while the 10D took 1.12 sec. The difference here is so small that most people are unlikely to notice it.
The 20D has a huge advantage over the 10D in its continuous drive capability. In our test, the 20D alternated between taking 15 and 16 Large/Fine JPEG frames in a burst at 5.17 fps. After the last frame, the camera slowed to 0.94 seconds between frames. In contrast, the 10D can shoot 9 JPEG frames at 3.2 fps. It then slows to 4.95 seconds between shots. In RAW mode, the 20D is able to shoot 6 frames at 5.5 fps before slowing to 2.08 seconds between frames. The 10D can shoot 9 RAW images at 3.17 fps before slowing to 8.57 seconds between shots.
To make the 20D's speed advantage even clearer, the 20D can empty 79.5 MB of JPEG images from its buffer in just 14.22 seconds while it takes the 10D more than twice as long (33.91 seconds) to clear half the data (39.7 MB). In continuous RAW mode, the 20D can clear 61.8 MB of images in just 10.09 seconds while the 10D clears 68.9 MB in nearly a minute (59.94 seconds).
Not only is the 20D faster at writing its files, but it can also write in circumstances that the 10D can't. For example, the 10D will not write files if the shutter button is pressed halfway down (unless the buffer is entirely full). The 20D is able to write files with the shutter button halfway pressed in all situations. Also, unlike the 10D, you are able to access menu options while the camera is writing to the CF card. On the 10D, you will see a "busy" screen until all files are written before you can even get into the menu. The same applies for reviewing images.
Resolving Fine Lines
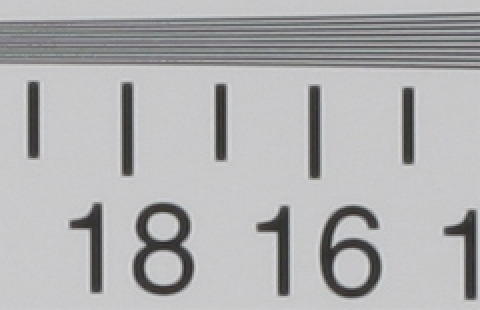
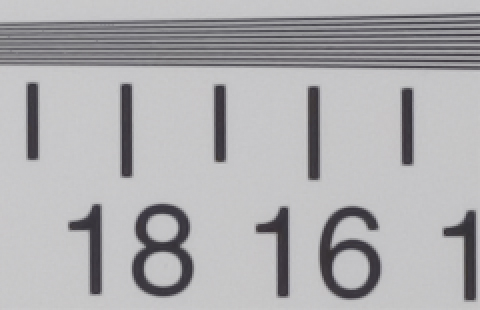
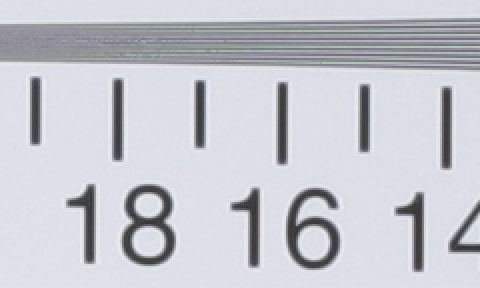
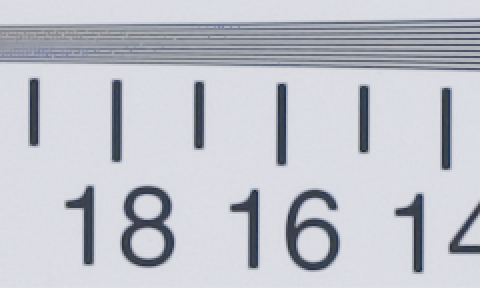
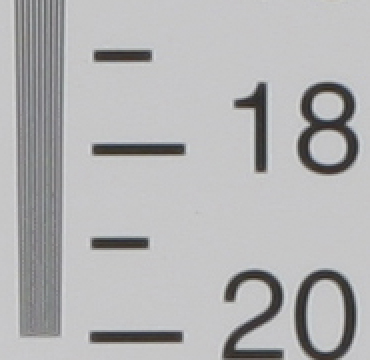
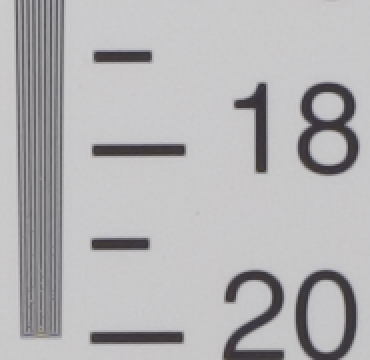
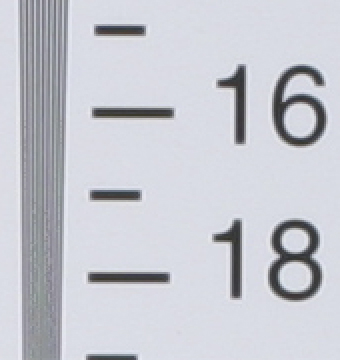
For our resolution test, we reset the cameras to their default settings and then captured the chart in both JPEG/Fine and RAW modes. The cameras were set to Aperture priority (f/11). A Canon 50mm Macro lens was used on both cameras. For more information, refer to our Testing Procedures page. The RAW images have been converted to high quality JPEG files using Photoshop. We did not do any post-processing other than adjusting the EV (exposure value) when necessary. The original CRW/2 files are also available for download. Below the downloadable charts are 200% crops of the test. When reading this chart (ISO12233), the numbers represent lines per picture height (LPH). For example, the number 15 would represent 1,500 lph.| 20D | 10D | |
| JPEG/Fine | Download | Download |
| RAW (JPEG) | Download | Download |
| RAW (original) | Download WARNING: 8MB |
Download WARNING: 6MB |
| 20D JPEG (+1.3 EV) |
 |
| 20D RAW (+1.3 EV) |
 |
| 10D JPEG (+1.5 EV) |
 |
| 10D RAW (+2.0 EV) |
 |
| 20D JPEG (+1.3 EV) |
 |
| 20D RAW (+1.3 EV) |
 |
| 10D JPEG (+1.5 EV) |
 |
| 10D RAW (+2.0 EV) |
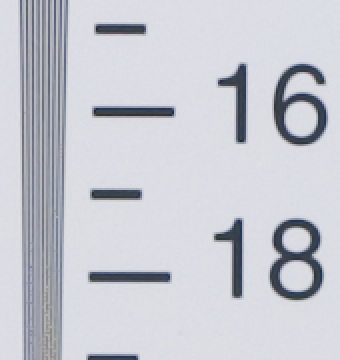 |
Our resolution chart shows that the 20D is able to resolve fine lines out to 1,800 LPH (lines per picture height) in RAW mode. The image loses detail as the lines become finer, but the chart ends before extinction occurs. In JPEG/Fine mode, the 20D loses a small amount of resolution and produces fine lines out to 1,700 LPH. Again, extinction does not occur because of the limit of the chart.
In RAW mode, the 10D is able to capture fine detail out to 1,600 LPH. Extinction does not quite occur by the end of the chart, but it is close. In JPEG/Fine mode, the 10D can produce distinct lines up to 1,500 LPH. What this test shows is that the 20D is able to capture as much as 2,000 LPH more than the 10D.
Color Reproduction
* For all of our color tests, we reset the 20D and 10D to their factory default settings. A Canon 50mm Macro lens was used on both cameras. The 20D was set to Parameter 2 while the 10D was set to Standard. Then, they were set to record using the highest image quality JPEG option in Aperture priority mode (F/11).We took a picture of our color chart using each of the following WB settings: Auto, Tungsten, and Manual. Click on a thumbnail below to view the full-size image.
Tungsten
| Auto WB | Tungsten WB | Manual WB | |
| 20D |  Click to enlarge. |
 Click to enlarge. |
 Click to enlarge. |
| 10D |  Click to enlarge. |
 Click to enlarge. |
 Click to enlarge. |
 Reference Chart ("actual colors") |
|||
Crops
| Auto WB | Tungsten WB | Manual WB | |
| 20D | 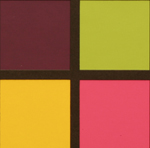 |
 |
 |
| 10D | 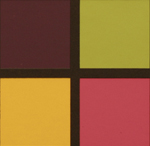 |
 |
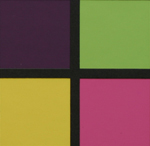 |
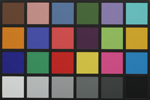
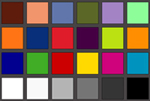
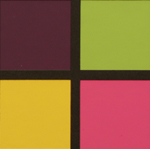
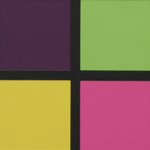
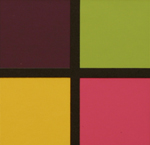
With Auto WB, both cameras have a strong yellowish cast. However, the 20D is just a bit more accurate than the 10D. When Tungsten WB is set, the colors are more accurate, but there is still a slight yellowish cast. Again, the 20D chart is a little more accurate and brighter overall. When both cameras are set to Manual WB, the colors are very accurate. Our only complaint is that the charts are slightly underexposed. Overall, the 20D does the best job dealing with Tungsten light and produces brighter exposures than the 10D.
Daylight
| Auto WB | Daylight WB | Manual WB | |
| 20D |  Click to enlarge. |
 Click to enlarge. |
 Click to enlarge. |
| 10D |  Click to enlarge. |
 Click to enlarge. |
 Click to enlarge. |
 Reference Chart ("actual colors") |
|||
| Auto WB | Daylight WB | Manual WB | |
| 20D | 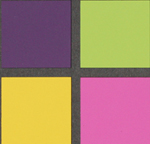 |
 |
 |
| 10D | 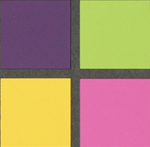 |
 |
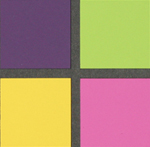 |
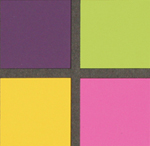
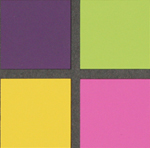
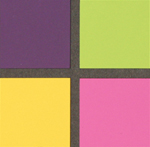
In sunlight, both cameras do a wonderful job producing accurate colors. However, the 10D produces charts that are just a bit brighter than the 20D. At any rate, both cameras produce consistent accurate results in Auto, Daylight, and Manual WB modes.
Studio Shot (Tungsten)
In this shot, we tested each camera's ability to reproduce colors in our studio shot using different WB settings. The cameras were set to Aperture priority mode (f/11) without the flash.| Auto WB | Tungsten WB | Manual WB | |
| 20D | 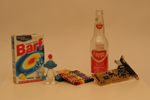 Click to enlarge. |
 Click to enlarge. |
 Click to enlarge. |
| 10D |  Click to enlarge. |
 Click to enlarge. |
 Click to enlarge. |
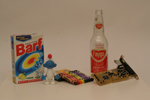
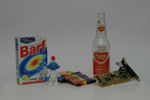
In this comparison, it is easy to see that both the 20D and 10D have an orange-yellow cast in Auto WB mode in tungsten lighting. However, the 10D has just a slightly stronger cast than the 20D. With Tungsten WB, it's a similar story. Both show a lighter orange-yellow cast than in Auto WB. And again, the 20D does just a bit better than the 10D. In Manual WB mode, the cameras do much better. Both cameras underexpose the image, but the 20D is a bit brighter than the 10D. Overall, we were not very impressed with the 20D's performance in tungsten light. We are happy to see it producing more accurate colors than the 10D, but we expect more than this.
Built-in Flash
For the flash test, we set both cameras to Program AE mode and set the ISO mode to 100, white balance to Auto, and recording quality to Large/Fine JPEG. The 20D was set to "Parameter 2" and the 10D was set to "Standard". The pictures were taken from 5 feet away.| Program AE mode | |
 20D (Parameter 2) Click to enlarge. |
 10D (Standard) Click to enlarge. |
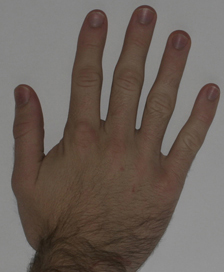
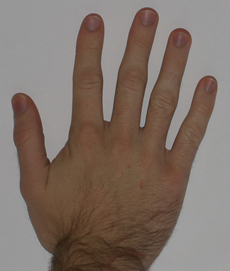
While both the 20D and 10D are able to reproduce accurate colors, they have both underexposed the shot in Program AE mode. However, the 10D image is noticeably brighter than the 20D.
| Auto mode | |
 20D Click to enlarge. |
 10D Click to enlarge. |
In Auto mode, we can see that both cameras produce pictures with higher levels of saturation. In addition, the 20D now has a slight orange cast on the white background that is most likely caused by saturation of the ambient tungsten light in the room. The background on the 10D image is virtually identical to the Program AE shot. Overall, we found the 10D to produce more accurate images with its built-in flash. The 20D shoots significantly underexposed images in Program AE mode and highly saturated images in Auto mode.
Noise
The noise test consists of pictures of our studio shot taken at increasing ISO levels to show the effect on the image. The pictures were taken after resetting the cameras to their factory default settings. The cameras were then set to record with the highest quality option with manual WB. Aperture priority (f/11) was used. The 20D has been set to Parameter 2 while the 10D is set to Standard. A Canon 50mm Macro lens was used on both cameras. Click on a 100% crop below to view the full-size image.Across the board, the 20D dominates over the 10D in its low noise capabilities. Even at ISO 200 and 400, the 20D produces clean images while the 10D images begin to get a bit grainy. By ISO 1600 and 3200, the advantages of the 20D are astounding. While the 10D takes on serious detail loss and discoloration, the 20D retains significantly more fine details. In our noise test, it is safe to say that ISO 3200 on the 20D is roughly equivalent to somewhere between ISO 800 and 1600 on the 10D. This is a very important advantage for 20D users because it empowers them to shoot in darker lighting with much better results than the 10D.
General Image Quality
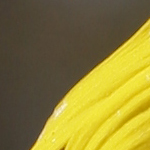
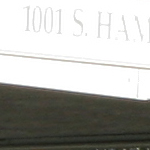
For these pictures, both the 20D and 10D were reset to their factory default setting. A Canon 50mm Macro lens was used for each camera. The 20D was set to Parameter 2 while the 10D was set to Standard. Both cameras were set to record in in JPEG mode (Large/Fine). The pictures were then taken using modes in the "Creative Zone" with Auto WB. The shooting information can be seen directly under each thumbnail. Click on a thumbnail to view the full-size image. The crops below the thumbnails are 100%.  50mm ISO 200, 1/500, f/9.0 Click to enlarge. |
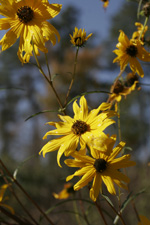 50mm ISO 100, 1/640 f/5.6 Click to enlarge. |
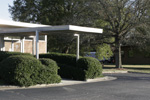 50mm ISO 400, 1/400, f/7.1 Click to enlarge. |
 |
 |
 |
 50mm ISO 3200, 1/200, f/6.3 Click to enlarge. |
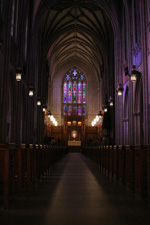 28-135mm (I.S. enabled) ISO 3200, 1/100, f/3.5 Click to enlarge. |
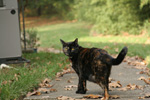 28-135mm ISO 800, 1/500, f/5.6 Click to enlarge. |
 |
 |
 |
The first two samples show that the 20D is capable of producing sharp, well-exposed, and low-noise images. In the third sample, we were looking to see how the 20D could handle an image with some very dynamic lighting. Although the dynamic range is pretty good, it does not appear to be noticeably different than that of the 10D. The fourth and fifth images clearly show the 20D's amazing low-noise capabilities at ISO 3200. Both images were handheld - something that would be hard to do (particularly the chapel shot) on the 10D at ISO 800 or 1600. As for other aspects of image quality, the 20D is very similar to the 10D. Both cameras use a low default sharpening and saturation setting. Most people shooting in JPEG mode will probably want to boost the sharpening level as both cameras are very conservative with the default setting.
ISO 3200 Comparison
Below, we have compared the 20D to the 10D in their abilities to shoot indoor high ISO images.| 20D | 10D |
 28-135mm ISO 3200, 1/180, f/5.6 Click to enlarge. |
 28-135mm ISO 3200, 1/100, f/5.6 Click to enlarge. |
 |
 |
As this handheld shot comparison clearly shows, the 20D is able to produce impressively low noise images at its highest ISO setting. The 10D image, on the other hand, suffers from a massive loss of detail. This comparison is important because it shows that the 20D provides the freedom to shoot low light subjects without a tripod and still achieve usable results.
Long Exposure Comparison
For our long exposure comparison shot, we set both the 20D and 10D to ISO 100, Auto WB, and Large/Fine JPEG mode. The picture was taken from the same tripod with mirror lockup enabled. For the 20D, we took a picture with and without NR (Noise Reduction).| 20D | 20D (NR) | 10D |
 Click to enlarge. |
 Click to enlarge. |
 Click to enlarge. |
 |
 |
 |
Interestingly, the 10D image comes out a bit sharper in this comparison even though it has several stuck pixels throughout the image. In the 20D image without NR, there is one red stuck pixel (as shown in the crop). However, when NR is enabled via the Custom Functions, the stuck pixel does not appear.
Final Words
With the 20D, Canon has taken a great camera and made it even better. The 20D shares a very similar look to the 10D in a slightly smaller and lighter body. The new camera features a 1.9 megapixel advantage over the 10D and has an EF-S lens mount that accepts Canon's new wide angle EF-S lenses as well as a plethora of existing EF lenses. Other than some minor updates to the controls and body, the real improvements are in its performance.In our review, we discovered that the 20D is much faster than the 10D. From the moment the power switch is flipped, the 20D is ready to shoot. The new 9-point auto-focus system proves to be speedier than the 7-point system on the 10D. Despite producing larger average files than the 10D, the 20D is able to clear its buffer to the flash card at significantly faster speeds. The 20D improves on the 10D's continuous drive capability as well. The 10D can shoot 9 JPEG files at 3 fps while the 20D can shoot approximately 20 at 5 fps. We found that the most significant advantage of the 20D is its ability to clear its buffer quickly. When we filled each camera's buffer, the 20D was able to clear it in 14.2 seconds while it took the 10D 59.9 seconds. After shooting with the speedy 20D for a while, going back to the 10D seemed almost painfully sluggish. The 10D will not allow you to view previously taken pictures or change menu settings until all images have been cleared from the buffer. In contrast, the 20D gives priority to user input.
The 20D's white balance performance is very similar to the 10D. Both cameras show a bit of a yellowish cast with Auto WB in tungsten light, although the 20D is just slightly better. Also, the 20D seems to produce images that are a bit brighter than the 10D. In sunlit shots, both cameras prove to have outstanding color reproduction. One downside of the 20D is that we found it to underexpose images taken with the built-in flash compared to the 10D. However, this can always be worked around with some exposure compensation. We would have like to see the 20D provide a larger dynamic range than the 10D. Unfortunately, if it does have a larger dynamic range, it is a fairly small difference as we were unable to notice it.
For anybody looking for a good reason to get into the digital SLR scene, the 20D is an excellent choice. At a price of $1500 for the body and an extra $100 for the kit lens, the 20D is an amazing value. The question of whether to upgrade becomes a very hard question for current 10D and Digital Rebel owners. Regarding image quality, the biggest advantage is the 20D's ability to shoot low noise images at ISO 3200. This provides the opportunity to handhold indoor and low light shots without using a flash. The other really big advantage of the 20D is its super fast performance. If you find the "busy" screen on the 10D and Digital Rebel as annoying as we do, it just might be worth the upgrade. Until full frame Digital SLRs become much more affordable, it's not going to get much better than this.
| Pros | Cons |
|
|
Thanks again to Newegg.com for loaning us the Canon 20D Kit for review.

