Original Link: https://www.anandtech.com/show/1511
Fujifilm FinePix E550: Fuji's Newest Packs a Punch
by Stephen Caston on October 15, 2004 12:05 AM EST- Posted in
- Digital Camera
Index
Fujifilm stands out amongst other digital camera companies because of its research in sensor technology. The Fujifilm FinePix E550 incorporates the Super CCD HR. This sensor continues where the Super CCD left off, providing the same benefits of the Super CCD in a smaller physical size. The advantages over traditional CCD technology include a wider dynamic range, improved sensitivity and signal-to-noise ratio. The FinePix E550 is the latest camera from Fujifilm offering a 4x optical zoom and 6.3 megapixel output (12.3 interpolated) with exposure controls ranging from full auto to manual.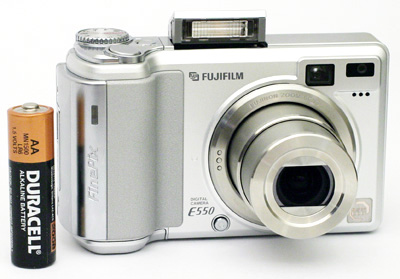
In our review, we found the FinePix E550 to be a great performer. The camera proved itself to be fast and responsive in many of our tests. For example, start up, shot to shot, and shutter lag times were very speedy. The E550 is also capable of producing some well-exposed and detailed images. Furthermore, in RAW mode, we noticed a considerable increase in dynamic range (both in highlight and shadow detail). The camera produces clean low noise images (even in long exposures) consistently. Considering the low price tag on the E550, we were very impressed with its overall performance.
Product Sample provided by Newegg.com
Fujifilm FinePix E550 Specifications
| Fujifilm FinePix E550 | |
| Release Date | July 2004 |
| Price | ~$349 - $449 |
| Pixel Count | 6.3 Million |
| Camera Type | Compact zoom |
| Highest Resolution | 4048x3040 (interpolated) |
| Lower Resolutions | 2848x2136, 2048x1536, 1600x1200, 640x480 |
| Sensor Type | Super CCD HR |
| Sensor Size | 1/1.7" |
| LCD Screen Size | 2.0" |
| Optical Zoom | 4x; 32.5mm - 130mm equivalent |
| Focus Range | 2.0' - Infinity |
| Macro | 3.0" - 33.5" |
| Digital Zoom | Up to 4x |
| Lens Thread | Fits accessory lenses |
| Auto Focus | Yes |
| Auto Focus Type | TTL contrast-type |
| Manual Focus | Yes |
| Aperture Range | W: f2.8 - 8.0; T: f5.6 - 8.0 |
| Shutter Speeds | 3 - 1/2000th sec. |
| ISO | Auto, 80, 100, 200, 400, 800 |
| Flash | Built-in, pop-up |
| Flash Range | W: 2.0 - 14.8'; T: 2.0 - 7.2' |
| Flash Compensation | -2/3, -1/3, +/-0, +1/3, +2/3 |
| Exposure Compensation | +/- 2 stops in 1/3 increments |
| White Balance | Auto, Custom, Daylight, Shade, Fluorescent ("daylight"), Fluorescent ("warm white"), Fluorescent ("cool white"), Incandescent |
| Bracketing | Yes, 1/3, 2/3, 1.0 EV |
| Metering | Multi, Spot, Average |
| Color Space | RGB |
| Aperture Priority | Yes |
| Shutter Priority | Yes |
| Manual Exposure | Yes |
| Continuous Drive | Yes, 3.7 fps for 4 frames |
| Self-Timer | Yes, 10, 2 sec. |
| Storage Method | xD-Picture Card |
| Storage Included | 16MB xD-Picture card |
| Compressed Format | JPG |
| Uncompressed Format | RAF |
| Quality Settings | None |
| Video clips | 640x480, 320x240, 30 fps, w/sound, AVI, unlimited duration |
| Battery Type | 2 AA Ni-MH/Alkaline |
| Charger Included | Yes, 4.5 hours |
| PC Interface | USB |
| TV-out | Yes |
| Tripod Mount | Yes, plastic |
| Weight (w/out battery or card) | 7.1 oz. |
| Dimensions | 105mm x 63mm x 34.4mm |
| Included in the Box |
|
The Design: Fujifilm FinePix E550
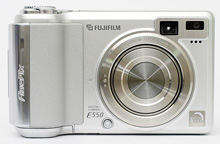
The front of the E550 has a large hand grip on the left side that makes handling the camera very easy. There is a self-timer lamp built in to the hand grip that lights up and blinks during a self-timer shot. The lens is capable of a 4x optical zoom with a 35mm equivalent to 32.5mm - 130mm. The wide end of the zoom is just a bit wider than average for most compact cameras. Above and to the right of the lens are the viewfinder window, flash control sensor, and microphone.
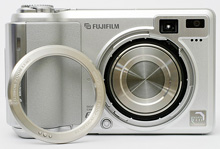
To the lower left of the lens is the "adaptor ring release" button. By pressing this button, you are able to rotate the adaptor ring counter-clockwise. This allows you to remove the adaptor ring in order to attach optional accessory lenses.
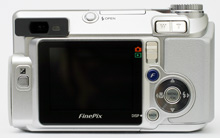
There are a lot of things to see on the back. The E550 features a large 2.0" LCD monitor with 154,000 pixels. On the left side is the E.C. (exposure compensation) button. In the upper-right corner are the viewfinder and the viewfinder indicator lamp. To the right is the flash release button. Pressing this button causes the flash to pop up from its closed position. To close the flash, you must push it back into the body. On the lower right side of the LCD monitor are some of the control buttons. Here, we see the 4-direction pad with separate Menu/OK button in the middle along with the Display/Back and Photo mode buttons. The directional pad is used primarily for navigating through menus. The Menu/OK button serves both to accept an option and to enter/exit the main menu. The Photo mode button is used to access image size, ISO, and color options. Above the Photo mode button is the Mode switch that changes the camera back and forth from Play and Record modes. Above the mode switch is the zoom controller that controls the optical and digital zoom in record mode as well as the magnification of an image in play mode.
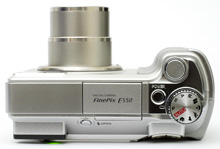
On the top of the camera is the built-in flash. The flash is spring-loaded and can be released by pressing the flash release. The working range of the built-in flash is 2.0' - 14.8' in wide angle and 2.0' - 7.2' at telephoto. To the right of the flash is the main power button. This button turns the camera on and off in either record or play mode. To the right are the shutter button and the Mode Dial. The Mode Dial has 10 positions that cover the range from Auto to Manual to Movie mode.
 Click to enlarge. |
 Click to enlarge. |
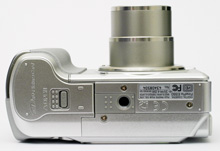
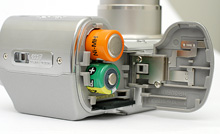
The bottom of the E550 has a sliding door that reveals the xD-Picture card slot and the AA battery compartment. The E550 comes packaged with 2 Fujifilm AA NiMH 2300 mAh rechargeable batteries. The camera can also be powered with AA alkaline batteries or an NH-10 rechargeable battery. Additionally, there is an optional "PictureCradle" and AC power adaptor that can be purchased separately. The bottom of the E550 also features a plastic tripod mount.
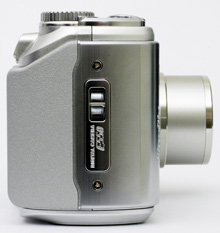
On the right side is a post for the supplied wrist strap.
 Click to enlarge. |
 Click to enlarge. |
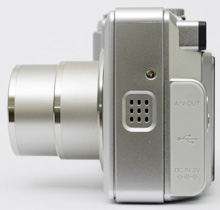
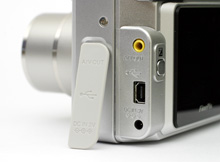
On the left side, we can see the built-in speaker. To the right is a rubber tab that covers the A/V-out, USB, and DC-in ports. To access these ports, you must physically remove the rubber tab as it is not attached to the camera. Perhaps Fujifilm could have devised a way to attach the tab to the camera. Instead, they have simply included a spare tab in the kit should you happen to lose the original.
The Fujifilm FinePix E550 is constructed mostly from hard silver plastic, although there are some metal buttons and plates. It is very comfortable to hold, thanks to its light weight and generously-sized hand grip. Although it is fairly compact, you will definitely remember that it is in your pocket.
Recording Features
In all recording modes, the FinePix E550 records images as either JPEG or RAF (RAW) files. The resolution options are below:| Setting | Resolution (pixels) |
| CCD RAW | 2848x2139 |
| 12M F | 4048x3040 (interpolated) |
| 12M N | 4048x3040 (interpolated) |
| 6M | 2848x2136 |
| 3M | 2048x1536 |
| 2M | 1600X1200 |
| 03M | 640x480 |
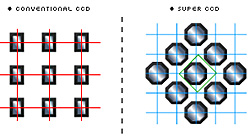
Super CCD
Image courtesy of Fujifilm
The FinePix E550 implements the Super CCD HR sensor. In briefly describing the sensor, we will give you a little background information on the technology that Fujifilm is developing. In 2002, Fujifilm created the Super CCD. The Super CCD consists of octagonally-shaped photodiodes. This is designed to help capture more information horizontally and vertically. Fujifilm claims that the benefits are improved sensitivity, dynamic range, and signal-to-noise ratio. Then, in 2003, the Super CCD HR was created with the idea that it can create images with great detail using a sensor that is less than 2/3 the size of the Super CCD. Later in 2003, the Super CCD SR was designed and is seen in cameras like the FinePix F700, S20 Pro, F710, and S3 Pro. The concept behind the Super CCD SR is to have two photodiodes at each photosite: one that is more sensitive to light and one that is less sensitive. By using two photodiodes, Fujifilm claims that the dynamic range is improved, producing an image "that is more richly detailed, particularly in the highlight area". Go to http://www.fujifilm.co.uk/digital/ to learn more about the technology developing at Fujifilm. (Click on the button "Find out about our new technology" for a cool flash presentation about the sensors.)
The E550 has 10 exposure modes ranging from Auto to Manual. They are Auto, Program, Shutter Priority, Aperture Priority, Manual, Portrait, Landscape, Sports, Night Scene, and Movie. In Auto mode, the camera determines most of the settings for you, giving you access to just a few options. Pressing the Photo mode button brings up the following options:
| Photo mode Menu (Auto) | |
| Quality | 12M F, 12M N, 6M, 3M, 2M, 03M |
| ISO | Auto, 80, 100, 200, 400, *800 |
| FinePix Color | B&W, Chrome, Standard |
We should point out that the ISO setting, "Auto", is only available in Auto mode. In all other modes, you must select the desired ISO level. RAW mode is also available through the Menu and offers 2848x2139 pixels. The difference between "12M F" and "12M N" is the amount of compression used. The owner's manual explains that the different quality modes are printable up to the following sizes:
| Setting | Printable size (inches) |
| 12M F | 14 x 17 (better quality) |
| 12M N | 14 x 17 |
| 6M | 10 x 12 |
| 3M | 6 x 8 |
| 2M | 4 x 6 |
| 03M | E-mail or website |
The ISO level corresponds to the camera's sensitivity to light. The ISO level can be set from Auto to 400 when any quality setting is selected. However, to enable ISO 800, you must use the quality setting 3M or smaller. If you have a higher quality setting selected before selecting ISO 800, the camera will shift the quality setting down automatically to 3M. The FinePix Color settings are effects that can be selected to shoot in black and white or chrome. In Auto mode, the Macro setting can also be enabled by pressing the left arrow pad, which allows focusing as close as 3 inches. By popping up the built-in flash, you can change the flash mode from Auto, Red-eye reduction, and Forced. The self-timer can also be enabled by pressing the Menu button and selecting between 10 seconds or 2 seconds.
There are 3 continuous drive options available in Auto mode: Top 4, Final 4, and 40 frames. These continuous drive options are not available if RAW is selected as the recording quality. "Top 4" allows you to shoot up to 4 continuous frames when the shutter button is held down. The next continuous drive option is called "Final 4". With Final 4, the camera will shoot up to 40 pictures in any quality setting for as long as the shutter button is held down. However, it will only save the last 4 images taken after the shutter button is released. The "40 frames" setting is referred to as "Long-period continuous shooting" in the manual and is only available in Auto mode. This setting automatically fixes the resolution to 1600x1200 and allows you to record images at rates as fast as 1.6 fps. The camera will continue to record images for as long as the shutter button is held down (up to 40 images). We should point out that in all continuous drive modes, except "40 frames", the camera displays images as you take them so that you can monitor action on the LCD screen. In "40 frames" mode, the LCD blacks out between shots.
In Program, Shutter Priority, Aperture Priority, and Manual modes, there are numerous additional options available to the user. By pressing the Menu button in any of these advanced recording modes, the following options are presented.
| Menu | |
| Self-timer | Off, 10, 2 sec. |
| White Balance | Auto, Custom, Daylight, Shade, Fluorescent ("daylight"), Fluorescent ("warm white"), Fluorescent ("cool white"), Incandescent |
| Focusing | AF (Center), AF (Multi), AF Area, Continuous AF, Manual |
| Photometry | Multi, Spot, Average |
| Continuous drive | Off, Top 4, Bracketing, Final 4 |
| Option | LCD, Set-up |
| Bracketing | +/- 1/3, 2/3, 1 EV |
| Sharpness | Hard, Normal, Soft |
| Flash | -2/3, -1/3, +/-0, +1/3, +2/3 |
| Focusing Modes | ||
 AF (Center) |
 AF (Multi) |
 AF Area |
 Continuous AF |
 Manual |
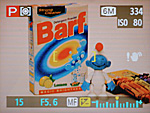
The E550 offers several white balance options from Auto to Manual. It even has 3 settings for different fluorescent light sources including "daylight", "warm white", and "cool white". The camera offers 5 different focusing modes from which to choose. With AF (Center), a crosshair appears in the center of the screen. You can half-press the shutter button to lock focus on your subject. Then, recompose the frame before pressing the shutter button fully. With AF (Multi), the camera attempts to detect the subject automatically when the shutter button is half-pressed. It then displays brackets to indicate the focus point. With AF Area, a box is presented with the phrase "Select AF Area" at the top of the screen. At this point, you are able to use the arrow pad to move the box to one of 49 areas in the frame. To finalize your decision, you press the Menu/OK button. With Continuous AF, the camera will focus constantly on its own until the shutter button is half-pressed. When the shutter button is half-pressed, focus is locked and the picture can be taken. To focus the E550 manually, you must select "MF" from the Focusing menu. To focus, you must hold down the E.C. (exposure compensation) button and use the zoom controller to focus near and far. When the desired focus is achieved, you can press the shutter button fully to take the picture.
There are 3 metering options available: Multi, Spot, and Average. When Multi metering is selected, the camera analyzes the scene to determine the proper exposure. With Spot metering, the camera uses information from the very center of the frame to determine the right exposure. With Average metering, the camera averages the values of the entire scene for the best exposure. In addition to the "Top 4" and "Final 4" continuous drive modes available in Auto, the advanced recording modes offer Bracketing. With Bracketing selected as the Continuous Drive setting, the E550 will take 3 pictures in a row with varying exposures. The exposure variance is set through the sub-menu, "Bracketing". When the shutter button is pressed, the camera will take 3 pictures in the following order: normal exposure, overexposure, and underexposure. The idea is that you can sort through the pictures later and pick the one with the best exposure.
Under the Option sub-menu, you can select the LCD brightness from 10 levels. The Set-up option displays the camera's Setup screen with settings related to camera operation. We will discuss these options further down on this page. With the Sharpness settings, you can select the desired level of sharpening that the camera will apply to JPEG images. The Flash options allow you to adjust the output of the flash. This is helpful if you find the flash is emitting too little/much light than you desire. Speaking of the flash, in the advanced recording modes, there are two additional flash modes available: Slow synchro and Red-eye reduction w/Slow synchro. Slow synchro refers to a special flash mode that helps to obtain a natural-looking flash picture in low light. The camera achieves this by first firing a flash to illuminate the subject. Then, the shutter stays open longer to allow ambient light in, creating a natural and well-lit flash image. Because of the slower shutter speed, a tripod is always recommended with Slow-synchro shots. In Program, Shutter Priority, and Aperture Priority modes, exposure compensation is available as +/- 2 stops in 1/3 increments. To apply compensation, hold down the E.C. button on the back left side of the camera and adjust the exposure up and down using the left/right arrow keys.
The other 4 still recording modes are Portrait, Landscape, Sports, and Night Scene. They operate like Auto mode in the sense that the camera offers very few options via the Menu button. There are only options for the self-timer and continuous drive modes, "Top 4" and "Final 4". The flash behavior can be changed in all modes except Landscape (where the flash is disabled). In Portrait mode, the camera uses a large aperture to create a small depth-of-field, causing the subject to stand out against a soft background. In Landscape mode, the camera uses a small aperture to achieve a larger depth-of-field. This creates an image where both the foreground and background are in sharp focus. With Sports mode, the camera sets a fast shutter speed in order to capture fast-moving subjects. In Night Scene mode, the camera uses a shutter speed as slow as 3 seconds to capture images in low light. The flash can be enabled to perform a slow-sync with or without red-eye reduction.
| Display | ||
 Standard |
 Standard w/Grid |
 No Information |
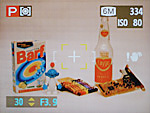
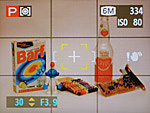
The LCD display can be changed by pressing the Display/Back button. The cycle is as follows: standard, standard w/grid, no information, LCD off.
Movie Mode
The E550 is capable of recording video with audio at 30 fps in AVI format. The duration of video clips is only limited by amount of available storage. The resolution options are 640x480 or 320x240. We were disappointed that there were no additional options available via the Menu/OK button. It would be nice to have the option to change the white balance or to apply exposure compensation. In addition, neither the optical nor digital zoom can be utilized during recording. In the General Image Quality section of this article, we will take a look at a sample video clip.In all recording modes, the Set-Up menu can be accessed via the Menu/OK button. The following options are available:
| Set-Up Menu 1 | |
| Image Display | Off, On, Preview |
| Power Save | Off, 2, 5 min. |
| Format | OK, Cancel |
| LCD | On, Off |
The Image Display option determines what the camera will do directly after taking a picture. If "Off" is selected, the camera will not display the image just taken. It will simply prepare for the next picture by displaying the live image on the LCD. If "On" is selected, the camera will display the image for 2 seconds immediately after it is taken. If the "Preview" option is selected, the camera will allow you to choose whether to record the image to the flash card or to discard it.
| Set-Up Menu 2 | |
| Beep | Off, Volume 1 - 3 |
| Shutter | Off, Volume 1 - 3 |
| Date/Time | Set |
| Time Difference | Set |
The first two options in the second menu allow you to either turn off the operation sounds or to adjust them in 3 increments. The Time Difference option allows you to switch easily from Home and Local times. This is useful if you find yourself frequenting two different time zones.
| Set-Up Menu 3 | |
| Frame No. | Continuous, Renew |
| USB Mode | Mass Storage Device, WEB, PictBridge |
| CCD-RAW | Off, On |
| Language | English, French, Dutch, Spanish, Japanese, Chinese |
The Frame No. option allows you to specify whether to continue with the present file numbering sequence or to reset it. The USB Mode option allows you to switch to one of the three options. With Mass Storage Device selected, you are able to transfer files to and from a computer. With WEB, the E550 can be used as a Web Cam. However, the manual indicates that this is only possible with Windows XP. The PictBridge option allows you to connect the camera to a PictBridge-compatible printer to print directly from the camera. With the CCD-RAW function enabled, the camera will record images directly from the sensor without any post-processing. The images are recorded as RAF files on the flash card.
| Set-Up Menu 4 | |
| Video System | NTSC, PAL |
| Discharge | OK, Cancel |
| Reset | OK, Cancel |
"Video System" refers to the TV-out capability of the camera. It can be toggled between NTSC and PAL, depending on the television that you will be using. The Discharge option is an interesting one. In order to help maintain the maximum charge capacity, the manual recommends using the Discharge option when using new Ni-MH batteries or when your batteries do not seem to be holding the same charge that they once did. Something known as the "Memory Effect" can occur with rechargeable batteries. This causes the batteries to hold a lesser charge than they are capable of. The Reset option resets the camera back to its factory default settings.
Overall, we found the recording options of the E550 to be very straightforward. We also like the layout of the menu system. Unlike some cameras that list all the menu options in a long list, the E550 uses a tab system that makes the process of finding and changing a setting much faster.
Playback Features
To view previously taken photos and videos, you must slide the Mode switch down to Play mode. Play mode can be entered either from Record mode or when the camera is off. Cycling through pictures and video clips is accomplished by using the left/right arrow buttons. Image regular view |
 Image magnified 21.1x |
An image can be magnified by using the zoom controller. The level of magnification depends on the resolution of the image. For example, an image shot in 12M mode can be magnified up to 21.1x, while an image shot in 6M mode can be magnified up to 14.8x. When magnified, you can navigate to different areas of the image by using the arrow pad. We found the process of zooming and moving to different areas to be rather slow. In fact, it takes nearly 7 seconds to perform a 21.1x magnification and nearly 13 seconds to move horizontally across the 4,048 pixels from the full magnification. Although this may be trivial, it is certainly something to be aware of.
 Standard |
 No information |
 Thumbnail |
 Detailed information |
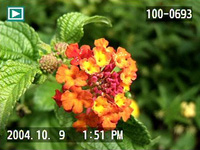
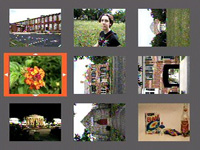
Pressing the Display/Back button causes the LCD to change its display. The default view displays the image with the file number, date, and time. Another press of the Display button clears the screen of all information, leaving just the image. A third press of the Display button changes the screen to a 9-image thumbnail view. While viewing a single image, you can access detailed information by holding down the exposure compensation button on the left side of the LCD monitor. The detailed information includes the resolution, quality setting, shutter speed, f-stop, FinePix Color mode, ISO setting, flash mode, date/time, and a histogram.
Pressing the Photo mode button brings up a DPOF (Digital Print Order Format) menu. You are able to mark images to be printed using a DPOF-compatible printer. You can also indicate weather or not you want the date stamped on the printed image.
By pressing the Menu/OK button, you gain access to several options. The first option that presents itself is an Erase menu. The choices are to delete the current frame or all frames. Next, you can protect frames from being accidentally deleted by marking them as protected. Then, there are Playback options that control the presentation of a slideshow. There are two options for duration and two options for transition style. We timed the first duration option at 3.5 seconds and the other at 10.5 seconds. The first transition style simply replaces the previous image with the next image with no effect. The second option uses a diagonal dissolve to reveal the next image. Also available via the Menu button is a Voice Memo option that allows audio clips to be associated with images. The audio clips are limited to 30 seconds and are recorded as WAV files with the same file number as the image. The final option is called "Trimming", and it allows you to crop an image. To do so, you use the zoom controller to adjust the magnification and the arrow pad to select the portion of the image to save. When you have framed the image as you would like it cropped, you simply select OK and the camera saves the newly cropped image as a new file. There is also an option to adjust the volume of the camera's speaker in 10 increments.
Battery Performance
Our general method for battery testing is to reset the camera to its default settings and change the recording mode to the highest quality option. Then, we take 5 pictures without the flash and 2 pictures with the flash until the battery is dead. For more information on our battery test, please refer to our Testing Procedures page. For this test, we used 2-AA NiMH Power2000 2500mAh batteries charged overnight in a Power2000 wall charger. The batteries were fully drained before charging for the test.| Number of shots taken in one battery charge |
| 558 |
Using our two AA NiMH Power2000 2500mAh rechargeable batteries, the E550 was able to take 558 shots on a single charge. We would expect a similar output using the included Fujifilm 2300mAh batteries. The great thing about AA powered cameras is that you can buy affordable spares to have charged as backups. Although 558 shots is a little lower figure than what an average camera does in our battery test, we feel that it will be plenty of power for a heavy day's shooting. We still recommend picking up some spare batteries to alleviate any down time for recharging.
The Timing Tests
* NOTE: For all of our time tests, the camera is reset to its factory default settings. The E550 was set to Auto mode. We also disabled all sounds. A Fujifilm 512MB xD-Picture card was used.Before reading our results, please refer to our Testing Procedures page.
Startup Time
The startup time is recorded from the moment the power button is pushed to the moment the shutter sounds. The camera was set to record in Auto mode.| Startup time (seconds) |
| 1.94 |
When the power button is pressed on the E550, the telescoping lens lurches out of the body and is fully extended after approximately 0.72 seconds. The camera can actually take a picture just 1.94 seconds after the power button is pressed. This includes a full auto-focus. The Sony DSC-F88 had a startup time of 1.73 sec. However, the F88 does not have an external telescoping lens. Considering this, the start up time on the E550 is nothing short of amazing.
Shutter Lag
To record shutter lag, we perform two tests. For the first test, we pre-focus the lens and measure the amount of time it takes the camera to take a picture after the shutter button is pressed. The second test measures the time it takes for the camera to take a picture after we press the shutter button without pre-focusing. Each test is performed 3 times and the results are averaged. For more information regarding our testing procedures, please refer to our Testing Procedures page.| With Pre-focus (seconds) | Without Pre-focus (seconds) |
| 0.09 | 0.38 |
The E550 showed a very good shutter lag performance. When the camera was pre-focused, the lag was only 0.09 seconds. The full shutter lag (without pre-focusing) resulted in a time of 0.38 seconds. As far as full lag goes, the E550 has the best time of any compact digicam that we have tested so far.
Write Times
We recorded 5 different write times with a Fujifilm 512MB xD-Picture card: Single Shot, Shot to Shot, Shot to Shot w/Buffer Full, Shot to Shot w/Flash, and Clear Buffer for Next Burst.Single Shot - The time it takes for a single picture to be completely written to the flash card (the time the "activity light" is on).
Shot To Shot (STS) - The time until the second shot is able to be taken after the first (shutter to shutter).
Shot To Shot w/Flash - The time it takes for the camera to take two pictures with the flash starting from the moment the first flash is fired to the moment the second is fired.
Shot To Shot w/Buffer Full - The time until the camera is able to take another picture when the buffer is full.
Clear Buffer for Next Burst - The time it takes the camera to clear the buffer for the next burst in "Top 4" continuous drive mode.
To give an idea of the performance differences, we ran our tests in 6M, 12M F, and RAW modes. We performed each test three times and averaged the results. Below are the resolutions and average file sizes used for the tests.
| Setting | Resolution (pixels) | Average file size (MB) |
| 2M | 1600X1200 | 0.6 |
| 6M | 2848x2136 | 1.5 |
| 12M F | 4048x3040 (interpolated) | 4.5 |
| RAW CCD | 2848x2139 | 12.7 |
| Single Shot | Shot To Shot | Shot to Shot w/Buffer Full | Shot to Shot w/Flash | Clear Buffer for Next Burst | |
| 6M (JPG) | 2.78 | 1.19 | 1.84 | 6.35 | 10.03 |
| 12M F (JPG) | 4.24 | 1.18 | 2.27 | 7.41 | 11.94 |
| RAW CCD | 6.34 | 5.91 | - | 11.99 | - |
In general, the images shot in 6M mode had faster times than those shot in 12M mode due to the larger file size of the 12M images. Although the single shot write times for JPG images are not very fast, the Shot to Shot times were fairly impressive. In 6M mode, the camera can take 3 shots at 1.19 sec. per frame before slowing to 1.84 sec. between images. In 12M mode, the camera takes 3 shots at 1.18 sec. per frame before slowing to 2.27 sec. between images. When it comes to Shot to Shot w/Flash, the camera slows down considerably to 6.35 sec. in 6M mode and 7.41 sec. in 12M mode.
As you would expect with a file size of 12.7 MB, in RAW mode, the times were much slower than in JPEG mode. Although the Shot to Shot time averaged out at 5.91 seconds, we feel that the RAW mode is still quite usable. This is actually a fairly fast time for a consumer camera. Where the E550 really slows down is when shooting flash images in RAW mode, with a Shot to Shot time of nearly 12 seconds.
In "Top 4" continuous drive mode, the E550 is capable of shooting 4 frames at 3.7 fps in both 6M and 12M mode. The camera is able to clear its buffer after 10.03 sec. in 6M mode and after 11.94 sec. in 12M mode. Continuous shooting is unavailable in RAW mode. In "40 frames" mode, the camera automatically sets the resolution to 2M (1600x1200). In this mode, the camera can shoot 40 frames at 0.91 fps.
Resolving Fine Lines
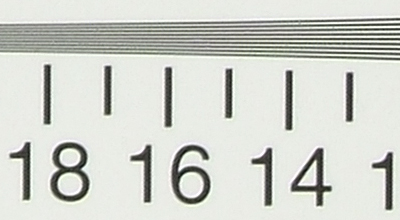
For our resolution test, we used manual WB and recorded three images with differing quality options: 6M JPEG, 6M RAW, and 12M (interpolated). The camera was set to Aperture priority mode at f5.6 with +1.3 E.V for all three images. The CCD RAW image was converted to JPEG in Photoshop. For more information, refer to our Testing Procedures page. Below are 200% crops of the test. Click on a crop to see the full chart. Click here to download an uncompressed TIFF version of the CCD RAW chart(WARNING: TIFF file is 17MB).
| 6M JPEG | 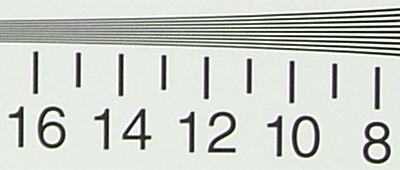 Click to enlarge. |
| 6M RAW | 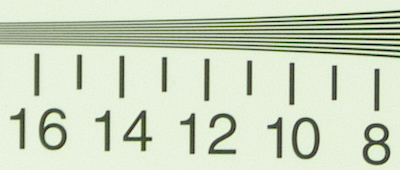 Click to enlarge. |
| 12M F JPEG (Interpolated) |
 Click to enlarge. |
As expected, the 6M RAW image produced the cleanest chart out of the three and showed resolution out to the 15 mark. The 6M JPEG image showed a fairly average resolution, retaining clarity until 13. The 12M interpolated JPEG image surprised us by surpassing the limit of the RAW chart and making it until the 16 mark before losing definition. However, we should point out that the 12M interpolated image contains the most artifacts out of the three charts.
| 6M JPEG | 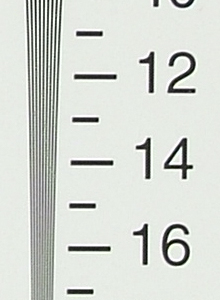 Click to enlarge. |
| 6M RAW | 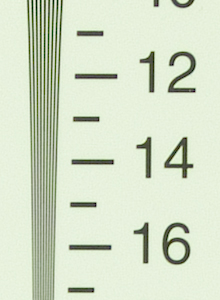 Click to enlarge. |
| 12M F JPEG (Interpolated) |
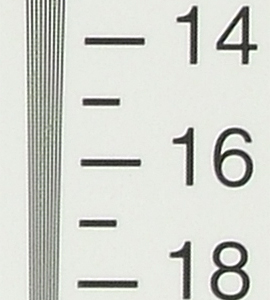 Click to enlarge. |
The vertical crops show the same resolution with each setting. Overall, we were impressed with the RAW and 12M interpolated settings. It is nice to have the option to shoot in 12M mode if you don't want to deal with as much post-processing as the RAW file demands. The E550 proves to be a camera that can capture a great amount of detail, and surprisingly, the 12M interpolated setting manages to gain a bit of resolution over the RAW version.
Color Reproduction
* For all of our color tests, we reset FinePix E550 to its factory default settings. It was then set to record using the highest image quality option.Incandescent WB
| Auto WB | Incandescent WB | Manual WB |
 Click to enlarge. |
 Click to enlarge. |
 Click to enlarge. |
 Reference Chart ("actual colors") |
||
| Auto WB | Incandescent WB | Manual WB |
 |
 |
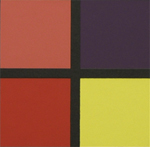 |
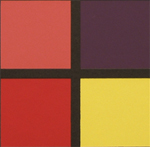
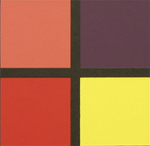
In Incandescent lighting, the E550 shows an average performance. Like most cameras, there is a yellowish-pink cast with Auto WB. When Incandescent WB is set, the colors are more accurate. However, there is a very slight yellowish cast over the chart. With Manual WB, the E550 has a slight bluish cast and is underexposed just a bit.
Daylight WB
| Auto WB | Daylight WB | Manual WB |
 Click to enlarge. |
 Click to enlarge. |
 Click to enlarge. |
 Reference Chart ("actual colors") |
||
| Auto WB | Daylight WB | Manual WB |
 |
 |
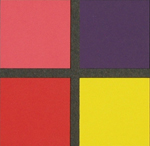 |
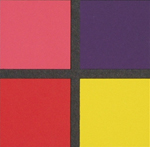
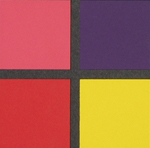
The E550 shows very impressive color reproduction performance in daylight. With all three settings, the color reproduction is outstanding. We are particularly impressed that there is virtually no difference between Auto and Manual WB.
Studio Shot
In this shot, we tested the camera's ability to reproduce colors in our studio shot using different WB settings. The light source is 1500 watts of tungsten light. The camera was set to Auto without the flash.| Auto WB | Incandescent WB | Manual WB |
 Click to enlarge. |
 Click to enlarge. |
 Click to enlarge. |
With this studio shot, the difference between the settings is much easier to see. With the Incandescent WB setting, colors are much more accurate than with Auto WB. However, there is a still a yellowish cast. With Manual WB, the bluish cast is clear as well as the slight underexposure.
Built-in Flash
For the flash test, we set the camera to Auto mode w/Auto flash. The picture was taken from 5 feet away.In our flash test, the E550 proves that it can produce flash images with accurate skin tones. We are very pleased with the results here. The only thing to point out is the slight bluish cast on the white background.
Noise
The noise test consists of pictures of our studio shot taken at increasing ISO levels to show the effect on the image. The pictures were taken after resetting the cameras to their factory default settings. The camera was then set to record with three different recording options (6M, 12M F, and RAW) with manual WB. Click on a 100% crop below to view the full-size image.Note: The 12M F images have been resized in Photoshop to a 6M image for comparison purposes. Also, the RAW files have been converted to JPEG files in Photoshop with no post-processing.
There isn't a huge difference in noise levels between the 6M images and the 12M F resized images. If anything, there is just a slight bit more detail in the 12M crops. What this comparison really shows is the benefit of shooting in RAW mode. The RAW crops are sharper and more detailed than the other two. For example, at ISO 400, while the 6M and 12M crops are showing a significant loss of detail with JPEG artifacts, the RAW crop is sharp with a higher level of detail.
Although ISO 800 is unavailable for resolutions above 2048x1536, we have included a sample crop. As the crop illustrates, there is nothing too exciting about ISO 800. In addition, the image appears to be underexposed. Overall, we are pleased with the E550's noise performance. As the ISO value increases, the addition of noise and loss of quality is not substantial.
General Image Quality
For these pictures, the camera was reset to its factory default setting. The pictures were then taken in Auto mode using the 6M recording mode unless otherwise stated. Portrait-style images have been rotated using Irfanview's "lossless operations". Click on a thumbnail to view the full-size image. The crops below the thumbnails are 100%.  Click to enlarge. |
 Click to enlarge. |
 Click to enlarge. |
 |
 |
 |
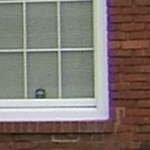
| As this crop demonstrates, the E550 is capable of capturing a significant amount of detail. However, there are several spots where chromatic aberrations are visible. We also want to point out the overexposed sky. | In this crop, chromatic aberrations are visible again. Also, sky detail is lost in this shot as well. However, the subject is exposed properly with a decent amount of detail. | This image taken in Macro mode appears to be a bit oversaturated, particularly the reds. Otherwise, this is a pleasant macro shot in sharp focus. |
JPEG VS. RAW Comparisons
Note: RAW images have been converted to JPEG in Photoshop without any additional processing.| JPEG (6M) | RAW |
 (ISO 80, f/5.0, 1/480 sec.) Click to enlarge. |
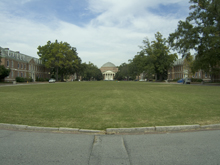 (ISO 80, f/5.0, 1/480 sec.) Click to enlarge. |
 |
 |
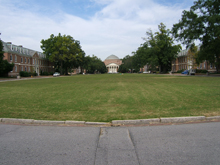
In this comparison, it is quite clear that RAW mode is capable of recording far more detail than JPEG mode. Also, we want to point out that the dynamic range is noticeably larger as well. Look at the highlights on the truck at the lower middle of the crop. There is also much more detail in the shadow areas of the trees on the right side of the frame.
| JPEG (6M) | RAW |
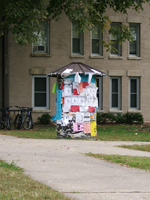 (ISO 100, f/5.4, 1/160 sec.) Click to enlarge. |
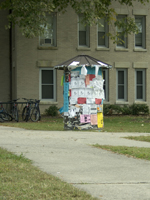 (ISO 80, f/5.4, 1/150 sec.) Click to enlarge. |
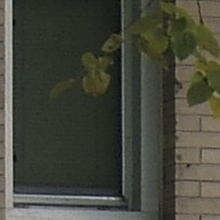 |
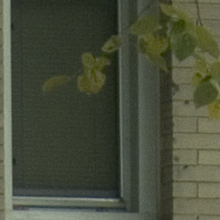 |
Again in this comparison, the difference is very clear. There is quite a bit more detail in the shadow of the window with the RAW image than the JPEG image. Also, leaf detail is far better in the RAW crop.
Night Scene Mode (JPEG, 6M)
| Night Mode |
 (ISO 80, f/2.8, 1.1 sec.) Click to enlarge. |
 |
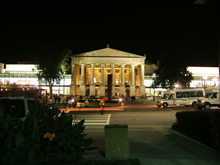
We were very impressed with Night Scene mode on the E550. This image shows very low noise and a very high level of detail. Unfortunately, the camera is limited to a 3-second exposure maximum. This means that it could prove difficult to get proper exposures in really low light situations.
Movie Mode
(640x480, 30 fps)
Click to view.
The E550 produces video clips that are smooth and detailed at 30 fps with a maximum resolution of 640x480. We were disappointed that white balance adjustment and exposure compensation are not offered. Really, the only image quality related option is to toggle the resolution back and forth from 640x480 to 320x240. Overall, we think that movie mode on the E550 is good. However, it would have been even better if it allowed the use of the optical zoom and/or offered some adjust shooting options.
Final Words
The Fujifilm FinePix E550 offers quite a bit for its price. It features a 6.3 megapixel Super CCD HR sensor and 4x optical zoom with exposure modes ranging from full auto to manual. It has 3 metering modes, exposure compensation, and a 30 fps 640x480 video mode. On top of all the features, the performance is really outstanding. We found the E550 to be a very fast camera. It proved to have a super fast startup time and very little shutter lag. In addition, Shot to Shot times were very fast as well. The camera only proved to be slow in regard to Shot to Shot w/Flash times both in JPEG and RAW mode. For a compact camera, we were surprised to see the FinePix E550 shooting up to 4 frames at 3.7 fps. This is very fast for a camera in this price range.When it comes to image quality, the E550 does not disappoint. We found very high resolution in both RAW mode and 12M F modes. Although color reproduction was fairly average under tungsten lighting, it proved to be very accurate in sunlight. Although the E550 shows average noise performance in JPEG mode, it produces some very clean low noise images when the camera is set to RAW mode. In addition, Night Scene mode is able to produce surprisingly sharp and low-noise results. The Super CCD HR promises to deliver improved sensitivity and dynamic range. We found both to be true. However, to really see the enhanced dynamic range, images must be shot in RAW mode.
The negative aspects of this camera are mostly small things. For example, there are some noticeable chromatic aberrations in our outdoor samples. Although they certainly exist, they are small enough that they do not really threaten the overall image quality. We found the Shot to Shot w/Flash times to be relatively slow, especially in RAW mode where you must wait nearly 12 seconds between shots. In terms of battery life, the E550 shows an average performance in comparison to other compact digicams that we have tested. Since the camera uses AA's, finding spares is convenient and affordable. We have a couple of other small issues with the camera. It is unfortunate that the shutter speed is limited to 3 seconds. This rules out any possibility of doing any extremely low-light exposures. The other problem we have is that the rubber tab to cover the A/V-out, USB, and DC-in port is not attached to camera.
All in all, we really enjoyed our time with the E550. The menu layout is very straightforward and user-friendly. The fast startup time cannot be praised enough. It makes the whole process that much more enjoyable when you can just pick up the camera and shoot without waiting. Given that the E550 has such a wide range of exposure modes, it makes it a good camera for a beginner or an advanced user. Also, having the option to shoot in RAW mode offers unlimited options for post-processing endeavors. Overall, the features and performance offered by the Fujifilm FinePix E550 are a pleasure to see in a reasonably-priced consumer camera.
| Pros | Cons |
|
|
Thanks again to Newegg.com for loaning us the Fujifilm FinePix E550 for review.

