Original Link: https://www.anandtech.com/show/1402
Nikon Coolpix 5200: Does It Deliver?
by Stephen Caston on July 23, 2004 12:05 AM EST- Posted in
- Digital Camera
Index
Product Sample provided by Newegg.comIn May 2004, Nikon released the Coolpix 5200, promising outstanding image quality in a compact body. The camera features Nikon's special ED lens designed to reduce chromatic aberrations while providing clear and color-rich pictures. With the Coolpix series and its popular "Scene" and "Assist" modes, Nikon has become known for making photography easy and rewarding. At about $400, the Coolpix 5200 is a bit above the average price for current competing 5 megapixel compact cameras.
In our review, we are going to test the Coolpix 5200 to see if it can deliver what Nikon promises. Will it sacrifice image quality for body size? Is the image quality and camera performance good enough to warrant the $400 price tag? We are going to find out...
Nikon Coolpix 5200 Specifications
| Nikon Coolpix 5200 | |
| Release Date | May 2004 |
| Price | $400 |
| Pixel Count | 5.1 Million |
| Camera Type | Compact |
| Highest Resolution | 2592x1944 |
| Lower Resolutions | 2048x1536, 1600x1200, 1024,768, 640x480 |
| Sensor Type | CCD |
| Sensor Size | 1/1.8" |
| LCD Screen Size | 1.5" |
| Lens | Fixed |
| Optical Zoom | 3x; 38 - 114mm equivalent |
| Focus Range | 11.8" - Infinity |
| Macro Range | 1.6" - Infinity |
| Digital Zoom | 4x |
| Lens Thread | No |
| Auto Focus | Yes |
| Auto Focus Type | Contrast-detect TTL |
| Manual Focus | No |
| Aperture Range | f2.8 - 4.9 |
| Shutter Speeds | 4 - 1/2000 sec. |
| ISO | Auto, 64, 100, 200, 400 |
| Flash | Built-in |
| Flash Range | W: 1 - 14.7'; T: 1 - 11.4' |
| Flash Compensation | No |
| Exposure Compensation | +/- 2 stops in 1/3 stop increments |
| White Balance | Auto, Manual, Daylight, Incandescent, Fluorescent (FL1, FL2), Cloudy, Shade, Speedlight |
| Bracketing | Auto (-.5 stop, Normal, +.5 stop)+ WB (Normal, Bluish, Reddish) |
| Metering | Matrix, Center-weighted, Spot |
| Color Space | RGB |
| Aperture Priority | No |
| Shutter Priority | No |
| Manual Exposure | No |
| Continuous Drive | Yes, 2.5fps for 7 frames (5M/Normal) |
| Self-Timer | 3, 10 sec. |
| Storage Method | SD + Internal |
| Storage Included | 12MB Internal flash |
| Compressed Format | JPG |
| Uncompressed Format | None |
| Quality Settings | Fine, Normal, Basic |
| Video clips | 640x480, 320x240, 160x120, 30 fps, w/sound, QuickTime MOV, unlimited duration |
| Battery Type | EN-EL5 Rechargeable (included) |
| Charger Included | Yes, 2 hours |
| PC Interface | USB 2.0 |
| TV-out | Yes |
| Tripod Mount | Yes, plastic |
| Weight (with battery) | 7 oz. |
| Dimensions | 88 x 50 x 36.5mm |
| Included in the Box |
|
The Design: Nikon Coolpix 5200
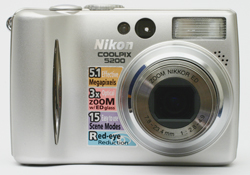
88 x 50 x 36.5mm
Click to enlarge.
The front of the Nikon Coolpix 5200 features a Nikkor ED lens capable of a 38 - 114mm (35mm equivalent) optical zoom and a 4x digital zoom. Nikon developed their ED (Extra-low Dispersion) lenses to help reduce chromatic aberration while delivering rich color and sharp image quality. This lens is also capable of shutter speeds from 4 - 1/2000 sec. and an aperture range of f2.8 - 4.9. The lens is protected by a built-in cover that opens automatically when the camera is powered on and closes when the camera is powered off. Just to the right of the lens is a small microphone. Above the microphone is the flash with a range of 1' - 14.7' in wide angle and 1' - 11.4' in telephoto. To the left of the flash are the viewfinder window and AF assist/Self-timer lamp. We are continually impressed with Nikon's ability to make compact cameras so easy to hold. Even on a camera as small as the Coolpix 5200, there is a decent-size hand grip on the left side of the camera.
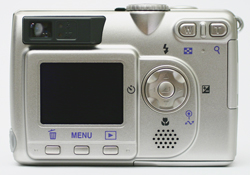
The back of the CP5200 houses its 1.5" LCD monitor with 110,000 pixels. The monitor can be adjusted to 5 levels of brightness available through the Set up mode. Above the LCD are the viewfinder, a green AF indicator lamp, and a red Flash indicator lamp. Just below the monitor are 3 dedicated buttons: Delete, Menu, and Play. On the right side of the monitor is a 4-way arrow pad with a dedicated "Enter" button in the middle. Below the arrow pad is a speaker, which is used to play back audio from movie clips and voice memos. The zoom controls for the lens can be found at the upper right hand corner. When holding the camera, our thumb naturally found a resting place on the zoom controller, and we found it relatively easy to reach the arrow pad without repositioning our hand.
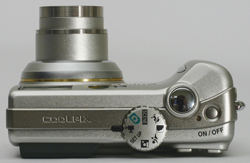
When looking at the camera from the top, you will see the Mode dial, Shutter-release button, Power-on lamp, and On/Off button. The Mode dial is used to access different shooting modes and the main Setup screen. The Shutter-release button is pretty standard: half-press to focus and full press to shoot. The camera can be turned on in two different ways. To power up in Record mode and extend the lens, you simply press the On/Off button. However, if you wish to enter Playback mode without extending the lens, you can hold down the Play button for two seconds. To power down the camera, you must press the On/Off button. Whenever the camera is on, the Power-on lamp will be lit. However, if the camera is left on for 1 minute without being used, the camera will enter standby mode and the light will blink for 3 minutes until the camera powers itself down. The amount of time before the camera enters standby mode can be changed to 30 sec, 1, 5, or 30 minutes.
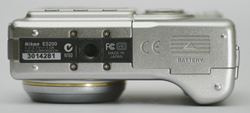 Click to enlarge. |
 Click to enlarge. |
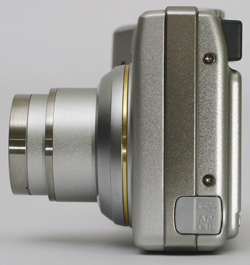
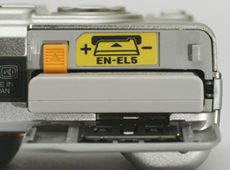
There is a plastic tripod mount on the bottom of the camera. The battery compartment is on the right side behind a sliding spring-action door. The CP5200 uses a rechargeable EN-EL5 Lithium-Ion battery (3.7V 1100mAh), which is included in the box.
 Click to enlarge. |
 Click to enlarge. |
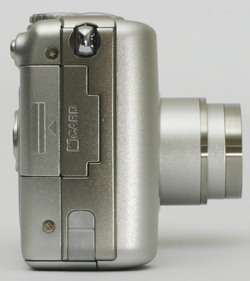
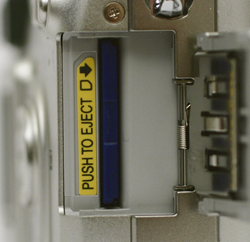
On the right side of the camera are a wrist strap post, a sliding spring-action door that covers the SD flash card slot, and a tab that can be moved out of the way to make room for the optional AC adaptor. The CP5200 supports SD flash cards.
The only thing on the left side of the camera is a combination USB and A/V out port.
Recording Features
The CP5200 records images as JPG files with quality settings Fine, Normal, or Basic and the following resolution options:| Setting | Resolution (pixels) |
| 5M | 2592x1944 |
| 3M | 2048x1536 |
| 2M | 1600x1200 |
| PC | 1024x768 |
| TV | 640x480 |
On the CP5200, Auto is the main shooting mode and there are several preset modes including Scene modes and Assist modes. Although Auto mode is designed for general-purpose shooting, it contains the largest number of options available to the user than any of the other modes. While in Auto mode, each direction on the arrow pad brings up a mini menu.
Pressing the left arrow pad brings up an option to turn the self-timer on or off. When the self-timer is activated, pressing the shutter button once will lock focus and begin counting down from 10. If you press the shutter button twice in a row, the time changes from 10 seconds to 3 seconds. Another press of the shutter button will cancel the shot. Pressing the up arrow pad displays a menu with the following flash options: Auto, Flash w/Red-eye, Flash Off, Always Fire, and Flash w/Slow Sync.
A press of the right arrow pad will display a menu that allows Exposure Compensation of +/- 2 stops in 1/3 increments. The down arrow pad gives the user the option to enable or disable Macro mode. When Macro mode is enabled, the camera is able to focus on subjects up to 1.6 inches away from the lens. Pressing the Menu button gains access to 13 additional camera options, which are only available in Auto mode. These options are: Image mode, White balance, Metering, Continuous (drive), BSS (Best Shot Selector), Image adjustment, Image sharpening, Sensitivity, Auto bracketing, Saturation control, AF area mode, Auto-focus mode, and Noise reduction. While in any of the menus, pressing the shutter button down half-way will exit the current menu and return the camera to record mode.
The Image mode menu has options to set the resolution and quality settings mentioned earlier. In the White balance menu, the options are: Auto, Manual, Daylight, Incandescent, Fluorescent (FL1 or FL2), Cloudy, Shade, or Speedlight. As you scroll through the options, the live image behind the menu is updated with the highlighted white balance setting.
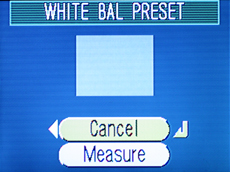
It's good to see that Nikon included manual white balance on this camera. Setting manual WB is pretty fast and straightforward. After selecting White balance from the main menu, you simply select the "PRE White bal. preset" option and press "Enter". The camera's lens zooms in and the LCD shows a preview of the image that it will measure. After framing your white balance subject, you select "Measure" and press Enter. Then, you are ready to shoot with your manual WB setting.
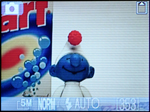 Matrix metering |
 Center-weighted metering |
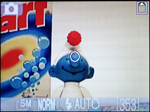 Spot metering |
The CP5200 offers a few different options for metering in Auto mode: Auto, 256-segment Matrix, Center-weighted, or Spot metering. The 256-segment Matrix setting is suggested for general shooting conditions. It measures 256 areas of the frame to determine the best exposure. With Center-weighted metering, the camera will measure mostly the center of the frame to determine a proper exposure. If Spot metering is selected, the camera will measure light in a very small area at the center of the frame.
In the "Continuous" menu, there are 4 options: Single, Continuous, 5 shot buffer, and Multi-shot 16. With Single selected, the camera is set to record only one picture at a time. With the camera set to Continuous and image quality set to 5M/Normal, the camera will take up to 7 frames at 2.5 fps with the shutter button held down. 5 shot buffer will take pictures for as long as the shutter button is held down, but the camera will only record the last 5 shots taken. Multi-shot 16 is an interesting feature that takes 16 small pictures (648x486) at 3.5 fps and then combines the pictures into 4 rows creating the final 2592x1944 pixel image.
The next option on the menu is Best Shot Selector (BSS). The idea is that when you hold the shutter button down, the camera will take up to 10 pictures in a row. Automatically, the camera compares the pictures taken, saves the sharpest of the images, and discards the rest. This setting is really designed to filter out images that may be blurry due to hand movement during exposure. Although this feature sounds a bit superfluous, we feel that some people will find it useful in weeding out those blurry pictures when a tripod is not convenient (i.e. at a concert). By design, this feature disables the flash (to increase continuous shooting speed).
By going to the menu option Image adjustment, you are given the choice between Auto, Normal, More contrast, and Less contrast. In the Image sharpening menu, you can select from Auto, High, Normal, and Low sharpness. With the Sensitivity menu, you are able to select between 5 different ISO settings: Auto, 64, 100, 200, and 400. In the Auto bracketing menu, you are given the option to bracket exposure or WB. With Auto bracketing (exposure) selected, when the shutter button is pressed, the camera takes 3 pictures: one with normal exposure, one with +.5 E.C. (Exposure Compensation), and one with -.5 E.C. With WB bracketing, every time the shutter button is pressed, the camera takes 3 pictures: one with the normal WB setting, one with a bluish cast, and one with a reddish cast. WB bracketing is especially useful if you want to make sure that you get the right color. With 3 pictures of varying WB, your chances of getting a satisfactory shot are much higher than if you just take 1 picture. For Saturation control, you can choose from Enhanced, Normal, or Moderate.
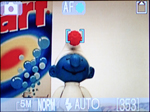 AF area: Auto |
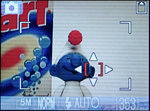 AF area: Manual |
When it comes to focusing, the CP5200 offers users a little bit more control than a straight forward point-and-shoot camera. Although there is no option for manual focus, you can select the AF area mode: Auto, Manual, or Off. When the AF area mode is set to Auto, the camera will automatically select one of five focus points (in a "plus sign" formation). In Manual mode, you can use the arrow pad to select from 99 focus points on the screen. When the auto focus mode is set to "Off", the camera will automatically focus on the center of the frame, allowing you to half-press the shutter to lock focus and then recompose the framing before taking the picture. In addition to the AF area modes, you can choose between two types of Auto-focus modes: Continuous AF and Single AF. Continuous AF causes the lens to focus continuously until the shutter button is pressed halfway. This would be useful if you are shooting subjects that are moving quickly. In Single AF mode, the camera will only focus when the shutter button has been pressed halfway. One of the really nice features of the CP5200 is the inclusion of an AF assist lamp. In low light situations, the AF assist lamp turns on automatically to help illuminate the scene in order to focus properly. Finally, there is an option to turn Noise reduction on or off to reduce noise in long exposures.
The next option on the Mode Dial is Scene Mode. In Scene mode, pressing the Menu button brings up a screen that shows 11 preset shooting options along with image quality and resolution settings. The shooting options are:
| Party/Indoor Beach/Snow Sunset Dusk/Dawn Night landscape Close up Museum Fireworks show Copy Back light Panorama Assist |
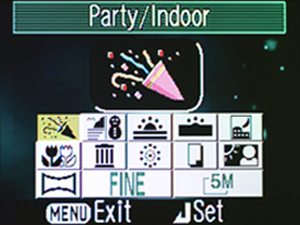 (In this screenshot, the Party/Indoor setting is selected) |
These preset options are designed to be used for popular shooting conditions. It is questionable as to how useful the "Fireworks show" option is, but some of the others are pretty handy. For example, the Party/Indoor setting presets the flash for red-eye reduction and uses a slow sync. Slow sync helps to create a natural-looking background by leaving the shutter open after the flash has fired, allowing ambient light to fill in the scene.
Another example is the Sunset setting, which automatically intensifies the colors found in sunset pictures. In Scene mode, the functionality of the 4-way arrow pad changes for each Scene. For example, with the Museum Scene selected, pressing the up arrow pad will not give you the option to turn on the flash. Each Scene has its own preset camera settings from the Menu options that we mentioned in Auto mode.

(Portrait Assist)
The next 4 options on the Mode Dial are Portrait, Landscape, Sports, and Night Portrait assist. After selecting any of these "Assist" modes, pressing the Menu button will take you to more specific options for each. For example, in Portrait Assist mode, the options are Portrait, Portrait Left, Portrait Right, Portrait Close-up, Portrait Couple, and Portrait Figure. With each of these options (except the first one), a yellow line drawing appears on the LCD over the live preview image. The line drawing serves as a framing guide to help compose portrait shots. The Portrait Assist mode is similar to the "Portrait" feature seen in many other cameras in that it attempts to make the background blurry by producing a small depth of field to make your subject stand out in the image.
The options in Landscape assist mode are similar to Portrait assist. You can choose from Landscape, Scenic View, Architecture, Group Right, and Group Left options. In Landscape mode, the camera ensures that both the foreground and background will be in focus. In the Scenic view option, the screen is split into 3 horizontal sections to assist the user in composing the shot. In the Architecture and Group settings, the on-screen framing guide helps to align buildings properly.
In Sports assist, the camera is automatically set to continuous drive. The other two options that you can select in the menu are Sport Spectator and Sport Composite. In Sport Spectator mode, the camera can take 7 pictures at 2.5 fps with image quality set to 5M/Normal. Sport Composite mode is similar to the Multi-shot 16 mode discussed earlier. The camera takes 16 small pictures and combines them into the final 2592x1944 pixel image.
The Night Portrait assist function is the same as the regular Portrait assist except it is designed for low light situations. Therefore, when taking a Night Portrait shot, the camera will use a slow sync to capture the ambient lighting in addition to using the flash.
The next position on the Mode Dial is "Set up". In Set up mode, you can set the date, monitor info, screen brightness, sound settings, auto-off time, language, USB mode, and video out (NTSC or PAL). You can also change the camera's welcome screen, reset all of the camera's settings, and check the Firmware version. We felt that having a "Set up" button would have made a little more sense than a Set up mode on the dial. In order to take a picture when you are in Set up mode, you must rotate the Mode Dial to the shooting mode that you want. On the other hand, if there was a Set up button, a half-press of the shutter button could be programmed to exit the Set up dialog and return to shooting. This is a standard practice with many other digital cameras. Another feature that would be nice to see is an image orientation sensor to rotate portrait shots automatically. This is something that is becoming more and more common in today's digicams.
Movie mode is the last position on the Mode Dial. The CP5200 offers 3 resolution options for Movie mode. Each option records in QuickTime (MOV) format at 30 fps with audio. The resolution options are 640x480, 320x240, and 160x120. It is important to note that the duration of a movie is only limited by the amount of free space available. On our PNY 512MB SD card, we were able to hold 5 minutes and 51 seconds of 640x480 video. You must set the optical zoom to where you want it before you start recording. Once you have started, you are only able to use the digital zoom up to 2.5x.
Playback Features
You can enter Playback mode in 2 different ways. If you are already in Record mode, you can simply press the Play button. However, if you wish to enter Playback mode when the camera is off, you can hold down the Play button for 2 seconds to enter Playback mode without extending the lens. The following information is available when viewing a picture: date and time of picture, folder name, file number, storage location (internal memory or SD card), transfer (on or off), whether or not a voice memo has been recorded, image quality setting, and the picture number (out of the total number of pictures).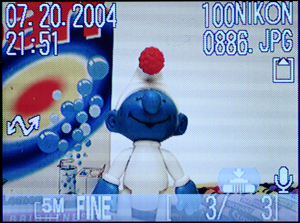
(Sample playback screen)
You can move from picture to picture by using the left/right arrow pads or you can view the pictures as thumbnails by pressing the W (zoom out) button on the zoom control. Pressing the W button once will display a screen with 4 pictures at a time and pressing it again will display 9 pictures on the screen. You can then select a picture to view full-screen by using the arrow pad controls. While viewing a picture in full-screen mode, you can use the T (zoom in) button on the zoom control to magnify the image by up to 6x in 0.2x increments. While zoomed in on a picture, pressing the shutter button all the way down will bring up a dialog that asks if you want to "Save this image as displayed?" Selecting "Yes" will copy a cropped version of the original image to the original image's storage location. To exit the zoom mode quickly, you can press the middle Enter button. If you press the Enter button again, a histogram will appear onscreen along with new information about the metering mode, exposure compensation, and flash mode used in the picture.
A cool feature that the CP5200 offers is the ability to record voice memos. When viewing a full-screen image, you can hold the shutter button down to record a memo that will be linked to the picture. Pressing the Menu button in Playback mode will display the following list of options: Print set, Slide show, Delete, Protect, Auto transfer, Small pic., and Copy. Selecting the Print set option will bring up a display that allows you to pick which pictures to print on a DPOF (Digital Print Order Format) printer. The Slideshow option allows you to display all the pictures on the camera either one time through or in a loop. With the Delete option, you can either select pictures to erase or you can delete all of them. By using the Protect feature, you can safeguard yoru pictures against accidental deletion pictures; however, formatting the card (in Set up mode) will erase everything including protected pictures. The menu option Auto transfer is used to tell the camera which pictures to transfer to your computer when it is connected. You can choose All on, All off, or Select images. With the Small pic. feature, you are able to resize pictures to 640x480, 320x240, or 160x120. Selecting one of the resize options will create a copy of the image in the newly specified size. Lastly, the Copy option allows you to copy images from the internal memory to an SD card or vice versa.
Something that disappoints us about the CP5200 is the absence of a shooting-priority feature in Playback mode. In many digital cameras, pressing the shutter button down halfway will automatically return the camera to Record mode. Interestingly, a shooting-priority feature is available in Record mode during menu navigation. This feature would have been nice to include in Playback mode as well because it makes quick shooting possible. Instead, you must press the Play button to switch the camera to Record mode.
Battery Performance
Our general method for battery testing is to reset the camera to its default settings and change the recording mode to the highest quality option. Then, we take 5 pictures without the flash and 2 pictures with the flash until the battery is dead. For more information on our battery test, please refer to our Testing Procedures page. The EN-EL5 battery was fully drained before charging for the test.| Number of shots taken in one battery charge |
| 965 |
At almost 1,000 pictures, the Coolpix 5200 performed very well in our battery test. We would expect this battery to endure a very heavy day of shooting. As for weekend shooting trips, it may be worth the $25 to buy and charge a spare EN-EL5 as a backup.
The Times
* NOTE: For all of our time tests, the camera is reset to its factory default settings and set to record using the highest quality setting. The flash is turned off unless otherwise noted. For the CP5200, we disabled the "Welcome screen" and the camera's startup and shutter sounds. A PNY 512MB SD card was used.Before reading our results, please refer to our Testing Procedures page.
Startup Time
The startup time is recorded from the moment the power button is pushed to the moment the shutter sounds.| Startup time (seconds) |
| 3.34 |
The startup time for the CP5200 was a little faster than average at 3.34 sec., less than a second longer than the super-fast Casio QV-R51 (reviewed previously). With the "Welcome screen" and startup sounds enabled, the time jumped to about 5-1/2 seconds.
Shutter Lag
Note: We have updated our testing method for our shutter lag tests to a more accurate one (starting with the Coolpix 5200). To record a camera's shutter lag, we start a stopwatch and perform 2 separate tests. For the first test, we pre-focus the camera on the stopwatch display and press the shutter button as soon as the stopwatch displays a new second. This first test will give us the time it takes the camera to actually take a picture after the shutter button is pressed. For the second test, we do not pre-focus the camera. Instead, we fully press the shutter button as soon as the stopwatch displays a new second. This records the time it takes the camera to focus and take a picture. We perform both of these tests 3 times and review the pictures. The 3 times for each test are averaged.| Shutter Lag excluding focus (seconds) | Shutter Lag including focus (seconds) |
| .08 | .82 |
When we pre-focused the CP5200, the shutter lag was very impressive at just .08 sec. When we included the focusing time in the test, we got an average time of .82 sec. This time is going to vary depending on the lighting conditions. In low light situations, the camera will have to use its AF assist lamp to focus, causing a longer delay. Given that our test did not require use of the AF assist lamp, .82 sec. is not a terribly impressive time. Although the CP5200 did not blow us away with its speed, its lag time is just about average for current digicams.
Write Times
We recorded 4 different types of write times for both the internal memory and with a PNY 512 SD card: Single Shot, Shot to Shot, Shot to Shot w/Flash, and Shot to Shot w/Buffer full.Single Shot - The time it takes for a single picture to be completely written to the flash card.
Shot To Shot (STS) - The time between the first and second shots.
Shot To Shot w/Flash - The time it takes for the camera to take two pictures with the flash, starting from the moment the first flash is fired to the moment the second is fired.
Shot To Shot (Buffer Full) - The time it takes the camera to capture another picture after the in-camera buffer is full.
We set the camera to the highest quality setting and ran 4 tests. We performed each test three times and averaged the results. Below is the quality setting and average file size used for the tests.
5M/FINE, 2592x1944; Avg. file size = 1.69MB
| SD card (seconds) | ||||
| Single Shot | Shot To Shot | Shot To Shot w/Flash | Shot To Shot w/Buffer Full | |
| .41 | 2.17 | 3.02 | 2.51 | |
The Single Shot write time was very impressive at just .41 sec. For the Shot To Shot times, the camera slows down a bit. However, at 2.17 sec. without the flash and 3.02 sec. with the flash, the CP5200 is by no means slow. In fact, since the camera can write images to the flash card at .41 sec per image (roughly 2.5 fps), you can keep shooting at the Shot to Shot times without ever filling up the buffer. With the Continuous drive feature, it was 2.51 sec. from the moment the 6th picture was taken until we were able to take the next picture.
| Internal memory (seconds) | ||||
| Single Shot | Shot To Shot | Shot To Shot w/Flash | Shot To Shot w/Buffer Full | |
| 4.76 | 2.50 | 3.12 | N/A | |
As our Single Shot results show, the internal memory is extremely slow compared to the SD card. The Shot To Shot times with the internal memory were just a bit slower than with the SD card. Unfortunately, we were unable to fill up the buffer using the internal memory, since it would only hold 6 pictures at the highest quality setting. Since the internal memory is so small (12MB) and so much slower than an SD card, it would be a shame to own this camera and not buy at least a 128MB card. Overall, we were very impressed by the CP5200's times with a flash card.
Resolving Fine Lines
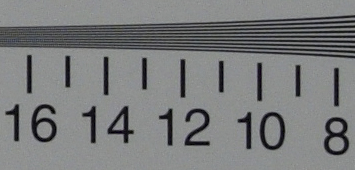
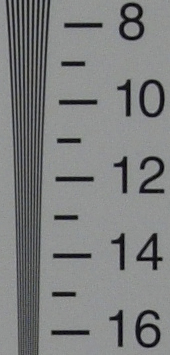
For our resolution test, we reset the camera to its default settings and then used the highest quality recording mode. For more information, refer to our Testing Procedures page. Below are 100% crops of the test. Click on a crop to see the full chart.The horizontal crop above shows that the CP5200 has pretty good vertical line resolution. The lines remain very strong until just before 15 where they begin to move to extinction by the 16 mark (on par with the Olympus C-50 Zoom in our previous review.
In the vertical crop, the CP5200 does just a bit worse than the horizontal crop, beginning to break up between 14 and 15. The lines are no longer distinguishable by the 16 mark where they lose their definition. Overall, however, the CP5200 puts in good resolution performance and the resolution chart looks clean and sharp.
Color Reproduction
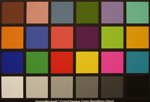
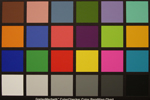
* For all of our color tests, we reset the CP5200 to its factory default settings. It was then set to record using the highest image quality option.We took a picture of our color chart using each of the following WB settings: Auto, Incandescent, and Manual. Click on a thumbnail below to view the full-size image.
| Auto WB | Incandescent WB | Manual WB |
 Click to enlarge. |
 Click to enlarge. |
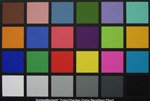 Click to enlarge. |
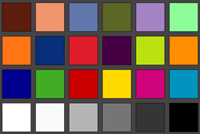 Reference Chart ("actual colors") |
||
Crops
| Auto WB | Incandescent WB | Manual WB |
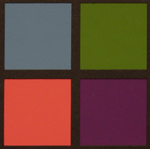 |
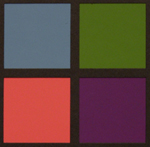 |
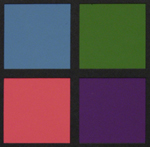 |
We are still waiting to be impressed by the performance of Auto WB in today's digital cameras. Unfortunately, the CP5200 is no exception. Although it's not horrible, you can see a yellowish-red cast in the Auto WB crop above (especially visible in the full chart). The incandescent setting does much better than Auto, producing very accurate colors. Surprisingly, the manual setting was too bluish, causing the purple color square to look more blue than purple. If you plan on shooting with available tungsten light, we recommend using the Incandescent setting to get accurate results.
Studio Shot
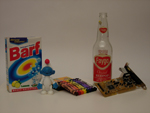
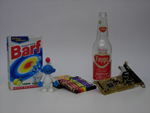
In this shot, we tested the camera's ability to reproduce colors in our studio shot using different WB settings. The camera was set to Auto mode without the flash. 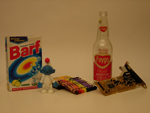 Click to enlarge. |
 Click to enlarge. |
 Click to enlarge. |
The yellowish-red cast of the Auto WB mode is clearly visible on our studio shot. Again, the manual WB setting proved to be too bluish. The incandescent setting performed the best in our studio shot, producing the most accurate colors without a noticeable color cast.
Built-in Flash
For the flash test, we set the camera to Auto mode (with Auto WB). The picture was taken from 5 feet away.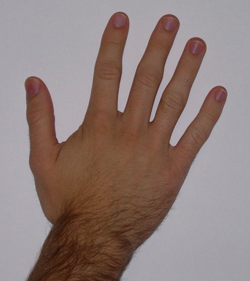
The CP5200 showed average performance on our flash test. The image is a bit darker than we would like it to be and there is a slight bluish cast on the background (white paper).
Since the CP5200 has a "Party/Indoor" option in Scene mode, we decided to include a sample. The picture was taken 4 feet away from the subject. Click on the thumbnail to view the full-size image.
The "Party/Indoor" feature uses a slow sync in addition to the flash to produce more natural-looking indoor pictures. We were pretty impressed with the results. The initial flash froze our subject and the slow sync that followed captured the ambient light in the room to provide an evenly-lit final image.
Noise
The noise test consists of pictures of our studio shot taken at increasing ISO levels to show the effect on the image. The pictures were taken after resetting the camera to its factory default settings. The highest quality recording mode was used. Click on a 100% crop below to view the full-size image.| Nikon Coolpix 5200 (Manual WB) | |
| ISO 64 | 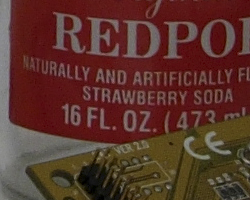 Click to enlarge. |
| ISO 100 | 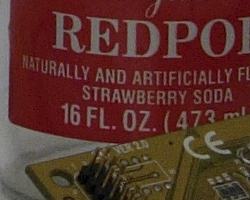 Click to enlarge. |
| ISO 200 | 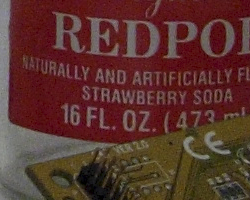 Click to enlarge. |
| ISO 400 |  Click to enlarge. |
As you can see by these crops, there isn't a huge increase in noise from ISO 64 to 100. At ISO 200, there is a noticeable addition of noise and also some discoloration in some shadow areas (i.e. the shadow under the crayons). At ISO 400, the resulting image loses a lot of detail as noise and discoloration become much more prevalent. In general, we found the noise performance tolerable from ISO 64 to 200. We would recommend staying clear of ISO 400 unless absolutely necessary because, as with most digital cameras, the maximum ISO setting yields a very noisy image.
General Image Quality
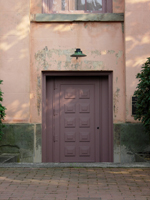
For these pictures, the camera was reset to its factory default setting. Then, it was set to its highest quality recording setting. The pictures were then taken in Auto mode. Click on a thumbnail to view the full-size image. The crops below the thumbnails are 100%. 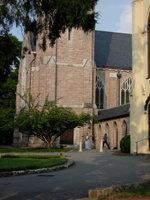 Click to enlarge. |
 Click to enlarge. |
 Click to enlarge. |
 |
 |
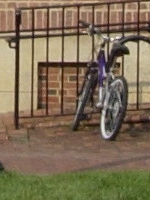 |
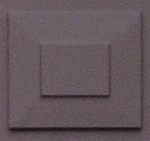
| In this first crop, we can see that the CP5200 is capable of capturing a good amount of detail. In addition, the picture has a very even exposure. | In this image, although the camera overexposed the sky, car, and other bright white objects on the left side of the frame, we can see that the Nikon ED lens helped to avoid any significant chromatic aberrations. The main subjects in the image (the dumpsters) are well-exposed and sharp. | This image is exposed properly and the colors are well-balanced. However, there is some loss of detail in the shadows to the left of the door. |
 Click to enlarge. |
 Click to enlarge. |
 Click to enlarge. |
 |
 |
 |
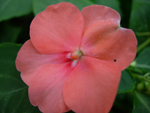
| This image shows a fair amount of grain, but detail is not lost and the color is right on. | In this macro shot, the subject is clear while the background is thrown softly out of focus. The colors are nicely saturated, detail is high, and image grain is not an issue. | Again, in this macro image, the lines are sharp and the colors are pleasant. |
Our outdoor images look pretty good overall. Despite the CP5200's tendency to produce slightly grainy pictures, the level of detail seems unaffected. In the picture with the overexposed sky, there is no problem with chromatic aberrations and the main subject of the image has good detail and color balance. The CP5200 demonstrates its versatility producing sharp and nicely saturated "walk-around" pictures in addition to vibrant and well-focused macros.
Video
Click on the thumbnail below to download a short video clip recorded in Movie mode at 640x480.Final Words
The Nikon Coolpix 5200 is a compact and lightweight digital camera that packs quite a punch. As our tests show, the CP5200 proves that it has impressive line resolution and detail. In our outdoor pictures, the colors are well saturated and have great detail despite being a bit grainy. The Auto White Balance setting performed great outside in the sun, but had some trouble with our tungsten lights. This is a common problem with most current digital cameras. However, we found that setting the WB to the Incandescent setting produced very accurate colors. The camera can also take natural-looking indoor pictures by using the built-in flash and slow sync. The camera has an AF assist lamp that makes low light focusing fast and efficient. The Macro mode on the CP5200 takes great-looking macros with the ability to focus as close as 1.6".Not only does this camera excel in image quality, but it has a decent startup time and quick Shot-To-Shot times as well. With a battery performance of 965 shots, you can expect the CP5200 to shoot all day without any problems. However, for about $25, we recommend picking up a spare EN-EL5 battery pack for multiple day trips. The camera's movie mode has a smooth look to it at 30 fps and the duration is only limited by the amount of free space available. One thing that we would have liked to see in the CP5200 is a shooting-priority feature in Playback mode. However, considering this is only a minor drawback, we think that the Coolpix 5200 is an outstanding little camera.
| Pros | Cons |
|
|
Thanks again to Newegg.com for loaning us the Nikon Coolpix 5200 for our review.

