Original Link: https://www.anandtech.com/show/1391
5 Megapixels for < $300: Kodak DX4530, Olympus C-50 Zoom, Casio QV-R51
by Stephen Caston on July 15, 2004 12:05 AM EST- Posted in
- Digital Camera
Index
Product Samples provided by Newegg.comFor this digital camera roundup, we will be looking at three 5-megapixel cameras: the Kodak DX4530, the Olympus C-50 Zoom, and the Casio QV-R51. We will look at each camera's features and run our regular tests to see which camera stands out from the others. When looking for a good digital camera, there are several things that should be kept in mind. Firstly, of course, is price. Secondly, you need to know if you are looking for a point-and-shoot camera or one that offers more advanced features such as adjustable exposure setting. Another thing to be aware of is image quality. If you are only going to be printing 4x6 photos or taking pictures that are going to be 300x200 pixel images on your website, you may not need a camera that has the very best image quality as opposed to someone who wants to make 11x14 prints. Also, you should be aware that many digital cameras have special features such as internal memory, in-camera filters, fast startup times, and the ability to record movie clips with sound.
It is with these and many other considerations in mind that we decided to take a look at the three cameras mentioned earlier. Hopefully, after reading this article you will be able to decide which of these cameras, if any, are right for you.
Kodak DX4530 Specifications
| Kodak DX4530 | |
| Release Date | August 2003 |
| Price | $220 |
| Pixel Count | 5.0 Million |
| Camera Type | Compact |
| Highest Resolution | 2580x1932 |
| Lower Resolutions | 2580x1720, 2032x1524, 1288x966 |
| Sensor Type | CCD |
| Sensor Size | 1/2.8" |
| LCD Screen Size | 1.8" |
| Lens | Fixed |
| Optical Zoom | 3x; 38 - 114mm equivalent |
| Digital Zoom | 3.3x |
| Lens Thread | Yes, fits accessories |
| Auto Focus | Yes |
| Auto Focus Type | TTL |
| Manual Focus | No |
| Aperture Range | f2.8 - 4.8 |
| Shutter Speeds | 4 - 1/7000 sec. |
| ISO | 130 - 200 (Auto) |
| Flash | Built-in |
| Flash Range | W: 2 - 11.2ft; T: 2 - 6.6ft |
| Flash Compensation | None |
| Exposure Compensation | +/- 2 stops in 1/2 increments |
| White Balance | Auto |
| Metering | Multi-pattern |
| Color Space | sRGB |
| Aperture Priority | No |
| Shutter Speed Priority | No |
| Manual Exposure | No |
| Continuous Drive | No |
| Self-Timer | 10 sec. |
| Storage Method | SD/MMC + Internal |
| Storage Included | 32MB Internal flash |
| Compressed Format | JPG |
| Uncompressed Format | None |
| Quality Settings | JPG |
| Video clips | QuickTime (MOV), 320x240, w/audio, 15fps, duration limited by card capacity |
| Battery Type | CRV3, 2AA NiMH, Lithium |
| Charger Included | No |
| PC Interface | USB |
| TV-out | Yes |
| Tripod Mount | Yes, plastic |
| Weight (with battery) | 7.4 oz |
| Dimensions | 110.5 x 66 x 39mm |
| Included in the Box |
| Kodak DX4530 Camera |
| CRV3 single-use battery |
| A/V cable |
| USB cable |
| Lens cap |
| Wrist strap |
| EasyShare camera dock insert (for EasyShare printer or dock) |
| User's Guide |
| Kodak EasyShare CD |
The Design: Kodak DX4530
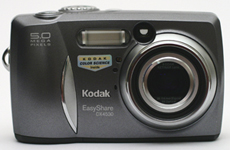
110.5 x 66 x 39mm
The first thing to notice about the Kodak DX4530 is that it is quite a bit bulkier than the other two other cameras in this roundup, and it has a rounded plastic body. The front of the camera houses the lens, built-in flash, viewfinder window, self-timer light, light sensor, and microphone. The lens is capable of an optical zoom of 3x (38 - 114mm equivalent on a 35mm camera) and a digital zoom of 3.3x. The aperture range is f2.8 - 4.8 and the shutter speed range is 1/1700th - 4 seconds. The built-in flash has a range of 2-11 ft in wide angle mode and 2-6.6 ft in telephoto mode.
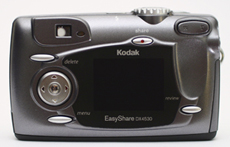
You would think that with a larger size body, this camera would have a larger screen to fit, but such is not the case here. The monitor is a pretty standard-sized 1.8" indoor/outdoor display with 72,000 pixels. That being said, Kodak did use the space to make the camera more comfortable to hold. It has a depression for our thumb on the back and a decent front grip for our other fingers. The camera's directional controls are on the left side of the LCD monitor between the delete and menu buttons. Kodak decided not to make the OK button independent from the arrow pad. Instead, the OK button is activated by pressing in the middle of the arrow pad. Although this can sometimes create a problem on some cameras, we found this button to be easy enough to press without triggering one of the arrows accidentally. On the top left are the optical viewfinder and the Ready light. Just above the LCD monitor is the share button, which is used for tagging your favorite pictures that you would like to email or print later. On the right side of the LCD monitor are the review button and the zoom controls. It should be noted that the optical zoom on this camera only has 7 positions and they are predefined. This means that by tapping the Telephoto side of the zoom control, the camera will zoom a certain amount automatically, no matter how fast you press it.
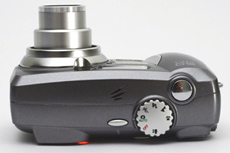
On the top of the camera, you will find the shutter button on the right. Just to the left is the mode dial, which is used to switch the camera from the Off position to one of the following modes: Auto, Sport, Night, Landscape, Close-up, and Video. To the left of this dial is the camera's speaker and flash button. When the camera is on, pushing the flash button will cycle through the different available flash modes: Auto, Off, Fill, and Red-eye.
 |
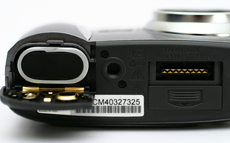 |
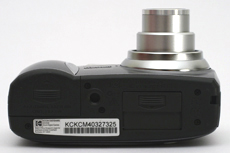
On the bottom of the camera, there is a hinged door that swings open to reveal the battery compartment, which will accept any of the following battery types: CRV3 lithium, 2-AA lithium, Ni-MH rechargeable battery pack, or 2-AA Ni-MH rechargeable. Just to the right of the battery compartment is a plastic tripod mount. Finally, just below the lens is the connection to the optional EasyShare dock. The connection has a sliding door to protect it from dust and particles. We found this door to be a little too easy to slide back and forth. On several circumstances, we found that the door had opened itself during regular use of the camera. Kodak must not have been too worried about foreign matter getting into the connections.
 |
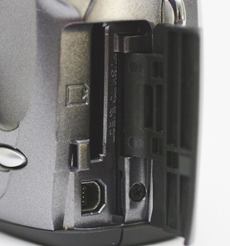 |
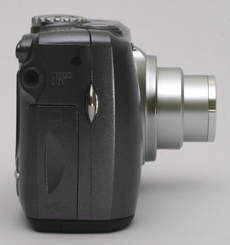
The right side of the camera has an audio/video-out port. Video output can either be NTSC or PAL (selectable as a menu option). There is a sliding hinged door that covers the USB port and the SD/MMC slot. Also on the right side is the wrist strap post.
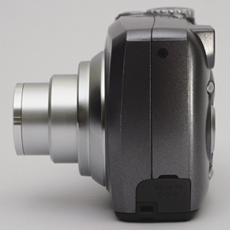
The only thing on the left side of the camera is the port for the optional 3V AC adapter and the lens cap strap post (used to secure the enclosed lens cap).
This camera offers 4 image size settings: Best ***, Best (3:2) ***, Better **, or Good *. While these options seem a little abstract, we've outlined the details in the table below.
| Setting | Compression | Resolution (pixels) |
| Best *** | JPG | 2580x1932 |
| Best (3:2) *** | JPG | 2580x1720 |
| Better ** | JPG | 2032x1524 |
| Good * | JPG | 1288x966 |
All 4 of the quality settings are JPEG and there is no option to shoot in an uncompressed mode. This camera shoots with an aspect ratio of 4:3 on all settings except the one specified above. The DX4530 comes with 32MB of internal memory. This is a feature that is being seen more in newer digital cameras. It is a great feature to have if you are out shooting and you run out room on your memory card; at least you know that you can fit a few more shots on the internal memory. As nice as it is, you are going to need a memory card sooner or later because Kodak allows for 21 pictures to be taken on the internal memory at the highest quality setting. The DX4530 supports SD/MMC memory cards. These smaller card types are becoming increasingly popular because of their compact size and, more recently, due to their speed potential. Recently, Pretec announced their new 2GB MMC card that offers 18MB/sec write speed and 22.5MB/sec read speed. With advances like these, I think that we will be seeing more companies moving away from the larger format cards like Compact flash.
This camera does not offer manual focus. The DX4530 uses an auto focus system that marks off the focal point with a pair of brackets. However, the user does not have total control over the focal point as shown through the camera. In the user's guide, there is only one page dedicated to the auto focus system. It states that you should press the shutter button half-way to set the focus (the camera will focus on subjects in the foreground by default). The camera will then show you on the monitor what it has chosen as its focal point. The manual says to repeat the process until the camera focuses on your desired subject.
In addition to the limited focus options, the only option that Kodak gives for exposure control is through the exposure compensation setting. This feature gives the user the ability to change the exposure by +/- 2 stops in 1/2 step increments. Unfortunately, getting to this option through the menu isn't very convenient. You must press the Menu button, use the arrow keys to scroll down to Exposure Compensation, press OK, use the arrow keys to select the amount of compensation, then press OK again. Kodak could have made this feature easier to access by simply assigning compensation to the left and right arrow keys, especially since these keys currently serve no other function.
Because this camera is aimed at point-and-shoot users, there are no options for adjusting white balance. In addition, there are no options for metering. Instead, white balance is always automatic and the camera's multi-pattern metering mode is used. There are no manual settings on the DX4530 where you can adjust aperture and shutter speed. The user is confined to Auto, Sport, Night, Landscape, and Macro modes. In macro mode, you can focus from 2.8 - 28 inches in wide angle and 11 - 28 inches in telephoto. With no manual control available, it should come as no surprise that the DX4530 offers no way to adjust the ISO setting on the camera. It is automatically chosen and will fall between ISO 130-200.
Like many consumer digicams, this camera offers a video mode, which records in QuickTime (MOV) format with a resolution of 320x240 at 15 fps. We should point out that this camera is capable of recording audio with the video clip (something that is not yet standard with movie-capable cameras). You can either record a video clip by holding down the shutter button for the length of time that you wish to record or you can press the shutter button once to begin recording and again to stop. If you turn on the self-timer function, you can set the record time to unlimited, 5, 15, or 30 seconds. With the self-timer, there will be a 10-second delay before the camera starts recording.
The DX4530 has a menu option called "Long Time Exposure", which gives the user the option to do a long exposure. The options are preset at: 0.7", 1", 1.5", 2", 3", and 4". This option to do a long exposure is one of the few "creative" options that Kodak offers on this camera. Another feature that is worth mentioning is the Orientation Sensor. In the menu, you can turn on this sensor, which will automatically rotate your pictures for you if you had the camera tilted upright (for a portrait shot, for example). This feature can save you time later when editing the pictures on your computer.
Playback
In playback mode, you have the option to magnify an image (with 2x and 4x as options). This feature can be used to check the focus of a picture to ensure that it is sharp enough. It is also worth noting that moving to different areas of a magnified photo is fast and smooth with the use of the directional arrow pad. You can hold one of the arrow keys and immediately move across the entire picture without having to press the arrow key repeatedly.Also during playback, you have the option to press the Share button in order to mark a picture or video clip for future identification. This makes remembering your favorites easier when you transfer everything to your computer or print from a Kodak printer. Two other playback options that are convenient are the ability to protect and copy pictures. When you mark a picture as "protected", you cannot delete it until protection is removed. However, formatting the card will erase all pictures and videos, whether or not they are protected. The ability to copy either from a flash card to the internal memory or vice versa is a nice feature to have, as it allows you to transfer pictures from friends' memory cards without the use of a computer.
Olympus C-50 Zoom Specifications
| Olympus C-50 Zoom | |
| Release Date | October 2002 |
| Price | $280 |
| Pixel Count | 5.0 Million |
| Camera Type | Compact |
| Highest Resolution | 2560x1920 |
| Lower Resolutions | 2048x1536, 1600x1200, 1280x960, 1024x768, 640x480 |
| Sensor Type | CCD |
| Sensor Size | 1/1.76" |
| LCD Screen Size | 1.8" |
| Lens | Fixed |
| Optical Zoom | 3x; 38 - 114mm equivalent |
| Digital Zoom | 4x |
| Lens Thread | No |
| Auto Focus | Yes |
| Auto Focus Type | TTL |
| Manual Focus | No |
| Aperture Range | 2.8-8.0 |
| Shutter Speeds | 8 - 1/1000 sec. |
| ISO | Auto, 80, 160, 320 |
| Flash | Built-in |
| Flash Range | W: 2 - 11ft; T: 2 - 6.6ft |
| Flash Compensation | +/- 2 stops in 1/3 increments |
| Exposure Compensation | +/- 2 stops in 1/3 increments |
| White Balance | Auto, Daylight, Overcast, Tungsten, Fluorescent |
| Metering | Digital ESP, Spot |
| Color Space | sRGB |
| Aperture Priority | Yes |
| Shutter Speed Priority | Yes |
| Manual Exposure | Yes |
| Continuous Drive | Yes, 1fps for 3 frames (unavailable in TIFF mode) |
| Self-Timer | 12 sec., Remote Control |
| Storage Method | xD-Picture Card |
| Storage Included | 32MB xD-Picture Card |
| Compressed Format | JPG |
| Uncompressed Format | TIFF |
| Quality Settings | JPG, TIFF |
| Video clips | AVI, silent, 15fps, 320x240 (for up to 15 sec.), 160x120 (up to 70 sec.) |
| Battery Type | LI-10B (Lithium-Ion) included |
| Charger Included | Yes, 2 hours |
| PC Interface | USB |
| TV-out | Yes |
| Tripod Mount | Yes, plastic |
| Weight (with battery) | 8 oz |
| Dimensions | 99 x 58.5 x 41.5mm |
| Included in the Box |
| Olympus C-50 Zoom Camera |
| LI-10B battery pack |
| Battery charger |
| 32MB xD-Picture Card |
| Video cable |
| USB cable |
| Remote control |
| Wrist strap |
| User's Guide |
The Design: Olympus C-50 Zoom
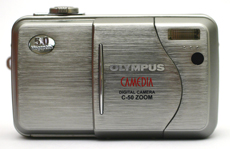
99 x 58.5 x 41.5 mm
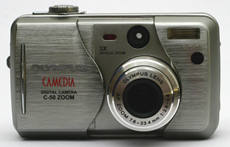
The front of the camera has a sliding door that acts as the main power switch for the camera as well as a shield to protect the lens. When you slide the door to the side, the lens extends automatically and the camera is ready to shoot. Conversely, sliding the door back towards the lens triggers the camera to power off, causing the lens to retract and the shutter to close. It is worth noting that, on occasion, we found that we moved the sliding door accidentally during shooting and caused the camera to power off. The lens has an aperture range of f2.8 - 8.0 in wide angle mode and f4.8 - 8.0 in telephoto mode. The camera is capable of shutter speeds from 1/1000th - 8 seconds. On the top left is the Self-timer/Remote control lamp. This light flashes to tell the user when the picture will be taken in remote control or self-timer mode. Just to the right of this lamp is the viewfinder window. In the right corner is the built-in flash. The flash range is 0.6 - 11.2 ft in wide angle and 1.0 - 6.6 ft in telephoto mode. Below the built-in flash is the receiver for the remote control. The C-50 Zoom has a 3x optical zoom that is equivalent to 38-114mm on a 35mm camera. There is also a 4x digital zoom.
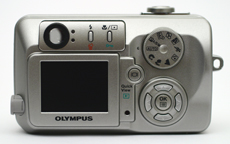
The Olympus C-50 Zoom is much smaller than the Kodak DX4530 and has a magnesium alloy body. Given the layout of the controls on the back, there was very little room for a comfortable place to rest our thumb. We had to rest our thumb on the Mode dial. Luckily, however, the Mode dial is sturdy enough that it does not rotate when our thumb rubs against it. On the left side of the camera is the review monitor which is 1.5" with 134,000 pixels. Above the monitor are the viewfinder, orange and green indicator lamps, a flash/erase button, and a Macro/Spot/Protect button. Pressing the flash button cycles through the following 6 modes: Auto, Red-eye, Fill, Slow (to capture ambient light in addition to the flash), Slow w/Red-eye, and Off. Pressing the Macro/Spot button in shooting mode cycles through the following 4 options: Spot metering mode, Macro mode, Macro with Spot metering mode, and Off. In playback mode, pressing the Macro/Spot/Protect button will mark an image as "protected" so that you cannot delete it by accident. While in macro mode, you can focus from 7.9 inches - 19.7 in wide angle and 11.8 - 19.7 inches in telephoto. We have some trouble understanding how Olympus considers this range a macro range.
In the middle of the camera, just to the right of the LCD monitor is the Monitor/Quick View button and a red lamp that blinks while a picture is being written to the camera or a flash card. The Quick View button serves to turn on/off the live LCD display while in record mode. A double-press of this button will switch the camera to review mode where you can look at previously stored pictures and video clips. On the right side are the Mode dial and an arrow pad. The arrow pad has a separate OK/Menu button in the middle. Rotating the mode dial selects one of the following options: Fully automatic, Portrait, Landscape and Portrait, Landscape and Scene, Night Scene, Sports, Self-portrait, Movie, My (custom settings), and P/A/S/M (Program, Aperture priority, Shutter priority, and Manual) mode. If P/A/S/M mode is chosen, a series of menus must be used to select which sub-mode you want.
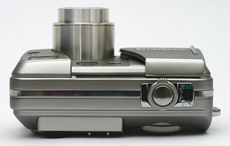
Olympus kept the top of the camera pretty clear with just the shutter button and a zoom control. The zoom control on this camera is much more sensitive than the Kodak DX4530. We were able to zoom optically at ~20 different levels with the C-50 Zoom. This gave the zoom a more fluid feeling than the DX4530.
 |
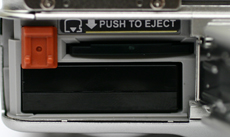 |
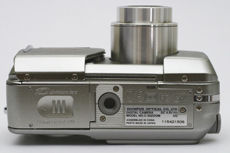
On the bottom is the compartment for the LI-10B rechargeable lithium-ion battery pack (supplied with a charger in the box). The charge time for the battery back is about 2 hours. Behind the same hinged door is the slot for an xD-Picture Card (a 32MB card is supplied in the box). Also on the bottom of the camera is a plastic tripod mount. Something that we feel is worth mentioning is the 256MB flash card capacity limitation on the C-50 Zoom. Because of this limitation, we had to buy a 256MB card, as our 512MB version simply did not work in the camera. We found this limitation to be especially contradictive, since the camera has the option to record in the large file-sized TIFF mode and offers no way to upgrade past a 256MB card.
UPDATE: A firmware update is available that would allow 512MB xD cards to be used in the C-50 Zoom. To receive the update, you must send your camera to one of two Olympus service centers with the proof of purchase from your 512MB Olympus, SanDisk, or Lexar xD card. Without the proof of purchase, the upgrade is $39.95.
 |
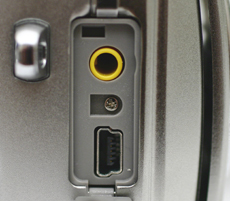 |
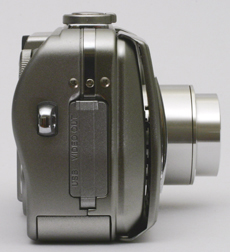
The right side of the camera has a tab that snaps in place to cover the USB port and the Video out jack. You can select NTSC or PAL output through the Setup menu. There is also a wrist strap post on this side.
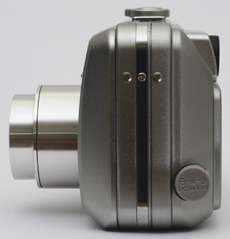
The only thing on the left side is the port for the optional 4.8V AC adaptor.
The C-50 Zoom offers a wide range of image size settings: TIFF (uncompressed), SHQ, HQ, SQ1, and SQ2. Option SQ2 has 4 additional choices. The details of each of these settings are outlined in the table below.
| Setting | Compression | Resolution (pixels) |
| TIFF | Uncompressed | 2560x1920 |
| SHQ | JPG | 2560x1920 |
| HQ | JPG | 2560x1920 |
| SQ1 | JPG | 2048x1536 |
| SQ2 | JPG | 1600x1200 |
| JPG | 1280x960 | |
| JPG | 1024x768 | |
| JPG | 640x480 |
All of the quality options have an aspect ratio of 4:3. In addition to the resolution settings, sharpness can be set to Hard, Normal, or Soft and contrast can be set to High, Normal, and Low. The C-50 Zoom supports xD-Picture Cards and comes with a 32MB starter card in the box. Since our tests with the SHQ setting averaged around 2MB per picture, you will most likely find yourself needing a higher-capacity card.
Auto focus on the C-50 Zoom is very straightforward. You simply point the two auto focus brackets over the subject that you are trying to capture and press the shutter down halfway. If the camera is able to lock focus, the green indicator lamp will light up on the back of the camera to the right of the viewfinder. If it is not able to lock focus, the green light will flash. Olympus did not include manual focus on this camera.
It is nice to see that Olympus included Program, Aperture priority, Shutter priority, and Manual exposure modes on this camera. This adds a great deal of flexibility in terms of creative control. Two other handy features that are available on this camera are exposure compensation and flash compensation. Both can be adjusted to +/- 2 stops in 1/3 stop increments. To adjust the exposure compensation, all you need to do is press the left arrow key to decrease and the right arrow key to increase exposure. To adjust the flash compensation, you can set up a shortcut in order to adjust the setting with the press of two buttons (otherwise, you must navigate through a few menu options). It should be noted that there is a mode called "My Mode" that allows you to customize default settings for essentially every option in the menu. This is very convenient for people who want to switch to their favorite settings quickly.
The C-50 Zoom gives you two options for metering: Digital ESP and spot. Digital ESP is the default metering mode and it measures both the light in the center and the rest of the frame separately. It's good to have the option to switch to spot metering mode if there is a strong light behind the subject. This would help ensure against underexposing the subject. It's disappointing to see that the C-50 Zoom does not have an option for manual white balance. Instead, you are given 5 options: Auto, Daylight, Overcast, Tungsten, and Fluorescent. The camera offers the following ISO settings: Auto, 80, 160, and 320.
This camera also offers a continuous drive option to record 1fps for 3 frames (continuous drive is not available in TIFF mode). You can select between continuous drive with or without auto-focusing before each picture. In addition, the camera has a bracketing feature with options +/-0.3, 0.7, and 1.0 for 3 or 5 frames (bracketing for 5 frames is only available in SQ2-1024x768 and 640x480 modes).
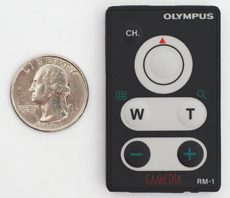
Like the Kodak DX4530, the C-50 Zoom has a Movie mode that records video clips at 15fps. There are two options (both are QuickTime): 320x240 (for up to 15 seconds) or 160x120 (for up to 70 seconds). We should point out, however, that this Olympus camera does not record sound with its video clips. The C-50 Zoom comes with a small remote control that offers zoom controls and a shutter button. To use the remote, you must turn on the Remote Control option in the menu. Pressing the shutter button on the remote will trigger the camera's self-timer/remote control lamp to start flashing. After about 3 seconds, a picture will be taken. The remote can also be used in video mode to start and stop recording. Another useful function of the remote control is its ability to cycle through pictures while outputting to a TV screen. You can also use the "-" and "+" keys on the remote to zoom in during playback.
A couple of extra functions on the C-50 Zoom include Panorama and 2-in-1 mode. In Panorama mode, the camera locks the exposure, focus, and white balance settings for the first frame taken and allows up to 10 frames to be recorded. Software included in the box helps to stitch these frames together to create the final panorama. The 2-in-1 mode is a way to take 2 separate pictures and have them saved as one file. You are prompted to take the first vertical half of the picture and then the second. The two pictures are joined and saved automatically. TIFF is not available as a quality setting for the 2-in-1 mode.
To get to playback mode while the lens is extended, you can press the Quick View button twice. During playback, you are given six levels of magnification from 1.5x-4x to zoom in on a particular part of a photo. In addition, there are a few options for image manipulation in-camera. While in playback mode, you can rotate an image, convert it to Sepia or B&W, or resize it to either 640x480 or 320x240. If any of these options are selected, the camera saves a separate file with the changes and leaves the original file intact.
There were a couple things that we found frustrating about the C-50 Zoom. First, the camera does not offer the option to delete a picture immediately after it is taken during auto-review. It would have been easy to implement this option as Kodak did on their DX4530. Instead, you must hit the Quick View button twice to switch to playback mode and delete it from there. Secondly, navigating the menu system is not immediately intuitive because the button for "OK" and the menu are the same. This dual-function button takes some getting used to during menu navigation. For example, while navigating through the menus, you must press the right arrow key to confirm a highlighted menu option instead of the OK/Menu button. However, if you are actually selecting a specific setting, then you must use the OK/Menu button to confirm your choice. The menu would be much easier to use if there were dedicated OK and Menu buttons. Although it takes some time to get the feel of the menu operation, it is easy enough to navigate.
It's a shame that they didn't include manual focus and white balance modes on this camera, given that it has a Manual exposure mode. We tend to think that advanced settings such as Manual, Aperture priority, and Shutter speed priority go right along with the ability to perform manual white balance.
Casio QV-R51 Specifications
| Casio QV-R51 | |
| Release Date | February 2004 |
| Price | $290 |
| Pixel Count | 5.0 Million |
| Camera Type | Compact |
| Highest Resolution | 2560x1920 |
| Lower Resolutions | 2560x1712 (3:2), 2048x1536, 1600x1200, 1280x960, 640x480 |
| Sensor Type | CCD |
| Sensor Size | 1/1.8" |
| LCD Screen Size | 2" |
| Lens | Fixed |
| Optical Zoom | 3x; 39 - 117mm equivalent |
| Digital Zoom | 4x |
| Lens Thread | No |
| Auto Focus | Yes, Multi, Spot |
| Auto Focus Type | TTL Contrast |
| Manual Focus | Yes |
| Aperture Range | 2.8-8.4 |
| Shutter Speeds | 4 - 1/2000 sec. |
| ISO | Auto, 50, 100, 200, 400 |
| Flash | Built-in |
| Flash Range | W: 2 - 10.5 ft: T: 2 - 5.9ft. |
| Flash Compensation | Strong, Normal, Weak |
| Exposure Compensation | +/- 2 stops in 1/3 increments |
| White Balance | Auto, Daylight, Shade, Incandescent, Fluorescent, Manual |
| Metering | Multi-pattern, Center-weighted, Spot |
| Color Space | sRGB |
| Aperture Priority | No |
| Shutter Speed Priority | No |
| Manual Exposure | No |
| Continuous Drive | No |
| Self-Timer | 10 sec., 3 sec. |
| Storage Method | SD/MMC + Internal |
| Storage Included | 9.7MB Internal flash |
| Compressed Format | JPG |
| Uncompressed Format | None |
| Quality Settings | Fine, Normal, Economy |
| Video clips | AVI, 320x240, silent, 15fps, 60 sec. duration max |
| Battery Type | 2AA: Ni-MH (included), Lithium, Alkaline |
| Charger Included | Yes, 4 hours |
| PC Interface | USB |
| TV-out | No |
| Tripod Mount | Yes, plastic |
| Weight (with battery) | 7.8 oz |
| Dimensions | 88.3 x 60.4 x 33.4mm |
| Included in the Box |
| Casio QV-R51 Camera |
| 2AA NiMH 2100 mAh batteries |
| Battery charger |
| USB cable |
| Wrist strap |
| User's Guide (on CD) |
The Design: Casio QV-R51
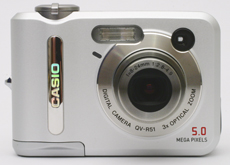
88.3 x 60.4 x 33.4mm
On the front of the camera, we can see the lens, the built-in flash, and a self-timer lamp. The lens is protected by a small automatic cover that opens before the lens extends and after the lens retracts. The lens has a 3x optical zoom and a 4x digital zoom. The optical zoom is equivalent to 39-117mm on a 35mm camera. The aperture range is between f2.8 - 4.8 in wide angle and f4.9 - 8.4 in telephoto. The shutter speed range is from 1/2000th - 4 seconds. Both are automatically adjusted. The flash range is 2 - 10ft in wide angle and 2 - 5.9ft in telephoto.
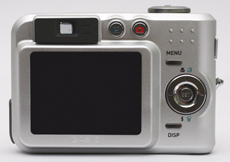
On the back of the camera, the first thing that really stands out is the size of the LCD screen. It is a 2" screen with 82,960 pixels. Just above the LCD screen are the optical viewfinder, 2 indicator lamps, a play button, and a record button. Pressing the play button when the camera is off will take you to play mode without having to extend the lens. Pressing the play button when the camera is on will switch from Record mode to Play mode (the lens will retract automatically after being left in Play mode for about 10 seconds). Pressing the Record button when the camera is off will turn the camera on in Record mode. Pressing record when the camera is already on and in play mode will also cause the camera to switch over to record mode. One common digital camera function that is missing from the QV-R51 is a shooting priority feature that would allow a half press of the shutter to switch the camera automatically to record mode. In order to take a picture from play mode you must press the record button and then press the shutter release button.
To the right of the LCD screen is a dedicated Menu button. Just under it is a 4-way arrow pad with an independent "Set" button in the middle. Below the arrow pad is a Display button that changes the display settings in record and play mode. In record mode, pressing this button will cycle through the following display settings: live histogram, clear camera setting information from LCD, turn off LCD, turn on LCD with camera setting information. In play mode, the Display button controls the following options: add a histogram and shooting info to the display, clear the display except for the picture, bring back the basic information on top of the picture (shot number, resolution, quality setting, date, time, and battery status).
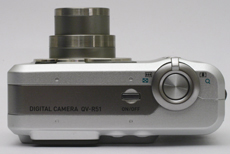
On the top of the camera is a small Power button. When the camera is off, pushing this button will turn on the power and LCD screen and extend the lens to its default position. The speed at which this camera can be ready to shoot is surprisingly fast (we will discuss this later in the article). When the camera is on, pushing the Power button will power down the camera and retract the lens. Also on top of the camera is the zoom control and shutter button.
 |
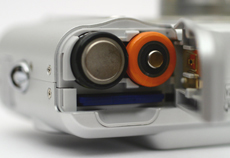 |
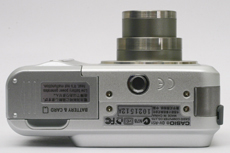
The bottom of the camera contains the battery compartment and metal tripod mount. The Casio QV-R51 supports 2 NiMH, Lithium, or Alkaline AA batteries. The camera comes with 2AA NiMH batteries and a wall charger. The charge time for these batteries is approximately 4 hours.
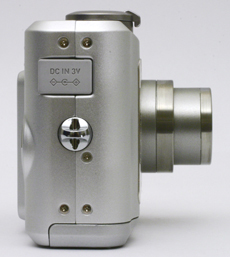
On the right side of the camera is a movable tab that covers the port for the optional 3V AC adaptor. Just a little bit further down is a post for the included wrist strap.
 |
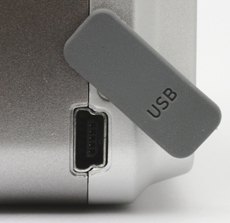 |
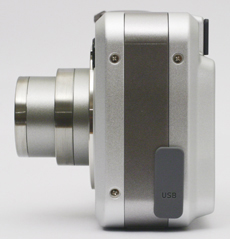
The left side of the camera is bare except for a tab that covers the USB port for downloading pictures from the camera.
The Casio QV-R51 offers a number of image size options with quality options: Fine, Normal, or Economy. The image size settings are outlined in the table below.
| Setting | Compression | Resolution (pixels) |
| 2560x1920 | JPG | 2560x1920 |
| 2560x1712 (3:2) | JPG | 2560x1712 |
| 2048x1536 | JPG | 2048x1536 |
| 1600x1200 | JPG | 1600x1200 |
| 1280x960 | JPG | 1280x960 |
| 640x480 | JPG | 640x480 |
This camera does not have an uncompressed image setting. All of the image sizes have an aspect ratio of 4:3 except for the second one (as labeled). In addition to image size options, there are also several adjustable quality settings. Sharpness can either be set to Hard, Normal, or Soft. Saturation and contrast both have options for High, Normal, or Low.
Another feature that the camera offers is the option to use digital Color filters. The options include: Off, B&W, Sepia, Red, Green, Blue, Yellow, Pink, and Purple. Although these are all options that can be applied by an image-editing program afterwards, the ability to compose shots with color filters may bring about some creative ideas.
In Snapshot mode (Auto mode), you have control over flash behavior and focusing modes. Pressing the down arrow key will switch between these different flash modes: Flash off, Always fire, Red-eye, and Auto. An indicator icon will show up on the LCD screen to indicate which setting you have chosen. The absence of an icon means the camera is in Auto flash mode. Pressing the up arrow key will cycle through the 4 different focusing modes: Auto, Macro, Infinity, and Manual focus. Again, the absence of an icon means that you are in Auto focus mode.
With auto focus, you can select between Spot and Multi modes. Spot mode focuses on the very center of the frame in the brackets (as shown). In Multi mode, 7-point focus points appear on the display. When you half-press the shutter button, the camera automatically selects a focal point based on the closest subject to the camera. In Macro focus mode, you can focus from 3.9"-27.6". Infinity focus mode causes the camera to focus out to infinity automatically. In Manual focus mode, you can control the focus by using the left and right arrow pads to focus close and far, respectively.
Besides Snapshot mode (Auto), there are 21 "BestShot" modes available as well as a Movie mode. Some examples of BestShot modes are Portrait, Scenery, Nature, and Candlelight. Each option has specific preset menu settings that are designed to enhance the overall image quality for the type of shot that you are taking. A quick description of the purpose of each setting is displayed when cycling through them. Two interesting BestShot options are Coupling Shot and Pre-shot modes. Both are options that allow you to include yourself in a picture with a friend by taking two separate shots that are automatically "stitched" together for the final picture. In movie mode, the camera captures a silent 320x240 movie clip in AVI format. The maximum length for a clip is 60 seconds (whether or not you have a larger capacity card).
This camera offers exposure compensation by +/- 2 stops in 1/3 increments. You can adjust the compensation in the menu or you can program the left and right arrow keys to decrease and increase the exposure. Flash compensation is also available with three options: Strong, Normal, and Weak. There are 3 different metering modes from which to choose. The default setting is Multi-pattern, where the camera measures the light in several sections of the frame to determine the best exposure. The second option is Center-weighted metering, which measures the light mostly in the center of the frame in the focus brackets. The last option is Spot metering, which measures a very small area from the center of the frame. In addition to metering options, you are given the following ISO settings to select: Auto, 50, 100, 200, and 400. With Auto chosen, the camera will attempt to pick the best ISO setting for the situation (from 50-200).
The QV-R51 offers 6 white balance options: Auto, Daylight, Shade, Incandescent, Fluorescent, and Manual. It is nice to see that this camera is following in the footsteps of the QV-R40 and R41 in that it offers manual WB. We feel that it is something that every camera should have for those shots when preset options don't quite capture the color.
One of the nice features about the QV-R51 is that you can customize the behavior of the left/right arrow keys in Record mode. They can be set to select any of the following: Recording mode (Snapshot, BestShot, Movie), Exposure compensation, White balance mode, ISO setting, and Self-timer mode. If you tend to switch between one of these settings frequently, it is much faster to use the left/right arrow keys than it is to go through the menu. Another handy feature is the ability to tell the camera what to remember when you turn off the camera. Almost all the options in the menu have an On/Off setting to indicate whether the camera should retain the settings it had before it was turned off. Also, the live histogram function (via the Display key in Record mode) is very useful for obtaining an even exposure. Some cameras offer histograms in play mode only after the picture is taken. Another feature that may be useful to some users is the option to compose shots with a 3x3 grid, which is displayed over the live image on the LCD.
In play mode, pressing the right/left arrow keys shuffles through previously taken photos. If you hold the right or left arrow key, the camera will shuffle through the pictures at a very fast pace. There is also a calendar screen that displays the first picture taken on each day of the month. A traditional thumbnail display ,which holds 9 images at a time, is also available to find pictures that you have taken. When viewing a single picture, you have the option to magnify the image by sliding the zoom controller to the right. An image can be magnified up to 4x.
In play mode, there are a number of options available to the user, including: Slideshow (specify images, slideshow duration, and picture interval time), Protect, Rotate, Resize (to 1600x1200, 1280x960, or 640x480), Trimming (with a moveable and sizeable cropping area), Create Album (creates an HTML-based webpage of photos), Alarm (turns on camera and sounds at a specified time), and Copy (from internal memory to flash card and vice versa).
Battery Performance
Our general method for battery testing is to reset the cameras to their default settings. Then, take 5 pictures without the flash and 2 pictures with the flash until the battery is dead. For more information on our battery test, please refer to our Testing Procedures page. Because only the Olympus had the ability to shoot in raw format (TIFF), we chose to use the highest JPG settings on all 3 cameras. Otherwise, the numbers would not have been comparable because the Olympus would have had a significantly lower number if shooting 15MB files. For the Kodak and Casio cameras, we used 2AA NiMH Power2000 2500mAh batteries charged overnight in a Power2000 wall charger. For the Olympus camera, we used the included LI-10B battery after charging it to capacity. All batteries were fully drained before charging for the test.| Number of shots taken in one battery charge | |
| Kodak DX4530 | 1282 |
| Olympus C-50 Zoom | 852 |
| Casio QV-R51 | 1431 |
We were surprised by the results of our battery test. The Casio outperformed both the Kodak and the Olympus. One thing that is worth noting about the Olympus camera is that because we were forced to use a 256MB card (thanks to the 256MB card-size limitation), we had to format the card twice as often, adding more strain to the battery. Despite this difference, any of these cameras would do fine in one day of heavy shooting. However, the benefit of the Kodak and the Casio is that you can charge extra batteries in advance to bring with you. Keep in mind that for our battery test, we shoot continuously until the battery is dead. Casual shooting, where there are long gaps in between picture taking sessions, will result in shorter battery life than what we were able to achieve.
The Timing Tests
* NOTE: For all of our time tests, the cameras were reset to their factory default settings and then set to the highest recording resolution and quality. The Kodak and Casio cameras were loaded with a PNY 512MB SD card and the Olympus was loaded with a Fujifilm 256MB xD-Picture Card.Shutter Lag
Before reading our results, please refer to our Testing Procedures page. For our shutter lag test, we performed 2 separate tests on each camera. For the first test, we pre-focused the lens and then measured the amount of time it took for the camera to take a picture after we pressed the shutter button. For the second test, we included the focusing time in our measurement to record a more general "lag" time. This is the time it takes the camera to focus and take a picture.| Shutter Lag excluding focus (seconds) | Shutter Lag including focus (seconds) | |
| Kodak DX4530 | .07 | .81 |
| Olympus C-50 Zoom | ‹ .05 | .73 |
| Casio QV-R51 | ‹ .05 | .27 |
As you can see, the difference between all 3 cameras for the pre-focused times was very small. This difference was not even noticeable when using the cameras. The real issue is how fast the cameras were able to focus and take a picture. The Casio QV-R51 beat the Kodak and Olympus hands down with an average time of .27 sec. This gave the Casio a very responsive feeling when taking a picture. After pushing the shutter button, the Kodak camera was the slowest to shoot with an average of .81 sec. and the Olympus was just a little bit faster at .73 sec. In short, the Casio camera was really the best performer in terms of shutter lag and general shooting lag.
Startup Time
The startup time for each camera is recorded from the moment the power button is pushed to the moment the camera's shutter sounds.| Startup time (seconds) | |
| Kodak DX4530 | 6.02 |
| Olympus C-50 Zoom | 5.70 |
| Casio QV-R51 | 2.58 |
Again, Casio is the clear winner in our startup time test. The Kodak and Olympus cameras really take their time extending their lenses after the power is turned on. If you were trying to capture a moment as fast as possible, the Kodak and the Olympus could really be irritating.
Write Times
We recorded 4 different types of write times: Single shot, Shot to shot, Shot to shot w/flash, and Shot to shot w/buffer full.Single Shot - The time it takes for a single picture to be completely written to the flash card
Shot To Shot (STS) - The time until the second shot is able to be taken after the first
Shot To Shot w/flash - The time it takes for the camera to take two pictures with the flash, starting from the moment the first flash is fired to the moment the second is fired
Shot To Shot (Buffer Full) - The time until the camera is able to take another shot after the in-camera buffer is full
We set the cameras to their highest quality JPG setting and ran the same 4 tests on each camera 3 times and averaged the results. If the cameras offered an uncompressed setting, we ran both the tests with both JPG and uncompressed settings. First, we'll start with the JPG write times. Below are the resolution and quality settings for each camera.
JPG Times
| Camera Settings (JPG) | |
| Kodak DX4530 | JPG, 2580x1932; Avg. file size = 880KB |
| Olympus C-50 Zoom | JPG, 2560x1920; Avg. file size = 2MB |
| Casio QV-R51 | JPG fine, 2560x1920; Avg. file size = 900KB |
| Results (in seconds) | ||||
| Single Shot | Shot To Shot | Shot To Shot w/Flash | Shot To Shot w/Buffer Full | |
| Kodak DX4530 | 9.02 | 2.52 | 2.54 | 4.32 |
| Olympus C-50 Zoom | 2.93 | 3.50 | 7.78 | Same as STS |
| Casio QV-R51 | 2.90 | 4.24 | 8.51 | Same as STS |
Although Kodak has a 9.02 sec. time for the Single Shot test, we were able to take 6 pictures in a row at 1 frame every 2.52 sec. There is not a dedicated "disk activity" light on the DX4530, so we measured the time that the green "ready" light was blinking after a picture was taken. The DX4530 outperformed both the Olympus and the Casio for Shot to Shot, Shot to Shot w/Flash, and Shot to Shot w/Buffer Full times. The Olympus and Casio cameras were exceptionally slow for Shot to Shot w/Flash times. Although the Olympus and Casio cameras performed worse than the Kodak camera for the first 6 pictures, it is worth noting that after the 6th picture, the C-50 Zoom and the QV-R51 still shot at their usual Shot to Shot time while the DX4530 slowed down to 4.32 sec. So, the Kodak camera is going to perform better if you want to take 6 pictures in a row (with or without flash) while the Olympus and Casio cameras will do a little bit better for more continuous shooting.
Uncompressed Times
| Camera Settings (Uncompressed) | |
| Kodak DX4530 | N/A |
| Olympus C-50 Zoom | TIFF, 2560x1920; Avg. file size = 15MB |
| Casio QV-R51 | N/A |
| Results (in seconds) | ||||
| Single Shot | Shot To Shot | Shot To Shot w/Flash | Shot To Shot w/Buffer Full | |
| Kodak DX4530 | N/A | N/A | N/A | N/A |
| Olympus C-50 Zoom | 21.22 | 25.25 | 25.28 | Same as STS |
| Casio QV-R51 | N/A | N/A | N/A | N/A |
Since the C-50 Zoom was the only camera to offer an uncompressed recording mode, we don't have much for comparison here. However, it should be obvious that 25 seconds between shots is totally unacceptable for any camera. It is nice to have the option to shoot uncompressed, but almost useless at this speed.
Resolving Fine Lines
For our resolution test, we reset each camera to its default settings and then used the highest quality recording mode. For more information, refer to our Testing Procedures page. Below are 100% crops of the test. Click on a picture to see the full chart.| Kodak DX4530 | 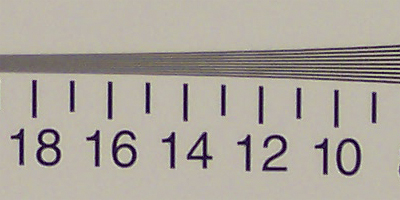 Click to enlarge. |
| Olympus C-50 Zoom | 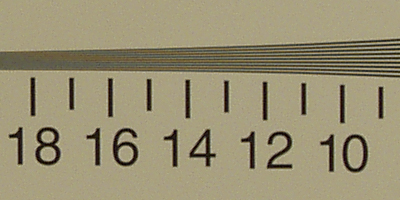 Right click to download full image. |
| Casio QV-R51 | 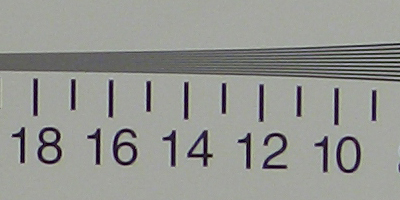 Click to enlarge. |
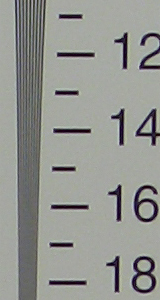
In the horizontal crops, the C-50 Zoom retains its line resolution the longest, losing clarity between 14 and 15 and gradually moving into extinction around the 16 mark. The DX4530 and the QV-R51 did not fare quite as well, retaining their line resolution up to 13 and quickly moving to extinction at 14.
| Kodak DX4530 | Olympus C-50 Zoom | Casio QV-R51 |
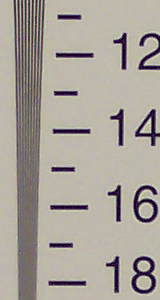 Click to enlarge. |
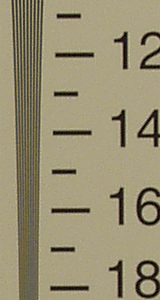 Click to enlarge. |
 Click to enlarge. |
Not surprisingly, the Olympus had the best results in our vertical crop as well. The lines retained their definition up to the 15 mark. Kodak and Casio did a little bit better on these crops. The Kodak held out until midway between 14 and 15 before extinction, while the Casio made it to 14. In general, we were impressed with the line resolution of all of these compact cameras.
Color Reproduction
For our color tests, we reset all cameras to their factory default settings. Each camera was set to record using the highest quality (compressed) option. We took a picture on each camera using Auto WB. Because the Olympus and the Casio had options for Tungsten WB, we took another picture comparing the two. The Casio was the only camera with the ability to set Manual WB. Click on a picture below to download the full-size file.Crops
| Kodak DX4530 | Olympus C-50 Zoom | Casio QV-R51 | |
| Auto WB | 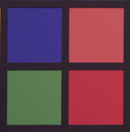 |
 |
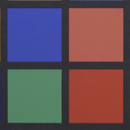 |
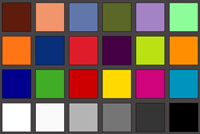
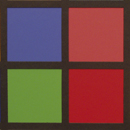
Starting with the Auto WB, it looks like the DX4530 had some trouble reproducing red in our Auto WB crop. It is hard to distinguish it from the pink section directly above it. However, if you look at the full color chart, the rest of the colors translated pretty well. Although the C-50 Zoom did a better job producing a realistic red, the rest of the chart suffers from a yellowish tint. On the QV-R51, the colors are kind of dull. The full color chart reveals a blue cast over most of the colors.
The Auto and Tungsten settings on the Olympus camera produced very noticeable differences. On the Tungsten setting, the colors are very accurate. In Auto mode, there is just a slight yellowish cast. The difference between the Auto, Tungsten, and Manual settings on the Casio yielded almost no noticeable difference in the colors. The only thing that we could pick up was that the Tungsten setting made the image slightly lighter than in Auto and Manual. Overall, it looks like the Kodak DX4530 had the best color reproduction in Auto WB mode followed by the Olympus C-50 Zoom.
Studio Shot
In this test, we compared each camera's ability to reproduce our studio shot using different WB settings.| Auto WB | Tungsten WB | Manual WB | |
| Kodak |  Click to enlarge. |
N/A | N/A |
| Olympus |  Click to enlarge. |
 Click to enlarge. |
N/A |
| Casio |  Click to enlarge. |
 Click to enlarge. |
 Click to enlarge. |
In our studio shot, you can see that the Kodak produced the most accurate colors in Auto WB mode and the Olympus did a great job with a Tungsten setting. The Casio had a bluish cast in all but the Manual WB setting.
Built-in Flash
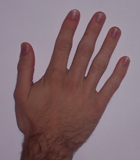
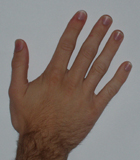
For the flash test, all cameras were set to Auto mode. Each picture was taken from 5 feet away.| Kodak DX4530 | Olympus C-50 Zoom | Casio QV-R51 |
 |
 |
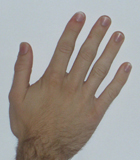 |
We were generally disappointed with the results of all 3 cameras in the flash test. The Kodak was too pink/red; the Olympus, too dark and yellow; and the Casio, too light. If we had to choose one of them, it would be a close call between Olympus and Casio. The Olympus was a bit dark and had more contrast, while the Casio was too light and almost washed-out.
Noise
The noise test consists of pictures of our studio shot taken at increasing ISO levels to show the effect on the image. Because the Kodak 4530 did not have an option to adjust the ISO setting, we had to leave it out of the table below. All pictures were taken after resetting the cameras to their factory default settings. They were set to record in the highest quality JPG mode.ISO 50 on the QV-R51 is quite a bit clearer with less noise than ISO 80 on the Olympus C-50 Zoom. The Olympus showed very little increase in noise from ISO 80 to 160. The difference is just a bit of added graininess. At ISO 320, the image is still usable, but has a very grainy appearance. The Casio showed very little noise up to ISO 200. At ISO 400, the noise is very bad and makes the image almost unusable.
General Image Quality
For these pictures, each camera was reset to its factory default setting. Then, they were set to their highest quality recording settings. The pictures were then taken in Auto mode in Carrboro, North Carolina on a very hot day with partly cloudy skies at 2:30pm. Clicking on a thumbail will download the full-size picture.| Kodak DX4530 | Olympus C-50 Zoom | Casio QV-R51 |
 Click to enlarge. |
 Click to enlarge. |
 Click to enlarge. |
There are a couple of things to look at in this first comparison. Kodak appears to have the sharpest image here, followed by Olympus and Casio. It is interesting to see that the DX4530 rendered a dark brown color from a reddish-brown subject (the "Cliff's" text). Another point of interest is the chromatic aberrations along the left side of the lettering on the Casio image.
| Kodak DX4530 | Olympus C-50 Zoom | Casio QV-R51 |
 Click to enlarge. |
 Click to enlarge. |
 Click to enlarge. |
Here, we can see that the DX4530 is showing strong signs of chromatic aberration along the sides of the floodlight. The Casio is also showing some slight signs as well. Other than an overall grainy appearance, the Olympus seems to be free of visual defects in this shot.
| Kodak DX4530 | Olympus C-50 Zoom | Casio QV-R51 |
 Click to enlarge. |
 Click to enlarge. |
 Click to enlarge. |
In this shot the Kodak did a great job representing the colors accurately with a reasonable amount of saturation. However, the Olympus and Casio images show a slightly sharper image. Although the Olympus picture appears to be the sharpest, it also has too much contrast (like our flash test) and the color of the barn is too blue. The Casio did a pretty good job in regards to sharpness, but the barn color is too gray.
From these test pictures, it seems that the Olympus C-50 Zoom may have the best overall image quality. Chromatic aberrations were visible in both the Kodak and Casio samples. The main problem that we had with the Olympus was its tendency to produce highly saturated and grainy images. Although the Kodak and Casio cameras showed signs of chromatic aberrations, the sunlight was very harsh at the time the pictures were taken and produced a difficult scene to capture.
Conclusion
It was hard to make a decision between these three cameras because they all have their pros and cons. In the end, what helped us make our decision was the price.
Overall, the Kodak DX4530 seems to be the best option because of its affordable price, impressive battery life, Shot-to-Shot speed, good color reproduction, audio included with video mode, unlimited video recording time, and good overall image quality. However, the Kodak DX4530 is a point-and-shoot camera. If you are looking for something that offers you more features and control, the Olympus and the Casio cameras are good options as well, although they are about $70 more than the Kodak camera.
The Olympus C-50 Zoom has very impressive line resolution and offers user-controlled exposure settings. Be aware, however, of the 256MB flash card limit (see the update on p.5) and the slow TIFF write times.
If you don't care about exposure control, but you still want more features than the DX4530, the Casio QV-R51 is a remarkably fast little camera. It has very fast startup and shutter lag times, a nice sized 2" LCD monitor, great battery life, and 21 preset shooting modes.
Thanks again to Newegg.com for loaning us the cameras for our review. For pricing and further product information visit Newegg.com.


