Original Link: https://www.anandtech.com/show/10826/commercial-nas-operating-systems-a-comprehensive-overview
Commercial NAS Operating Systems - A Comprehensive Overview of Core Features
by Ganesh T S on November 14, 2016 8:30 AM EST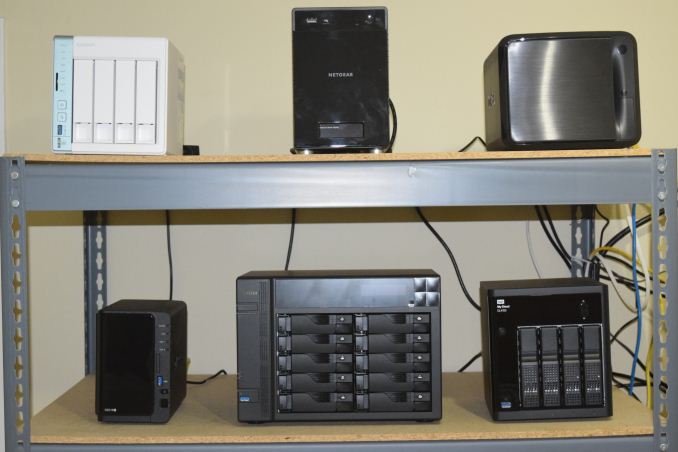
The market for network-attached storage units has expanded significantly over the last few years. The rapid growth in public cloud storage (Dropbox, OneDrive, Google Drive and the like) has tempered the expansion a bit amongst consumers who are not very tech-savvy. However, the benefits provided by a NAS in the local network are undeniable, particularly when complemented with public cloud services. Enterprise users obviously need NAS units with different performance and feature requirements. Our previous NAS reviews have focused more on the performance aspect. With feature set and ease of use becoming important across all market segments, we believe that a qualitative evaluation of the different commercial NAS operating systems is needed to educate consumers on the options available.
Introduction
Commercial off-the-shelf (COTS) NAS operating systems are popular across a wide range of market segments - business and enterprise users (including those with dedicated IT staff) prefer to have plug-and-play storage units that don't need much babysitting, while the average consumer often wants a media-centric unit without the hassle of re-purposing an old PC or building a file server from scratch. This regularly-updated piece will take a look at the features and usability of the currently popular COTS NAS operating systems.
The following NAS vendors / operating systems are currently covered in this article:
- Asustor [ ADM 2.6.5R9N1 ]
- Netgear [ ReadyNAS OS 6.6.0 ]
- QNAP [ QTS 4.2.2 ]
- Synology [ DSM 6.0.2-8451 Update 3 ]
- Western Digital [ My Cloud OS 2.21.19 ]
- ZyXEL [ FW v5.20(AATB.0) ]
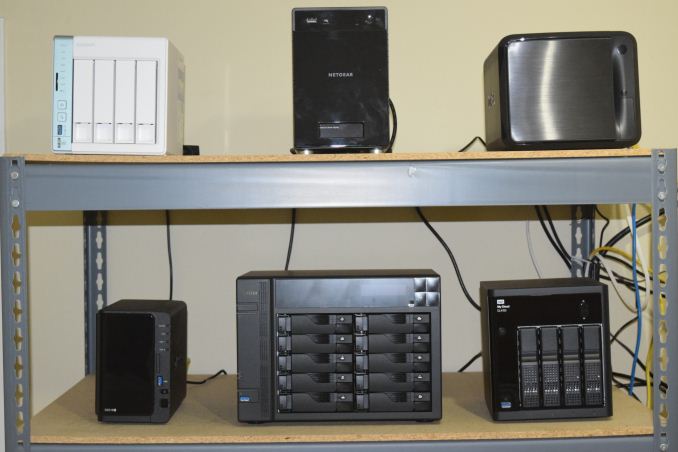
Different vendors cater to different market segments - both in terms of hardware and software features. For example, Asustor, Netgear, QNAP and Synology have units ranging from 2-bay desktop models targeting the average home consumer to 12-bay rackmounts targeting SMBs and SMEs. Western Digital has only desktop units- 1- and 2-bay models targeting entry level users, and multiple 2- and 4-bay models targeting experts, professionals and business users. ZyXEL, on the other hand, focuses on only one market segment - the average home consumer. Every vendor other than ZyXEL in the list above carries both ARM- and x86-based solutions. ZyXEL has only ARM-based solutions in their lineup. The choice between ARM and x86 has to be made by the end-user depending on the requirements (number of users, transcoding support etc.). This piece is not meant to provide inputs on the hardware choice, though we will briefly touch upon how the OS features might vary based on the platform. The hardware currently used to test out the various OS features are tabulated at the end of this section.
Security has turned out to be a very important concern for equipment connected to the network, particularly those exposed to the Internet. Therefore, frequent updates are needed even in the NAS firmwares to handle vulnerabilities that get exposed from time to time. The release date of the latest firmware is also a measure of the commitment of the NAS vendor to their consumers.
Most COTS NAS operating systems are based on Linux, and utilize software RAID (mdadm) with the stable ext4 file system. Recently, btrfs has also become popular in this space. ZFS, due to its resource-hungry nature, has been restricted to units targeting enterprise users. DIY consumers can also get a taste of it using open-source BSD-based operating systems such as FreeNAS.
The following table provides the essential information discussed above in a easy to compare manner.
| NAS Operating Systems Evaluation - Comparison Details | ||
| Vendor | ||
| Firmware Version | ADM 2.6.5R9N1 | ReadyNAS OS 6.6.0 |
| Firmware Release Date | October 3, 2016 | September 29, 2016 |
| OS Kernel | Linux 4.1.0 | Linux 4.1.30 |
| File System | ext4 | btrfs (Customized) |
| Evaluated Hardware | 10-bay AS6210T | 4-bay ReadyNAS RN214 |
This piece focuses on the core user-facing aspects of COTS NAS systems. These include the setup process and the quality of the user interface. Storage management and configurable services are the next topic. An overview of user management is followed by discussion of the networking features available in each OS.
Most NAS operating systems have feature parity in terms of core features. However, as we shall see at the end of this piece, there is a difference in ease of use which make some vendors stand out of the crowd. These vendors also try to differentiate with value-added services such as media servers, surveillance (IP camera) support, cloud features and other such features. They will be covered in detail in a follow-on article.
Setup Process and User Interface
The setup process adopted by different NAS vendors is similar in many ways. Connecting a diskless NAS unit to the network results in the unit getting a DHCP address, with a web server up and running. A web browser can then be used to follow the step-by-step instructions to insert hard drives, configure an appropriate storage volume, set up access credentials and some other essential aspects of the NAS.
In order to make the process simpler for the average consumer, some vendors supply a separate program to search for their NAS units in the local network. These programs occasionally come with value-added features. The setup process for each vendor is discussed in detail in this section. Vendors are covered in alphabetical order. Readers interested in jumping ahead to a particular vendor can use the list below.
Asustor
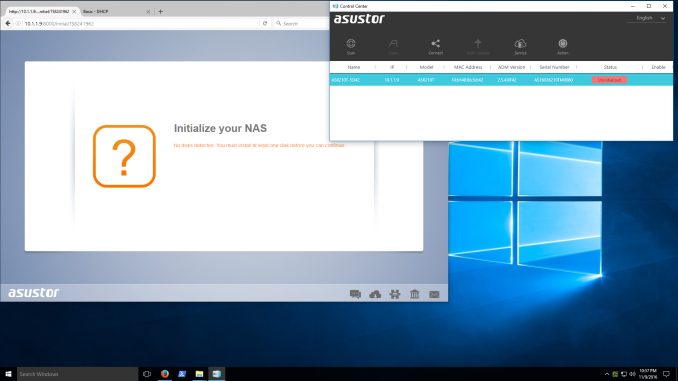
Asustor supplies the Asustor Control Center program that can recognize the Asustor units in the local network with its 'Scan' function. It helpfully provides the DHCP IP of the NAS unit also, and the user can open a web browser for further setup.
After inserting empty hard drives into the unit, the NAS can be initialized. The flow also checks whether a newer firmware version (compared to the one currently in the DOM inside the unit) is available. Users can opt to continue initialization without updating the firmware, or allow it to be updated directly off the net, or allow the upload of the newer firmware from a local source. The setup wizard allows 1-click configuration, but, advanced users will usually end up opting for the customized manual configuration.
The initialization process requires setting up a password for the admin account, date and time settings (computer time, manual, or synchronizing with a NTP server), network configuration (link aggregation configuration, IP settings - DHCP or static), and volume settings (RAID level configuration with selected disks in the unit). The final step in the process is the optional registration.
After the initialization of the NAS, the Asustor Control Center (ACC) becomes much more useful. The 'Open' button opens the browser interface for the NAS, and the 'Connect' option can be used to map network drives, create a remote file folder (WebDAV or FTP), or open a connection to the NAS via FTP. The 'Photo Gallery' and 'Surveillance Center' services can also be accessed via ACC. WOL settings can be configured, and power control options are also provided.
On the whole, the setup process is fairly simple and the Asustor Control Center provides easy access to tasks that might be essential for certain users.
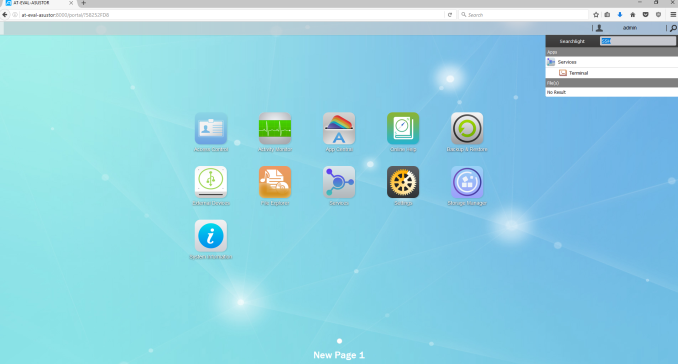
Asustor adopts an app-style browser UI for the NAS interface. Various options are arranged as a rectangular array of icons similar to what one sees in modern mobile operating systems.
One of the important aspects highlighted above is the 'searchlight' on the top of the page to the right. Often, it is difficult to remember where a particular option is buried in the layout. The searchlight helps take the user directly to the relevant section. Beyond the initial app view, the various windows that pop up within after selecting the available options follow a desktop-style UI.
Netgear
Netgear has completely revamped their OS a couple of times in the last 5 years. Starting from square one has resulted in their OS not being as feature-rich as the ones from other vendors in the market. For example, their local NAS discovery tool - RAIDar - is quite dated and requires Java to be installed. None of the other vendors we are covering in this article require Java for that tool.
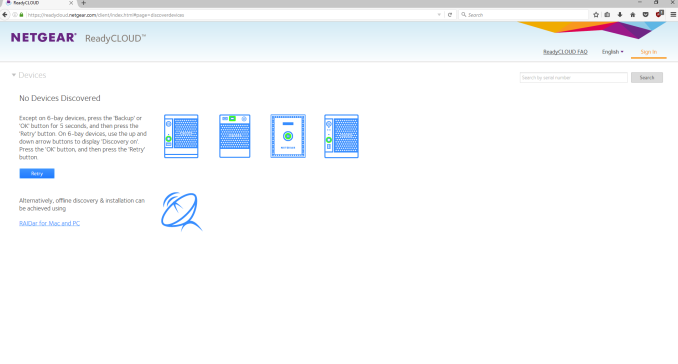
Fortunately, Netgear also has a cloud discovery mode using the 'ReadyCloud' feature. We tried it out with mixed luck, as shown the gallery below.
Eventually, we moved to the offline installation mode that involved accessing the DHCP IP (getting to that point still involved accessing the unit physically after inserting the disks - something that wasn't needed for units from other vendors). The usual time and date settings, host name, and login credentials could be configured. One of the interesting aspects was the ability to configure alerts to be sent to an e-mail ID during the setup process itself (other vendors have it as a buried option in their OS). The other was the automatic configuration of the disks in X-RAID (unlike other vendors who allow the RAID level to be chosen by the user during the setup process). End users can always remove the volume and reconfigure it after the initialization is complete.
In our evaluation, Netgear's setup process based on ReadyCLOUD doesn't appear to be very robust, while the offline installation mode requires more babysitting that we would like. Netgear also needs to create a version of RAIDar that can work without Java. All said, power users will not have any trouble getting a ReadyNAS unit up and running.
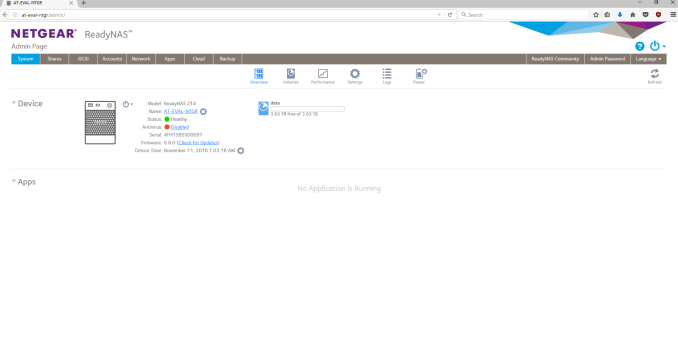
The ReadyNAS OS 6 browser UI is spartan compared to what we see from other vendors. It follows a ribbon-style set of menus - the first row is plain text, while the second row has icons with associated text. The UI takes some getting used-to, particularly if one is familiar with other COTS NAS operating systems.
Options and information pop-ups are placed in unlikely areas. The UI also suffers from some inconsistencies - for example, detailed disk information can be obtained by hovering over the green circle next to the 'Disk' entry in the 'Performance' view, but, similar green circles elsewhere in the UI are not of the informative variety. There is also no easy way to get to a desired option from the front page (i.e, no search box to put in keywords like, say, Samba or SSH). The UI is novel. However, it requires some rework to become more intuitive.
QNAP
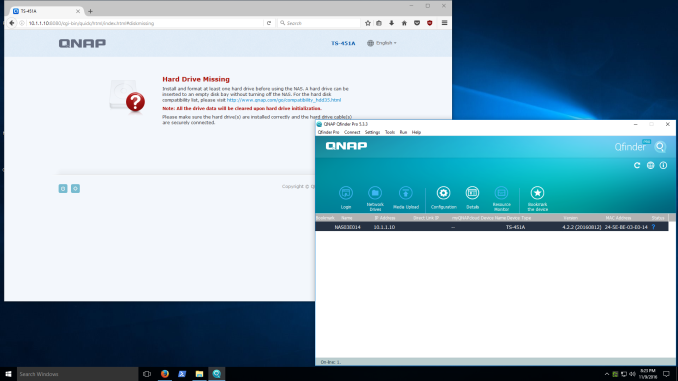
QNAP's setup process is very similar to that of Asustor discussed earlier in this section. Like the Asustor Control Center, we have the QNAP Qfinder Pro program to identify and manage QNAP NAS units in the local network. The feature sets of both programs are similar. Double-clicking a NAS entry directly opens up the browser interface for the unit.
After inserting empty hard drives into the unit, the NAS can be initialized. QNAP allows the user to choose between setting up a NAS either for home use or business use. This just modifies the services / applications installed by default, and users can always add / remove applications after the initialization process. Subjectively speaking, QNAP's browser UI for setup is better than Asustor's, but, both get the job done. A point of difference is that Asustor's flow includes a firmware update check, while QNAP's does not. On the other hand, QNAP allows more configuration options for the enabled services and storage volume (such as turning on encryption and checking for bad blocks in the disks).
The initialization process requires setting up a password for the admin account, date and time settings (computer time, manual, or synchronizing with a NTP server), network configuration (link aggregation configuration, IP settings - DHCP or static), and volume settings (RAID level configuration with selected disks in the unit). The final step in the process is the optional registration.
After the initialization of the NAS, the QNAP Qfinder Pro becomes much more useful. Though there seems to be no direct access to the internal services via Qfinder Pro, it does allow for more management features compared to ACC.
QNAP's setup process is comprehensive, and there is little to complain about. For the average consumer, QNAP also includes a cloud setup process similar to Netgear's ReadyCLOUD (though it needs a cloud key that is tagged on to the unit, unlike Netgear). However, most users will find it unnecessary, given that the local network setup process is straightforward.
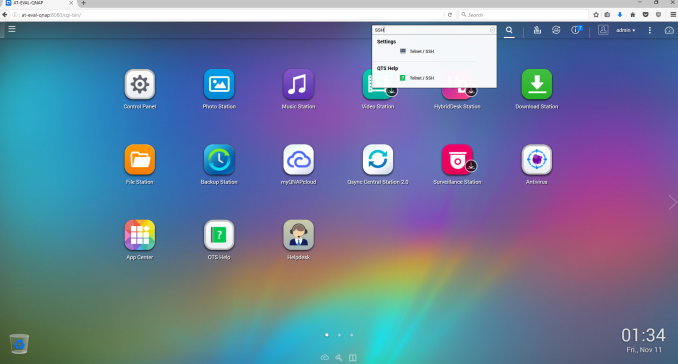
On the UI front, QNAP was one of the first NAS vendors to go with the app-style layout for the various segments of interest in the NAS OS. The spacing between the icons presents a better look compared to Asustor's ADM.
We have a search icon in the top bar that triggers a search box to get quickly to the desired areas inside the QTS OS.
Synology
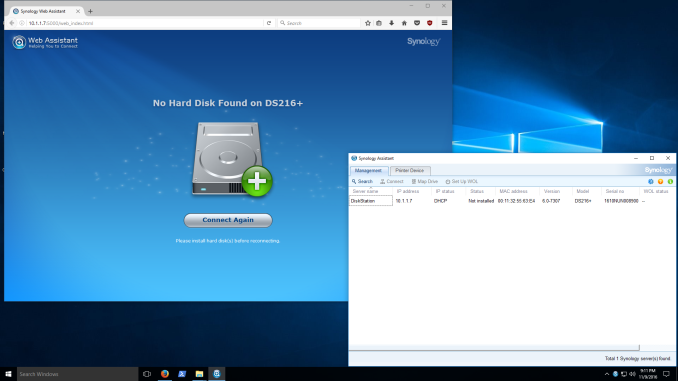
Synology, like QNAP, is a veteran in the COTS NAS market. The setup process is similar to what we have already seen with QNAP and Asustor. The Windows program for management of Synology NAS units in the local network is the Synology Assistant. Its features are similar to that of QNAP's Qfinder Pro and Asustor's Control Center.
The browser UI to set up the unit is similar to what we have seen earlier. A couple of points stand out - the Synology UI doesn't tell us the steps that remain to complete the initialization process, and the UI heavily promotes setting up of a Synology ID / QuickConnect for remote access. The other aspect is the focus on the DSM update process. Given the effects of the SynoLocker malware, it is only logical that Synology attempts to keep the DSM OS updated with minimal user intervention.
One of the unique aspects of Synology's DSM is the availability of both btrfs and ext4 as file system options for the storage volume in x86 units. However, it must be noted that the default volume that gets setup in the initialization process is btrfs (for the DS216+, it is a SHR RAID-1 volume).
The Synology Assistant is not as feature-rich as the offerings from QNAP and Asustor, but, it does have two unique features - a printer device tab to access / control printers connected to the Synology NAS unit's USB ports, and an advanced option to run a memory test for the RAM in the NAS unit.
Synology's setup process is user-friendly. The Synology Assistant could do with some additional features, but, the DSM desktop UI in the browser provides the same functionality with better user-experience compared to a standalone Windows program.
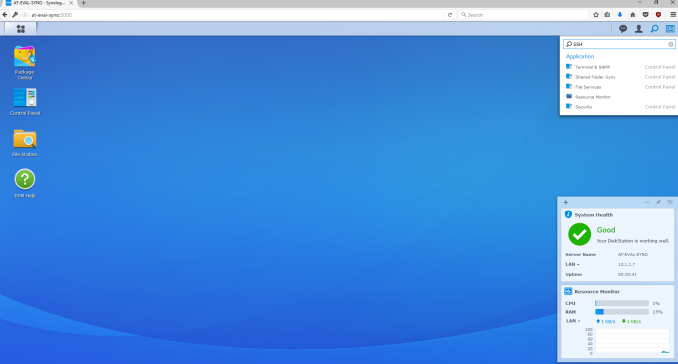
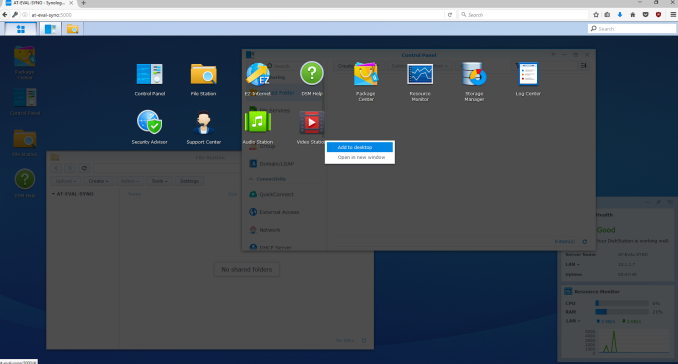
Synology's desktop UI with support for widgets was quite innovative when it was launched. Fortunately, it has withstood the test of time. The design of the 'Main Menu' that can be accessed from the top left is similar to the app layout adopted by QNAP and Asustor. Newly installed packages make an appearance in the main menu, and can also be added to the desktop, if desired.
Based on our experience, we believe that the Synology UI combines the best of both approaches. The search option in the front page ensures that it is possible to access the desired portions of the DSM OS quickly. Subjectively speaking, the DSM OS has the best UI and UX of all the NAS operating systems that we are covering here.
Western Digital
Western Digital's My Cloud OS was launched a couple of years back with the aim of unifying the software and UI across multiple product lines. While the NAS OS side has turned out to be acceptable, the Windows program side is still in a state of flux. Western Digital has two Windows program - the WD Quick View and WD Access - that have overlapping functionality. They can identify the My Cloud OS NAS devices in the network, and accessing the dashboard helps make progress with the setup process.
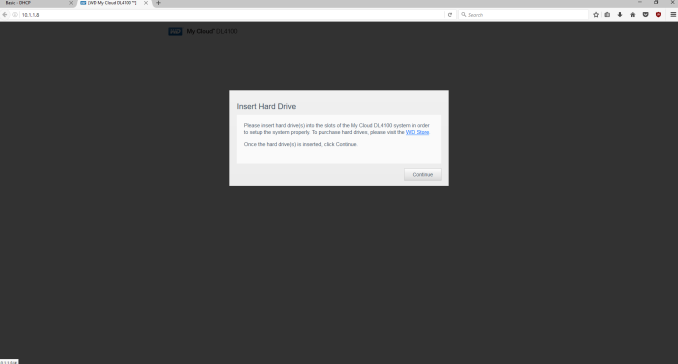
After insertion of the new hard drives, the setup process is automatic and ends up in the My Cloud OS browser UI's storage tab. An important point to remember here is that no volume is created by default. Without creation of one, it is not possible to, say, do a firmware update.
The RAID volume wizard is user friendly, and allows encrypted volumes to be set up in the step-by-step guide. A drive self-test is also processed before the volume is created. After reboot, the login credentials and cloud access can be configured.
The Quick View and Access Windows applications are meant to be used as taskbar-resident ones. From the viewpoint of the setup process, their main use is to provide access to the browser UI via the Dashboard option.
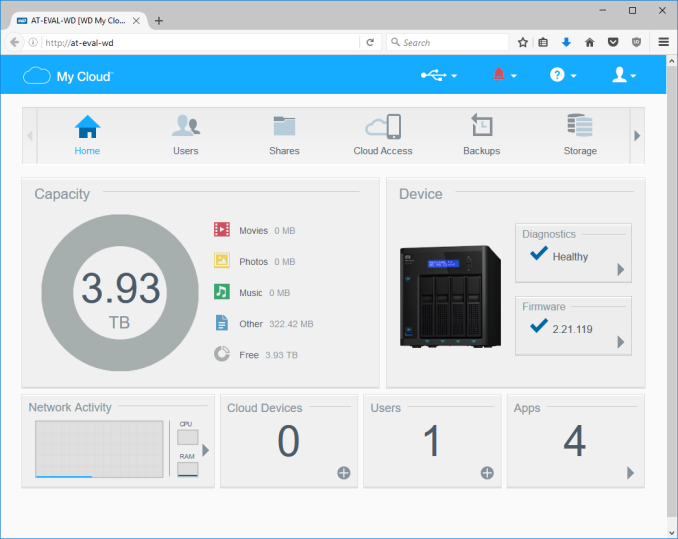
The My Cloud OS follows a ribbon-style user interface. There is a row of icons with associated text at the top, and the options in the main frame vary based on the choice at the top.
In some respects, the UI adopts an approach similar to Netgear's ReadyNAS OS. Despite not looking as polished, it is more intuitive. There is no search option in the Home screen to get quickly to buried options. This is one aspect that Western Digital could improve upon in future releases.
ZyXEL
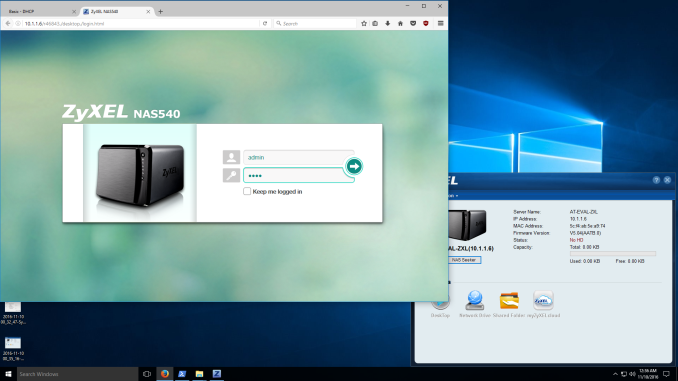
ZyXEL has NAS units targeting the home consumer market only. Despite not being a very significant player, ZyXEL's setup process is surprisingly good. A diskless unit's DHCP address is visible via the NAS Seeker function in the NAS Starter Utility. The ZyXEL units come with default credentials of admin / 1234.
The setup process is similar to that of other NAS units with extra focus on the type of RAID volume to be created. Other than that, an update to the default login credentials is required.
The NAS Seeker and NAS Starter Utility provide some basic configuration options (enabled after the creation of the storage volume in the NAS).
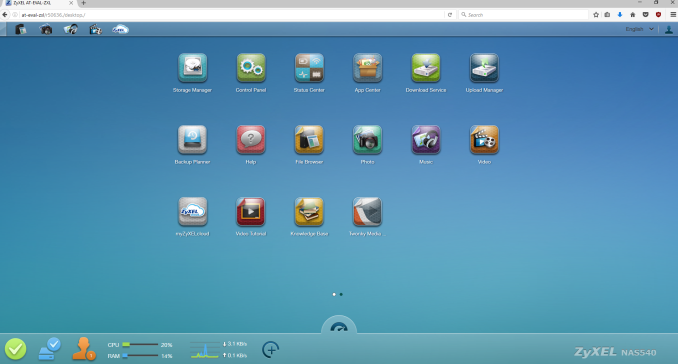
In terms of UI, ZyXEL adopts the app-style approach with a desktop back-end, similar to QNAP and Asustor. However, there is also limited widget support in the bar at the bottom. The older firmware versions had an advanced section with a tree-view of the available options (visible in the gallery above), but that seems to be missing in the newer versions. That said, recent firmware versions have hugely improved the number of available features, and the UI has been modified accordingly.
Since the advanced settings page seems to have been done away with, a search facility (similar to QNAP's or Synology's) would be very welcome in the front page of the browser UI.
Storage Management and Services
The basic function of a NAS unit is to aggregate disks and present a storage volume accessible over an IP network. In most cases, it is intended that the storage volume be resilient to failures in one or more member disks. Most COTS NAS units allow the storage volume to be expanded, either by replacing existing disks with disks of higher capacity, or, by adding disks to empty bays. Certain RAID configurations also allow for replacement of faulty disk(s) while maintaining data availability.
The storage can be made available over the network either as shared folders (accessible using protocols such as Samba or NFS) or, as a volume via iSCSI (support for SCSI storage commands over an IP network). Since storage management and the ways to access it over the network are some of the most important aspects of a NAS OS, it is helpful to see how various vendors stack up against each other.
The average consumer does not care about Samba, NFS, iSCSI or FTP, but, just requires the storage space in the NAS to be accessible on a computer or mobile device. The popularity of mobile operating systems and networked media players for content consumption presents a different challenge - a list of files and folders is not expected in that scenario. In such cases, traditional protocols such as Samba and NFS are not used. Instead, the NAS is expected to run a media server / support the uPnP protocol to provide access to the stored media files.
In order to understand the various options for exposing the storage in the NAS UI, users need to understand two concepts:
- Services
- Access Permissions
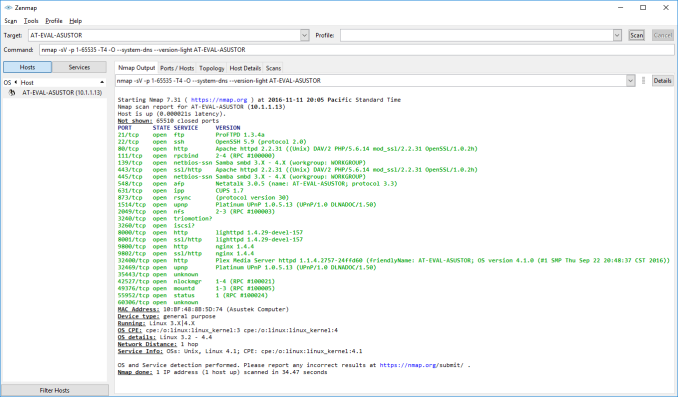
A NAS can run support various storage access protocols. These protocols are backed by 'services' running in the NAS OS. Each service is advertised as being available when a client tries to access the NAS over a particular port. As an example, a quick scan of the ports on an Asustor NAS delivers the following results (note that the default configuration may result in a different set of open ports).
This scan reveals the services currently running on the NAS (including the version of the program behind the service), many of which are associated with storage protocols or installed media servers.
Except for certain iSCSI configurations, the data accessed on a NAS always exists as a file or folder in the file system of the storage volume in it. The presence of an active service is not enough for an user to be able to access the internal storage through it. There are two possible filter levels - a file or folder might not be configured for access via the relevant storage protocol, or, the user might not have permissions to access the content.
Consumers aiming for a plug-and-play experience need to keep in mind that Windows PCs can mount and access content in Samba shares natively. Linux users should opt for NFS and/or Samba, while Apple users need to enable AFP in the list of services on the NAS. Business users and consumers who are tech-savvy might also want to enable iSCSI. Configuring iSCSI options requires some technical knowledge - an understanding of targets, initiators, LUNs, CHAP authentication, thin provisioning etc. Going into these technical aspects is beyond the scope of this article, but, a quick-start guide is available for interested readers.
We now proceed to see how different vendors address the aspects related to storage management and content sharing over the network. The vendors are covered here in alphabetical order. Readers interested in jumping ahead to their vendor of interest can use the links below:
Asustor
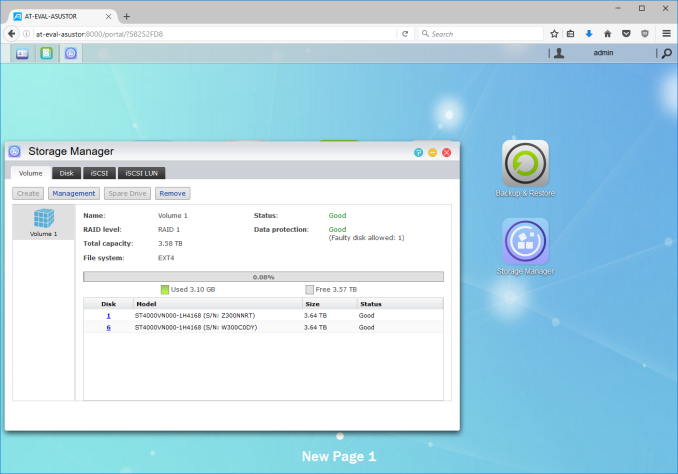
The home screen of the Asustor web UI carries a 'Storage Manager' option by default. Activating it presents details of the currently configured volume (including the RAID level, member disks etc.).
The 'Management' option allows addition of disks to the volume, migration to a higher RAID level or replacement of the existing disks with larger ones. The 'Disk' tab presents details of all the disks currently in the NAS (independent of the configured volumes). 'Bad Block Scans' and 'S.M.A.R.T Checks' can be scheduled for the disks. The next tab of interest in the storage manager is 'iSCSI'. LUNs can be configured along with targets. Thin provisioning is supported. LUN snapshots can also be scheduled. As of the reviewed firmware version, only file-based LUNs are supported (i.e, configured LUNs actually exist as files in the volume).
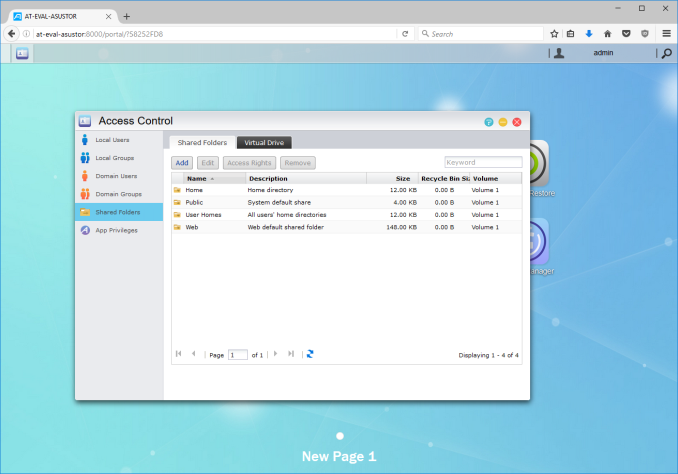
The next task for any user is to create folders in the volume that can be accessed over the network. This is a bit buried in the current configuration, and reachable through the 'Access Control' option in the main screen.
This section allows users to add new shared folders. Available configuration options include the volume to place the folder in and the ability to enable a 'Recycle Bin' for the folder's contents. Interestingly, Asustor's ADM also allows encryption on a per-folder basis.
Access rights for the shared folders can also be configured during the creation phase. This includes access using anonymous FTP / WebDAV. There is also an option to enable Windows ACL. This option is useful if modifying the file permissions through Samba is desired. The traditional permissions model mandates that file permissions can be modified from the in-built File Explorer application only. The permissions can be edited at any point of time. An interesting point to note here is that if the NFS service is enabled, NFS privileges (that are based on the client address) can also be configured for the shared folders.
This brings us to the 'Services' topic, which dictates the ways in which clients can communicate with the NAS. The option is available in the main screen of the web UI by default.
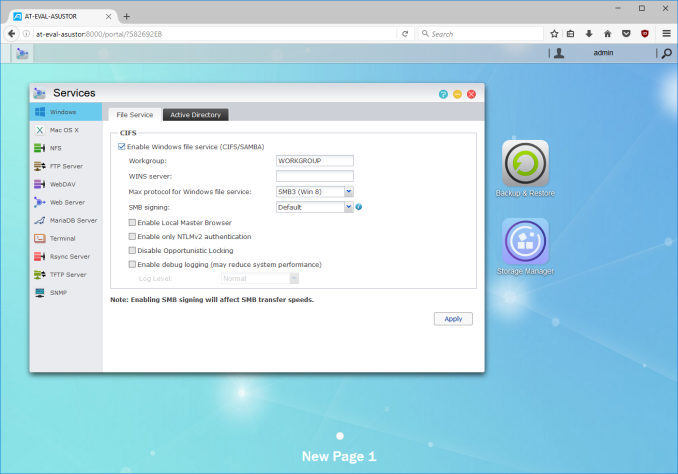
The option lists all the available services on the left pane, with advanced configuration for each on the right. The available services include Samba, AFP, NFS, WebDAV, FTP, web server (Apache), database server (MariaDB), SSH / SFTP, rsync, TFTP and SNMP.
Asustor's ADM supports SMB 3.0. It also supports signing, but, doesn't support encryption. It is also possible to make the NAS join a Windows Active Directory domain. AFP support includes advertisement over Bonjour and support for Time Machine backups. The FTP service can be configured with limitations on the number of total as well as per-IP connections. The ports for passive FTP can also be configured, and transfer rates can be throttled, if necessary. WebDAV can be configured to accept anonymous connections. A web server can also be easily configured with the desired port numbers. A 'virtual host' feature enables hosting of multiple websites using the same NAS. MariaDB (a database server similar to MySQL) can also be enabled. The NAS can also be configured to act as a rsync server for backup jobs. The SNMP service allows the NAS to deliver its operational status to a network management system. A MIB file containing the details of the operational status can be downloaded from the SNMP service configuration page. This can be imported into a monitoring system.
Netgear
Netgear's options for storage management, services and permissions for shared folders are spread out across the web UI differently compared to other vendors. Most of the storage management operations are performed in the System > Volumes section, except for the iSCSI-related options that have a separate main menu entry.
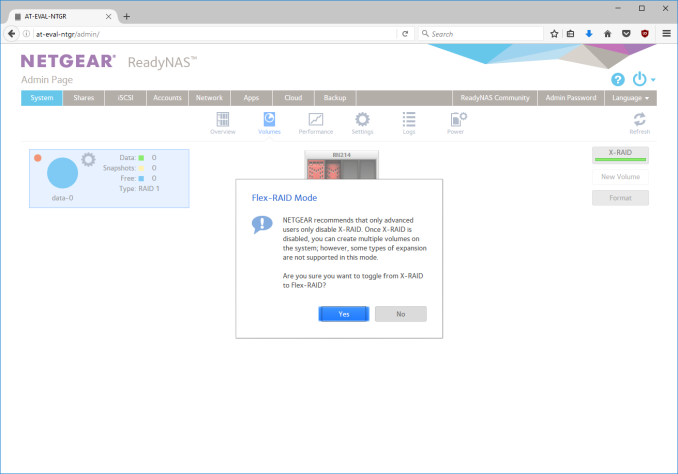
By default, the ReadyNAS volumes are created in X-RAID. But, users can opt to delete the volume and create multiple ones with Flex-RAID. The gallery below shows the various options available in the Volumes sub-section.
Note that most of these options require a basic understanding of how btrfs filesystems are managed. These include concepts such as defragmentation, scrubbing, and balancing. Volumes can also be destroyed. Manual volume creation allows for encryption, with the key being stored on a USB drive (and, optionally, e-mailed). Volume options include the ability to schedule the various btrfs maintenance tasks as well as disk testing.
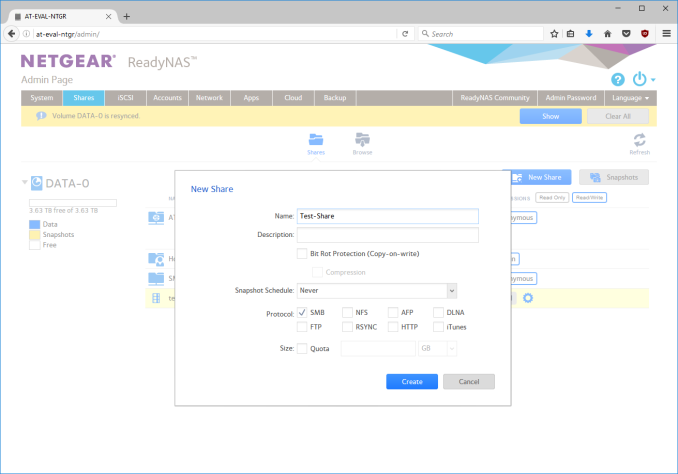
Most home consumers don't bother with iSCSI, and Netgear has taken a good decision to isolate the related options away in a separate menu. After setting up the desired volumes, users generally move on to configure the shared folders. Home folders are created by default along with the volume. A single screen handles all the necessary options to configure a share - the name, decision to enable bit-rot protection (not recommended on ARM-based systems), compression, snapshot scheduling, quota for the share and the protocols over which access to the shared folder is available.
In the default state, shares are set to 'anonymous' permissions - that means anyone in the local network can read and write to the share. This is really helpful for users in a secure firewalled local network who don't want to bother with setting up multiple users and access credentials. iSCSI LUNs also appear in the 'Shares' section, but, we will deal with them separately.
It is possible to create explicit snapshots for each shared folder. The 'Settings' in the context menu allows enablement of bitrot protection, quota and other settings at a later point in time after creation. The access protocols can also be enabled similarly. Netgear presents a DFS option that enables aggregation of Samba shares from multiple NAS units over a single share. Permissions across different users and protocols can also be modified.
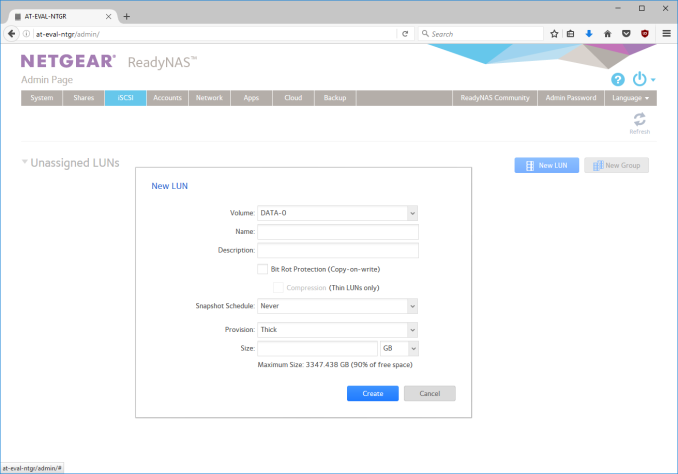
The iSCSI options are similar to those for shared folders. The first step is to create a LUN. Compression can be enabled only for thin ones.
Creation of a new group involves configuring the the 'target' details that an 'initiator' can use to mount the iSCSI volume. CHAP authentication and restrictions on the allowed initiators can be configured. Unassigned LUNs can then be assigned to the created group.
Multiple LUNs and groups can be created. Multiple LUNs can be assigned to the same group, so that the initiator can see multiple disks after connecting to the group target. The same initiator can connect to multiple targets on the ReadyNAS also, as shown in the above gallery.
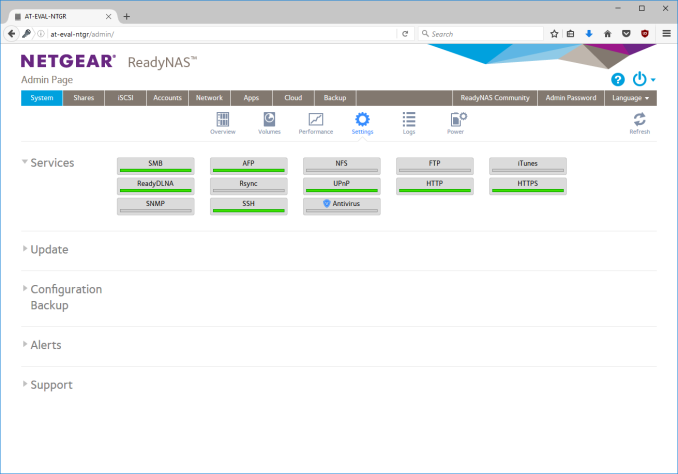
The 'Services' section can be accessed from the main screen under System > Settings. The layout is such that the services can be toggled on or off from the same view.
The options for each service are configured at the time of enabling. For example, the workgroup name can be configured for SMB. Interestingly, Netgear supports SMB 3.0 for all connections. However, if advanced options are desired, Netgear requires installation of an additional package. This keeps the options in the services section relatively clean.
NFS options include the number of NFS threads and NFSv4 domain configuration. All aspects of the FTP service (ports, transfer rates limiting etc.) can also be configured. Media-centric service options include an 'iTunes Server' and a 'ReadyDLNA' digital media server (DMS). The uPnP service enables ReadyCLOUD to work on the LAN without having to go through the cloud. Basic web servers can also be configured in the HTTP / HTTPS service sections. A SNMP service and a MIB file are available for use with network management systems. Advanced users can use SSH to monitor and configure the NAS. An antivirus service is also available, based on the Cyren Commtouch engine. In the process list, this engine appears as 'ctscand'.
QNAP
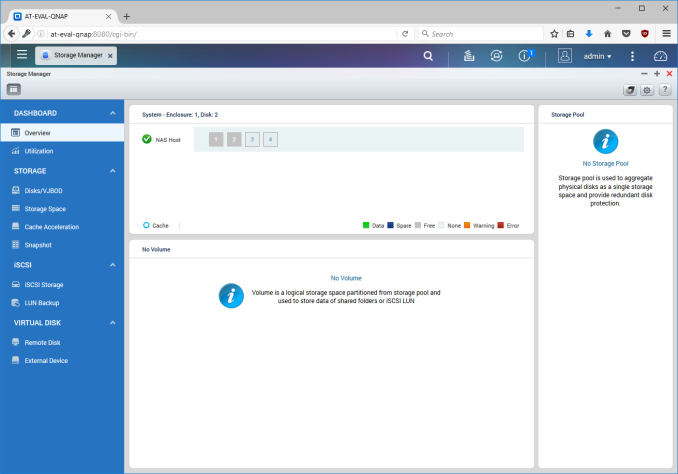
The 'Storage Manager' option can be found by navigating the 'Control Panel' > 'System Settings' > 'Storage Manager' route from the home screen in the QTS web UI.
The storage manager dashboard presents a large number of options because QNAP has one of the most comprehensive storage management suites in the COTS NAS market. These include storage pools, ability to act as an iSCSI initiator and cache acceleration using SSDs.
The Disks/VJBOD section presents details of the disks in the system (including S.M.A.R.T information). VJBOD is an interesting feature wherein iSCSI LUNs on a remote QNAP NAS can become part of a storage pool in the local NAS. The storage pools in the system are the equivalent of disk groups in the OS of some of the other vendors. Each storage pool is configured with a particular RAID type. Space can be reserved for snapshots when the pool is configured.
Volumes can be created to take up disks completely (static single volume), or be part of a storage pool. In the latter case, the size of the volume can be either thick or thin. A storage pool can have multiple volumes, but they are all of the same RAID type. QNAP provides the ability to control options such as bytes per inode when creating a volume. In the SSD caching options, users can set the desired cache algorithm (least-recently used (LRU) or first-in, first-out (FIFO)), and whether it is a read-only or read-write cache. The Snapshot option allows creation of backups of volumes as well as LUNs to remote QNAP NAS units.
QNAP also provides wizards for creation of iSCSI targets and LUNs. One of the interesting options is the ability to set clustering access so that a given iSCSI target can be accessed from multiple initiators. Otherwise, all standard settings such as CHAP authentication are available. The LUNs can either be image files in a volume, or space allocated from a storage pool. LUNs can be configured to report a 4KB sector size and/or a volatile write cache to the initiator. iSCSI LUNs can be backed up, and ones on a remote iSCSI target can also be mounted as virtual disks.
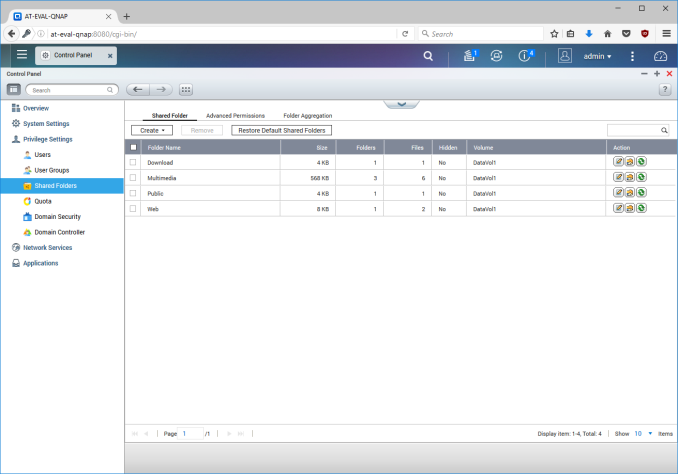
The next step for most users after creation of a volume is the setting up of shared folders. QNAP's options for shared folders are buried under 'Control Panel' > 'Privilege Settings' > 'Shared Folder' - it is often easier to use the searchlight in the main screen to get directly to it. The default 'Shared Folders' view presents the details of all the currently existing shared folders including the volume in which they are resident.
The reason for the 'Shared Folders' section being under the 'Privilege Settings' is evident when one tries to create a new shared folder. Options for new folders include the access permissions, whether the folder needs to be encrypted and guest access rights. The other standard options for Samba shares (such as hiding the network drive, oplocks and network recycle bin) are also available. Windows ACL can also be used when enabled under the Advanced Permissions. QNAP also supports a DFS implementation, terming it folder aggregation. It allows aggregating Samba shares from other units in the network into a portal folder in the NAS.
The permissions for shared folders can also be edited after creation. In particular, NFS access privileges for the shares can be set. IP restrictions can also be placed for Samba shares.
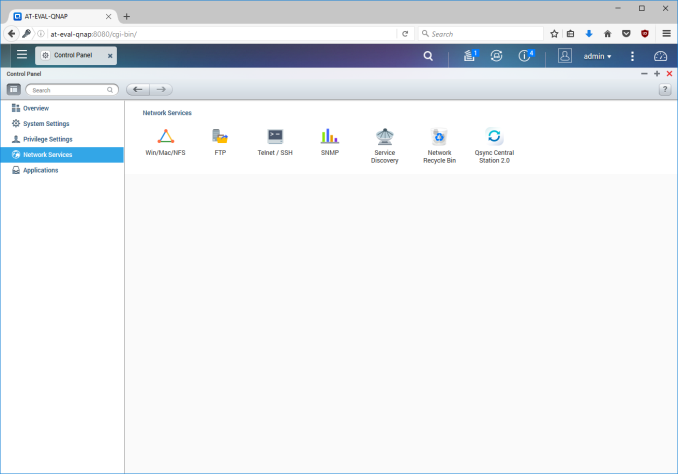
The discussion about NFS brings us to the 'Services' aspect. QNAP places this under 'Control Panel' > 'Network Services'.
Options under Samba (Microsoft networking) include the workgroup name. The NAS can either act as a standalone server (typical in home environments), or, an Active Directory domain member. The NAS can also act as a domain controller. AFP and NFS options are also available, though NFS v4 seems to be absent.
QNAP also supports FTP with extensive options to configure the service, as can be seen in the above gallery. Telnet and SSH are available. SNMP can also be enabled, and the MIB file for the network management system (NMS) can be downloaded from the NAS itself. The QNAP NAS also supports a uPnP discovery service and Bonjour.
Synology
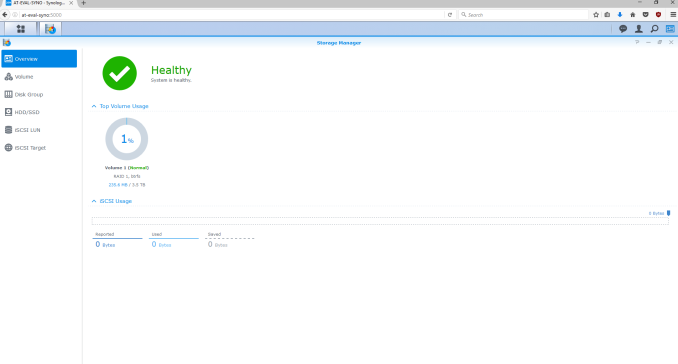
Synology's main menu (accessible from the top left corner of the UI) has a 'Storage Manager' entry that takes us to the relevant pages offering up information regarding the disks in the system. In addition to viewing S.M.A.R.T information, disk tests can also be scheduled, and alerts can be configured for bad sectors and disk lifespan. The Storage Manager section also has the various options to configure storage volumes and iSCSI LUNs / targets.
Synology has the concept of disk groups that correspond to QNAP's storage pool - a set of disks that are put together in a RAID configuration. Synology presents an option to check for bad sectors during the creation of a disk group.
Volumes can be created either with disks that are not part of any disk group, or, on one of the available disk groups. The latter option allows for creation of multiple volumes. On recent x86 systems, Synology allows a volume to be formatted either in btrfs or ext4. Management options include data scrubbing and defragmentation for btrfs volumes. Volumes can also be expanded by adding hard disks or taking up unallocated disk space.
iSCSI LUNs can either be file-based or block-based. In the latter option, users can allocate a set of disks completely to the LUN (single LUN on RAID), or, choose the multiple LUNs on RAID option. The second option utilizes a disk group. iSCSI targets can be configured to support CHAP.
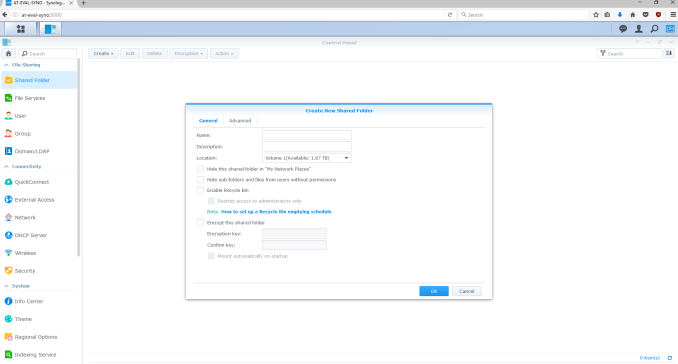
Options for the shared folders are available under 'Control Panel' > 'File Sharing' > 'Shared Folder'.
Shared folders created in btrfs volumes can have bit-rot protection (termed as 'advanced data integrity protection', and available under the advanced options). Options to enable file compression and a quota on the shared folder are also available.
Editing the created shared folder allows setting of permissions for various scenarios. If the NFS service is enabled, the allowed clients and privilege settings can also be configured for the share.
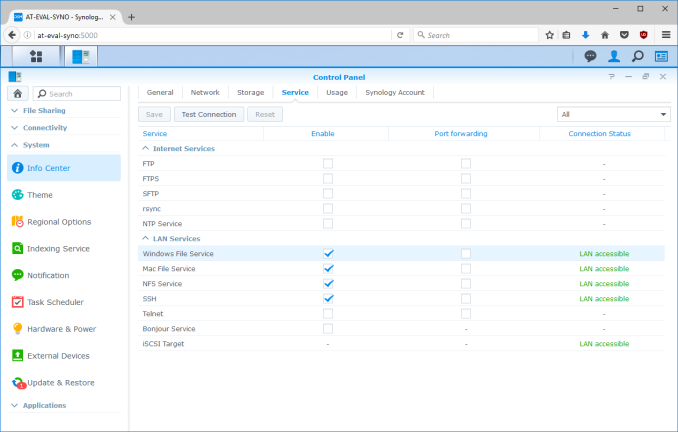
The configuration of various services is, in our opinion, one of the confusing aspects. Strangely, the best place to control various services seems to be under 'Control Panel' > 'System' > 'Info Center'.
The advance settings for the services, however, are spread out across the UI. For example, the 'File Services' are under 'Control Panel' > 'File Sharing' > 'File Services', while the Telnet / SSH and SNMP controls are elsewhere under 'Control Panel' > 'Applications' > 'Terminal & SNMP'. The Synology NAS units support WedDAV, but, the settings controlling them are not readily visible.
The Samba service can be configured with a workgroup name. Transfer logs can also be enabled for this service. Advanced settings include the maximum protocol (DSM supports SMB 3.0), and signing amongst a host of others that can be viewed in the above gallery. The AFP service has a couple of settings related to application of default UNIX permissions and resource release after a disconnect. NFS v4 is supported, and customized ports can be used for the NFS services, if needed. Read and write packet sizes can also be configured in the advanced settings. FTP, SFTP and TFTP all come with plenty of configuration options. rsync is also supported with speed limit configurations that can even be set on a schedule.
Advanced settings for SSH include the encryption algorithm used (specified as different levels in the UI, instead of the actual algorithm names). The MIB files for the SNMP are available for download from Synology's website.
Western Digital
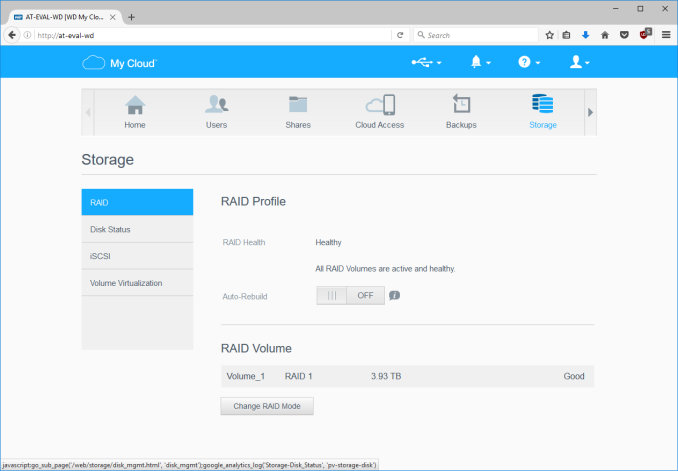
The My Cloud OS is not as feature-rich as the offerings from vendors dedicated to NAS units. Therefore, getting to the storage section in the UI is as simple as scrolling through the top ribbon menu and getting to the 'Storage' option.
The view shows the health of the current volume, its RAID type, an option to control auto-rebuild after replacement of a missing or faulty disk, and an option to change the RAID mode (RAID migration and expansion).
The Disk Status section allows monitoring of the S.M.A.R.T. data for the disks in the NAS. Since the My Cloud OS is used on NAS units targeting home consumers as well as businesses, iSCSI support also exists.
Only file-based LUNs are supported, and a given target can only support one LUN (configuring the target in the UI includes the LUN configuration also). CHAP authentication is supported. The volume virtualization option allows the NAS to act as an initiator and map iSCSI targets from other network members as volumes in the My Cloud OS. This feature supports multiple LUNs from a single target, as can be seen in the above gallery.
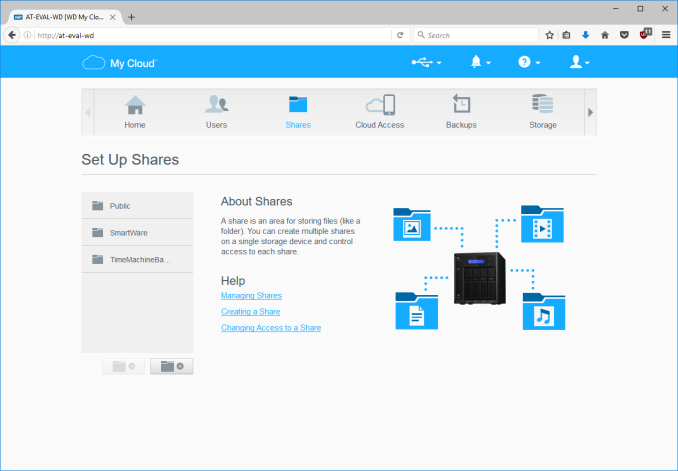
Similar to the 'Storage' option, the 'Shares' option is also one of the main entries in the ribbon menu.
Adding new shares is as simple as clicking the folder with the plus sign below the folder list. The share profile can then be edited to set the permissions (Public, or, on a per-user basis).
Other aspects such as recycle bin support, oplocks, media server source etc. can also be configured. The share's access is only through Samba by default. But, it can also be opened to other protocols such as FTP, WebDAV and NFS.
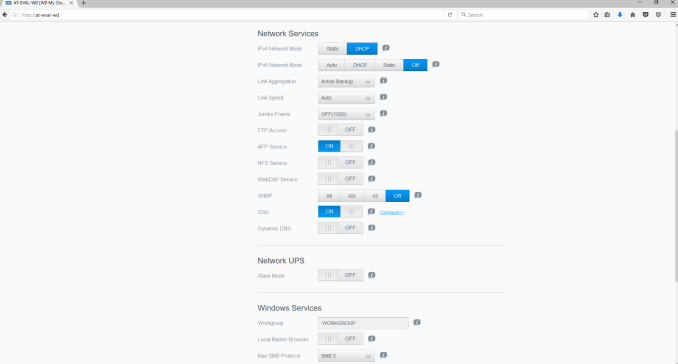
Access to the configuration of various services is obtained by navigating through 'Settings' > 'Network'. In addition to the storage and access services, the My Cloud OS puts in network configuration into the mix in this section.
The FTP service can be configured with a host of options. Access to each folder over FTP has to be set explicitly in te shares page, as shown in the gallery below. NFS, WebDAV, SSH and SNMP are available.
Samba configuration options include the workgroup name. My Cloud OS supports SMB 3. It also supports share aggregation for a DFS implementation. Active Directory support also exists.
ZyXEL
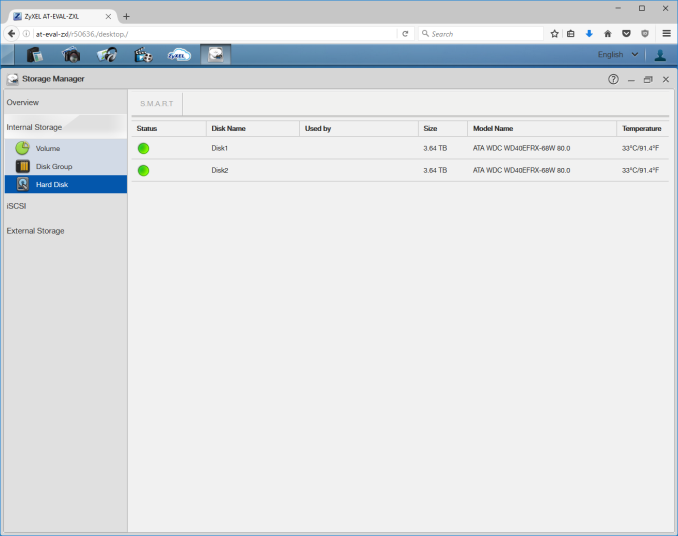
ZyXEL's web UI has the 'Storage Manager' as the first entry in the main screen. The overview section shows the current list of volumes and their status. The status of the member disks are under 'Internal Storage' > 'Hard Disk'.
ZyXEL adopts a disk group - volume approach for the storage, similar to Synology's terminology. The disk group is configured in a particular RAID type, and multiple volumes can be created in it.
iSCSI LUNs in the ZyXEL NAS units are file-based. There is support for thin provisioning as well as instant allocation, and write-back can be enabled to increase performance. Disabling it will report a volatile write cache to the initiator. CHAP is supported, but optional. However, the allowed initiator (IQN) can't be left blank, and no wildcard can be used. So, it is now possible to set up a target without knowing the details of the machine that will connect to the target and map the LUN.
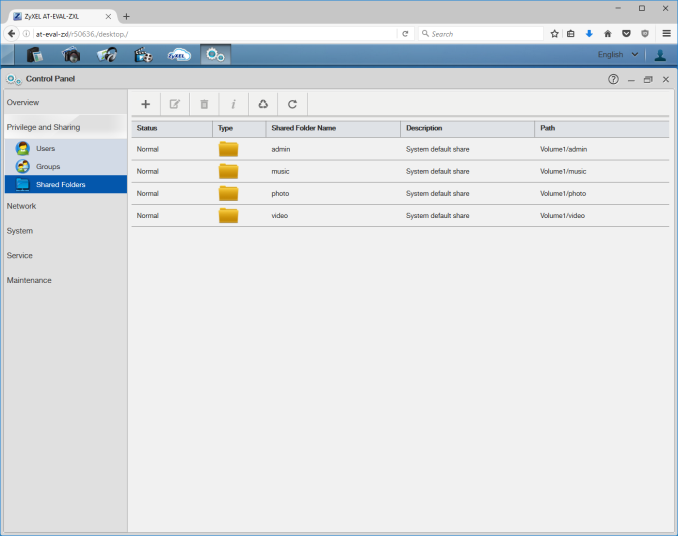
Shared folders are found under 'Control Panel' > 'Privilege and Sharing'. The default view lists the shares and their paths, along with the status.
Adding a share involves setting the location (if there are multiple volumes in the system), and some basic Samba settings such as being hidden in the network and enabling a recycle bin for it. The second step is the setting of access rights for various users / groups in the system.
Shares can also be published to the media servers as well as the web. In the latter case, contents can be accessed over a web browser (read-only). NFS is interesting, as it is not available by default, but, requires an additional package to be installed, as shown in the services gallery. The downside is that it is not possible to have a folder shared over both Samba and NFS, unlike NAS units from the other vendors covered in this section.
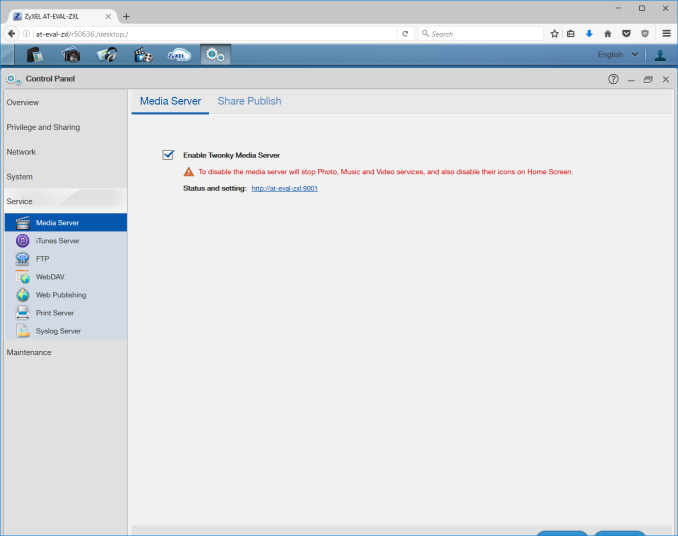
Available services can be configured from 'Control Panel' > 'Service'. Options include the inbuilt 'Twonky Media Server', iTunes Server, FTP, WebDAV, Web Publishing (Apache), Print Server and Syslog Server.
The Telnet and SSH services can be configured in the 'Control Panel' > 'Network' > 'Terminal' section. Configuration options for the media server include the ability to select certain types of contents from each folder, as shown in the gallery below.
The FTP service is as configurable as any implementation we have seen from other vendors. WebDAV needs to be enabled for the mobile app to work. As mentioned earlier, NFS (as well as the TFTP service) need to be installed from the App Center.
Networking Features
Network-Attached Storage units connect to the network via one or more network interfaces. High-performance units come with at least two wired Gigabit LAN ports. Some units also support Wi-Fi dongles. Multiple network interfaces in a single system can be used for a variety of purposes - ranging from link aggregation to configuration of the NAS as a switch, and, in certain cases, dedicated network interfaces for virtual machines running on the NAS itself. In this section, we will take a look at the networking features offered by various COTS NAS operating systems.
The vendors are covered here in alphabetical order. Readers interested in jumping ahead to their vendor of interest can use the links below:
Asustor
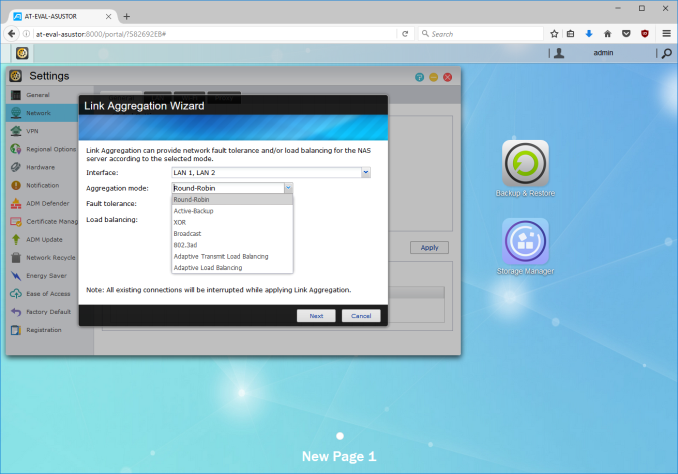
Asustor's network settings are under 'Settings' > 'Network'. There are four different aspects handled in that section - the server name and gateway settings, as well as link aggregation (creation handled by a step-by-step wizard approach) are in the General tab.
The link aggregation settings can be set to any desired mode depending on the type of switch the NAS is connected to, as well as desired performance / operation.
The LAN section specifies whether the unit is set up with a static IP or, it acts as a DHCP client. The MTU can also be altered, and the current state of the interface is also visible. Advanced settings include 802.1Q VLAN tagging, with the option to set the VLAN ID. A proxy server can also be configured for use by the NAS. Asustor's ADM supports Wi-Fi dongles connected to the USB ports of their NAS units.
Netgear
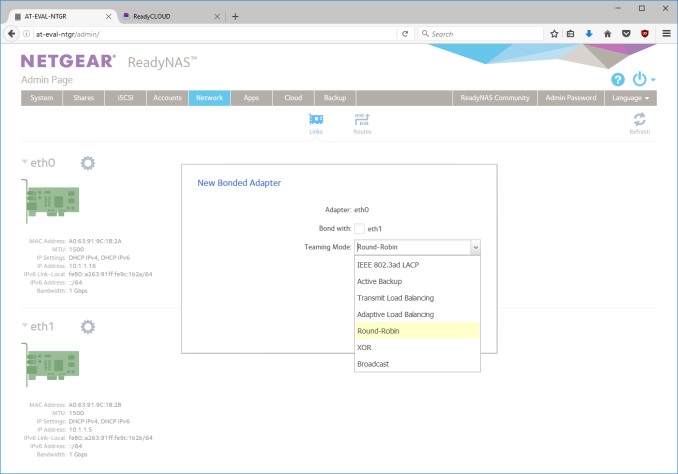
Netgear puts all the network-related settings in the 'Network' option in the top-level menu. There are two sub-options - links and routes. The links refer to the physical interfaces. Clicking on the gear icon adjoining the interface names brings up various options, including the ability to make it bond with another one.
Various teaming modes are available, and the end user can choose one depending on the switch and desired performance.
ReadyNAS also allows the network interfaces to be part of a VLAN (802.1Q support with a specific VLAN ID). It is possible to alter the MTU value in the settings for each interface. DHCP client / static IP settings are also available. New routes can be added to a specific adapter, as shown in the above gallery.
QNAP
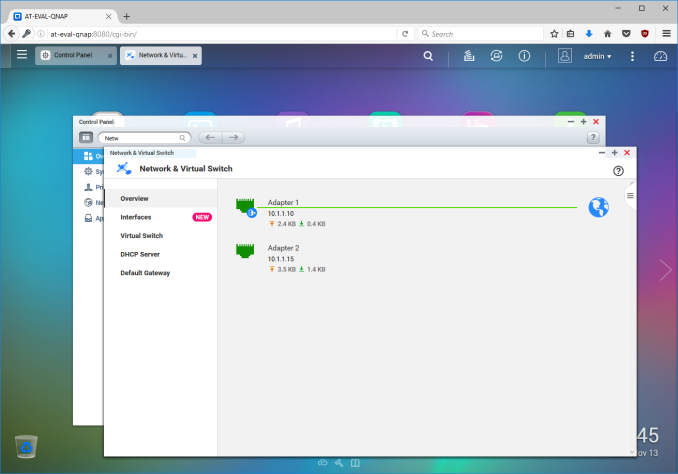
QNAP's networking configuration sections are under 'Control Panel' > 'System Settings'. The first section is the 'Network & Virtual Switch'. The Overview sub-section shows the various physical adapters in the system along with their IP addresses and real-time transfer rates in one view. The MAC addresses are also visible in a section to right.
The Interfaces sub-section allows setting of DNS servers and port trunking configuration. In models that support usage as a direct-attached storage unit (like the TS-451A in our testbed), the Interfaces section also has a 'USB QuickAccess' entry. The way the scheme works is to have a USB network adapter chip inside the NAS. When the USB cable is connected to a PC, the PC recognizes a new LAN adapter, and the contents of the NAS are visible over that interface. Since the connection is still over a LAN as far as either OS is concerned, various access restrictions that can be places on a network share can also be placed in the USB direct-attach mode. All of these aspects are brought out in the gallery below.
The IP address supplied to the USB LAN adapter can also be configured in the same section. Upon attachment to a PC, Qfinder Pro automatically delivers a 'USB QuickAccess detected' message. Even if Qfinder Pro were to be unavailable, users can just open up the network locations and access the 192.168.0.x subnet to view the QNAP NAS and access its contents in a 'direct-attach' mode.
Yet another interesting aspect is that of the Virtual Switch. QTS can configure a set of available adaters in either 'private network mode' or 'switch mode'. In the former, the NAS can act as a DHCP server on the selected interface. In the switch mode, the unit can act as a DHCP relay with the uplink port going to the router, and the downlink ports all connected to different devices that still act as DHCP clients for the main router in the system.
QTS also has a 'Network Access' section that helps in service binding - i.e, allowing some services only on certain interfaces. The configuration matrix can be seen in the above gallery. The NAS units can also be configured with a proxy, and options are available for using a dynamic DNS service. VPN client services are available through a separate VPN Client application available under 'Control Panel' > 'Applications'. Both PPTP and OpenVPN are supported.
Synology
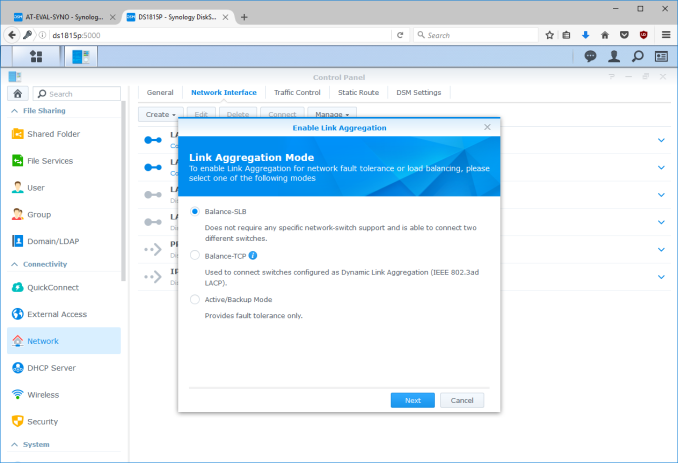
Synology's network configuration options are available under 'Control Panel' > 'Connectivity' > 'Network'. Various link aggregation modes are supported when bonds are created in the Network Interface subsection.
The General configuration section helps set the server name as well as the adapter to use for the default gateway. A proxy server can also be configured. Under the Network Interface section, VPN connections (PPTP or OpenVPN or L2TP/IPSec) can also be created.>/p>
Synology's DSM also supports Open vSwitch for running Docker DSM and Virtual DSM. Traffic control rules in terms of guaranteed bandwith and limitation of bandwidth are available on a port-by-port basis. IP routing tables can also be set up. Wi-Fi options are available under 'Connectivity' > 'Wireless', with the NAS capable of acting as a wireless AP, a wireless router or just a WLAN client.
One of the interesting options buried in the DHCP Server section is the ability to turn on PXE (pre-boot execution environment). The boot loader needs to be placed in the root folder of a local or remote TFTP server in the same subnet as the DHCP client.
Western Digital
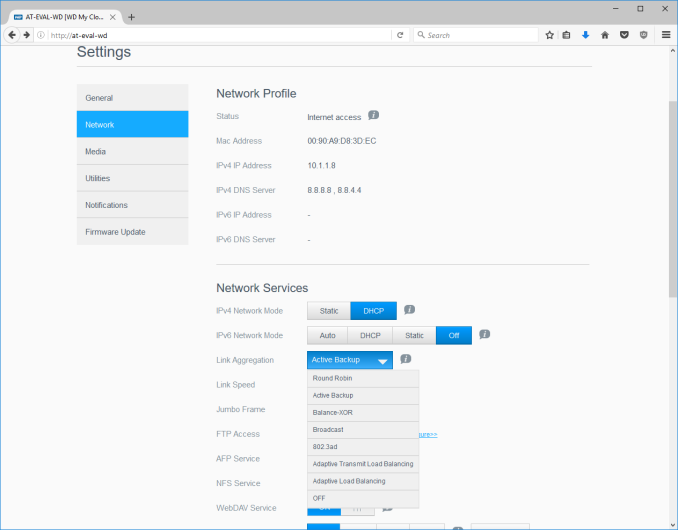
Western Digital's networking options under the 'Settings' menu has already been seen in multiple sections before. In this section, we just confirm that the My Cloud OS is able to support various teaming modes for link aggregation.
Other network options include static / DHCP IP configurations an jumbo frame / MTU settings. Port forwarding settings can also be configured automatically with a uPnP router. Certain options for standard service ports are readily available, as shown in the gallery above.
ZyXEL
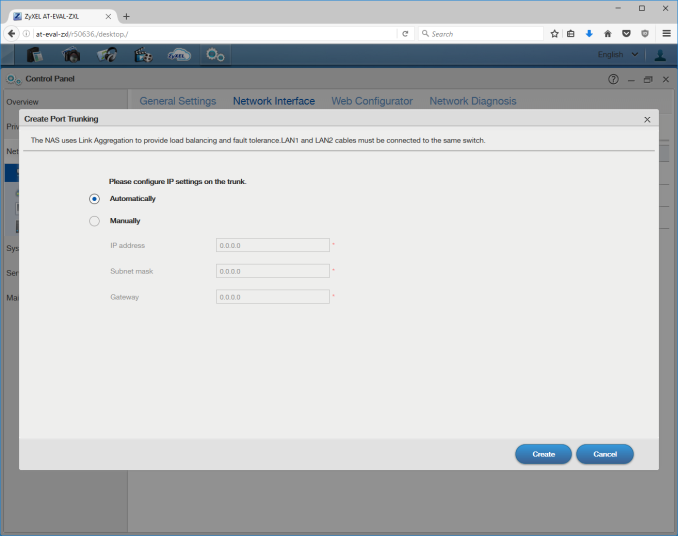
ZyXEL doesn't carry any x86-based NAS units. Since most ARM-based NAS units are too weak to support high-performance teaming modes, ZyXEL opts for only load balancing and fault tolerance while creating a trunk. This setting can be reached via 'Control Panel' > 'Network' > 'TCP/IP' > 'Network Interface'.
The other available network settings are the bare minimum we expect from a NAS - DHCP or static IP choices for each interface, uPnP port mapping, and support for dynamic DNS service providers.
Setting the Stage...
As we draw the first part of our comprehensive coverage of commercial NAS operating systems to a close, it is important to touch upon one additional core aspect. The setting up of multiple users, user groups, joining domains etc., LDAP or NIS authentication etc. are very important for business NAS units, but, not so much for NAS units targeting the home market.
Since the COTS NAS operating systems are all based on Linux, adopting the standard user / group strategy is not very difficult for the vendors. ZyXEL, as expected due to their targeting of home users, has only very basic user and group settings with quota support. Western Digital goes a bit further by allowing for multiple users to be created at the same time. Asustor, QNAP, and Synology have that feature and much more too. For example, Synology even supports 2-factor authentication for certain groups. Netgear does support some advanced features like Active Directory, but there are lots of things that Netgear could learn from the aforementioned vendors.
Today's piece dealt with the core aspects of NAS operating systems - storage and how it is configured, the user interface, setting up of the desired services and shared folders, and the configuration of the network links. Even though the coverage has been very subjective, there are some clear areas for each vendor to improve.
Asustor, QNAP and Synology have the setup process nailed down to a decent extent. However, Netgear needs to make its ReadyCLOUD process more robust. Alternatively, the RAIDar program should be fixed to avoid Java requirements. Western Digital's approach is almost perfect, given that they mostly sell systems with disks pre-installed. However, it would be good if a volume is created by default when the My Cloud OS is installed. ZyXEL's approach is passable, but the slow web UI leads to an unsatisfactory UX.
On the storage and services side, Synology and QNAP turn out to very feature-rich, followed closely by Asustor. Netgear still has some catching up to do as certain aspects like advanced SMB options still require an external package to be installed.
In terms of networking features, QNAP is very much on top. While all vendors have some sort of teaming implementation, QNAP has gone beyond that and started to implement various network modes that can really take advantage of the multiple LAN ports.
Next week, we will have a follow-up article that deals with value-add features. These include media services, surveillance (DVR for IP cameras) solutions, and the public cloud (integration with Dropbox, Google Drive etc.). We will also discuss support for virtualization - in terms of being a datastore, as well as the NAS being a host for guest VMs. A look at some of the third-party applications and the usage models that they enable will round up our comprehensive coverage of NAS operating systems.

