Original Link: https://www.anandtech.com/show/9475/buffalo-terastation-5200-network-video-recorder-review
Buffalo TeraStation 5200 Network Video Recorder Review
by Ganesh T S on July 31, 2015 8:00 AM EST- Posted in
- IP cameras
- NAS
- Buffalo
- NVR
Introduction
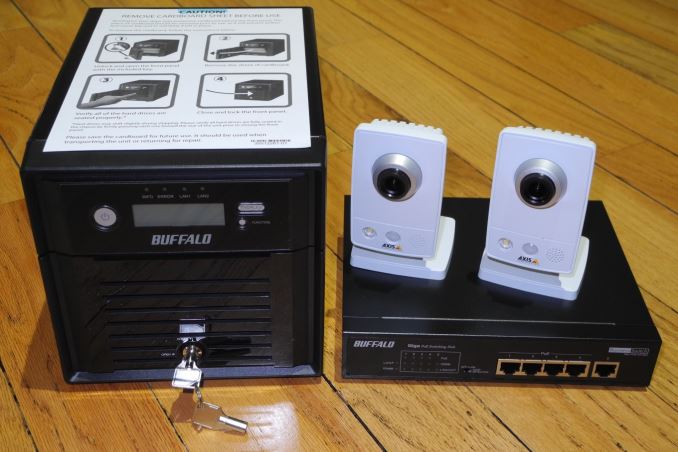
Surveillance cameras have experienced rapid growth over the last few years as security has turned out to be a very important aspect in both home and business environments. Almost all NAS vendors have either specific NVR (network video recorder) models, or provide apps for recording surveillance footage on their generic NAS models. A couple of years back, we reviewed the LenovoEMC PX2-300D with Milestone Arcus VMS pre-installed on the NAS. In that article, we also touched upon Synology's Surveillance Station to get an idea of the typical VMS provided by NAS vendors. Unlike pure NAS vendors, vendors of networking components such as Buffalo Tech and Netgear can provide a complete package for surveillance based on IP cameras. In today's article, we take a look at Buffalo's TeraSTation 5200 NVR (2TB variant) coupled with their 5-port Power-over-Ethernet (PoE) business switch - the BSL-POE-G2105U.
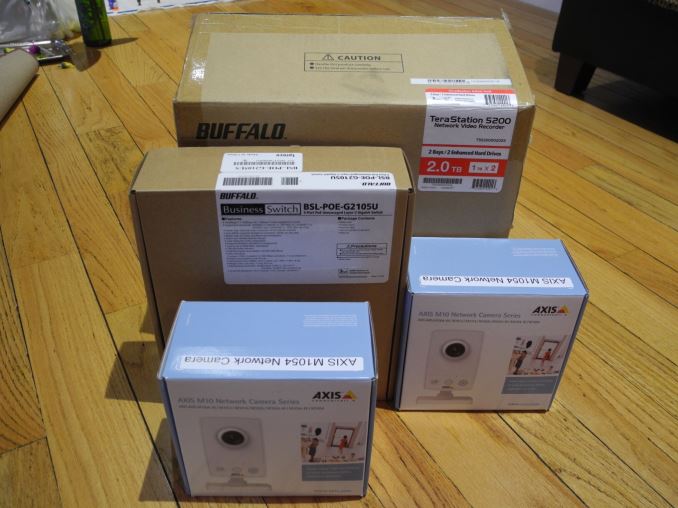
Buffalo Technology markets their NVRs with the promise of being compatible with Axis Camera Companion. Axis Communications is one of the leading vendors in the IP camera space, and the Axis Camera Companion is part of the firmware running on most of their current models. The feature also includes a PC client and mobile apps for control, configuration and viewing surveillance video from the cameras. The Buffalo TeraStation 5200 NVR and the BSL-POE-G2105U switch make up an 'Axis partner solution' for small surveillance systems having up to 16 cameras. In addition to the core review components in the NAS and the switch, Buffalo also provided us with two Axis M1054 cameras for evaluating their solution.
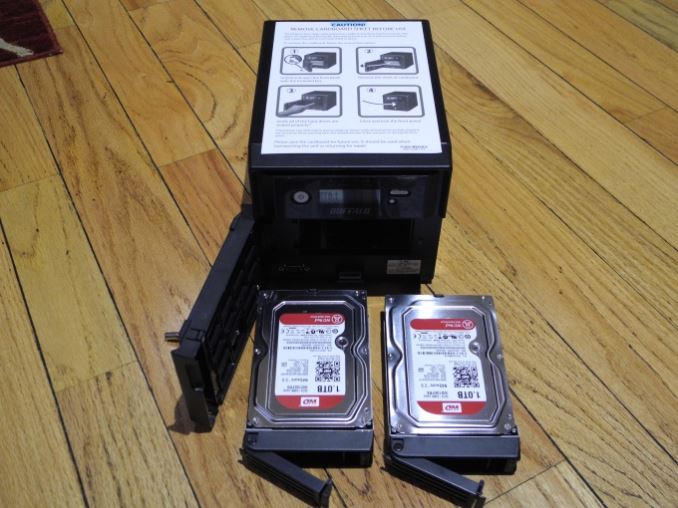
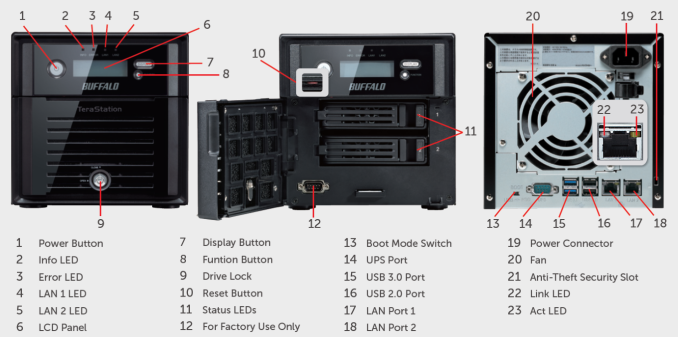
The TeraStation 5200 NVR is physically the same as the TeraStation 5200 2-bay NAS that Buffalo introduced back in 2012. The NVR version is qualified by Axis for use with their IP cameras. In terms of hardware specifications, we have the old Intel Atom D2550 in a 2-bay chassis. Our sample came with 2x 1TB Western Digital Red drives pre-installed and pre-configured in RAID-1. The hardware specifications are summarized in the table below.
| Buffalo TeraStation 5200 Specifications | |
| Processor | Intel Atom D2550 (2C/4T, 1.86 GHz) |
| RAM | 2 GB DDR3 RAM |
| Drive Bays | 2x 3.5"/2.5" SATA 6 Gbps HDD / SSD (Hot-swappable) |
| Network Links | 2x 1 GbE |
| USB Slots | 2x USB 3.0 / 2x USB 2.0 |
| eSATA Slots | None |
| Expansion Slots | None |
| VGA / Display Out | None |
| Full Specifications Link | Buffalo TeraStation 5200 NVR Specifications |
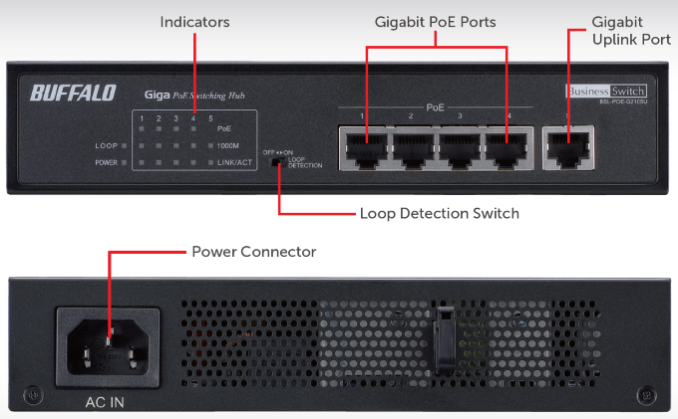
The BSL-POE-G2105U is a 5-port Gigabit PoE switch with four PoE ports and one non-PoE uplink port. It can deliver up to 15.4 W on each port (40 W maximum on all four together). It is available standalone for less than $90 currently.
We won't go too much into the specifications of the Axis M1054 (since they are not part of the core NVR setup, and almost any current Axis camera can be used instead). For our evaluation setup, it suffices to note that they can be powered via PoE. They can output two streams (for example, we set it up to stream out 1280 x 800 15fps streams upon motion detection, but only stream out 640 x 400 5fps streams at other times for recording to the NVR). The maximum resolution stream clocks in at around 1.3 Mbps, while the low resolution stream at 5 fps comes in at 25 kbps.
Setup and Usage Impressions
The most difficult part of setting up the NVR system actually turned out to be the wiring and placement of the two cameras relative to the PoE switch. In our evaluation setup, we decided to connect the TeraStation 5200 NVR and the BSL-POE-G2150U uplink to a switch connected directly to a router. The cameras were then connected to the PoE switch. The network components received addresses via DHCP without any problems.
Setting up the NAS
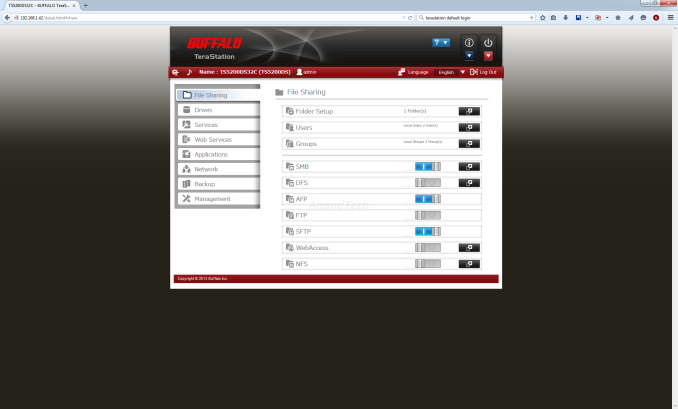
Accessing the IP of the NAS led us to the web administration page (default password being 'password'). The web UI shows that the NVR can also be configured for regular NAS duties. We decided to evaluate it as a dedicated NVR.
We found that the two WD Red drives were configured in RAID-1 and formatted in XFS, and that a shared folder was already set up. By default, SMB, AFP and SFTP were turned on. We turned off AFP and SFTP as they were not essential for NVR functionality. Under the Applications tab, we also have Surveillance Camera Settings where a particular shared folder could be chosen for recording surveillance videos.
Once the initial setup was done, we could completely forget about the NAS unit. In fact, we never had to access it via its web UI other than to shut down the system at the end of our review process.
Axis Camera Companion
The two M1054 cameras could be easily configured stand-alone via their web UI. However, for NVR purposes, it turned out to be easier to configure them from one interface using the Axis Camera Companion PC client. We installed it on a Windows 7 PC and created a MyAxis cloud account. The account is mandatory for the use of the Axis Camera Companion software and important for accessing the cameras on-the-go via the Internet, as we shall see further down.
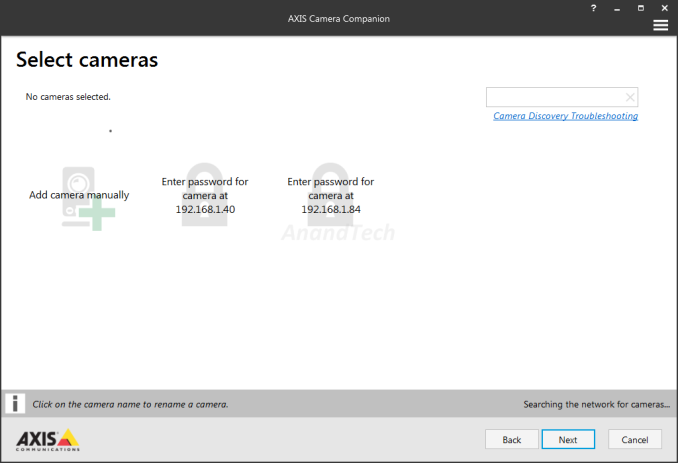
The Axis Camera Companion (referred to as ACC hereon) automatically searches for all compatible Axis cameras in the network. Our cameras had already been configured via their web UI, and hence, it was necessary to enter the login credentials in order to use them with ACC.
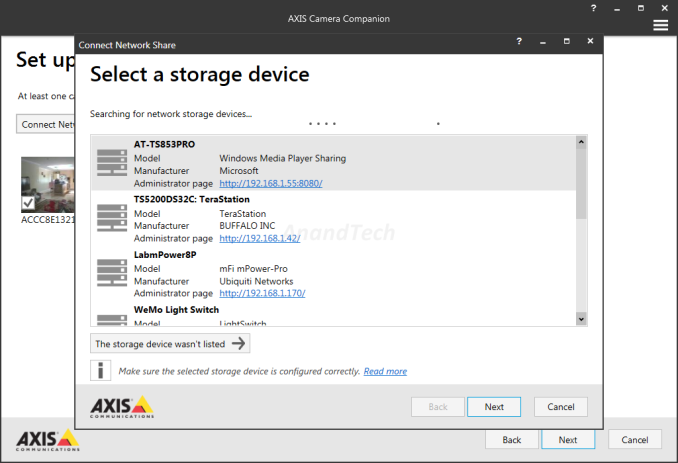
Some Axis cameras also record to local storage, but all of them can record to a network share. ACC allows configuration of the network share by automatically search for available storage devices. It appears that ACC is internally using uPnP for this purpose, as shown in the screenshot below.
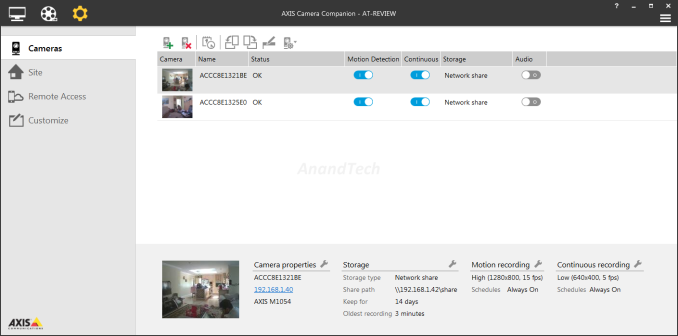
The two cameras were set up to record continuously to the NAS (a 640x400 5fps stream all the time and a 1280x800 15fps stream upon motion detection). It is also possible to configure how long recordings are kept (we chose two weeks, considering that our NVR came with only 1 TB of usable space).
The firmware that initially shipped with the cameras in our review package didn't support remote access, but a firmware update helped enable this option. ACC also allows customization of the streaming parameters / saving locations for the videos etc., as shown in the gallery below.
Surveillance On-the-Go: Mobile Streaming
The Axis Camera Companion also has a mobile component - Android and iOS apps. Upon installation of the app, the user is required to log in with a MyAxis account. A single account can be associated with multiple 'sites'. We configured the two cameras in our review package as 'AT-REVIEW' on the PC, and this automatically appeared when we entered the credentials on the Android app.
The gallery below shows the various important features of the Android app. It must be noted that all these features work over the Internet also (not just the local network). However, that is also dependent on the firmware / model of the cameras themselves. No port forwarding is necessary. It must also be noted that the video recordings are not hosted or held in Axis's servers for access via the Internet.
The features of the app include live viewing (by default, in a matrix form, but also on a per-camera basis), ability to view and locally save segments of the recorded video, alter the quality of the streamed video and also take snapshots. The timeline view of the recorded video is blue in the time span where there is no movement, and red when motion has been detected. This enables easy navigation to timestamps of interest when viewing the recorded video on a mobile device. The viewing of the recorded video entails the IP cameras reading from the network share on the TeraStation 5200 NVR and transmitting it across the network (over the Internet, if necessary).
Miscellaneous Aspects and Final Words
Power consumption is an important factor for systems that run 24x7 like the Buffalo NVR setup. The last 2-bay NVR that we reviewed consumed more than 27 W during operation, mainly because of the 7200 RPM enterprise drives that were pre-installed. Thankfully, Buffalo uses NAS drives (WD Red in our review sample) for the NVRs that ship with disks pre-configured. During operation, we found that the number of streams that were recording to the NVR (1 or 2) didn't actually cause too much shift in the power consumption. Interestingly, the impact of accessing the archived footage using the Axis Camera Companion was also minimal. We were also curious about the power consumption numbers of the PoE switch. Our observations are summarized in the table below.
| Buffalo TeraStation 5200 NVR Setup - Power Consumption | |
| TeraStation 5200 (2x 1TB WD Red) | 18.77 W - 20.58 W |
| BSL-POE-G2105U PoE Switch (no clients) | 4.52 W - 5.2 W |
| BSL-POE-G2105U PoE Switch with 1x Axis M1054 | 8.14 W - 8.82 W |
| BSL-POE-G2105U PoE Switch with 2x Axis M1054 | 11.53 W - 12.21 W |
Power consumption numbers are very reasonable, and a definite improvement over the LenovoEMC PX2-300D. The PoE switch also manages to remain fanless, thanks to its low power consumption profile. The TeraStation 5200 NVR is a proper NAS, and it had no trouble operating in degraded mode when one of the member drives in the RAID-1 array was pulled out. The cameras continued recording to the NAS even in that state and also during the rebuild process.
Coming to the business end of the review, we see that the TeraStation 5200 NVR with two 1TB drives comes in around $770 and the PoE switch is less than $90. There are a wide variety of compatible Axis cameras to choose from. For less than $900, we get a NVR setup which can also double up as a proper x86 NAS. This is a bit on the high end, but par for the course when comparable devices such as the LenovoEMC PX2-300D are considered.
It must be noted that the TeraStation NVR seems to have been created keeping only the Axis cameras in mind. Unlike the LenovoEMC PX2-300D NVR, the TeraStation 5200 NVR doesn't come with a VMS that runs on the NAS. Instead, most of the heavy lifting in terms of user-experience is done by the Axis Camera Companion. However, the Buffalo components enable the actual installation and usage by operating without hiccups in the background.
Except for the wiring part, the rest of the setup process has been simplified to a great extent. The process is intuitive and even non-tech savvy users could probably do a self-install. For others, a detailed how-to has also been created on Spiceworks by Buffalo. Recent firmware improvements to the Axis cameras (not available for all models, but applicable to the M1054 we used in the review) have made the configuration even more user-friendly for day-to-day usage. In terms of their target market (small businesses and home consumers), we believe that the partnership between Buffalo Technologies and Axis has resulted in a compelling IP surveillance solution.

