Original Link: https://www.anandtech.com/show/1599
DSC-L1: Sony's Latest Ultra-Compact Digicam
by Stephen Caston on January 27, 2005 12:05 AM EST- Posted in
- Digital Camera
Index
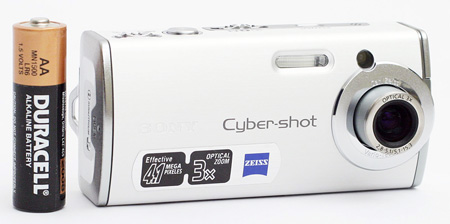
The DSC-L1 is Sony's latest ultra-compact 4 megapixel digicam. It features a 3x optical zoom in an attractive metal body that comes in 4 different colors (silver, black, blue, and red). In addition to a wide array of still recording modes, it offers a superb movie mode with unlimited video at 640x480 and 30 fps.In our review, we discovered some interesting things about this camera. For example, the L1 proves to be very responsive in terms of startup, shutter lag, and write times. It offers great features like an AF-assist lamp and the option to turn off the LCD backlight to save battery power. However, upon inspection of the L1's image quality, we were pretty disappointed. Throughout all the images that we took with the L1, we noticed a muddy quality that compromised detail. In addition, we found that whenever we took pictures with the lens extended to a telephoto position, the resulting images had significant blurring near the edges of the frame. Read on for a detailed review of this camera and its mixed performance.
Product Sample provided by Newegg.com
Sony DSC-L1 Specifications
| Sony DSC-L1 | |
| Release Date | September 2004 |
| Price | ~$275 |
| Pixel Count | 4.1 Million |
| Camera Type | Ultra-compact |
| Highest Resolution | 2304x1728 |
| Lower Resolutions | 2304x1536, 2048x1536, 1280x960, 640x480 |
| Sensor Type | CCD |
| Sensor Size | 1/2.7" |
| LCD Screen Size | 1.5" |
| Optical Zoom | 3x; 32 - 96mm equivalent |
| Focus Range | 4.7" - Infinity |
| Macro | N/A |
| Digital Zoom | Smart: up to 10x; Precision: up to 6x |
| Lens Thread | None |
| Auto Focus | Yes |
| Auto Focus Type | TTL |
| AF-assist Lamp | Yes |
| Manual Focus | No |
| Aperture Range | f/2.8 - 5.1 |
| Shutter Speeds | 2 - 1/2000th sec. |
| ISO | Auto, 100, 200, 400 |
| Flash | Built-in |
| Flash Range | W: 0.7 - 6.6'; T: 1.6 - 4.9' (Auto ISO) |
| Flash Compensation | Yes, (+, Normal, -) |
| Exposure Compensation | +/- 2 stops in 1/3 increments |
| White Balance | Auto, Daylight, Cloudy, Fluorescent, Fluorescent |
| Bracketing | No |
| Metering | Multi-pattern, Spot |
| Color Space | sRGB |
| Aperture Priority | No |
| Shutter Speed Priority | No |
| Manual Exposure | No |
| Continuous Drive | Yes, 1.4 fps for 4 frames (2304x1536/Fine) |
| Self-Timer | Yes, 10 sec. |
| Storage Method | Memory Stick Duo |
| Storage Included | 16MB Memory Stick Duo card |
| Compressed Format | JPG |
| Uncompressed Format | None |
| Quality Settings | Fine, Standard |
| Video clips | 640x480, Fine (30fps), Standard (16 fps), 160x112 (8 fps), w/sound, MPEG VX, unlimited duration |
| Battery Type | NP-FT1 rechargeable battery |
| Charger Included | Yes, 2.5 hours |
| PC Interface | USB 2.0 |
| TV-out | No |
| Tripod Mount | Yes, metal; comes with adapter |
| Weight (w/out battery or card) | 4.0 oz. |
| Dimensions | 95 x 44 x 26 mm |
| Included in the Box |
|
The Design: Sony DSC-L1
 |
 |
| Click images to enlarge. | |
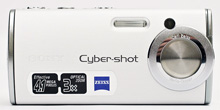
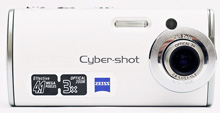
The front of the DSC-L1 features its 3x Carl Zeiss Vario-Tessar optical zoom lens. The lens is protected by a sliding metal door that moves out of the way to allow the lens to extend when the camera is powered on. Just above the lens is the Self-timer/AF-assist lamp. To the left of this is the thin built-in flash. When the camera is set to Auto ISO, the flash has a working range of 0.7' - 6.6' at wide angle and 1.6' - 4.9' at telephoto. Although this flash range is rather short, it is not unusual for cameras of this size. The left side of the camera is left open to leave room for your grip.
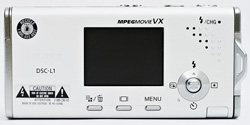
On the back of the camera is a 1.5" LCD monitor with ~78K pixels. Just below the LCD are three buttons: Image size/Delete, Display, and Menu. To the right of these buttons is a multi-controller for navigating the menu. In addition, each direction corresponds to a recording function. Press the controller up to toggle between multi-pattern and spot metering, down to enter review mode, up to toggle the various flash modes, and down to enable a self-timer. The controller can also be pushed in to select items in the menus. Above the multi-controller is the speaker as well as small bumps to increase traction on your thumb while holding the camera. At the upper-right corner is the flash/charge light. This light will blink while the flash is charging. It will also light up during a self-timer shot or while the battery is being charged.
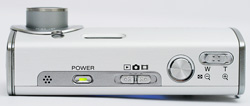
On the top of the camera are the microphone and main power button. To the right of this is the Mode switch with options to enter playback, still image, and movie modes. To the right of the Mode switch is the shutter button. Finally, at the far right is the zoom controller, which serves to operate the optical/digital zoom in record mode as well as to magnify images in playback.
 |
 |
| Click images to enlarge. | |
On the bottom of the camera is a tiny screw mount on the right side. However, there is nothing to fear; the supplied tripod adapter attaches to the camera via a thumbscrew. Although we didn't find it necessary, the screw also has a slit for a flathead screwdriver. After attaching the tripod adapter to the camera, it is ready to be fitted to a standard tripod screw.
 |
 |
| Click images to enlarge. | |
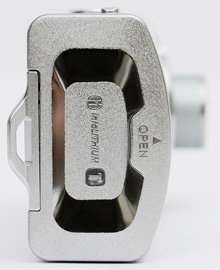
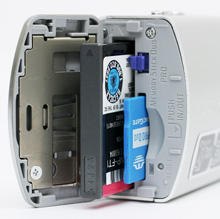
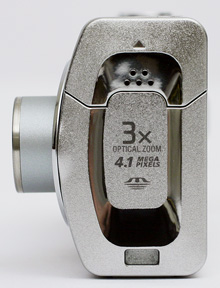
On the right side of the camera is a spring-action sliding door that conceals the battery compartment and Memory Stick Duo slot. The camera comes with a NP-FT1 rechargeable battery, which takes about 2.5 hours to recharge from a completely depleted state. Sony bundles a 16MB Memory Stick Duo with the camera. However, we highly recommend starting out with something more like 128MB. The Memory Stick Duo is approximately a third of the physical size of the regular Memory Stick. Luckily, Sony has included a Memory Stick Duo adapter that allows you to use the Duo in regular Memory Stick devices (card readers and other Memory Stick electronics). Just to the lower right of the flash card slot is a disk activity light. Also on this side is a post for the included wrist strap.
 |
 |
| Click images to enlarge. | |
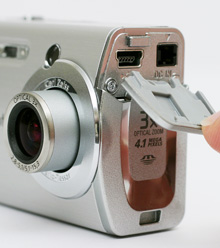
On the left side of the camera is a plastic sliding tab that covers the USB and DC-in ports. On the bottom of this side is a notch where the tripod adapter snaps in to add further security.
The Sony DSC-L1 feels very solid in our hands. The body is constructed almost entirely of metal and is shaped in a brick-like design. The only possible design-wise drawbacks that we notice are a relatively small LCD monitor and the absence of a viewfinder. On the other hand, we are happy to see the inclusion of an AF-assist lamp on such a small camera. Now, let's move on to the recording capabilities of this little digicam.
Recording Features
In all recording modes except Auto, the DSC-L1 records images as JPEG files with quality settings: Fine or Standard. In Auto mode, the camera always uses the Fine setting. The resolution options are below:| Setting | Resolution (pixels) |
| 4M | 2304x1728 |
| 3:2 | 2304x1536 |
| 3M | 2048x1536 |
| 1M | 1280x960 |
| VGA | 640x480 |
The L1 offers 9 different recording modes: Auto, Program, Twilight, Twilight portrait, Landscape, Soft snap, Snow, Beach, and Candle. In Auto mode, the camera will determine all the advanced settings for you, so all you have to do is point and shoot. However, there are still some key operation functions that are available. For example, the multi-directional controller can be used to select from the following flash modes: Auto, Forced flash, Slow synchro, and Off. Forced flash is an option that allows you to force the flash to fire, even if it is not needed for adequate light. This option is frequently used to fill in the shadows on a person's face or to illuminate a backlit subject. Slow synchro is a two-part flash mode that utilizes a slower shutter speed. The camera uses a long exposure during which the flash fires and the shutter stays open to gather ambient light to capture background detail. The result is a picture with a well-lit foreground and background as opposed to a picture where the background is dark. By pressing down on the controller, a 10-second self-timer can be enabled. By pressing the Image quality button, a resolution setting can be selected from the options listed in the table above. Pressing the Menu button will bring up a menu with the following record modes: Normal, Burst, and Multi Burst. In Burst mode, the camera can take pictures continuously while the shutter button is held down. The maximum number of pictures is determined by the resolution and quality settings. At resolution setting "4M" and quality setting "Fine", the L1 can record up to 4 images in a row. With Multi Burst, the camera will record 16 images each time that the shutter button is pressed. These images are assembled into a 1280x960 JPEG and recorded to the flash card. In Auto mode, the interval between each picture is set to 1/30th sec. However, in all other recording modes except the Twilight and Landscape modes, there are options for 1/15th and 1/7.5th sec. as well. When these Multi Burst pictures are reviewed in-camera, each picture is displayed full screen in an animation. The DSC-L1 does not have a designated macro mode. Instead, at any time, it is capable of focusing on objects as close as 4.7".
 |
 |
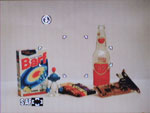 |
By pressing the Display button, the camera will toggle through four different displays: normal, normal w/live histogram, less information, backlight off. The option to turn off the backlight is an interesting idea. We found that when shooting outdoors, we could not even tell the difference between the on and off states. This leaves the user a real opportunity to save battery power in brightly-lit situations. It is refreshing to see that the battery status indicator actually provides the number of minutes remaining in the battery charge. Most cameras simply have a two- or three-bar indicator, which leaves you guessing about the exact battery life remaining.
To switch to another mode, simply press the Menu button and select the desired shooting mode under the camera heading. In Program mode, there are several additional options that can be manipulated. For example, by entering the menu, the following options can be adjusted:
| Menu | |
| EV | +/- 2 stops in 1/3 stop increments |
| Focus | Multi AF, Center AF |
| White Bal | Auto, Daylight, Cloudy, Fluorescent, Incandescent |
| ISO | Auto, 100, 200, 400 |
| P. Quality | Standard, Fine |
| REC mode | Normal, Burst, Multi Burst |
| Interval | 1/30, 1/15, 1/7.5 |
| Flash Level | -, Normal, + |
| P. Effect | Off, Sepia, B&W |
| Saturation | -, Normal, + |
| Contrast | -, Normal, + |
| Sharpness | -, Normal, + |
| Setup | Enter |
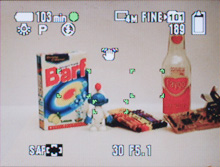 Multi AF, Focus lock |
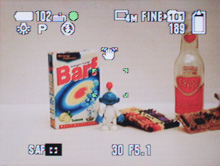 Center AF, Focus lock |
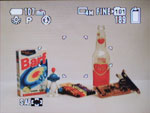
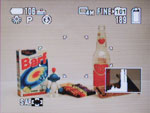
The auto focus area can be selected from either Multi AF or Center AF. If Multi-AF is selected, the camera will select one or more of 5 possible focus points automatically. The chosen points will be marked as green brackets. If all points are used, the green brackets will not be displayed. For adjustment of the flash level, saturation, contrast, and sharpness, there are 3 levels from which to choose: "-", Normal, or "+". Setup mode is available in all shooting modes, so we will discuss those options a bit later.
In Twilight mode, the L1 can expose scenes for as long as 2 seconds. In Twilight Portrait mode, the camera uses a slow synchro flash to capture both subject and background detail. In Landscape mode, the camera focuses to infinity. In Soft Snap mode, the camera uses less sharpening and saturates colors for warmer tones. In snow and beach modes, the camera applies a positive exposure compensation to ensure bright images. With Beach mode, the camera also ensures that blue tones from water are captured properly. In Candle mode, the L1 uses a slow shutter speed and daylight white balance to capture natural looking candlelit images.
The DSC-L1 records video clips as MPEG files at either 16 or 30 fps with audio. The resolution options are either 640x480 or 160x120. In the 640x480 mode, you can select between Fine (30 fps) and Standard (16 fps). When Fine is selected, a Memory Stick Duo Pro must be used in order to keep up with the data stream. If a regular Memory Stick Duo is used, the Standard option must be selected. With all recording options, the duration of a movie clip is limited only by the remaining space on the flash card.
By pressing the Menu button, there are several additional options that can be adjusted:
| Movie Menu | |
| EV | +/- 2 stops in 1/3 stop increments |
| Focus | Multi AF, Center AF |
| White Balance | Auto, Daylight, Cloudy, Fluorescent, Incandescent |
| P. Effect | Off, Sepia, Black&White |
| Setup | Enter |
Although the optical and digital zoom cannot be adjusted while recording, the camera will focus continuously as it records. In all modes, the 5 setup menus are available as the last option in the main menu. Below, we have outlined the menus:
| Camera 1 | |
| AF mode | Single, Monitor |
| Digital Zoom | Smart, Precision, Off |
| Date/Time | Date/Time, Date, Off |
| Red Eye Reduction | On, Off |
| AF Illuminator | Auto, Off |
| Auto Review | On, Off |
The AF mode option allows you to specify either Monitor or Single. With Single selected, the camera will only focus when the shutter button is pressed halfway down. Then, it will lock focus until you press the shutter button down fully. If Monitor is selected as the AF mode, the camera will focus continuously until the shutter button is half-pressed. Then, it will lock focus until the shutter button is fully pressed. If Red Eye Reduction is enabled, the camera will fire a series of short flashes before taking the picture. This helps to contract the pupils of your subject and reduce the red-eye effect. With Auto Review enabled, the camera will display a 2-second review of an image immediately after it is taken.
| Camera 2 | |
| Enlarged Icon | On, Off |
The Enlarged Icon option refers to the size of icons on the display screen while they are being adjusted. For example, with this option enabled, a larger icon of the flash mode will appear while cycling through different flash options. After about a second, the icon will shrink back down to its normal size. This option simply helps you to see settings as you change them.
| Memory Stick Tool | |
| Format | OK, Cancel |
| Create REC Folder | OK, Cancel |
| Change REC Folder | OK, Cancel |
If Format is selected, the camera will erase all data from the flash card, including files marked as protected. By selecting Create REC Folder, the camera will make a new folder on the flash card. With the Change REC Folder option, you can specify which folder to use to record and review images.
| Setup 1 | |
| LCD Backlight | Bright, Normal |
| Beep | Shutter, On, Off |
| Language | Select |
The DSC-L1 offers two levels of brightness for the LCD backlight. With Shutter selected as a Beep option, the camera will make a "shutter-like" sound when taking a picture. If On is selected, it will make a beeping sound every time when a button is pressed.
| Setup 2 | |
| File Number | Series, Reset |
| USB Connect | PictBridge, PTP, Normal |
| Clock Set | OK, Cancel |
The File Number option allows you to specify how new files are named. If Series is selected, the camera will assign file names incrementally, even if you are in a new folder. If Reset is selected, the camera will start from 0001 each time you change to a new folder. If there are already files in a folder, the camera will start with the next number in that folder. If PictBridge is selected from the USB Connect options, the camera can be connected to a PictBridge-compatible printer. If PTP is selected, when the camera is connected to a computer running Windows XP or Mac OS X, the computer will display a file transfer wizard to assist in copying the files. The "Normal" option allows you to establish a standard USB connection between the camera and a computer.
Playback Features
To switch to playback mode on the L1, slide the Mode Switch to Play. The lens will retract automatically after approximately 15 seconds. If the camera is started up in Play mode, the lens will not extend.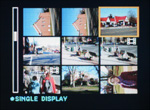 Thumbnail view |
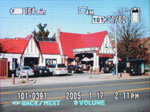 Image regular view |
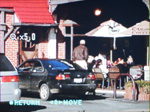 Image magnified 5x |
Images can be viewed as a 3x3 grid of thumbnails or one at a time as full screen images. To switch to thumbnail mode, slide the zoom controller toward the wide end. To switch back to single image view, slide the zoom controller to the telephoto position. You can also magnify an image up to 5x in 17 increments by sliding the zoom controller further in the telephoto direction. To view different portions of the image while you are zoomed in, use the multi-directional controller. If you want to zoom all the way out all at once, you can press in on the multi-directional controller to do so. To play/pause a video clip, simply press in the multi-controller. The volume can be adjusted while the clip is playing by pressing up/down on the multi-controller. In addition, you can skip back and forth in the clip by pressing left/right on the multi-controller and pressing in to play.
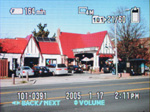 Info. |
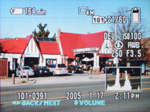 Detailed Info. |
 No info. |
The playback display can be selected from one of 4 options: normal, normal w/histogram and shooting details, no information, and backlight off. The normal display will have the battery remaining (minutes), image resolution, folder, image number out of total images in folder, file number and date/time. On the display with the histogram, the following information is also added: exposure compensation, ISO, flash, white balance, shutter speed, and aperture.
By pressing the Menu button, there are a number of additional options at your disposal. Below is a table outlining these options:
| Playback Menu | |
| Folder | Select |
| Protect | Tag |
| DPOF | Tag |
| All in this folder, DPOF image, Select, This image, Cancel | |
| Slide | Interval (3, 5, 10, 30 sec., 1 min), Image (Folder, All), Repeat (On, Off), Start, Cancel |
| Resize | 4M, 3M, 1M, VGA, Cancel |
| Rotate | Rotate, OK, Cancel |
| Divide/strong> | Set dividing point, Ok, Cancel, Exit |
| Setup | Enter |
The Folder option allows you to specify which folder contains the images/videos that you want to view. The Protect option allows you tag specific files so that they cannot be deleted accidentally. Protected files can, however, be erased if the memory stick is formatted. DPOF (Digital Print Order Format) allows you to specify images that you wish to print and the Print option allows you to print images on a PictBridge-compatible printer. The Resize option will allow you to upsize and downsize images to one of the higher/lower resolutions. With the Rotate option, you can rotate images full circle, 90 degrees at a time. The Divide option is for movie clips and it allows you to specify a point to split the movie into two files. This feature is handy for removing unneeded footage in order to save precious flash card space. The Setup option leads to the options that we discussed at the end of the Recording section.
Battery Performance
Our general method for battery testing is to reset the camera to its default settings and change the recording mode to the highest quality option. Then, we take 5 pictures without the flash and 2 pictures with the flash until the battery is dead. For more information on our battery test, please refer to our Testing Procedures page. For this test, we used the bundled NP-FT1 Lithium-ion rechargeable battery (680 mAh) and left the LCD backlight on. The battery was fully drained before charging for the test.| Number of shots taken in one battery charge |
| 1,413 |
The L1 put in a very impressive battery performance at 1,413 frames on a single charge. Keep in mind that this number will be lower if the camera is used over a longer period of time (our test only took 3 hours). Still, you should expect the L1 to easily last through a full day of heavy shooting. We should also mention that it was a relief having the number of minutes remaining available on the LCD while we were shooting. With other cameras that just have a segmented bar icon, we really have no idea how much longer a battery will last.
The Timing Tests
* NOTE: For all of our time tests, the camera is reset to its factory default settings and set to record using the highest resolution and quality setting. It is set to record in Auto mode. Auto Review is set to Off. A Sandisk 512 MB Memory Stick Pro Duo is used.Before reading our results, please refer to our Testing Procedures page.
Startup Time
The startup time is recorded from the moment that the power button is pushed to the moment that the shutter sounds. The camera is set to record in Auto mode.| Startup time (seconds) |
| 2.54 |
The L1 takes just 2.54 seconds to start up and take a picture. This is a very impressive time for a camera with an extending lens.
Shutter Lag
To record shutter lag, we perform two tests with the lens at its widest angle setting. For the first test, we pre-focus the lens and measure the amount of time that it takes the camera to take a picture after the shutter button is pressed. The second test measures the time that it takes for the camera to take a picture after we press the shutter button without pre-focusing. Each test is performed 3 times and the results are averaged. For more information regarding our testing procedures, please refer to our Testing Procedures page.| With Pre-focus (seconds) | Without Pre-focus (seconds) |
| ‹0.01 | 0.31 |
We were very impressed with the L1's shutter lag. Since our timer only provides us with hundredths of seconds, we can only state that the L1 has a pre-focused shutter lag of ‹0.01sec. When we allowed the camera to perform a full auto-focus, the time lag time was just 0.31 sec. Indeed, this is the fastest camera that we have tested so far with respect to shutter lag.
Write Times
We recorded 5 different write times with a Sandisk 512 MB Memory Stick Pro Duo:Single Shot - The time that it takes for a single picture to be written completely to the flash card (the time that the "activity light" is on).
Shot To Shot (STS) - The time until the second shot is able to be taken after the first (shutter to shutter).
Shot To Shot w/Flash - The time that it takes for the camera to take two pictures with the flash, starting from the moment that the first flash is fired to the moment that the second is fired.
Buffer Full to Next Burst - The time from the sound of the last shutter of a burst until the first shutter of another burst.
We performed each test three times and averaged the results. Below are the resolution, quality setting, and average file size used for the tests.
| Resolution (pixels) | Quality setting | Avg. file size (MB) |
| 2304x1728 | Fine | 1.64 |
| Single Shot | Shot To Shot | Shot to Shot w/Flash | Buffer Full to Next Burst |
| 0.76 | 1.53 | 4.70 | 4.52 |
The Sony DSC-L1 proves to be a fairly speedy little camera. It is able to write a single file in just 0.76 sec. and can shoot at 1.53 sec. between frames endlessly without filling its buffer. When the flash is used, the camera slows down considerably to 4.70 sec. between shots. When set to Burst mode, the L1 can shoot up to 4 frames at 1.4 fps, at 4M/Fine quality. After filling its buffer, the L1 needs 4.52 sec. before it is able to shoot another 4 frames. The camera will not let you shoot more frames until the entire buffer is cleared out to the flash card. In general, we are very impressed with the speed of the L1. Even with a slower shot-to-shot w/flash time of 4.70, this camera is on par or faster than other ultra-compact cameras in its class. For example, in a previous review, we found the Olympus Stylus Verve needed nearly 11.50 seconds between flash shots.
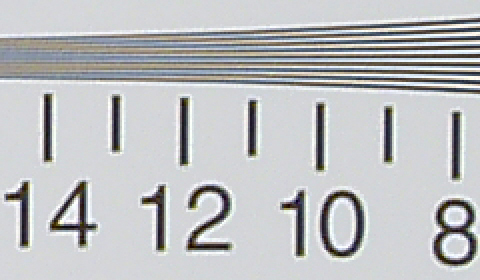
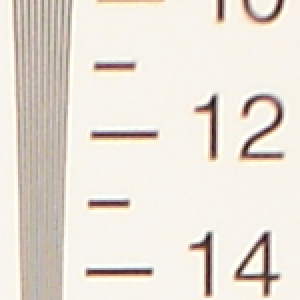
Resolving Fine Lines
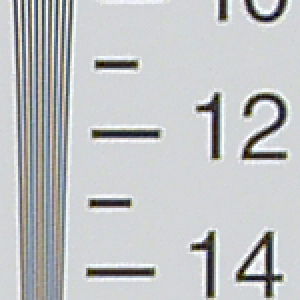
For our resolution test, we reset the camera to its default settings and then used the highest resolution and quality setting. The camera was then set to +2.0 E.V. For more information, refer to our Testing Procedures page. When reading this chart, the numbers represent lines per picture height (LPH). For example, the number 15 would represent 1,500 LPH. Below are 200% crops of the test. Click on a crop to see the full chart at 100%. 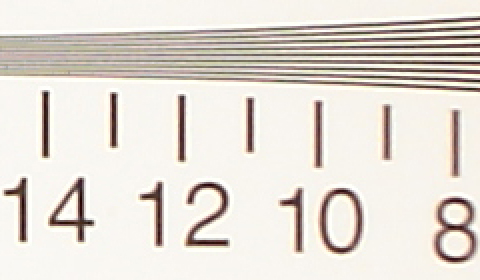 Sony DSC-L1 Click to enlarge. |
 Olympus Stylus Verve Click to enlarge. |
 Sony DSC-L1 Click to enlarge. |
 Olympus Stylus Verve Click to enlarge. |
In the horizontal comparison crops above, the L1 shows just a touch higher resolution performance than the Olympus Stylus Verve. The L1 is able to resolve lines out to 1,200 LPH before moving to extinction around 1,600 LPH. However, in the vertical crop, the Verve slightly outperforms the L1. The Sony L1 is only able to resolve out to 1,100 LPH before moving to extinction by 1,500 LPH. One of the most noticeable differences between these cameras is their default levels of sharpness and contrast. The Verve has higher contrast and higher compression, which results in the visibility of JPEG artifacts. The Sony L1 produces softer results with no JPEG artifacts. However, we should also point out the significant blurring towards the edges of the frame on the L1 resolution chart.
Color Reproduction
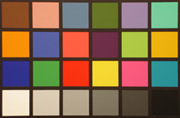
* For all of our color tests, we reset the DSC-L1 to its factory default settings. It was then set to record using the highest image quality option. All images are sRGB.We took a picture of our color chart using each of the following WB settings: Auto, Incandescent, and Manual. Click on a thumbnail below to view a larger image.
Incandescent WB
| Auto WB | Incandescent WB | |
 Click to enlarge. |
 Click to enlarge. |
|
 Reference Chart ("actual colors") |
||
| Auto WB | Incandescent WB |
 |
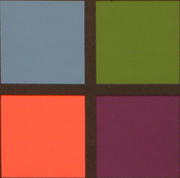 |
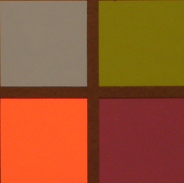
Under our tungsten lights, the L1 shows a rather strong, yellowish cast when set to Auto WB. When we changed the WB to Incandescent, the colors are more accurate. However, there is still a slight yellowish cast.
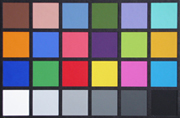
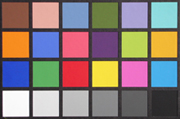
Daylight WB
| Auto WB | Daylight WB | |
 Click to enlarge. |
 Click to enlarge. |
|
 Reference Chart ("actual colors") |
||
| Auto WB | Daylight WB |
 |
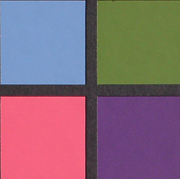 |
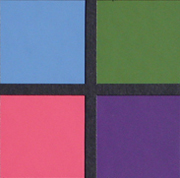
In direct sunlight, the L1 reproduces our color chart with bright colors. There is a very slight bluish color cast when the camera is set to Auto WB. With Daylight WB, the colors are extremely accurate.
Studio Shot
In this shot, we tested the camera's ability to reproduce colors in our studio shot using different WB settings under tungsten light.| Auto WB | Incandescent WB |
 Click to enlarge. |
 Click to enlarge. |
In this comparison under tungsten light, the difference between the Auto and Incandescent settings is more obvious. The Auto WB setting produces an image with a fairly strong yellowish cast and the Incandescent setting is considerably more accurate while still displaying a yellowish cast.
Built-in Flash
For the flash test, we set the camera to Auto mode w/Auto flash. The picture was taken from 5 feet away.In our flash test, we found that the L1 produced a slight yellowish-orange cast over the entire image.
Noise
The noise test consists of pictures of our studio shot taken at increasing ISO levels to show the effect on the image. The pictures were taken after resetting the camera to its factory default settings. The camera is then set to record with the highest quality option with Incandescent WB. Click on a 100% crop below to view the full-size image. All images are sRGB.| ISO 100 |  Click to enlarge. |
| ISO 200 |  Click to enlarge. |
| ISO 400 |  Click to enlarge. |
In this ISO comparison, we can see that although noise is relatively low at ISO 100, the image has a muddy appearance. At ISO 200, there is a mild increase in noise and loss of detail. By ISO 400, there is a considerable loss of detail. The noise visible throughout the L1's images is soft and appears to add to the overall soft/muddy appearance.
General Image Quality
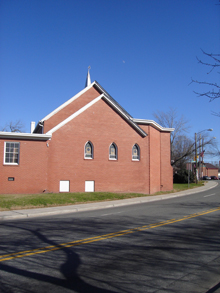
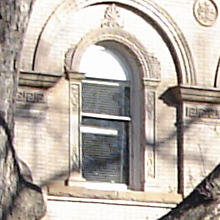
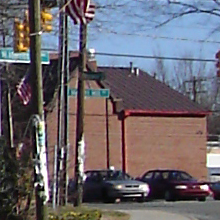
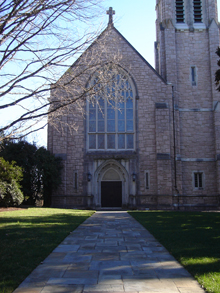
For these pictures, the camera was reset to its factory default setting. Then, it was set to its highest quality recording setting. The pictures were then taken in Auto mode unless otherwise stated. Portrait-style images have been rotated using Irfanview's "lossless operations". Click on a thumbnail to view the full-size image. The crops below the thumbnails are 100%. All images are sRGB.  Click to enlarge. |
 Click to enlarge. |
 |
 |
 Click to enlarge. |
 Click to enlarge. |
 |
 |
In the first image above, the L1 proves capable of capturing a good amount of detail. However, the camera has slightly overexposed this image and we noticed some blurring near the corners. In the second image, we have cropped out a portion of the image that exemplifies a common image quality point. Although the camera captures a fair amount of detail, the details are quite soft in appearance. In the third sample, we have cropped out a portion of the image that shows fairly strong purple fringing. We did not find purple fringing to be a very common problem except in extreme circumstances like this. In the third image, we also want to point out that the L1's slight cool Auto WB in combination with the shade gives this image a bluish color cast. In the final sample, we have highlighted a common problem with this camera. In shots like this where we extended the lens to its telephoto position, we noticed more significant blurring at the edges in shots taken at wide angle. In addition, the blurring appears to begin closer to the center of the image and worsens near the edges. Overall, the image quality is unimpressive because of the soft/muddy quality and the blurring near the edges of many of our pictures. When we set the camera to "+" sharpening, we were not able to gain any more detail. When sharpness was boosted, we began to notice JPEG artifacts and the same soft look in the details.
| Twilight Mode |
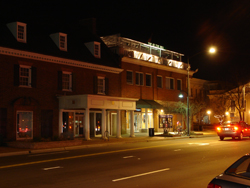 (f/3.5, 1.6 sec., ISO 100) Click to enlarge. |
 |
With a maximum shutter speed of 2 seconds in Twilight mode, the L1 is able to capture some impressive night shots with relatively low noise levels. When the shutter speed is slower than 1/6th sec., the camera utilizes noise reduction automatically to help produce images with less noise.
| Movie Mode | |
 (640x480, 30 fps) Click to view. |
 (640x480, 16 fps) Click to view. |
We are fairly impressed with the movie mode of the L1. At the highest quality, the clips are very smooth at 30 fps and the image quality is outstanding. When compared to the clip at 16 fps, you can see the benefit of shooting with Fine quality. We should point out that you will need a Memory Stick Pro Duo in order to utilize Fine mode. Otherwise, the flash card will not be able to keep up with the data stream.
Final Words
When it comes down to it, the Sony DSC-L1 falls just short of being great. There are several areas in which this camera excels. For example, it has a stylish and solid metal body. In our tests, it proved to have both decent resolution and incredible battery life. In addition, the camera is very fast. With respect to startup, write speed, and shutter lag, this camera is one of the most responsive ultra-compact digicams that we've tested so far. Provided you have a Memory Stick Pro Duo, the movie mode is superb, offering unlimited video w/audio at a rate of 30 fps at 640x480. The L1 even offers some extra features that are not commonly seen in this class, such as the option to turn off the LCD backlight to save battery power in brightly-lit environments. We are also impressed to see an AF-assist lamp, which gives this camera the ability to focus in total darkness.On the other hand, the L1 leaves something to be desired when it comes to image quality. We found an overall soft/muddy quality in most of the pictures that we took. In addition, we discovered that when the lens is extended to its telephoto end, the pictures display significant blurring near the edges of the frame. Although the L1 produces well-saturated colors, the accuracy is just a bit off. The auto white balance system tends to produce a yellowish cast in tungsten light and a slightly bluish cast in daylight. In the end, it's really going to come down to priorities. For a point-and-shoot user who doesn't plan on doing any heavy cropping to their photos or printing at 8x10, this camera may be near perfect. It is very responsive with fast startup, write, and shutter lag times. The image quality is great for smaller prints or web use. To top things off, it is very small and attractive. However, if you are looking for a camera with superb image quality, you might want to keep looking. It is unfortunate that this camera has so much going for it and yet, it is unable to take amazing pictures. If the image quality was better, it would be one of the best cameras around - especially considering the reasonable price tag.
| Pros | Cons |
| - Decent resolution performance - Fast write times - Incredibly fast shutter lag times - Very fast startup time - Movie mode is outstanding - Excellent battery life - AF-assist lamp - Backlight can be turned off to save power |
- Images are muddy/soft - Blurring at edges of frame - Auto WB produces yellowish cast in tungsten light - Auto WB produces slight bluish cast in daylight - Fairly noisy images past ISO 100 - No TV-out |
Thanks again to Newegg.com for loaning us the Sony DSC-L1 for review.

