Original Link: https://www.anandtech.com/show/1469
Building the AnandTech Staging Environment
by Jason Clark on September 10, 2004 12:05 AM EST- Posted in
- IT Computing
Over the years, we've had various hardware setups for the staging server at AnandTech. For the most part, it had been running off my personal web server, since ColdFusion is quite easy to develop from anywhere because of its scripting language roots. For the new .NET architechture for AnandTech, I performed all development on my local machine due to the simplicity of local debugging with Visual Studio .NET (it's geared for local host development, especially debugging). The problem that I ran into is mostly a limitation of Windows XP - its limit of 1 website. That is, you can only create one website in Windows XP's IIS. There are a few hacks out there to work with multiple projects or websites, like IIS Multiplex, but none of these available hacks or work-arounds can really replace an unrestricted version of IIS.
The reason for requiring multiple websites is that there are several key projects that make up the AnandTech back end. The main AnandTech .NET project is the largest project; it contains the entire website (www.anandtech.com) front end code and back end API. Next, we have the Ad tracking engine that is a .NET port of our old ColdFusion-based FuseAds ad engine. The rest of the projects are all ColdFusion- based, as they are mostly form interfaces to our database for reporting purposes. We have a statistics site that analyzes our home-grown, database-driven web statistics engine, and the AnandTech Admin site (allows the Editorial Staff to post and edit their content), which is a home-grown CMS. Each of these projects are separate websites.
First Try
The first thing that we tried was building a separate server out of some spare parts. We threw a dual Opteron 246 together with a 120GB 8MB Cache SATA hard drive and 1GB of memory. The hardware itself worked fine, although I/O was a bit of a bottleneck due to the mediocre IDE hard drive. Compiling larger .NET projects is very I/O intensive. The main problem, however, lied with the software side of the implementation, particularly debugging. In order for Visual Studio to debug projects on remote servers, there are several hoops that you have to jump through, and after you finish doing that, you may or may not be successful.After spending a day or two trying to get remote debugging working correctly, I decided that developing the .NET projects locally was the reliable choice. The next decision: which hardware were we going to use? I/O wasn't that great on our home-built server, and we wanted to use the latest technology to build a powerhouse workstation that would serve our needs for years to come (rebuilding workstation/servers isn't something that we like doing often).
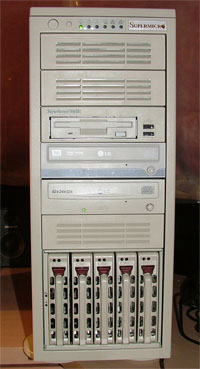
As luck would have it, we received a SuperMicro 7044A-82R from SuperMicro, which certainly fits the "Powerhouse" workstation bill that we were looking for. Not only is our new workstation outfitted with the latest technology, it has the redundancy and workstation/server chassis to go with it. We've used some Supermicro products through the years, and it has always served us well. In fact, we still have an old SC750-A Supermicro case around the labs, which was one of the first server cases that we used at AnandTech.
The New Powerhouse
Chassis
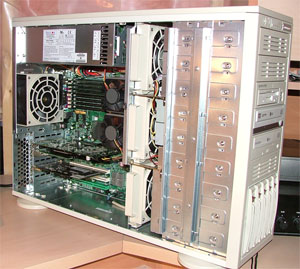
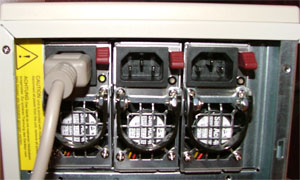
The 7044A-82R is a mid-tower system that is targeted at the workstation/server market. Its case design and feature-set could definitely put it in either market, with a strong emphasis on the server market due to its redundant power, rack-mount option, and hot swappable hard drive cage. The case itself has a triple redundant 760 Watt power supply, hot swappable cooling fans and a flexible drive bay configuration. Our unit was equipped with 5 hot swap drive bays, but the system can handle 10 hot swap bays with a stackable drive cage mounted in the front of the case (see image below).Motherboard & CPU
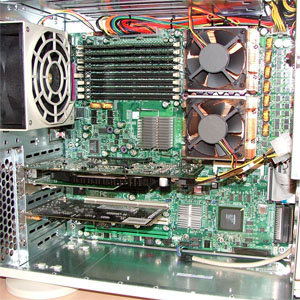
The heart of our new workstation is a Supermicro X6DA8-G2, outfitted with Dual 3.6 GHz, 800MHz FSB Nocona CPUs. The X6DA8-G2 is one of the latest boards from Supermicro for Intel's new Nocona CPUs. This particular board uses Intel's E7525 Tumwater chipset and has the following features:- 16GB DDR2-400 SDRAM (our system arrived with 4 512MB Infineon sticks)
- Intel Dual Gigabit Network interfaces
- Adaptec Dual U320 SCSI (AIC-7902)
- Dual SATA ports (ICH5R)
- 1 (x16) PCI-Express slot
- 1 (x4) using (x16 slot) PCI-Express
- 1 x 64Bit 133Mhz bit PCI-X
- 2 x 64bit 100 Mhz PCI-X
- 1 32bit PCI slots
- Zero channel raid support (allows you to buy an Adaptec 2010S to add raid support)
- AC'97 6-channel sound
Graphics Card
Since our system was built as a workstation, it was outfitted with a NVidia Quadro FX 3400. Granted, this card is overkill for my purpose, but it does have Dual DVI and is ready for SLI with another 3400 if the need for more power is ever required. The Tumwater chipset is currently the only chipset that will support operating NVidia's Quadro or 6800 based cards in SLI. The Quadro FX managed to maintain 60+ fps at 1024 x 768 high quality in Doom 3 when I wasn't busy writing code.I/O
Since compiling is very I/O intensive, we put two Seagate 18GB U320 15,000RPM drives in the system. We'll probably get larger drives in the future, but for now, it's enough space for the OS and the site code, with some room left over for the odd game or two.Operating System
After mounting an extra CDROM and DVD-R into our new workstation, it was time to load the operating system. Since our requirement was to have multiple websites, we decided to go with Windows 2003 Server Standard. That's right, a server OS instead of a desktop/workstation OS. Windows XP has served me well, but my daily focus is web development, and Windows 2003 fits that requirement right now.To make the transition smoother to Windows 2003, I did some research on converting the operating system into more of a workstation environment. I found a great website that goes through all of the tips and tricks of customizing the OS for workstation use. Obviously, I'm not the only one who feels the pain of Windows XP's single site limitation. I'll outline the changes that I made below. They are all detailed in the tutorial located here (http://www.msfn.org/win2k3/).
Desktop/Theme changes
By default, Windows 2003 uses the classic theme. I used to prefer it over the funky blue in Windows XP. But, over the years, I got used to the funky blue and now prefer it over the classic theme. To enable the Windows XP themes, all you have to do is start the themes service from the Services panel - it's that easy. I also enlarged the icon size in Internet Explorer by right-clicking on the toolbar in IE and choosing Toolbars, Customize and Change the Icon Size to large (XP Default). Lastly, by default, Windows 2003 Icons are not transparent on the desktop. By following the instructions here, you can enable transparent icons.Core Operating System changes
The first alteration for the core operating system was to modify the focus of the OS resources by changing its focus from background services to programs. You do this by going to System in the control panel, click on Advanced, then Performance Settings, and then select the Advanced tab. Change the processor scheduling to Programs instead of Services, and Memory Usage to programs instead of System Cache. Next was disabling IE security enhancements, which is that annoying feature that asks you to add the "safe" URLs before visiting them. This is simple; just go to the Control Panel, add Remove Programs, add/remove Windows Components and remove Internet Explorer Enhanced Security. Next, I removed the Shutdown Tracker functionality that is equally as annoying. For this change, click Start, then Run and type gpedit.msc. This brings up the Group Policy Editor. Open Computer Configuration, Administrative templates, System, and in the right window pane, look for Display Shutdown Event Tracker. Double-click on this, and choose "disabled" and then hit OK.After dealing with the minor annoyances, it was time to bring the OS up to snuff for the occasional gaming. I installed Direct X 9 by going through MSFN's tutorial (http://www.msfn.org/win2k3/directx.htm).
One of the most useful parts of Windows XP is Remote Desktop - I use it all the time. Windows 2003 also uses Remote Desktop, but each Remote Desktop connection starts a new windows session; meaning, you aren't connecting to your running console login. Windows XP only supports one remote connection, which is why it defaults to the current console. To do this, all you have to do is start up Remote Desktop, select Options and fill in the configuration details. Then choose "Save As" to save the configuration information. Open that file with notepad (it's just an .INI file), and add the following line to the end of the config file: connect to console:i:1. Now, whenever you connect to your Windows 2003 workstation, it will connect to the first console.
So, after a day or so of installing some hardware into our new workstation and configuring the operating system, we are left with a fast, reliable workstation that is ready for work.


